From Pretzels to Buns: My Family’s Burger Game Changer
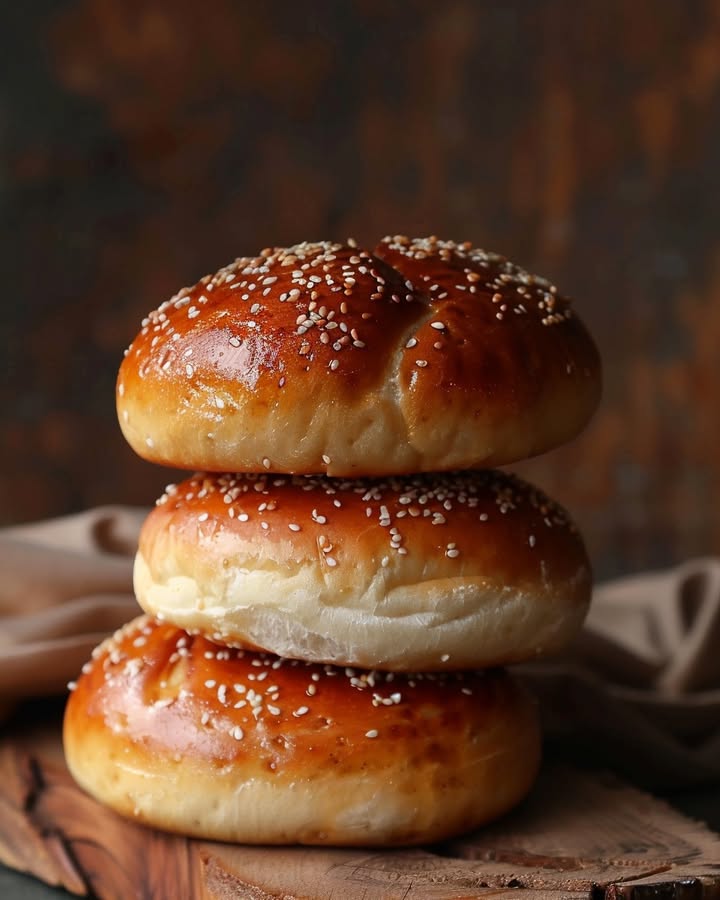
Let me tell you about the first time I served homemade pretzel burger buns. My husband, the grill master, took one look and declared his usual burger buns “officially retired.” There’s something magical about that chewy, salty pretzel crust giving way to a soft, fluffy interior. It turns a simple Tuesday night burger into a special event. Forget store-bought forever! Once you taste a juicy patty nestled in one of these glossy, golden-brown beauties, you’ll never go back.
A Twist on a German Classic
The humble pretzel, or Brezel, has a history stretching back centuries in Germany. Monks, bakers, and everyone in between have shaped this iconic treat. The classic lye bath gives it that distinct dark crust and flavor. My version uses a gentler baking soda bath for that same signature taste and texture, but in a handy bun shape perfect for holding your favorite fixings. It’s a fun fusion, taking the soul of a Bavarian beer hall snack and transforming it into the ultimate American backyard barbecue essential. It’s tradition, with a delicious, practical twist.
Why You’ll Fall in Love With This Pretzel Bun Recipe
First, the flavor is unbeatable. That subtle malty, tangy pretzel taste makes every burger sing. Second, they’re surprisingly fun to make! Watching the dough puff up and then giving it its quick “spa bath” is strangely satisfying. Finally, nothing impresses friends and family more than saying, “Oh, the buns? I made those.” They’re sturdy enough for the messiest, juiciest burgers or piled-high pulled pork, yet tender and delicious on their own.
When to Whip Up These Spectacular Buns
These buns are your secret weapon for any gathering. They’re perfect for summer cookouts, turning standard burgers into a gourmet experience. Game day is another prime time—imagine them holding bratwursts or saucy pulled chicken. I love making a batch for a “build-your-own-burger” night with the kids. They even make incredible sandwich buns for your weekday lunch, making a simple ham and cheese feel like a cafe treat.
Your Pretzel Hamburger Bun Shopping List
Gather these simple ingredients. You likely have most in your pantry already!
- 1 ¼ cups warm water (110°F/43°C)
- 2 teaspoons (1 packet) active dry yeast
- 2 teaspoons granulated sugar
- 4 cups all-purpose flour or bread flour
- 2 teaspoons salt
- 4 tablespoons unsalted butter, melted
- ⅓ cup baking soda (for the boiling water bath)
- 1 large egg, lightly beaten (for the egg wash)
- Coarse sea salt or pretzel salt for sprinkling
Easy Ingredient Swaps
No worries if you’re missing something! Here are some simple swaps:
- Yeast: Instant yeast works fine. Skip the initial foam test and mix it right in with the dry ingredients.
- Butter: An equal amount of vegetable oil or melted coconut oil works in a pinch.
- All-Purpose Flour: Bread flour is actually my favorite here for a chewier crumb, but all-purpose works perfectly.
- Topping Salt: No coarse salt? Flaky sea salt or even a very light sprinkle of kosher salt will do. Just don’t use fine table salt.
How to Make Perfect Homemade Pretzel Buns
Get ready for some kitchen fun. Follow these steps for bakery-worthy results.
Step 1: Wake Up the Yeast
In your stand mixer’s bowl, combine the warm water, yeast, and sugar. Give it a gentle stir and walk away for 5-10 minutes. You’re waiting for a foamy, creamy layer to form on top. This frothy “bloom” is your proof that the yeast is alive and ready to make your dough rise beautifully. If you don’t see foam, your yeast might be old—start over with a fresh packet. Pro tip: The water should feel warm like bathwater, not hot, to avoid killing the yeast.
Step 2: Make the Dough
Add the flour, salt, and melted butter to the foamy yeast mixture. Attach the dough hook and start mixing on low speed. Watch as the shaggy flour mixture transforms into a cohesive ball that cleans the sides of the bowl. The dough should feel slightly tacky but not stick to your fingers. If it’s too sticky, add a tablespoon of flour at a time. Let the mixer knead it for about 5-7 minutes until smooth.
Step 3: Let the Dough Rise
Lightly grease a medium bowl with oil or cooking spray. Place your smooth dough ball inside, turning it once to coat it lightly. Cover the bowl tightly with plastic wrap. Find a warm, draft-free spot for it to rest. I often use my turned-off oven with the light on. In about an hour, it should double in size, becoming puffy and full of air. Gently poke it—the indentation should slowly fill back in.
Step 4: Shape Your Buns
Punch down the risen dough! It’s a satisfying little *whoosh*. Turn it out onto a lightly floured surface. Using a sharp knife or bench scraper, divide the dough into 8 equal pieces. To shape each bun, cup your hand around a piece of dough and roll it on the counter in a circular motion, tucking the edges underneath to create a tight, smooth ball. Place the shaped balls on a piece of parchment paper as you work.
Step 5: The Magic Pretzel Bath
This is the fun part! Bring 2 quarts (about 8 cups) of water to a low boil in a large saucepan. Carefully add the baking soda—it will fizz up! Return to a steady boil. Using a slotted spoon, gently lower 2 dough balls into the water, seam-side down. Poach them for 30 seconds, flip, and poach for another 30 seconds. They’ll look a bit wrinkled. Transfer them to a cooling rack to drip dry for a minute. Chef’s tip: Don’t overcrowd the pot, and keep the boil gentle to avoid roughing up the buns.
Step 6: Bake to Golden Perfection
Preheat your oven to 425°F (220°C). Line a baking sheet with parchment paper. Arrange the poached buns on the sheet, leaving a couple of inches between them. Brush each one generously with the beaten egg wash—this gives them that deep, glossy brown finish. Sprinkle immediately with coarse salt. Use a very sharp knife or a single-edge razor blade to score a shallow ‘X’ on top of each bun. This lets them expand beautifully in the oven. Bake for 15-20 minutes until they are a deep, rich golden brown.
Your Pretzel Bun Timeline
Plan ahead for the best results:
- Prep Time: 25 minutes
- Rising Time: 1 hour
- Poaching & Prep Time: 10 minutes
- Bake Time: 15-20 minutes
- Total Time: About 1 hour 50 minutes
Most of this is hands-off waiting for the dough to rise, so you can do other things!
My Secret for the Best Crust
For an even more authentic, dark pretzel crust, you can add 1 tablespoon of barley malt syrup or dark brown sugar to the boiling water with the baking soda. It won’t change the flavor much, but it gives the buns that professional, deep mahogany color that makes them look straight from a German bakery.
A Pinch of History in Every Bite
The baking soda bath in this recipe is a home kitchen hack mimicking traditional food-grade lye. Lye is what gives commercial soft pretzels their dark, distinctive crust and unique flavor. The baking soda method is much safer and more accessible, creating a similar chemical reaction (alkalinity) on the dough’s surface that leads to browning and that classic “pretzel” taste we all love.
Gear You’ll Need
- Stand mixer with dough hook (or strong arms for hand-kneading!)
- Large mixing bowl
- Plastic wrap
- Large saucepan or Dutch oven
- Slotted spoon or spider strainer
- Cooling rack
- Parchment paper
- Pastry brush
- Baking sheet
- Sharp knife or razor blade for scoring
Storing Your Homemade Pretzel Buns
Let the buns cool completely on a wire rack after baking. Any trapped steam will make them soggy if stored too soon. Once cool, place them in a paper bag for the same day to keep the crust crisp, or in a plastic bag for softer crust.
For longer storage, seal them tightly in a plastic freezer bag. They will keep well in the freezer for up to 3 months. I recommend skipping the salt topping if you plan to freeze them, as it can absorb moisture and become soggy upon thawing.
To refresh, thaw at room temperature if frozen, then warm in a 350°F oven for 5-10 minutes. You can also slice and toast them directly from the freezer for a quick, warm bun.
Tips for Pretzel Bun Success
- Measure your flour correctly! Fluff the flour in its container, spoon it into your measuring cup, and level it off. Packing flour leads to dense buns.
- Don’t skip the egg wash. It’s essential for that beautiful, shiny, golden-brown top.
- Score the tops! That shallow ‘X’ isn’t just pretty. It controls where the bun splits as it bakes, preventing odd, giant bubbles.
- Use a light hand with the coarse salt. A little goes a long way for that perfect salty bite.
Serve Them Up in Style
Presentation is part of the joy! Brush the warm buns with a little melted butter right after baking for extra shine and flavor. Serve them on a wooden board or in a bread basket lined with a checked napkin. For a party, set up a burger bar with all the toppings and let everyone build their masterpiece on these incredible buns. They also make a stunning base for fancy chicken or turkey clubs at a ladies’ lunch.
Mix It Up! Pretzel Bun Variations
Once you’ve mastered the classic, try these fun twists:
- Everything Bagel Pretzel Buns: Sprinkle with an everything bagel seasoning mix instead of coarse salt before baking.
- Whole Wheat Pretzel Buns: Substitute half of the all-purpose flour with whole wheat flour for a nuttier flavor and extra fiber.
- Cheese-Stuffed Pretzel Buns: Flatten each dough ball, place a small cube of cheddar or mozzarella in the center, and seal it inside before shaping into a ball and poaching.
- Mini Pretzel Slider Buns: Divide the dough into 12-16 pieces for perfect party sliders. Just reduce the bake time by a few minutes.
- Garlic Herb Pretzel Buns: Add 1 teaspoon of garlic powder and 2 teaspoons of dried Italian herbs to the dry ingredients. Brush with garlic butter after baking.
- Sweet Cinnamon Sugar Pretzel Buns: Omit the salt topping. After brushing with egg wash, sprinkle with a mix of cinnamon and sugar. Perfect for breakfast sandwiches!
Common Mistakes to Avoid
Mistake 1: Killing the Yeast with Hot Water
This is the number one dough disaster. Water that’s too hot will kill the yeast, and your dough won’t rise. Your water should feel warm to the touch, around 110°F, like a pleasant baby’s bath. If you don’t have a thermometer, test it on your wrist—it should feel warm but not hot. No foam after 10 minutes means the yeast is dead, and you need to start over.
Mistake 2: Skipping the Poaching Bath
I know, it’s an extra step! But the baking soda bath is what gives pretzel buns their signature chewy crust and unique flavor. Without it, you’re just baking plain white rolls. The quick boil sets the outside, creating that perfect texture. Don’t be tempted to brush a baking soda mixture on top instead—it won’t work the same.
Mistake 3: Overcrowding the Baking Sheet
Placing the buns too close together on the pan is asking for trouble. As they bake, they need room for hot air to circulate. Without it, they’ll steam each other, leading to soggy sides and uneven baking. They might even fuse together into one giant pretzel blob! Give them at least 2 inches of personal space for the best rise and crust.
Mistake 4: Using Table Salt for the Topping
Fine table salt will mostly dissolve into the egg wash or create an overly salty spot here and there. The joy of a pretzel bun is the occasional crunch of a large salt crystal. Use coarse sea salt, pretzel salt, or flaky salt. These larger grains stick better and give you that classic, delightful salty burst in every few bites.
Your Pretzel Bun Questions, Answered
Can I make these without a stand mixer?
Absolutely! You can make this dough entirely by hand. Just mix the ingredients in a large bowl with a wooden spoon until a shaggy dough forms. Then, turn it out onto a floured surface and knead for about 10 minutes. You’ll know it’s ready when the dough is smooth, elastic, and springs back slowly when you poke it. It’s a great arm workout, and there’s something very satisfying about feeling the dough come to life under your hands.
Why did my buns turn out dense and heavy?
A dense bun usually points to one of three issues. First, the yeast might have been old or killed by water that was too hot. Always check for that foamy bloom. Second, you might have added too much flour. The dough should be slightly tacky, not dry. Third, the dough may not have risen enough. Make sure it’s in a truly warm spot. If your kitchen is cool, let it rise longer until it’s visibly doubled, even if it takes more than an hour.
Can I use instant yeast instead of active dry yeast?
Yes, you can use instant yeast. The method changes slightly. You would mix the instant yeast directly in with the dry ingredients (flour, salt, sugar). Then, add the warm water and melted butter. You can skip the initial 10-minute foam test because instant yeast doesn’t need to be proofed separately. Just proceed with mixing and kneading as directed. The rising times will be the same.
My buns are pale, not golden brown. What happened?
A pale bun often means the egg wash was too thin or wasn’t applied generously enough. Make sure your egg is well beaten. Brush it on in a nice, even, thick layer right before the buns go in the oven. Also, ensure your oven is fully preheated. An oven that’s still climbing to temperature won’t give that initial burst of heat needed for proper browning. An oven thermometer can help verify the true temperature.
Can I make the dough ahead of time?
You sure can! This is a great time-saver. After the first rise (when the dough has doubled), you can punch it down, wrap it tightly in plastic wrap, and refrigerate it overnight. The next day, let it sit on the counter for about 30 minutes to take the chill off. Then, proceed with shaping, poaching, and baking. The cold, slow rise in the fridge often develops even more flavor!
What’s the best way to split these sturdy buns?
Don’t just smash a knife through the top! These buns have a nice crust. The best method is to use a long, serrated bread knife. Hold the bun steady on its side on a cutting board. Gently saw back and forth horizontally through the middle to split it into two even halves. This prevents squishing and gives you a perfect surface for butter, mustard, or mayo.
Are these buns good for things other than burgers?
Oh, yes! They are incredibly versatile. Think of them as a fantastic upgrade for any sandwich. They’re amazing for pulled pork, grilled chicken, or even a fancy egg and bacon breakfast sandwich. You can slice them into cubes to make the world’s best croutons for a chef’s salad, or tear them up for a unique pretzel bread pudding. Get creative!
What can I use if I don’t have coarse salt?
No coarse salt in the pantry? You have options. Flaky sea salt (like Maldon) is a great substitute and gives a lovely texture. In a pinch, you can use kosher salt, but sprinkle it very lightly as it’s saltier by volume. You could also skip the salt altogether and use an “everything” bagel seasoning or sesame seeds. Just avoid fine table salt for topping.
Why do I need to score an ‘X’ on top of the buns?
Scoring isn’t just for looks, though it does give them a professional bakery style. That shallow cut controls the direction in which the bun expands during baking. Without it, the steam inside will escape randomly, often creating a large, awkward bubble or tear on the side. The ‘X’ guides the expansion upward, giving you an even shape and a perfect surface for holding your burger toppings.
Can I make mini pretzel buns for sliders?
Mini pretzel slider buns are a huge hit at parties! Simply divide the dough into 12 or 16 equal pieces instead of 8. Shape them into smaller, tighter balls. Follow the same poaching process, but reduce the poach time slightly to about 20 seconds per side. Bake them for a shorter time, about 12-15 minutes, until golden brown. Watch them closely so they don’t over-bake.
Ready to Be the Bun Hero
So there you have it—your guide to making the most incredible homemade pretzel hamburger buns. They might seem like a project, but each step is simple and so rewarding. The smell as they bake is pure happiness. The moment you present a burger on one of these golden, salty, chewy masterpieces, you’ll see the smiles. You’re not just making buns; you’re making memories around the table. Now, go preheat that oven and get ready for some serious compliments. Happy baking!
Loaded Bacon Fries
Ingredients
Equipment
Method
- Combine warm water, yeast, and sugar in a stand mixer's bowl and let sit for 5-10 minutes until foamy.
- Add flour, salt, and melted butter to the yeast mixture and mix on low speed until a dough forms.
- Knead the dough for 5-7 minutes until smooth, adding flour if too sticky.
- Grease a bowl and place the dough inside, covering it with plastic wrap to rise for about 1 hour.
- Punch down the dough and divide it into 8 equal pieces, shaping each into a ball.
- Boil 2 quarts of water and add baking soda, poaching the dough balls two at a time for 30 seconds each side.
- Preheat the oven to 425°F (220°C) and arrange the poached buns on a baking sheet lined with parchment paper.
- Brush each bun with egg wash, sprinkle with salt, and score a shallow 'X' on top.
- Bake for 15-20 minutes until deep golden brown.