Why This Pineapple Mascarpone Upside-Down Cake is a Game Changer
Let me tell you about the time I stumbled upon this little gem of a recipe. It was one of those lazy Sunday afternoons when I wanted to impress my family with something sweet but didn’t want to spend hours in the kitchen. Enter Pineapple Mascarpone Upside-Down Cake. These mini cakes are like a warm hug on a plate—rich, buttery caramel paired with juicy pineapple and a cloud-like mascarpone cake. Trust me, once you try them, you’ll wonder how you ever lived without them!
A Little History Behind the Upside-Down Cake
The upside-down cake has been around for ages, with its roots tracing back to ancient times when cooks flipped cakes cooked over fire to reveal a layer of fruit and caramel. But it wasn’t until the 1920s that the pineapple version became a household favorite, thanks to canned pineapple hitting the market. My twist? Adding mascarpone for an extra creamy texture. It’s a nod to tradition with a modern flair.
Why You’ll Love This Recipe
This Pineapple Mascarpone Upside-Down Cake is all about balance. The sweetness of the caramel complements the tangy pineapple, while the mascarpone adds a luxurious creaminess. Plus, these mini cakes are perfect for portion control (or sneaking seconds). They’re easy enough for beginners but impressive enough to wow guests. Did I mention they smell divine while baking?
Perfect Occasions to Whip Up These Mini Cakes
These cakes are versatile! Serve them at brunch, as a dessert after a cozy dinner, or even as a sweet treat during holiday gatherings. They’re also a hit at birthday parties or baby showers because they look adorable and taste heavenly. Who can resist a personal-sized dessert?
Ingredients for Your Mini Masterpiece
- For the Cake Batter:
- 250 g mascarpone
- 100 g sugar
- 150 g all-purpose flour
- 3 eggs
- 1 packet (about 10 g) baking powder
- 1 packet vanilla sugar
- For the Topping:
- 6 slices of pineapple (fresh or canned)
- 150 g sugar (for caramel)
Substitution Options
No mascarpone? No problem! You can use cream cheese mixed with a splash of heavy cream for a similar effect. If you’re out of fresh pineapple, canned works just fine—just drain it well. For a gluten-free option, swap the all-purpose flour with almond flour or your favorite GF blend.
Step 1: Preparing the Cake Batter
In a large mixing bowl, crack those eggs and whisk them together with the sugar and vanilla sugar until the mixture turns pale and fluffy. Think of it as giving your batter a good pep talk—it needs to be light and airy! Next, fold in the mascarpone gently. The mascarpone should melt into the mix, creating a silky-smooth batter that smells absolutely dreamy. In another bowl, combine the flour and baking powder, then gradually incorporate it into the wet ingredients. Pro tip: Don’t overmix; we want tender cakes, not tough ones.
Step 2: Making the Golden Caramel
Now comes the fun part—making caramel! Grab a sturdy saucepan and sprinkle the sugar evenly across the bottom. Turn the heat to medium and let the sugar do its thing. Resist the urge to stir; just swirl the pan occasionally. As the sugar melts, it transforms into a gorgeous amber liquid that smells like pure magic. Once it reaches a deep golden color, quickly pour it into your muffin tins. Pro tip: Work fast—the caramel hardens quickly!
Step 3: Assembling the Mini Cakes
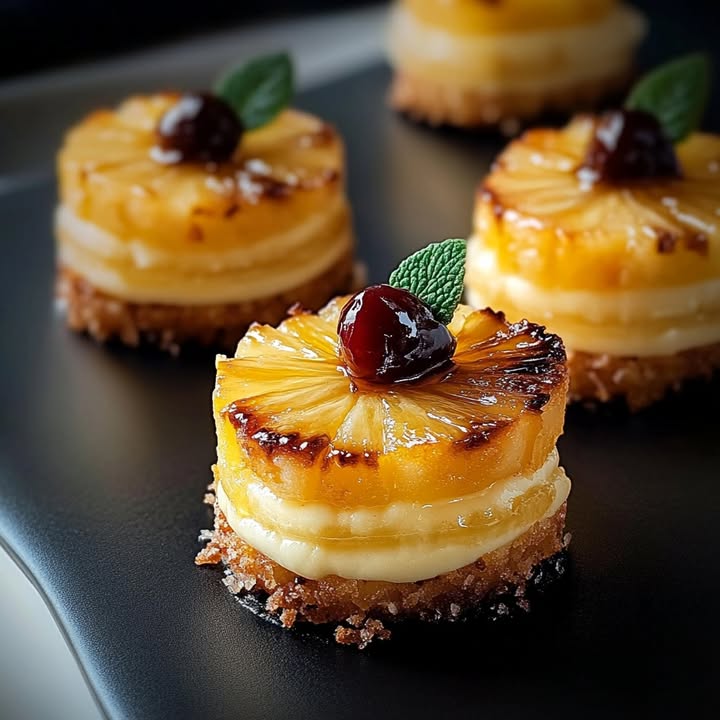
Place a slice of pineapple on top of the caramel in each tin. If you’re feeling fancy, add a cherry in the center for a retro touch. Now, spoon the batter over the pineapple slices, filling each tin about three-quarters full. Imagine the layers coming together like a tiny work of art. Chef’s tip: Tap the tins gently on the counter to remove air bubbles.
Step 4: Baking and Démoulage
Pop your cakes into a preheated oven at 180°C (350°F) for 25–30 minutes. Keep an eye on them—they’re done when a toothpick inserted comes out clean. Let them cool for five minutes before flipping them onto plates. Watching the caramel drizzle down the sides is pure satisfaction. Pro tip: Run a knife around the edges if they stick.
Timing Breakdown
- Prep Time: 20 minutes
- Cooking Time: 30 minutes
- Resting Time: 5 minutes
- Total Time: 55 minutes
Chef’s Secret
To take these cakes to the next level, brush the pineapple slices with a bit of rum before adding them to the caramel. It adds a subtle depth of flavor that pairs beautifully with the mascarpone.
An Interesting Fact About Pineapples
Pineapples were once considered a symbol of wealth and hospitality in colonial America. Only the rich could afford them, so having one at a party was a big deal. Now, you can bring that same sense of luxury to your table with these mini cakes!
Necessary Equipment
- Mixing bowls
- Whisk
- Saucepan
- Muffin tin or individual molds
- Oven
Storage Tips
If you have leftovers (unlikely!), store them in an airtight container at room temperature for up to two days. The caramel might soften slightly, but it will still taste amazing. For longer storage, refrigerate for up to a week. Bring them back to room temperature before serving.
To freeze, wrap each cake individually in plastic wrap and place them in a freezer-safe bag. They’ll keep for up to three months. Simply thaw overnight in the fridge and reheat briefly in the microwave.
One last note: Avoid stacking the cakes directly on top of each other, as the caramel can stick and make a mess.
Tips and Advice
- Use room-temperature eggs for easier mixing.
- Don’t rush the caramel process—patience is key!
- Grease your muffin tins lightly to ensure easy release.
Presentation Ideas
- Dust with powdered sugar for a snowy effect.
- Add a dollop of whipped cream on top.
- Garnish with mint leaves or edible flowers.
Healthier Alternatives
Here are six ways to lighten up this indulgent treat:
- Low-Sugar Version: Use coconut sugar for the caramel and reduce the overall sugar by half.
- Gluten-Free: Swap regular flour for almond or oat flour.
- Dairy-Free: Replace mascarpone with coconut cream.
- Vegan: Use flax eggs and plant-based butter for the caramel.
- Whole Grain: Try whole wheat pastry flour for added fiber.
- Fruit Swap: Experiment with peaches or apricots instead of pineapple.
Common Mistakes to Avoid
Mistake 1: Burning the Caramel
Burnt caramel happens when you walk away or turn the heat too high. Stay close and watch for that perfect amber hue. Pro tip: Have your tins ready before starting the caramel.
Mistake 2: Overmixing the Batter
Overmixing leads to dense cakes. Mix until just combined, and no more. Light hands make light cakes!
Mistake 3: Skipping the Resting Time
Rushing the resting step can cause the cakes to fall apart when flipped. Patience pays off here.
FAQs
Can I use fresh pineapple?
Absolutely! Fresh pineapple gives a brighter flavor, but canned works just as well. Just pat the slices dry to avoid excess moisture.
What if I don’t have vanilla sugar?
No worries—add a teaspoon of vanilla extract to the batter instead.
Can I make these ahead?
Yes! Bake them a day in advance and store them in the fridge. Reheat briefly before serving.
How do I know when the caramel is ready?
Look for a deep amber color and a nutty aroma. If it smells burnt, it probably is.
Can I double the recipe?
Of course! Just make sure you have enough tins and adjust the baking time slightly if needed.
Why is my cake sticking to the tin?
Make sure to grease the tins well or use nonstick spray. Running a knife around the edges helps too.
Can I freeze these cakes?
Yes! Wrap them individually and freeze for up to three months.
Do I need a stand mixer?
Nope! A hand whisk works perfectly fine for this recipe.
What’s the best way to serve these?
Warm, with a scoop of vanilla ice cream or a dollop of whipped cream.
Can kids help with this recipe?
Definitely! Kids love helping assemble the layers and watching the caramel form.
Final Thoughts
There you have it—a delightful recipe for Pineapple Mascarpone Upside-Down Cakes that’s sure to become a family favorite. Whether you’re baking for a special occasion or just because, these mini cakes are guaranteed to bring joy to anyone lucky enough to taste them. So grab your apron and get ready to create some sweet memories!
Pineapple Mascarpone Upside-down
Ingredients
Equipment
Method
- In a large mixing bowl, whisk together eggs, sugar, and vanilla sugar until pale and fluffy.
- Gently fold in the mascarpone until combined.
- In another bowl, mix together the flour and baking powder, then gradually incorporate into the wet ingredients without overmixing.
- For the caramel, pour sugar into a saucepan and heat on medium without stirring until it turns a deep golden color.
- Quickly pour the caramel into muffin tins.
- Place a slice of pineapple on top of the caramel in each tin and add a cherry if desired.
- Spoon the batter over the pineapple slices, filling each tin about three-quarters full.
- Bake in a preheated oven at 180°C (350°F) for 25-30 minutes or until a toothpick comes out clean.
- Let the cakes cool for five minutes before flipping onto plates.