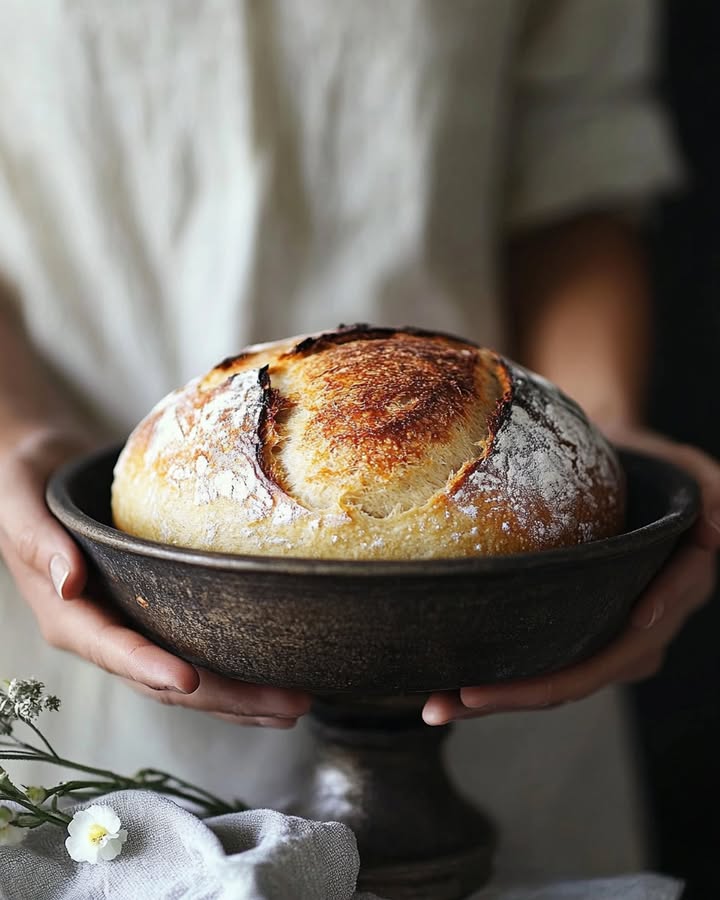
The Joy of Homemade Bread: No-Knead Market-Style Cheese Herb Bread
Is there anything better than the smell of fresh bread filling your home? It’s like a warm hug from your kitchen. I still laugh remembering the first time I made this no-knead cheese herb bread. My kids followed the cheesy aroma like little detectives, and we devoured half the loaf before it even cooled! This recipe is my secret weapon for a stunning, flavorful loaf with zero fuss. No kneading, no fancy skills, just incredible results every time.
A Bread Steeped in Simplicity
This bread is inspired by the rustic loaves you see at farmers’ markets, but with a clever no-knead twist. The method became famous thanks to baker Jim Lahey, who showed the world that time, not muscle, makes great bread. My version packs in gooey cheese and fragrant herbs for that homemade touch. It’s a modern shortcut to a tradition that’s been around for centuries, perfect for today’s busy home cook.
Why This Cheese Herb Bread Will Become Your Go-To
You’ll adore this recipe because it’s incredibly forgiving. Forget about precise kneading techniques. The dough does all the work while you relax. The result is a crusty, golden exterior with a soft, cheesy interior bursting with herbs. It fills your kitchen with an irresistible smell. It’s also wonderfully flexible. Use whatever cheese and herbs you have on hand. I’ve made it for everything from weeknight dinners to fancy parties, and it never fails to impress.
When to Bake This Delicious Bread
This bread is a superstar at any gathering. It’s perfect for a cozy family soup night, especially with a hearty sausage vegetable stew. Bring it to a potluck or picnic for easy sharing. Serve it at brunch with eggs, or as a side for your weekend barbecue. I love baking it when friends pop over. Paired with some wine and olive oil for dipping, it turns a simple visit into a special occasion. Any event feels fancier with a homemade loaf on the table.
What You’ll Need: Ingredients List
- 3 cups all-purpose flour
- 1 cup shredded cheese (cheddar or your choice)
- 1/4 cup fresh herbs (like rosemary, thyme, or parsley), chopped
- 1 tsp salt
- 1 tsp sugar
- 1 tsp instant yeast
- 1 1/2 cups warm water
- 2 TBSP melted butter for brushing, optional
Flexible Substitutions for Your Pantry
Out of something? No worries! This recipe is very adaptable.
- Flour: Swap up to half the all-purpose flour for whole wheat or rye.
- Cheese: Any good melting cheese works. Try Gouda, Monterey Jack, or a mix.
- Herbs: Use 1 tablespoon of dried herbs if you don’t have fresh.
- Fat: Olive oil or even avocado oil can replace the butter for brushing.
- Yeast: Active dry yeast is fine. Just proof it in the warm water with the sugar for 5 minutes first.
Step-by-Step Instructions for Perfect Bread
Step 1: Mix the Dry Ingredients
Grab a large mixing bowl. Whisk together the flour, salt, sugar, and instant yeast. Whisking is important here. It gets air into the flour and spreads the yeast evenly. You’ll see the mixture become light and uniform. This simple step sets the stage for a good rise and balanced flavor. Pro tip: Use a bowl that’s big enough for the dough to double in size later.
Step 2: Add Cheese and Herbs
Now, stir in your shredded cheese and chopped herbs. Mix until the cheese is coated in flour. This helps prevent it from clumping together in the bake. As you stir, the herbs will release their wonderful scent. I love the combination of rosemary and thyme. It smells like a cozy Italian kitchen. This is where your bread gets its personality.
Step 3: Incorporate the Water
Slowly pour the warm water into the bowl. Use a wooden spoon or your hands to mix everything. A shaggy, sticky dough will form. It should be wet and cling to the spoon. Don’t worry if it looks messy. That’s exactly right for no-knead dough. Pro tip: The water should feel warm on your wrist, like baby’s milk, to wake up the yeast without killing it.
Step 4: Let the Dough Rise
Cover the bowl tightly with plastic wrap or a damp kitchen towel. Find a warm, draft-free spot for it to rest. Let it sit for 1 to 2 hours. The dough will puff up and double in size. You might see bubbles on the surface. This slow rise builds amazing flavor. My favorite spot is inside the oven with just the light turned on. It creates the perfect cozy nook for the yeast to work.
Step 5: Preheat and Prepare
After the dough has risen, preheat your oven to 450°F (230°C). This high heat is crucial for a beautiful, crispy crust. While it heats, line a baking sheet with parchment paper. The parchment prevents sticking and makes cleanup a breeze. Having everything ready means you can handle the delicate dough gently when it’s time to shape it.
Step 6: Shape the Loaf
Carefully dump the risen dough onto the prepared baking sheet. It will be bubbly and delicate. With lightly floured hands, gently shape it into a round, rustic loaf. Don’t knead or punch it down. Just coax it into a ball. The sticky dough might cling to your fingers, so the flour on your hands is a must. This free-form shape gives it that charming market-style look.
Step 7: Bake to Golden Perfection
Place the baking sheet in the hot oven. Bake for 30 to 35 minutes. The loaf will turn a deep, golden brown. The cheese will melt and create delicious pockets. The herbs on top will get fragrant and toasty. Your kitchen will smell incredible. Pro tip: To test for doneness, tap the bottom of the loaf. It should sound hollow, like a drum.
Step 8: Finish and Cool
Take the beautiful loaf out of the oven. If you like, brush the top with melted butter for a shiny, flavorful crust. This step is optional but highly recommended. Then, transfer the bread to a wire rack. Let it cool completely before you slice it. I know it’s hard to wait. But slicing into warm bread makes it gummy. Letting it cool ensures perfect, neat slices.
Chef’s Tip: For an extra crispy, professional-looking crust, place a small oven-safe dish of hot water on the bottom rack while baking. The steam works wonders!
Timing Breakdown
- Prep Time: 15 minutes
- Rising Time: 1-2 hours
- Cook Time: 35 minutes
- Total Time: About 2 hours 50 minutes
- Servings: 1 loaf (about 12 slices)
- Calories: Approximately 200 kcal per slice
My Secret to the Best Cheese Herb Bread
My little secret is using two kinds of cheese. I mix a sharp cheddar for flavor with a melty Monterey Jack for stretch. Also, I sometimes add a tablespoon of grated Parmesan to the dry ingredients for a salty punch. Another trick? Letting the dough rise slowly in the fridge overnight. It develops a deeper, more complex flavor that’s absolutely worth the wait.
A Fun Fact About No-Knead Bread
No-knead bread is smart science. Instead of kneading to develop gluten, it uses a long, slow rise. Natural enzymes in the flour break down the starches over time. This process, called autolyse, creates fantastic flavor and texture. Bakers have used slow fermentation for millennia. Today, it’s a brilliant hack for getting artisan-quality bread at home with minimal hands-on work.
Tools You’ll Need
- Large mixing bowl
- Whisk
- Wooden spoon or silicone spatula
- Plastic wrap or a clean kitchen towel
- Rimmed baking sheet
- Parchment paper
- Wire cooling rack
- Measuring cups and spoons
How to Store Your Homemade Bread
Once your bread is completely cool, it’s time to store it. Wrap the whole loaf tightly in plastic wrap or aluminum foil. You can also put it in a bread bag. Store it at room temperature for up to 3 days. The crust will soften, but the inside will stay delicious. This is normal for crusty breads without preservatives.
For longer storage, freezing is your best friend. Slice the cooled loaf first. Place the slices in a single layer on a baking sheet to freeze them solid. Then, transfer the frozen slices to a zip-top freezer bag. They’ll keep for up to 3 months. This way, you can pull out just a slice or two for toast.
To refresh your bread, warm slices in a 350°F oven for 5-10 minutes. For frozen slices, you can toast them straight from the freezer. Avoid storing bread in the refrigerator. The cold temperature actually makes it go stale faster by speeding up the crystallization of the starch.
Pro Tips for Success
- For accurate results, consider weighing your flour. 3 cups is about 360 grams. Too much flour makes dense bread.
- The sugar isn’t just for sweetness. It feeds the yeast and helps the crust brown beautifully.
- If your dough seems too dry after mixing, add a tablespoon of water. If it’s a soupy mess, sprinkle in a little more flour.
- Play with herb combinations! Try chives and dill for a lighter flavor, or sage for a fall vibe.
- Always use a serrated bread knife to slice. It cuts cleanly without squashing the soft interior.
Serving Ideas to Impress
- Slice it thick, toast it, and slather with creamy butter or garlic herb compound butter.
- Serve alongside a big bowl of comforting sausage vegetable stew for the ultimate cozy meal.
- Cut into cubes, toss with olive oil, and bake for the most amazing homemade croutons.
- Present it as part of a cheeseboard with fruits, nuts, and cold cuts.
- Use day-old slices for a decadent cheese herb bread pudding for brunch.
Lighten Up: Healthier Variations
Want to make this bread a bit lighter? Here are six tasty twists:
- Whole Wheat Wonder: Replace half the white flour with whole wheat pastry flour. It adds fiber and a nutty taste without making the bread heavy.
- Lower Fat Favorite: Opt for a reduced-fat cheese blend and skip the butter brush. The herbs will still give tons of flavor.
- Gluten-Free Goodness: Use a 1:1 gluten-free all-purpose flour blend. You may need to add a teaspoon of xanthan gum if your blend doesn’t include it.
- Vegan Delight: Choose your favorite vegan cheese shreds and use olive oil instead of butter. It’s just as comforting and crowd-pleasing.
- Veggie-Packed Loaf: Fold in a half-cup of finely grated zucchini or carrot (squeezed dry) for extra moisture and vitamins.
- Seed & Grain Boost: Add a quarter cup of sunflower seeds or old-fashioned oats into the dry mix for added texture and nutrients.
Common Mistakes to Avoid
Mistake 1: Killing the Yeast with Hot Water
This is the most common bread-baking blunder. If your water is too hot, it will kill the yeast, and your bread won’t rise. Yeast is a living thing that likes warmth, not a hot tub. The perfect temperature is between 105°F and 115°F (40°C-46°C). A good rule of thumb? The water should feel warm and comfortable on your inner wrist, like pleasant bath water.
Mistake 2: Over-Handling the Dough
Since this is a no-knead recipe, the less you mess with it, the better. Over-stirring or trying to knead it smooth will develop too much gluten. This leads to a tough, chewy loaf instead of an airy, open crumb. Mix just until no dry flour remains. When shaping, be gentle and quick. Embrace the sticky, rustic look.
Mistake 3: Impatience with the Rise
Don’t rush the first rise. If the dough hasn’t doubled in size, it’s not ready. Baking it too soon gives you a dense, sad brick of bread. The rise time can vary based on your kitchen’s temperature. If it’s chilly, it might take the full 2 hours or even longer. Be patient. The wait is what creates the wonderful flavor and texture.
Mistake 4: Slicing While Hot
I know, the aroma is torture. But cutting into a hot loaf is a recipe for disappointment. The steam is still escaping, and the interior is setting. Slicing traps that steam, making the crumb gummy and wet. Let it cool on a wire rack for at least an hour. This allows the structure to firm up for perfect, clean slices that hold their shape.
Frequently Asked Questions
Can I use a Dutch oven instead of a baking sheet?
Absolutely! Using a Dutch oven is a fantastic way to get an even crispier crust. Preheat the Dutch oven in your 450°F oven for 30 minutes. Carefully place the shaped dough (on its parchment paper) into the hot pot. Cover with the lid and bake for 30 minutes. Then, remove the lid and bake for another 10-15 minutes until golden. This method traps steam perfectly.
My bread is very dense. What went wrong?
A dense loaf usually means the dough didn’t rise enough. The most common culprits are old yeast, water that was too hot or too cold, or a chilly rising environment. Check your yeast’s expiration date. Next time, ensure your water is the right warm temperature and let the dough rise in a truly warm spot, like an oven with the light on. Giving it plenty of time is key.
Can I make the dough ahead of time?
Yes, you can! This dough is perfect for prep-ahead baking. After mixing, cover the bowl and place it directly in the refrigerator. Let it rise slowly for 12 to 18 hours. When ready to bake, let it sit at room temperature for 30 minutes, then shape and bake as directed. This long, cold fermentation makes the flavor even more incredible.
Can I add garlic or onion to this bread?
Definitely! For garlic, I recommend using roasted garlic cloves or garlic powder. Fresh garlic can burn and taste bitter. Mix in 2-3 mashed roasted cloves or a teaspoon of garlic powder with the dry ingredients. For onion, a tablespoon of dried minced onion or onion powder works great. If using fresh, sauté it first to soften and remove excess moisture.
Why is my bread too salty?
If your bread tastes too salty, you might be using a very salty cheese, like feta or some pre-shredded blends that contain anti-caking salt. Remember, the recipe already has a teaspoon of salt. If your cheese is salty, consider reducing the added salt to 1/2 teaspoon. Always taste your cheese first if possible, and adjust the salt in the dough accordingly.
How can I make sure the cheese doesn’t all sink to the bottom?
To prevent cheese sinking, make sure it’s shredded, not grated. Grated cheese is too fine and can melt into a pool. Also, tossing the shredded cheese with the flour before adding water is crucial. The flour coating helps suspend the cheese throughout the dough. Finally, avoid over-mixing after adding the water, as this can break down the flour coating.
Is instant yeast the same as rapid-rise yeast?
Yes, for all practical purposes in this recipe, instant yeast and rapid-rise yeast are interchangeable. They are both designed to be mixed directly into dry ingredients. The main difference from active dry yeast is that active dry needs to be dissolved in liquid first. So if your packet says “instant” or “rapid-rise,” you can use it exactly as the recipe states.
Can I make smaller rolls instead of one big loaf?
You sure can! After the first rise, divide the dough into 8 equal pieces. Gently shape each into a ball and place them on the parchment-lined sheet, spaced a couple inches apart. Let them rest for 20-30 minutes while the oven preheats. They will bake faster, so check them after 20 minutes. These make perfect individual servings or slider buns.
My crust is very hard. How can I make it softer?
For a softer crust, brush the baked loaf generously with butter right when it comes out of the oven. Then, wrap the cooled loaf in a clean kitchen towel instead of plastic wrap. The towel allows just enough air flow to prevent sogginess but keeps the crust softer. You can also tent the loaf with foil during the last 10 minutes of baking to reduce browning.
What’s the best way to reheat leftover bread?
The best way to bring back that fresh-baked feeling is in the oven. Preheat to 350°F. Lightly sprinkle the loaf or slices with water. Wrap in foil and heat for 10-15 minutes if whole, or 5-8 minutes for slices. For a single slice, toasting is perfect. Avoid the microwave, as it will make the bread tough and chewy rather than crispy.
Final Thoughts on Your Baking Adventure
Making this no-knead market-style cheese herb bread is such a joy. It’s a simple process that feels like a little bit of kitchen magic. I hope this recipe becomes a trusted friend in your home, just like it is in mine. Remember, baking is about love and a dash of courage. Don’t be afraid to make it your own. Throw in your favorite extras, share it with people you care about, and savor every delicious bite. Happy baking!
Sausage Vegetable Stew
Ingredients
Equipment
Method
- In a large mixing bowl, whisk together the flour, salt, sugar, and instant yeast.
- Stir in the shredded cheese and chopped herbs until the cheese is coated in flour.
- Slowly pour in the warm water and mix until a shaggy, sticky dough forms.
- Cover the bowl tightly with plastic wrap or a damp kitchen towel and let it rise in a warm, draft-free spot for 1 to 2 hours or until doubled in size.
- Preheat your oven to 450°F (230°C) and line a baking sheet with parchment paper.
- Dump the risen dough onto the prepared baking sheet and gently shape it into a round loaf with lightly floured hands.
- Bake the loaf for 30 to 35 minutes, until golden brown and the bottom sounds hollow when tapped.
- Brush the top with melted butter, if desired, then transfer to a wire rack to cool completely before slicing.