The Homemade Strawberry Vanilla Bean Ice Cream You’ve Been Dreaming Of
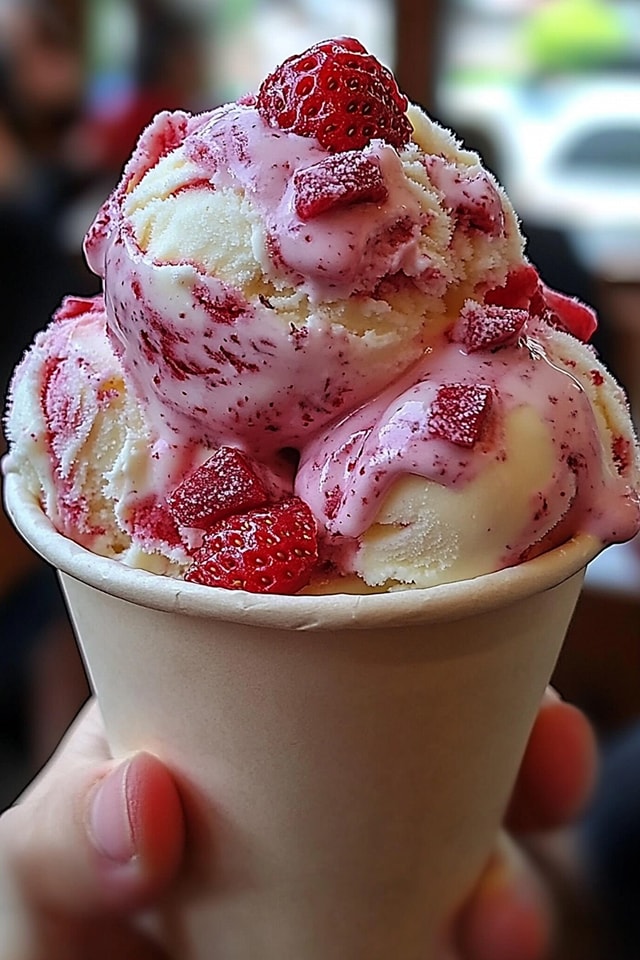
You know that feeling when the sun is high, the air is warm, and you crave something truly special? I do. For me, that craving is always for a scoop of the creamiest, most berry-packed strawberry vanilla bean ice cream. It tastes like summer in a bowl. This isn’t just any recipe; it’s my go-to for turning a pint of ripe strawberries into pure joy. I’ve been making this version for years, tweaking it until it was just right. It reminds me of laughing with my kids on the patio, spoons clinking. Let’s make some memories together!
A Spoonful of History: From Farm Stands to Freezers
Strawberry ice cream feels timeless, doesn’t it? Its history is a sweet blend of old-world charm and American ingenuity. In the 1700s, well before electric ice cream makers, cooks would painstakingly stir a creamy strawberry mixture in a bowl set inside a larger bowl of ice and salt. It was a rare luxury. Today, it’s a classic flavor found everywhere. The magic of this recipe lies in that perfect marriage: the deep, floral notes of a real vanilla bean and the sun-ripened tartness of fresh strawberries. My version skips the artificial pink color and lets the real fruit shine, just like those old-fashioned farm stand treats.
Why You’ll Fall in Love With This Strawberry Ice Cream
This recipe is a surefire winner, and I’ll tell you why. It’s incredibly creamy but still feels light and fresh. You get chunks of real strawberry in every bite. It’s also surprisingly simple—no cooking a custard base! Just mix, chill, and churn. Most importantly, the flavor is unbeatable. The vanilla bean seeds create tiny, fragrant specks that make the strawberry taste even brighter. It’s a dessert that feels fancy but is totally doable on a lazy afternoon.
The Perfect Occasion for This Sweet Treat
This strawberry vanilla bean ice cream is your new secret weapon for happy gatherings. I love serving it at weekend barbecues—it’s the perfect cool-down after grilled burgers. It steals the show at birthday parties (much better than store-bought!). Bring a tub to a picnic and watch it disappear. For a romantic touch, scoop it into fancy glasses for a date night at home. Honestly, any day that calls for a smile is a good day for this ice cream.
Gathering Your Ingredients
Quality ingredients make all the difference here. You’ll need:
- 2 cups heavy cream – This is the secret to a luxuriously creamy texture.
- 1 cup whole milk – It balances the richness of the cream.
- ¾ cup granulated sugar – Sweetens the base and helps keep it scoopable.
- 1 vanilla bean (or 2 tsp pure vanilla extract) – The bean makes it extraordinary.
- 1 ½ cups fresh strawberries, hulled – Look for bright red, fragrant berries.
- 1 tablespoon fresh lemon juice – This little splash makes the strawberry flavor pop!
Easy Swaps & Substitutions
No vanilla bean? No problem! Use 2 teaspoons of high-quality pure vanilla extract instead. For a dairy-free version, swap the heavy cream and milk for full-fat canned coconut milk—it gets wonderfully creamy. Frozen strawberries work in a pinch; just thaw and drain them well to avoid extra water. If you prefer a smoother texture, you can puree the strawberries completely before adding them.
Making Your Dreamy Strawberry Vanilla Ice Cream
Follow these simple steps for ice cream success. The wait is absolutely worth it!
Step 1: Create the Luxurious Cream Base
Find your biggest mixing bowl. Pour in the cold heavy cream and whole milk. Add the granulated sugar. Now, take your whisk and stir energetically for a few minutes. You want the sugar to completely dissolve into the liquid. You shouldn’t feel any graininess at the bottom of the bowl. Next, take your beautiful vanilla bean. Slice it straight down the middle lengthwise with a small, sharp knife. Open it up and use the back of the knife to scrape out all the tiny, sticky black seeds. Stir those precious seeds right into the creamy base. The mixture will immediately smell incredible.
Step 2: Prepare the Vibrant Strawberries
Wash and hull your fresh strawberries. I like to do this over a separate bowl to catch all the juices. Place the berries in the bowl and grab a potato masher or a fork. Gently mash them up. You’re looking for a chunky compote with some smaller bits and some larger pieces. This texture gives you amazing bursts of flavor later. Now, squeeze a tablespoon of fresh lemon juice over the mashed berries and stir. The lemon juice is like a magic wand—it brightens the strawberry flavor and keeps the color vibrant.
Step 3: Combine & Infuse the Flavors
This step is where the magic starts to really happen. Pour your gorgeous, jewel-toned strawberry mash into the vanilla cream base. Use a spatula to gently fold everything together. Watch as the white cream turns the most beautiful, soft shade of pink with red specks throughout. Once combined, cover the bowl tightly with plastic wrap. Now, patience! Let it chill in the refrigerator for at least 2 hours. This resting time lets the flavors get to know each other and makes the churning process much smoother. Pro tip: This is the perfect time to clean up and make sure your ice cream maker bowl is frozen solid!
Step 4: Churn to Creamy Perfection
After the wait, give the mixture a quick stir. Set up your ice cream maker according to its instructions. Pour the chilled strawberry cream into the frozen bowl of the machine. Turn it on and let it work its magic! As it churns, you’ll see the liquid slowly thicken and freeze against the sides. After about 20-25 minutes, it will look like the most perfect, soft-serve ice cream you’ve ever seen. It should be thick and hold its shape on the paddle. Chef’s tip: Don’t over-churn! Once it’s thick and creamy, stop the machine.
Step 5: Freeze, Scoop, and Savor
Get your airtight freezer container ready. Using your spatula, gently transfer the freshly churned ice cream into the container. Smooth the top, press a piece of parchment paper directly onto the surface (this prevents ice crystals), then seal the lid. Place it flat in your freezer. Let it firm up for at least 3-4 hours, or preferably overnight. When you’re ready, take it out, let it sit on the counter for 5 minutes for easier scooping, and dig in! The rich creaminess and fresh berry flavor will be everything you dreamed of.
How Long Will It Take?
Here’s a quick breakdown of the timing for this strawberry vanilla bean ice cream:
- Prep Time: 20 minutes
- Chilling Time: 2 hours (minimum)
- Churning Time: 20-25 minutes
- Freezing Time: 3-4 hours
- Total Time: About 6 hours (mostly hands-off)
My Secret for the Best Texture
My biggest secret? That tablespoon of lemon juice! It does more than just add flavor. The acid in the lemon juice slightly breaks down the strawberry fibers, allowing their sweet juice to mingle more deeply with the cream base. This creates a more integrated, powerful strawberry taste throughout the entire batch, rather than just having chunks of fruit floating in vanilla ice cream.
A Fun Ice Cream Fact
Did you know President George Washington was a huge ice cream fan? Records from 1790 show that he spent about $200 (a small fortune then!) on ice cream supplies one summer. He probably never had a machine like ours, but I like to think he’d approve of this homemade strawberry vanilla bean version.
What You’ll Need to Make It
You don’t need fancy equipment. Here’s the list:
- Large mixing bowl
- Whisk
- Spatula
- Measuring cups and spoons
- Small knife for the vanilla bean
- Potato masher or fork
- Ice cream maker (the kind with a frozen bowl is perfect)
- Airtight container for freezing
Storing Your Ice Cream Masterpiece
To keep your strawberry vanilla bean ice cream tasting fresh and creamy, proper storage is key. Always use an airtight container. This locks out freezer odors and prevents pesky ice crystals from forming on the surface.
For an extra layer of protection, press a piece of parchment paper or wax paper directly onto the surface of the ice cream before sealing the lid. This creates a barrier against the cold, dry air of the freezer.
Stored correctly, your homemade ice cream will stay delicious for up to 2 weeks. After that, it might start to develop freezer burn or lose its perfect texture. Honestly, in my house, it never lasts that long!
Helpful Tips & Tricks
- Berry Sweetness: Taste your strawberries before you mash them. If they are a bit tart, you can add an extra tablespoon of sugar to the mash.
- Pre-Freeze: Make sure your ice cream maker bowl is completely frozen solid. I keep mine in the back of the freezer for at least 24 hours before I plan to churn.
- Scooping Ease: If the ice cream is too hard to scoop, let it sit on the counter for 5-10 minutes. Running your ice cream scoop under hot water also works wonders.
- Mix-In Magic: For a fun twist, fold in some chopped dark chocolate or white chocolate chips during the last minute of churning.
Presentation Ideas to Wow Your Guests
- Scoop into pretty glass bowls and top with a fresh, whole strawberry and a sprig of mint.
- Create an ice cream sundae bar with hot fudge, whipped cream, and chopped nuts.
- Serve it in a homemade waffle cone for the ultimate summer experience.
- For a fancy dinner, layer it with crushed shortbread cookies in a glass for a quick parfait.
- Make ice cream sandwiches with your favorite soft chocolate chip cookies.
Lighter & Healthier Variations to Try
Love the flavor but want a lighter option? Here are some ideas:
- Yogurt-Based Berry Swirl: Use full-fat Greek yogurt instead of cream. Swirl in a sugar-free strawberry puree for a protein-packed, tangy treat.
- Vegan Coconut Bliss: Swap all dairy for full-fat coconut milk. The natural fat makes it super creamy, and the coconut flavor pairs beautifully with strawberry.
- Banana “Nice” Cream: Freeze ripe bananas, then blend them with frozen strawberries and a dash of vanilla for a one-ingredient wonder (plus fruit!).
- Lower-Sugar Option: Reduce the granulated sugar to ½ cup and add 2-3 pitted Medjool dates to the strawberry mash for natural sweetness.
- Mascarpone Dream: Replace 1 cup of the heavy cream with mascarpone cheese. It creates an unbelievably rich, almost cheesecake-like flavor.
- Sorbet Style: Omit the dairy entirely! Puree the strawberries with sugar, lemon juice, and a little water, then churn for a refreshing, fat-free sorbet.
Common Mistakes to Avoid
Mistake 1: Skipping the Chilling Step
You mixed your base and are ready to churn immediately. Don’t do it! Pouring a warm or room-temperature mixture into your ice cream maker will lead to a long, frustrating churn time and a grainy, icy final product. The pre-chill step is non-negotiable. It ensures the mixture is very cold when it hits the frozen bowl, allowing it to freeze quickly into tiny, creamy ice crystals. Always give it that full 2 hours in the fridge—it makes all the difference.
Mistake 2: Using Watery or Frozen Berries Without Draining
Fresh strawberry flavor is key. If you use frozen strawberries and don’t thaw and drain them properly, you’re adding extra water to the base. Extra water means more ice crystals, which makes your final ice cream hard and icy instead of creamy. Even with fresh berries, if they are overripe and very juicy, consider mashing them and letting them sit in a strainer for a few minutes to drain excess liquid before adding them to the cream.
Mistake 3: Over-churning the Ice Cream
More churning does not mean better ice cream. Once the mixture has thickened to a soft-serve consistency and is pulling away from the sides of the bowl, stop the machine! If you continue to churn, you are essentially whipping too much air into it and breaking down the fat structure. This can make the ice cream feel greasy or cause it to become too hard when frozen. Follow your machine’s recommended time as a guide, but always trust the look and texture.
Mistake 4: Storing in a Container with Air Space
Popping your freshly churned ice cream into a big, half-empty container is a recipe for freezer burn. Air is the enemy of creamy ice cream. Always choose a container that your ice cream will nearly fill. Pressing parchment paper directly on the surface before sealing the lid is my favorite trick. It removes that layer of air that causes large, crunchy ice crystals to form on top of your beautiful dessert.
Your Strawberry Ice Cream Questions, Answered
Can I make this without an ice cream maker?
Yes, you can! It takes a bit more effort but is totally doable. Pour your chilled mixture into a shallow, freezer-safe dish (like a metal loaf pan). Freeze it for 45-60 minutes until the edges start to set. Take it out and whisk it vigorously with a fork or hand mixer to break up the ice crystals. Return it to the freezer. Repeat this whipping process every 30-45 minutes, 3-4 more times, until it’s frozen and creamy. This method incorporates air and prevents large ice chunks, mimicking the churner’s action.
Why did my ice cream turn out icy and not creamy?
An icy texture usually points to too much water in the mix or not enough fat. This could be from using low-fat dairy, not chilling the base long enough, or adding watery fruit. Ensure you’re using full-fat heavy cream and whole milk. Always chill the base thoroughly. If using frozen fruit, drain it well. The fat in the cream and the quick freezing from a properly pre-frozen ice cream maker bowl are your best defenses against iciness.
How can I make the strawberry flavor stronger?
For an intense, almost jam-like strawberry punch, try macerating your berries first. Hull and chop them, then toss with 2 tablespoons of the recipe’s sugar and the lemon juice. Let them sit for 30 minutes. They’ll release tons of flavorful juice. Mash them, then add both the berries and all the accumulated syrupy juice to your cream base. This infuses the entire mixture with maximum strawberry essence.
My ice cream is rock hard. How do I soften it for serving?
Homemade ice cream doesn’t have the stabilizers commercial versions do, so it freezes harder. This is normal! The simple fix is planning ahead. Move the container from the freezer to the main part of your refrigerator about 15-20 minutes before you want to scoop it. If you’re in a hurry, let it sit on the counter for 5-10 minutes. You can also run your ice cream scoop under very hot water and dry it quickly before scooping.
Can I use frozen strawberries instead of fresh?
Absolutely. Frozen strawberries are a great year-round option. Thaw them completely in a strainer set over a bowl to catch all the liquid. You can use the collected juice, but be aware it will add more water to your recipe. For the creamiest result, I recommend using only the thawed berries themselves and maybe 1-2 tablespoons of the juice. Mash or puree them as you would with fresh berries.
What’s the difference between using a vanilla bean and vanilla extract?
The vanilla bean provides a deep, complex floral aroma and gives you those gorgeous little black specks that scream “homemade gourmet.” Vanilla extract adds a good, strong vanilla flavor but lacks the visual appeal and subtlety of the bean. For a special occasion, the bean is worth it. For everyday deliciousness, a high-quality pure vanilla extract works perfectly. Never use imitation extract—the flavor is harsh and artificial.
How long will homemade ice cream last in the freezer?
At peak creaminess and flavor, it’s best within the first week. Technically, it will be safe to eat for up to 2-3 months if stored in an airtight container with parchment pressed on the surface. However, after about two weeks, you might notice a slow decline in texture and the strawberry flavor might fade. Since it’s so good fresh, I doubt you’ll have to worry about long-term storage!
Can I double this strawberry ice cream recipe?
Be careful about doubling! Most home ice cream makers have a capacity of 1.5 to 2 quarts. This recipe is designed to fit that. If you double it, you risk overfilling the machine. The mixture won’t have room to churn properly and could overflow. It’s better to make two separate batches if you need a larger quantity. Plus, you get to enjoy some fresh churned ice cream right away and freeze the second batch for later.
What can I add to this recipe for fun mix-ins?
Oh, the possibilities! Fold in ingredients during the last minute of churning. Try dark chocolate chips or chunks, chopped toasted nuts (like almonds or pecans), or crumbled shortbread cookies. For a “strawberry cheesecake” vibe, swirl in a ribbon of graham cracker crumbs mixed with a little melted butter and cream cheese. Be creative, but keep mix-ins to about ¾ cup total so you don’t overwhelm the delicate strawberry vanilla flavor.
Is it necessary to use an airtight container?
Yes, it’s one of the most important steps for quality storage. The freezer is a dry, cold environment that will suck moisture right out of your ice cream, leading to freezer burn—those unpleasant, dry, icy patches. An airtight container, especially with that parchment paper shield, creates a sealed environment that keeps your ice cream’s moisture in and the freezer’s dry air out. A container with a loose lid or plastic wrap that doesn’t seal well simply won’t do the job.
A Sweet Finale
There you have it—my very favorite recipe for homemade strawberry vanilla bean ice cream. It’s more than just a dessert; it’s a little project that fills your kitchen with the best smells and ends with the most satisfying reward. This ice cream has been the star of so many happy afternoons and gatherings at my table. I hope it brings just as much joy to yours. Grab those strawberries, fire up your ice cream maker, and get ready for the creamiest, most flavorful treat you’ll make all summer. Happy scooping!
Sizzling Bulgogi Rice
Ingredients
Equipment
Method
- In a large mixing bowl, combine cold heavy cream, whole milk, and granulated sugar. Whisk until the sugar is completely dissolved.
- Slice the vanilla bean lengthwise, scrape out the seeds with a knife, and stir them into the cream base.
- Wash and hull the strawberries, then gently mash them in a separate bowl.
- Squeeze fresh lemon juice over the mashed strawberries and stir to combine.
- Fold the strawberry mixture into the cream base until the colors blend to a soft pink.
- Cover the bowl with plastic wrap and chill in the refrigerator for at least 2 hours.
- Pour the chilled mixture into an ice cream maker and churn according to the manufacturer's instructions for about 20-25 minutes.
- Transfer the churned ice cream into an airtight container, smooth the top, and place parchment paper on the surface before sealing the lid.
- Freeze for at least 3-4 hours, or preferably overnight, before serving.