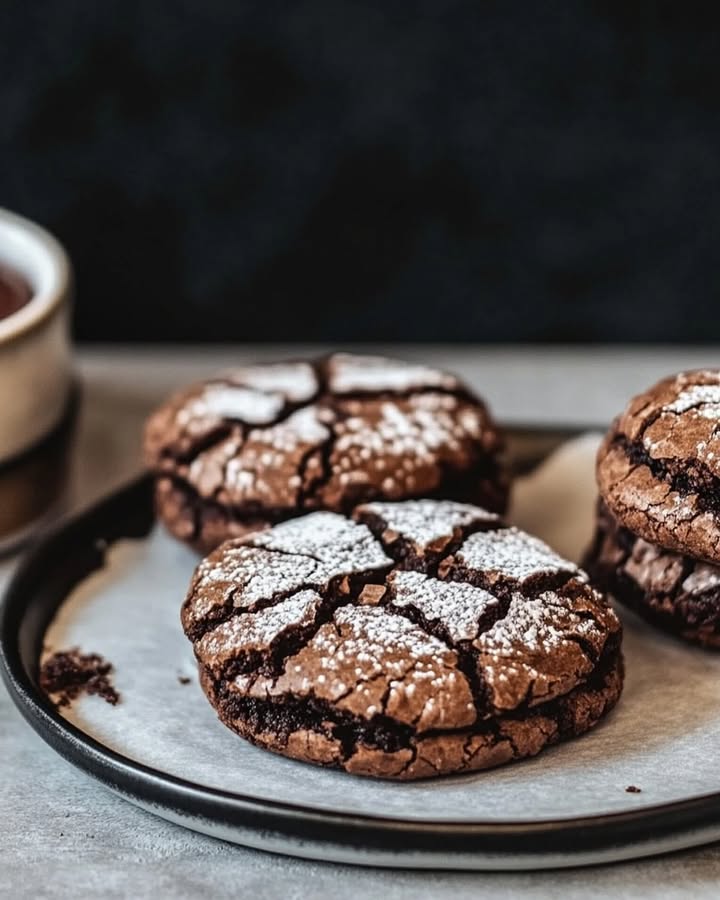
Chocolate Heaven in a Bite: My Gooey Hot Chocolate Brownie Crinkle Cookies
You know that feeling when you’re cozied up with a mug of hot chocolate, wishing you could eat that rich, chocolatey comfort? I was chasing exactly that feeling when I created these cookies. My kids begged for something “extra” for their school bake sale, and honestly, I wanted a treat that felt like a hug. After a few (delicious) experiments, we landed on these: part fudgy brownie, part chewy cookie, and all the magic of a steaming cup of cocoa. The second you pull them from the oven, dusted in snowy powdered sugar with those gorgeous crinkles, you just know they’re something special.
The Sweet Story of a Crinkle Cookie
Crinkle cookies have been a holiday staple for ages, often popping up as chocolate peppermint bites. But I wanted to take that classic crackly top and stuff it with all the joy of a winter dessert. The idea hit me one snowy afternoon. Why not combine the deep chocolate flavor of a brownie with the fun, gooey bits from a cup of hot chocolate? It was a “why didn’t I think of this sooner?” moment. This recipe is my modern, everyday twist—bringing that festive, special-occasion vibe right into your regular cookie jar, no special occasion required.
Why You’ll Fall in Love With This Recipe
First, the texture is pure magic. You get a crispy, sugary shell that gives way to a dense, fudgy center. Then, you hit little pockets of melted chocolate and soft, gooey marshmallow. It’s an experience! Second, they’re incredibly fun to make. Rolling the dough balls and watching them coat in powdered sugar is a kitchen activity everyone loves. Finally, they’re impressively easy. The dough comes together in one bowl (mostly!), and the rest is just chilling and baking. It’s a foolproof path to becoming a household hero.
When to Whip Up a Batch of These Cookies
These cookies are the ultimate crowd-pleaser for so many moments. They’re perfect for holiday cookie swaps, where their festive look steals the show. I love packing them in lunchboxes for a sweet surprise. They’re also my secret weapon for book club nights and casual get-togethers—pair them with coffee, and you’ve got instant best host status. Honestly, a rainy Tuesday is reason enough to bake them. They turn any ordinary day into a small celebration.
Gathering Your Ingredients
Here’s everything you’ll need to make about two dozen delightful cookies. Make sure everything is at room temperature except the butter, which we melt!
- 1/2 cup unsalted butter, melted
- 1 cup granulated sugar
- 1/2 cup brown sugar, packed
- 2 large eggs
- 1 teaspoon vanilla extract
- 1 cup all-purpose flour
- 1/2 cup cocoa powder (I use natural, unsweetened)
- 1 teaspoon baking powder
- 1/4 teaspoon salt
- 1/2 cup mini chocolate chips
- 1/2 cup mini marshmallows
- 1/2 cup powdered sugar, for rolling
Easy Ingredient Swaps (No Stress!)
Out of something? Don’t worry. This dough is very forgiving. You can use salted butter and just omit the extra salt. No brown sugar? Use all granulated, though you’ll miss a bit of that caramel depth. For the cocoa, Dutch-processed works great too—just don’t use hot chocolate mix! If you don’t have mini marshmallows, you can chop up regular ones, or even swap in some chopped nuts or white chocolate chips for a different texture.
Making Your Hot Chocolate Brownie Crinkle Cookies
Get ready to make your kitchen smell incredible. Follow these steps for cookie perfection.
Step 1: Preheat and Prep
Start by heating your oven to 350°F (175°C). This ensures it’s perfectly hot when your dough is ready. Line your baking sheets with parchment paper. This little step is a lifesaver! It prevents sticking and makes cleanup a total breeze. Trust me, you don’t want to skip it.
Step 2: Mix the Wet Ingredients
In a large bowl, whisk together your melted butter, granulated sugar, and packed brown sugar. You’ll see the sugars dissolve into the butter, creating a glossy, caramel-colored base. The aroma is already sweet and inviting. Beat in the eggs, one at a time, letting each fully incorporate before adding the next. This builds structure. Finally, stir in that vanilla extract for its warm, comforting flavor.
Step 3: Combine the Dry Ingredients
In a separate bowl, it’s time for the dry team. Sift together the flour, cocoa powder, baking powder, and salt. Sifting is key here! It breaks up any lumps in the cocoa and ensures everything is evenly mixed. You’ll get a beautiful, uniform chocolate powder that promises deep flavor in every bite. Pro tip: Whisk the sifted ingredients a few times with a fork to make sure the baking powder and salt are fully distributed.
Step 4: Bring It All Together
Now, gradually add your dry ingredients to the wet bowl. I like to do it in two or three additions. Mix on low speed or by hand with a sturdy spoon until just combined. You should see no more dry flour pockets, but don’t overmix! Overmixing leads to tough cookies. The dough will be thick, shiny, and intensely chocolatey.
Step 5: Fold in the Fun Stuff
This is the best part! Gently fold in the mini chocolate chips and mini marshmallows. Use a spatula in a folding motion to distribute them evenly without crushing the marshmallows. The dough will be quite sticky, and that’s exactly right. Those little white marshmallow bits peeking through the dark dough are like hidden treasure.
Step 6: The Essential Chill Time
Here’s the step that requires patience. Cover the bowl with plastic wrap and chill the dough for at least 30 minutes. This firms up the butter, preventing the cookies from spreading too much in the oven. It also allows the flavors to deepen. Chef’s tip: If you can, chill it for an hour. The longer chill makes the dough easier to handle and gives you a thicker, chewier cookie.
Step 7: Roll and Coat
After chilling, scoop out tablespoon-sized portions of dough. Roll them quickly between your palms into rough balls. Don’t worry about them being perfectly smooth. Place your 1/2 cup of powdered sugar in a shallow bowl. Roll each dough ball generously in the sugar until it’s completely covered in a snowy white coat. This is what creates that iconic, crackly crinkle top!
Step 8: Bake to Perfection
Place your sugar-coated dough balls on the prepared baking sheet, spacing them about 2 inches apart. They need room to spread. Bake for 10-12 minutes. The cookies are done when the edges look set and the tops have cracked beautifully. They will still look soft in the centers—that’s what you want! Pro tip: For super gooey centers, pull them out at 10 minutes. For a firmer set, go to 12.
Step 9: Cool and Enjoy
Let the cookies cool on the baking sheet for 5 minutes. They are very fragile right out of the oven. This rest lets them firm up just enough. Then, use a spatula to transfer them to a wire rack to cool completely. The wait is tough, but a warm cookie with a glass of milk is absolute bliss.
Timing Your Cookie Adventure
Good baking is all about timing. Here’s how your schedule will look:
- Prep Time: 15 minutes (measuring and mixing)
- Chilling Time: 30 minutes (essential for the perfect texture)
- Cooking Time: 12 minutes per batch
- Total Time: About 57 minutes from start to first bite
This recipe makes about 24 delicious cookies, each packing around 180 kcal of chocolaty joy.
My Secret Chef’s Trick
For an extra-rich, almost brownie-like flavor, use a combination of half regular cocoa powder and half dark cocoa powder. The dark cocoa gives them a sophisticated, Oreo-like depth that contrasts wonderfully with the sweet marshmallows. It’s a simple swap that makes everyone ask, “What’s your secret?”
A Little Cookie Trivia
Did you know the crinkle on top isn’t just for looks? It happens because the chilled, sugar-coated dough expands rapidly in the heat of the oven. The powdered sugar coating cracks as the cookie rises and spreads, creating that beautiful, rustic pattern. It’s a tiny bit of kitchen science that results in edible art!
Equipment You’ll Need
You don’t need any fancy gadgets. A simple set of basics will do:
- Large and medium mixing bowls
- Whisk and rubber spatula
- Measuring cups and spoons
- Baking sheets
- Parchment paper
- Wire cooling rack
- Cookie scoop (optional, but helpful for even sizing!)
Storing Your Cookie Creations
To keep your cookies fresh and delicious, let them cool completely first. Any leftover warmth can create steam in a container, making them soggy. Once cool, they can be stored.
Place them in an airtight container at room temperature. Layer them between sheets of parchment paper if you’re stacking them. They will stay perfectly soft and chewy for up to 4 days this way. The marshmallows might lose their gooeyness but the flavor is still amazing.
For longer storage, you can freeze the baked cookies for up to 3 months. Wrap them tightly in plastic wrap and then place in a freezer bag. Thaw at room temperature when you need a cookie fix. You can also freeze the unbaked dough balls! Just roll them in powdered sugar, place on a tray to freeze solid, then transfer to a bag. Bake straight from the freezer, adding 1-2 minutes to the bake time.
Tips and Advice for Cookie Success
- Measure your flour correctly: Spoon it into your measuring cup and level it off. Don’t scoop directly from the bag—this packs in too much flour and leads to dry cookies.
- Chill, chill, chill! I can’t stress this enough. Warm dough spreads too fast. Chilled dough holds its shape, giving you a thick, fudgy center.
- Don’t overbake. The cookies will continue to set as they cool on the hot baking sheet. If they look done in the oven, they are already overdone.
- Use a cookie scoop for uniform size. This ensures all your cookies bake at the same rate and look picture-perfect.
Presentation Ideas to Impress
These cookies are gorgeous on their own, but a little styling makes them extra special. Stack them on a vintage cake stand for a homey feel. For a party, place them in small paper liners on a platter. Drizzle with a little melted white chocolate for a festive touch. During the holidays, I like to pack them in a clear cellophane bag tied with a ribbon for a heartfelt homemade gift.
Healthier and Fun Recipe Variations
Want to mix things up? Here are six delicious twists on the classic hot chocolate brownie crinkle cookie.
- Peppermint Twist: Add 1/2 teaspoon of peppermint extract to the wet ingredients and replace the mini chocolate chips with crushed candy canes for a refreshing holiday version.
- Orange Chocolate Dream: Add the zest of one orange to the sugar-butter mixture. The bright citrus cuts through the rich chocolate beautifully.
- Gluten-Free Goodness: Swap the all-purpose flour for a 1-to-1 gluten-free baking blend. Ensure your cocoa powder is certified GF, and you’re all set.
- Salted Caramel Swirl: Before baking, press a single Rolo candy or a small dollop of thick caramel sauce into the top of each dough ball. The sweet and salty combo is divine.
- Mocha Chip Cookies: Dissolve 1 tablespoon of instant espresso powder into the melted butter before adding the sugars. It enhances the chocolate flavor without tasting like coffee.
- Nutty Delight: Replace the mini marshmallows with 1/2 cup of chopped pecans or walnuts. You’ll get a wonderful crunch in every chewy bite.
Common Mistakes to Avoid
Avoiding these simple pitfalls guarantees bakery-level cookies every single time.
Mistake 1: Skipping the Chill Time
I know, it’s tempting to bake right away. But warm dough causes the butter to melt too quickly. Your cookies will spread into flat, thin puddles instead of staying thick and crinkled. The chill time is non-negotiable for the right texture. It firms the fat and lets the flour hydrate. Set a timer and use the 30 minutes to clean up. Your patience will be rewarded with perfect cookies.
Mistake 2: Overmeasuring the Flour
This is the #1 reason for dry, cakey cookies. Scooping flour directly from the bag packs it down. You end up with more flour than the recipe needs. Always use the “spoon and level” method. Gently spoon flour into your measuring cup. Then, use the flat edge of a knife to level it off. This extra ten seconds makes a huge difference in achieving a fudgy, brownie-like crumb.
Mistake 3: Overbaking the Cookies
These cookies continue to cook from residual heat on the hot baking sheet. If you wait until they look fully set in the oven, they will be dry and crunchy once cooled. You want to pull them out when the edges are set but the centers still look soft and slightly underdone. They will firm up perfectly as they cool. Remember, a gooey center is the goal!
Mistake 4: Not Coating Generously in Powdered Sugar
Be generous when rolling your dough balls! A thin, timid coating of powdered sugar will just melt into the dough while baking. You won’t get those bright white, dramatic cracks. Roll each ball until it looks like a little snowball. The thick layer of sugar is what creates the beautiful contrast against the dark chocolate cookie as it expands and cracks open in the heat.
Frequently Asked Questions
Can I make the dough ahead of time?
Absolutely! This dough is fantastic for prepping ahead. You can cover it tightly and refrigerate it for up to 3 days before baking. The flavor actually gets better. Just let it sit at room temperature for about 10 minutes so it’s easier to scoop. You can also freeze the shaped, sugar-coated dough balls on a tray. Once frozen solid, transfer them to a freezer bag. Bake directly from frozen, adding 1-2 extra minutes to the bake time. It’s like having fresh cookie dough on demand!
Why did my cookies not crinkle?
If your cookies didn’t get those signature cracks, a few things could be at play. First, your dough might not have been chilled enough. Warm dough spreads before it can crack. Second, the baking powder might be old and lost its potency. It’s the agent that helps create the rise and cracks. Third, you might not have used enough powdered sugar for the coating. Make sure each ball is thoroughly and thickly coated in sugar for the best crinkle effect.
Can I use regular-sized marshmallows?
I don’t recommend it. Regular marshmallows are too large and can create huge, sticky pockets that burn easily. They also make the dough harder to scoop and roll. Mini marshmallows are the perfect size to distribute little bits of melty sweetness throughout. If you only have large ones, chop them into small, pea-sized pieces. Just be ready for them to be a bit stickier to work with than the minis.
My cookies came out cakey. What went wrong?
A cakey texture usually points to too much flour or overmixing. Double-check your flour measurement technique using the spoon-and-level method. Also, once you add the dry ingredients, mix only until the flour disappears. Overmixing develops the gluten in the flour, leading to a tougher, more bread-like texture instead of the dense, fudgy crumb you want. Gentle folding is the key here.
How do I keep the marshmallows from burning?
The mini marshmallows are tucked inside the dough, which mostly protects them. Burning happens if they’re exposed on the surface. When you fold them in, make sure they’re fully enveloped by dough. If one peeks out, just tuck it in when you roll the ball. Also, avoid overbaking. Pulling the cookies out at the 10-12 minute mark, while they still look soft, ensures the marshmallows inside just melt instead of scorching.
Can I make these without a mixer?
Yes, easily! This is a great hand-mixed recipe. Use a large bowl and a sturdy wooden spoon or silicone spatula. Whisk the wet ingredients by hand until the sugars are dissolved. When adding the dry ingredients, switch to folding and stirring until just combined. Your arm might get a little workout, but it’s totally doable and actually quite satisfying.
What’s the best cocoa powder to use?
For a classic, rich chocolate flavor, use natural unsweetened cocoa powder (like Hershey’s). It reacts perfectly with the baking powder. For a darker, more intense “Oreo” flavor, you can use Dutch-processed cocoa. You can even use half and half for a complex taste. Just avoid sweetened “drinking” cocoa mixes, as they contain sugar and milk powder and will throw off the recipe’s balance.
Why do I need to sift the dry ingredients?
Sifting does two important jobs. First, it breaks up any lumps in the cocoa powder and flour, ensuring a smooth batter without any dry, bitter pockets of pure cocoa. Second, it aerates the dry ingredients and combines them evenly. This means the baking powder and salt are distributed throughout, so every cookie rises uniformly and is perfectly seasoned. It’s a simple step for a big payoff in texture.
Can I double this recipe?
You certainly can! Simply double all the ingredients. Just be mindful of your mixing bowl size—it can get very full. You may want to mix the wet ingredients in one bowl and the dry in another, then combine them in a larger third bowl. The chilling time remains the same. You’ll have plenty of dough, so consider baking in batches or freezing some for later.
Are these cookies soft or crispy?
These hot chocolate brownie crinkle cookies are designed to be soft and fudgy in the center with a slightly crisp edge. The powdered sugar coating bakes into a delicate, crisp shell that cracks to reveal the soft, brownie-like interior. If you prefer a crisper cookie overall, you can bake them for a minute or two longer, but watch carefully to avoid overbaking.
The Final Sweet Word
There you have it—my all-time favorite cookie that blends two classic treats into one unforgettable bite. These Hot Chocolate Brownie Crinkle Cookies are more than just a recipe. They’re a moment of cozy joy, a guaranteed smile-maker, and proof that the best things in life are often simple to make. So preheat that oven, melt that butter, and get ready to fill your home with the most wonderful chocolate aroma. Happy baking!
Spicy Beef Broccoli Noodles
Ingredients
Equipment
Method
- Preheat the oven to 350°F (175°C) and line baking sheets with parchment paper.
- In a large bowl, whisk together melted butter, granulated sugar, and brown sugar until glossy.
- Beat in the eggs one at a time, followed by the vanilla extract.
- In a separate bowl, sift together flour, cocoa powder, baking powder, and salt.
- Gradually add the dry ingredients to the wet mixture and mix until just combined.
- Fold in mini chocolate chips and mini marshmallows gently.
- Cover the dough with plastic wrap and chill for at least 30 minutes.
- Scoop tablespoon-sized portions of dough, roll into balls, and coat in powdered sugar.
- Place dough balls on the prepared baking sheet, spacing them 2 inches apart.
- Bake for 10-12 minutes, until edges are set and tops have cracked.
- Allow cookies to cool on the baking sheet for 5 minutes before transferring to a wire rack.