Introduction
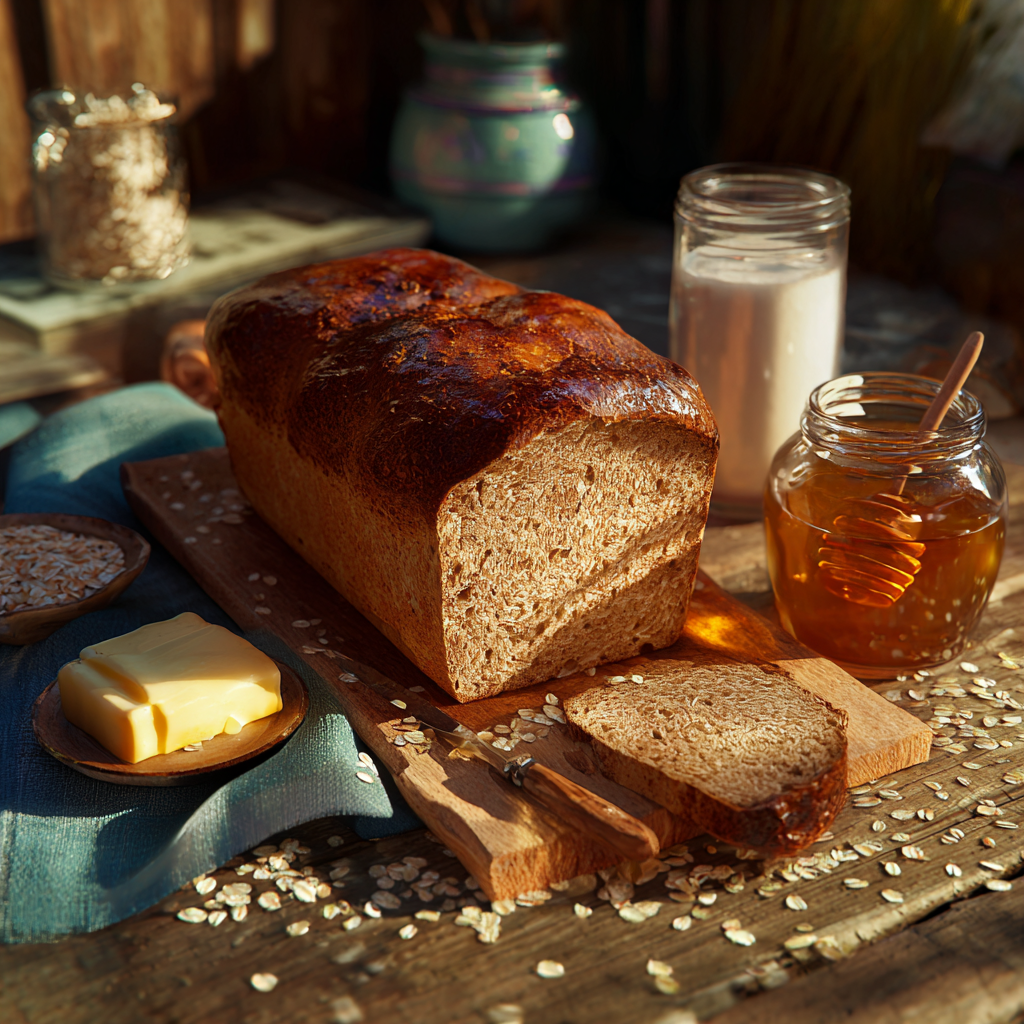
Baking has always been my happy place. There’s something magical about mixing simple ingredients and watching them transform into something warm, fragrant, and comforting. Over the years, I’ve experimented with countless recipes, but one that holds a special spot in my heart is squaw bread recipe. This hearty, dark bread isn’t just delicious—it carries a rich history that makes it even more meaningful.
I first discovered squaw bread while flipping through an old cookbook at a friend’s house. The name caught my eye, but as I read further, I realized its story goes much deeper. Today, conversations around terms like “squaw bread new name” reflect a broader cultural shift toward sensitivity and respect. These discussions matter, and they’ve inspired me to share this recipe thoughtfully. By the end of this article, you’ll know all about the key squaw bread ingredients, how to adapt it to your taste, and tips for mastering this classic bread at home.
What is Squaw Bread?
History and Cultural Context
Squaw bread traces its roots back to Native American traditions, where resourceful bakers created nourishing loaves using ingredients like molasses, rye, and whole grains. It became known as an old fashioned squaw bread recipe, cherished for its dense texture and slightly sweet flavor. For generations, it was a staple in many households, including those who dined at iconic places like Chart House restaurants, famous for their chart house squaw bread recipe.
However, language evolves, and so does our understanding of cultural respect. The term “squaw” has sparked important conversations about its origins and implications. Many now prefer alternatives, leading to phrases like “squaw bread new name” gaining traction. While opinions vary on what to call it, the essence of the bread remains unchanged: a wholesome, satisfying loaf perfect for any table.
Why Make Squaw Bread at Home?
There’s nothing quite like the pride of pulling a homemade loaf out of the oven. With squaw bread, you get to experience that joy while crafting something truly unique. Whether you’re searching for the best squaw bread recipe or a simple squaw bread recipe, there’s a version for everyone. Here are some reasons why making this bread at home is worth the effort:
- Customizable: Adjust sweetness, spices, or grains to suit your preferences.
- Nutritious: Packed with whole grains and natural sweeteners, it’s a healthier option than many store-bought breads.
- Versatile: Enjoy it plain, toasted, or as a base for sandwiches.
For example, King Arthur Flour offers a trusted take on this classic with their squaw bread recipe King Arthur. Their approach highlights the balance between tradition and innovation—something every home baker can appreciate. Plus, experimenting with variations like a dark squaw bread recipe adds excitement to your baking routine.
If you’re curious about the process, don’t worry—I’ll guide you step by step. From gathering your squaw bread ingredients to kneading and baking, we’ll cover everything you need to succeed. You might find yourself reaching for this recipe again and again, just like I do.
Ingredients You’ll Need for Your Squaw Bread Recipe
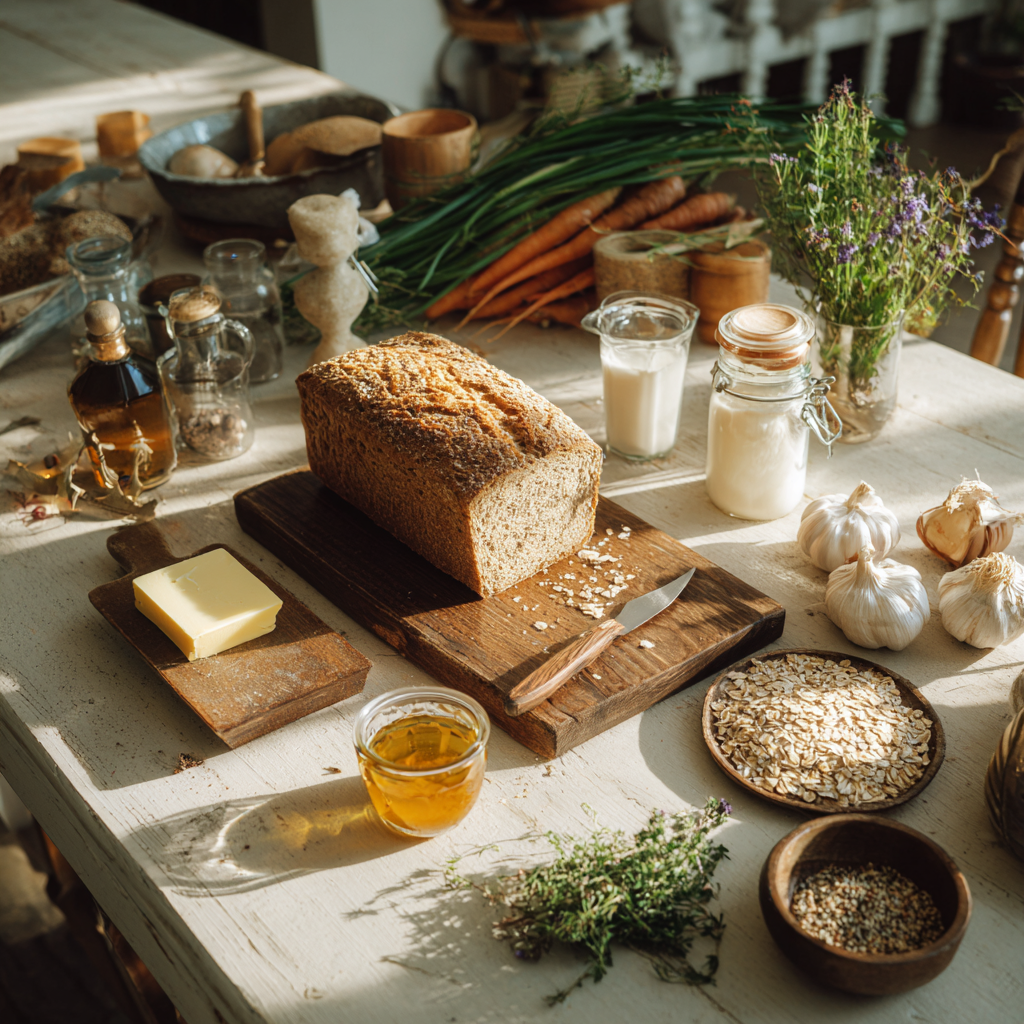
Alright, let’s dive into the good stuff—the ingredients. If you’re anything like me, you know that the magic of any recipe lies in what you put into it. For this squaw bread recipe, we’re talking about a mix of hearty, wholesome components that come together to create something truly special. Don’t worry; I’ll walk you through each one and explain why they matter. And hey, if you’ve ever wondered how to elevate your bread game, this is where it starts.
Core Ingredients
First things first, let’s break down the essentials. These are the non-negotiables—the backbone of your loaf. Here’s what you’ll need:
- Molasses: This sticky, dark syrup is what gives squaw bread its signature sweetness and deep color. Trust me, not all molasses is created equal. Go for unsulphured blackstrap molasses if you can—it’s rich, robust, and adds a depth of flavor that lighter varieties just can’t match.
- Rye Flour: A key player in many traditional bread recipes, rye flour brings a slightly tangy, earthy note to the mix. It also helps give the bread its dense texture, which is perfect for soaking up butter or jam.
- Whole Wheat Flour: This one’s a no-brainer. Whole wheat flour adds fiber and a nutty taste that complements the molasses beautifully. Plus, it makes the bread feel a little healthier—like you’re doing something good for yourself while indulging.
- Yeast: The unsung hero of any bread recipe. Active dry yeast is my go-to because it’s reliable and easy to work with. Just make sure it’s fresh; stale yeast can ruin even the best-laid plans.
- Warm Water: Yeast needs warmth to activate, so aim for water that’s around 110°F (43°C). Too hot, and you’ll kill the yeast; too cold, and it won’t wake up. Think of it as Goldilocks’ porridge—not too hot, not too cold.
- Salt and Oil: Salt enhances the flavors, while oil (or melted butter) keeps the bread soft and tender. Simple but essential.
By the way, quality really does make a difference here. Using fresh, high-quality ingredients will take your bread from “meh” to “wow.” I learned this the hard way when I once used old molasses that had been sitting in my pantry for who-knows-how-long. Let’s just say the bread turned out… less than stellar. Lesson learned!
Optional Add-ins
Now, here’s where you can get creative. While the core ingredients are non-negotiable, there’s plenty of room to play around and make this dark squaw bread recipe your own. Here are some ideas to inspire you:
- Nuts: Walnuts or pecans add a delightful crunch and pair beautifully with the sweetness of the molasses. Funny enough, I once tossed in some chopped almonds on a whim, and it became a family favorite.
- Seeds: Flaxseeds, sunflower seeds, or even pumpkin seeds can boost the nutritional value and texture. They also give the bread a rustic, artisanal vibe.
- Dried Fruits: Raisins, cranberries, or chopped apricots can lend a burst of sweetness and chewiness. If you’re a fan of cranberry bread, you might enjoy experimenting with this Ocean Spray cranberry bread recipe for inspiration.
- Spices: A pinch of cinnamon or nutmeg can warm things up, especially if you’re aiming for a cozy fall vibe. One time, I added a dash of cardamom, and it was like a hug in bread form.
Here’s the thing: baking is as much about experimentation as it is about following a recipe. Maybe you’ll stumble upon a combination that becomes your signature twist. Personally, I love adding a handful of toasted walnuts and a sprinkle of flaxseeds—it’s become my go-to variation.
Step-by-Step Instructions for Making Squaw Bread
Preparing the Dough
Alright, let’s roll up our sleeves and get to work. Preparing the dough might sound intimidating, but trust me, it’s easier than you think. Start by whisking together your dry ingredients—rye flour, whole wheat flour, salt, and yeast—in a large mixing bowl. Then, in a separate bowl, combine the wet ingredients: molasses, warm water, and oil. Slowly pour the wet mixture into the dry ingredients, stirring as you go. You’ll end up with a sticky, shaggy dough.
Now comes the fun part: kneading. If you’ve got a stand mixer with a dough hook, feel free to let it do the heavy lifting. But if you’re going old-school (which I highly recommend at least once), dust your hands and countertop with flour and get to work. Kneading helps develop the gluten, giving your bread structure and elasticity. Aim for about 8–10 minutes of kneading—or until the dough feels smooth and elastic. By the way, King Arthur Flour has some fantastic tips on kneading techniques in their squaw bread recipe King Arthur guide. Definitely worth a look if you’re new to bread-making.
Letting the Dough Rise
Once your dough is ready, it’s time to let it rest. Place it in a lightly oiled bowl, cover it with a damp towel or plastic wrap, and set it aside in a warm, draft-free spot. This is where patience comes in. Depending on the temperature of your kitchen, the dough should double in size in about 1–2 hours. If your house runs on the cooler side, don’t stress—you can speed things up by placing the bowl near a warm oven or on top of the fridge.
While you wait, here’s a little baking hack: use this downtime to prep other things. Maybe whip up a batch of banana bread using Better Homes and Gardens’ banana bread recipe. Or, if you’re craving something savory, check out Jimmy John’s bread recipe for sandwich inspiration. Multitasking is the name of the game!
When your dough has risen, punch it down gently to release any air bubbles. Then, shape it into a loaf and place it in a greased bread pan. Cover it again and let it rise for another 30–45 minutes. This second rise ensures your bread will have that light, airy texture we all love.
Baking Your Squaw Bread
Finally, the moment of truth: baking. Preheat your oven to 375°F (190°C) and pop the loaf in. Bake for about 30–35 minutes, or until the crust is golden brown and the bottom sounds hollow when tapped. Pro tip: if you’re unsure whether it’s done, insert a thermometer into the center of the loaf—it should read around 190°F (88°C).
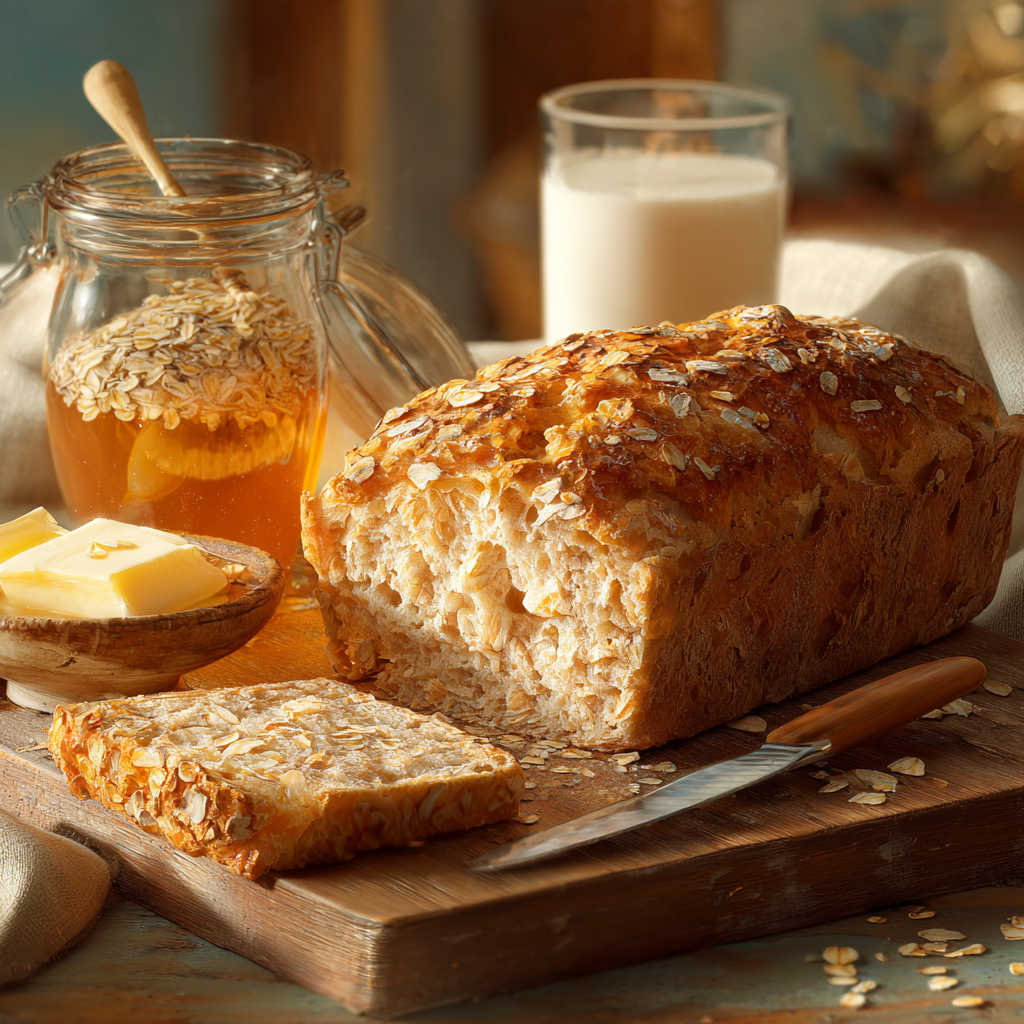
As soon as it’s out of the oven, brush the top with a little melted butter for an extra touch of richness. Let it cool completely before slicing—I know it’s tempting to dig in right away, but trust me, waiting pays off. The flavors deepen as the bread cools, making it even more delicious.
And there you have it—a homemade squaw bread recipe that’s as satisfying to make as it is to eat. Whether you stick to the basics or get adventurous with add-ins, this bread is sure to become a staple in your kitchen. Happy baking!
Baking Your Loaf
Alright, let’s talk about the final stretch—getting that loaf into the oven and out as a golden masterpiece. I’ve baked this bread enough times to know that it’s not just about following steps; it’s about paying attention to the little details. For example, your oven temp should be set to 375°F (190°C). That’s the sweet spot for squaw bread. Too low, and you risk a dense loaf. Too high, and you’ll end up with a burnt crust before the inside is fully cooked.
Now, baking time can vary depending on your oven’s quirks, but aim for 30–35 minutes. I always keep an eye on it after the 25-minute mark because ovens can be unpredictable. Here’s a trick I swear by: tap the bottom of the loaf. If it sounds hollow, you’re good to go. If it doesn’t, give it another 5 minutes. By the way, I once ignored this step and ended up with a slightly underbaked center. Lesson learned!
Another thing I like to do is insert a kitchen thermometer into the middle of the loaf. When it hits around 190°F (88°C), you’re in business. It’s such a simple check, but it takes the guesswork out of the process. And hey, if you’re aiming for that deep, glossy finish, brush the crust with a bit of melted butter right after it comes out of the oven. Trust me—it’s worth it.
Variations to Try
Here’s where things get fun. Once you’ve nailed the classic squaw bread recipe, why not experiment? Over the years, I’ve tried all sorts of twists, and some have become staples in my kitchen. For instance, adding a tablespoon of instant coffee or espresso powder gives the bread a subtle richness that pairs beautifully with the molasses. Funny enough, I stumbled on this idea when I accidentally spilled coffee into my mixing bowl one morning. Sometimes happy accidents lead to the best discoveries.
If you’re a fan of chocolate, try incorporating a couple tablespoons of cocoa powder into your dry ingredients. It transforms the bread into something almost dessert-like while still keeping it hearty. This variation reminds me of the chart house squaw bread recipe, which many people rave about for its depth of flavor. I’ve never been to Chart House, but their version inspired me to play around with bolder flavors.
For those who love spice, a pinch of ground ginger or cloves can add a warm kick. Or, if you’re feeling adventurous, toss in some finely chopped dried figs or dates. They bring a chewy sweetness that works wonders with the earthy rye and whole wheat flours. Honestly, the possibilities are endless. One time, I even added a splash of orange zest, and it brightened the entire loaf. You never know until you try!
By the way, if you’re looking for more bread inspiration, check out our collection of bread recipes. There’s something there for everyone, whether you’re into quick breads, sourdough, or sandwich loaves. I personally love flipping through them when I need a spark of creativity.
FAQs About Squaw Bread Recipes
- Can I use a bread machine for this recipe?
Absolutely! Just follow your machine’s instructions for adding wet and dry ingredients. The dough might take longer to rise due to the molasses, so adjust accordingly. - What can I substitute for molasses?
Dark brown sugar or maple syrup can work in a pinch, though the flavor will be slightly different. Molasses gives the bread its signature taste, so try to stick with it if possible. - How do I store squaw bread?
Keep it in an airtight container at room temperature for up to 3 days. For longer storage, wrap it tightly and freeze for up to 3 months. - Why didn’t my dough rise?
This could be due to old yeast, water that’s too hot or cold, or insufficient rising time. Make sure your yeast is fresh and your environment is warm but not too hot. - Can I make this bread gluten-free?
Yes, but you’ll need a gluten-free flour blend designed for bread. Keep in mind the texture may differ from traditional squaw bread. - What’s a good alternative to rye flour?
You can use spelt flour or additional whole wheat flour, though the flavor will be less tangy. - Is squaw bread vegan?
Most versions are, as long as you use plant-based oil instead of butter. Double-check your ingredients if you’re baking for someone with dietary restrictions. - Why does my bread taste bitter?
This could be from over-baking or using blackstrap molasses, which has a strong flavor. Try reducing the baking time or switching to a lighter molasses next time. - Can I double the recipe?
Definitely! Just make sure your bowls and pans are large enough to accommodate the extra dough. Adjust baking times slightly if needed. - What’s the best way to slice squaw bread?
Use a serrated knife and gentle sawing motions. Let the bread cool completely first to avoid squishing the slices.
Conclusion
Baking squaw bread at home isn’t just about making a delicious loaf—it’s about connecting with tradition, experimenting with flavors, and sharing something wholesome with loved ones. Whether you stick to the classic old fashioned squaw bread recipe or branch out with your own spin, every batch tells a story. So grab your ingredients, trust the process, and don’t be afraid to make it your own. After all, the best recipes are the ones that reflect YOU.
I’d love to hear how your bread turns out! Feel free to share your experiences or ask questions—I’m always here to chat about all things baking. Happy loafing!
Squaw Bread Recipe
Ingredients
Equipment
Method
- Whisk together rye flour, whole wheat flour, salt, and yeast in a large mixing bowl.
- In a separate bowl, combine molasses, warm water, and oil.
- Slowly pour the wet mixture into the dry ingredients, stirring until sticky and shaggy dough forms.
- Knead the dough for about 8-10 minutes until smooth and elastic.
- Place the dough in a lightly oiled bowl, cover with a damp towel, and let it rise in a warm spot for 1-2 hours or until doubled in size.
- Punch down the dough gently, shape it into a loaf, and place it in a greased bread pan.
- Cover and let it rise again for 30-45 minutes.
- Preheat the oven to 375°F (190°C).
- Bake for 30-35 minutes or until the crust is golden brown and sounds hollow when tapped.
- Brush the top with melted butter immediately after removing from the oven and let it cool completely before slicing.