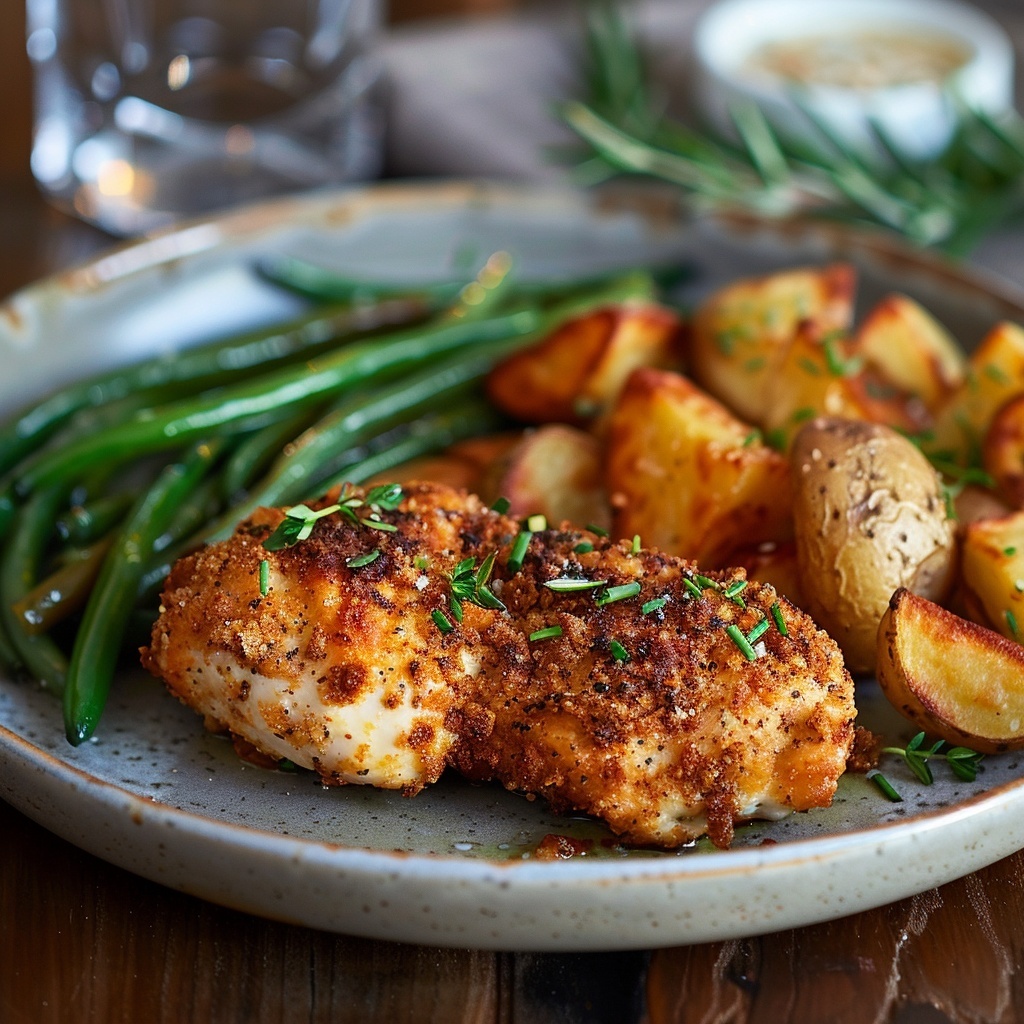
Last Tuesday, my eight-year-old ran into the kitchen and declared that our air fryer was basically magic. She wasn’t wrong. I’d just pulled out a batch of golden, crackling chicken that looked like it spent hours in a deep fryer, but without all the oil splatter on my stovetop and the lingering smell in my curtains. My husband took one bite and asked if I’d secretly ordered takeout. Nope, just my trusty air fryer working its magic again. That’s the beauty of making Crispy Air Fryer Chicken at home – you get all the crunch and flavor of traditional fried chicken without the mess, the guilt, or the giant pot of oil that haunts you for days.
What Makes Crispy Air Fryer Chicken So Special
Crispy Air Fryer Chicken is a modern take on everyone’s favorite comfort food. This recipe delivers that satisfying crunch on the outside while keeping the meat juicy and tender inside. The air fryer circulates hot air around the chicken, creating a crispy coating that rivals traditional deep-fried versions. What sets this recipe apart is how simple it is to prepare and how much healthier it is compared to conventional frying methods. You’ll use way less oil, yet still achieve that golden-brown perfection that makes your mouth water. Whether you’re making air fried chicken tenders for the kids or preparing a buttermilk fried chicken air fryer version for Sunday dinner, this method works beautifully every time.
The Journey of Air Fryer Chicken
Fried chicken has been a beloved dish in American cuisine since the 1800s, with roots tracing back to Scottish frying techniques and West African seasoning traditions. Southern cooks perfected the art of fried chicken, making it a staple at family gatherings and church picnics. Fast forward to today, and we’ve got air fryers that give us that same crispy goodness with a fraction of the oil. When I first got my air fryer three years ago, I was skeptical. Could a countertop appliance really replace my grandmother’s cast-iron skillet? After testing countless batches, I can honestly say it comes pretty darn close.
The traditional method involves submerging chicken in hot oil, which creates that signature crispy coating but also adds tons of calories and requires careful temperature monitoring. Air fryers changed the game by using rapid air technology to crisp up food. This modern approach has made dishes like power air fryer fried chicken and air fryer whole chicken incredibly popular among home cooks who want the taste without the fuss. The best part? You can make everything from air fryer chicken thighs keto style to marinated chicken in air fryer without adjusting your entire cooking method.
Why You’ll Fall in Love with This Recipe
This Crispy Air Fryer Chicken recipe has become my go-to for busy weeknights and lazy Sundays alike. The flavor is spot-on, with a perfectly seasoned coating that stays crunchy even after sitting for a few minutes. My family loves that they can enjoy their favorite fried chicken without feeling weighed down afterward. The simplicity is another huge win. You don’t need fancy ingredients or complicated techniques. Just season, coat, and let the air fryer do its thing.
The versatility of this recipe is fantastic too. You can adapt it for air fryer fried chicken wings on game day, make air fryer fried chicken breast for meal prep, or follow an air fryer chicken thigh recipe when you want dark meat. The cooking time is much shorter than oven-baking, and cleanup is a breeze. No oil disposal, no greasy countertops, just a quick wipe of the air fryer basket and you’re done. Plus, it’s healthier without sacrificing taste, which makes me feel like a superhero mom when my kids ask for seconds.
Perfect Times to Make This Crispy Chicken
This recipe shines at so many occasions. Game day gatherings are perfect for serving air fryer fried chicken wings alongside your favorite dips. Family dinners become special when you bring out a platter of golden, crispy chicken that everyone can enjoy. I’ve made this for birthday parties, potlucks, and even fancy dinner parties where I wanted to impress without stressing.
Weeknight meals get so much easier with this recipe in your back pocket. When you’re tired from work and the kids are hungry, knowing you can have crispy chicken ready in under 30 minutes is a lifesaver. It’s also great for meal prep. Make a big batch on Sunday, and you’ve got protein ready for salads, sandwiches, and quick dinners all week long. Holiday gatherings, picnics, and casual backyard barbecues all become more delicious with this crowd-pleasing dish on the menu.
Ingredients for Perfect Crispy Air Fryer Chicken
- 2 pounds chicken pieces (drumsticks, thighs, breasts, or wings)
- 1 cup buttermilk
- 1 cup all-purpose flour
- 1 teaspoon garlic powder
- 1 teaspoon onion powder
- 1 teaspoon paprika
- 1 teaspoon salt
- 1/2 teaspoon black pepper
- 1/2 teaspoon cayenne pepper (optional)
- 2 tablespoons olive oil or cooking spray
- 1 teaspoon dried thyme
- 1/2 teaspoon dried oregano
Substitution Options for Your Chicken
Buttermilk can be replaced with regular milk mixed with a tablespoon of lemon juice or vinegar. Let it sit for five minutes before using. If you’re avoiding dairy, coconut milk or almond milk with vinegar works too. All-purpose flour can be swapped for almond flour or coconut flour for a low-carb version, though the texture will be slightly different. Gluten-free flour blends work perfectly if you need a gluten-free option.
For seasoning variations, feel free to use your favorite spice blend instead of the individual spices listed. Cajun seasoning, Italian herbs, or even a simple salt and pepper mix all work beautifully. If you want to make air fryer chicken thighs keto, skip the flour coating and use crushed pork rinds or almond flour instead. Olive oil can be replaced with avocado oil, melted butter, or any neutral cooking oil you have on hand. Fresh herbs can replace dried ones, just use three times the amount.
Making Your Crispy Air Fryer Chicken
Step 1: Marinate the Chicken
Pour the buttermilk into a large bowl and add your chicken pieces, making sure each piece is fully submerged in the tangy liquid. The buttermilk works its magic by tenderizing the meat while adding a subtle richness that enhances the overall flavor. Cover the bowl with plastic wrap and let it sit in the refrigerator for at least one hour, though overnight is even better if you have the time. I usually prep this the night before when I know I’ll be making it for dinner the next day. The chicken will absorb the buttermilk’s acidity, which breaks down the proteins and makes the meat incredibly juicy. When you pull it out of the fridge, you’ll notice the chicken looks plumper and the buttermilk has thickened slightly around each piece.
Pro tip: Add a few dashes of hot sauce to your buttermilk marinade for extra flavor and a gentle kick that won’t overpower the dish.
Step 2: Prepare the Coating
In a shallow dish or large plate, combine the flour, garlic powder, onion powder, paprika, salt, black pepper, cayenne pepper, thyme, and oregano. Mix everything together with a fork until all the spices are evenly distributed throughout the flour. The mixture should look uniform in color with specks of the various seasonings visible throughout. This seasoned flour is what creates that beautiful golden crust on your chicken. Take a moment to smell the blend – the combination of spices should smell savory and inviting. I like to taste a tiny pinch to make sure the salt level is right for my family’s preference. The paprika adds color while the garlic and onion powders provide depth of flavor that makes this coating special.
Step 3: Coat Each Piece
Remove one piece of chicken from the buttermilk, letting the excess drip off but keeping the chicken still moist. Place it in the seasoned flour mixture and press down gently, then flip it over and press again. Make sure to get flour into all the nooks and crannies, especially around joints and skin folds. The flour should stick to the wet chicken, creating a thick coating that will become crispy during cooking. Shake off any excess flour and place the coated piece on a clean plate. Repeat this process with all the chicken pieces. Your fingers will get messy, but that’s part of the fun. The coated chicken should look slightly fuzzy with flour, and you should be able to see the seasonings in the coating. Let the coated pieces rest for about five minutes before cooking, which helps the coating stick better.
Pro tip: Use one hand for the wet chicken and one hand for the dry coating to keep your fingers from getting completely caked with flour.
Step 4: Prep the Air Fryer
Preheat your air fryer to 380°F for about three minutes. While it’s heating, lightly spray or brush the air fryer basket with oil to prevent sticking. This step is important because even though we’re not deep frying, a little oil helps achieve that golden color and crispy texture. Once preheated, arrange the chicken pieces in a single layer in the basket, making sure they’re not touching or overlapping. You might need to work in batches depending on the size of your air fryer. I usually do drumsticks and thighs first, then wings, and finally breasts if I’m making a variety. The hot air needs to circulate around each piece for even cooking. Lightly spray the tops of the chicken pieces with cooking spray or brush them with a thin layer of oil.
Step 5: Air Fry to Golden Perfection
Place the basket in the air fryer and set the timer for 12 minutes. After 12 minutes, open the basket and flip each piece of chicken using tongs. You’ll notice the bottom side has started to turn golden brown and smell amazing. Spray or brush the newly exposed side with a bit more oil, then continue cooking for another 10 to 12 minutes. The exact time depends on the size of your chicken pieces. How to cook chicken leg quarters in air fryer takes about 25 minutes total, while smaller air fried chicken tenders only need about 15 minutes total. The chicken is done when it reaches an internal temperature of 165°F and the coating is deep golden brown and crispy. The kitchen should smell incredible by this point, and you might have family members hovering around asking when it’ll be ready.
Pro tip: Don’t overcrowd the basket. Proper air circulation is the secret to crispiness, so cook in batches if needed.
Step 6: Rest and Serve
Transfer the cooked chicken to a wire rack or paper towel-lined plate and let it rest for about five minutes before serving. This resting time allows the juices to redistribute throughout the meat, ensuring every bite is moist and flavorful. The coating will continue to crisp up slightly as it cools. I know it’s tempting to dive right in, but trust me, those few minutes make a difference. The chicken should have a deep golden-brown color with a coating that looks crispy and textured. When you pick up a piece, it should feel light and crispy, not greasy. Serve it hot with your favorite sides, and watch it disappear faster than you can say “seconds please.”
Timing Your Crispy Air Fryer Chicken
The prep time for this recipe is about 15 minutes, not including marinating time. If you marinate the chicken overnight or for several hours, the actual hands-on prep is minimal. The cooking time varies depending on which cuts you’re using. For standard drumsticks and thighs, expect about 22 to 25 minutes total in the air fryer. Air fryer fried chicken breast takes about 20 minutes, while air fryer fried chicken wings cook faster at around 18 to 20 minutes.
The marinating time is ideally 4 to 8 hours, though even one hour makes a difference. After cooking, allow 5 minutes of resting time before serving. The total time from start to finish, not counting the marinade, is about 40 minutes. If you’re cooking multiple batches because of basket size, add about 10 minutes per additional batch. When making a full air fryer whole chicken, you’ll need about 60 minutes of cooking time, flipping halfway through.
The Secret to Extra Crispy Coating
Here’s my secret weapon for the crispiest coating possible: after coating the chicken in seasoned flour, let it sit on a wire rack for 10 to 15 minutes before air frying. This drying time allows the flour coating to set and adhere better to the chicken. The surface moisture evaporates slightly, which means when the hot air hits it in the air fryer, it crisps up faster and more thoroughly. I discovered this trick by accident one day when my daughter needed help with homework right as I was about to cook dinner. The chicken sat there waiting, and when I finally cooked it, the coating was noticeably crispier than usual. Now I do it every time, and it’s become my go-to technique for restaurant-quality results at home.
A Fun Fact About Air Fryer Chicken
Did you know that air frying can reduce the fat content of fried chicken by up to 75 percent compared to traditional deep frying? That’s a huge difference that lets you enjoy your favorite comfort food more often without the guilt. Air fryers were actually invented in 2010 by a Dutch company, and they’ve since revolutionized home cooking. The technology was originally developed to create a healthier alternative to deep frying while maintaining the taste and texture people love. When I learned this, it made me appreciate my air fryer even more. It’s not just a trendy gadget – it’s a legitimate tool that makes healthier cooking accessible and delicious.
Equipment You’ll Need
The most important piece of equipment is obviously an air fryer with a capacity of at least 4 quarts. Smaller models work too, but you’ll need to cook in more batches. You’ll also need a large mixing bowl for marinating the chicken in buttermilk. A shallow dish or pie plate works perfectly for holding the seasoned flour mixture. Tongs are essential for flipping the chicken halfway through cooking without piercing the coating. A meat thermometer ensures your chicken reaches the safe internal temperature of 165°F.
A wire rack is helpful for letting the coated chicken rest before cooking and for draining after cooking. Measuring cups and spoons keep your seasonings accurate and consistent. Plastic wrap or a lid for covering your marinating bowl keeps everything fresh in the fridge. Some people like using a basting brush for applying oil, though a spray bottle with olive oil works great too. If you’re making marinated chicken in air fryer regularly, consider getting a second bowl so you can prep different flavors at once.
Storing Your Crispy Air Fryer Chicken
Proper storage keeps your Crispy Air Fryer Chicken delicious for days. Once the chicken has cooled completely to room temperature, transfer it to an airtight container or wrap each piece individually in aluminum foil. Store it in the refrigerator where it will stay fresh for up to four days. The key is making sure the chicken is completely cool before storing, as putting warm chicken in a sealed container creates condensation that makes the coating soggy. I usually let mine cool on a wire rack for about 30 minutes after cooking before putting it away. When you’re ready to eat it again, the air fryer is perfect for reheating because it brings back that crispy texture.
For longer storage, freezing works wonderfully with this recipe. Let the cooked chicken cool completely, then arrange the pieces in a single layer on a baking sheet and freeze for about two hours until solid. This prevents the pieces from sticking together. Once frozen solid, transfer them to a freezer-safe bag or container, removing as much air as possible. Properly frozen chicken will maintain its quality for up to three months. Label the container with the date so you remember when you made it. When you’re ready to enjoy it, you can reheat it straight from frozen in the air fryer at 350°F for about 15 minutes, or thaw it overnight in the refrigerator first and reheat for about 8 minutes.
Reheating is where the air fryer really shines compared to the microwave. To reheat refrigerated chicken, preheat your air fryer to 350°F and cook for 5 to 8 minutes until heated through and crispy again. The circulating hot air revives the coating beautifully, making it taste almost as good as when it was freshly made. Avoid stacking pieces during reheating, as this prevents even heating and crispiness. If the coating seems dry, a light spray of oil before reheating helps restore some moisture and crunch. My family actually looks forward to leftovers because they know it’ll still taste amazing the next day.
Tips and Advice for the Best Results
For the juiciest chicken, don’t skip the buttermilk marinade. The longer it marinates, the more tender and flavorful your chicken will be. Pat the chicken pieces dry with paper towels after removing them from the buttermilk but before coating. This helps the flour mixture stick better and creates a more even coating. Use a thermometer to check doneness rather than relying on time alone, since air fryers vary in temperature accuracy.
Season generously and don’t be afraid to adjust the spices to your taste. If your family likes it spicier, add more cayenne pepper or some hot sauce to the buttermilk. For a milder version, reduce or skip the cayenne altogether. Room temperature chicken cooks more evenly than cold chicken straight from the fridge, so let it sit out for about 15 minutes before coating and cooking. This small step makes a noticeable difference in texture.
Experiment with different cuts to find your favorite. Dark meat like thighs and drumsticks stays juicier and is more forgiving if you slightly overcook. Chicken breasts are leaner and cook faster, but they can dry out if you’re not careful. Air fried chicken tenders are perfect for kids and cook quickly. Don’t forget to clean your air fryer basket between batches if you’re cooking a lot of chicken. Built-up residue can smoke and affect the flavor of subsequent batches.
Making Your Chicken Look Restaurant-Worthy
Presentation turns a simple meal into something special. Arrange your Crispy Air Fryer Chicken on a large wooden cutting board or rustic platter for a casual, family-style look. Garnish with fresh herbs like parsley or thyme sprigs to add a pop of color against the golden chicken. Lemon wedges not only look pretty but also give guests the option to add a bright, citrusy kick to their chicken.
For a more elegant presentation, place each chicken piece on individual plates with your chosen sides arranged artfully around it. A drizzle of honey or hot sauce in a decorative pattern on the plate adds visual interest. Serve with small ramekins of different dipping sauces like ranch, honey mustard, or barbecue sauce. The variety of colors makes the plate more appealing.
For parties and gatherings, create a chicken station with the crispy pieces arranged on a tiered serving stand. This adds height and makes the spread look more impressive. Line baskets with checkered napkins or parchment paper for a classic diner feel that everyone loves. Include picks or small tongs so guests can serve themselves easily. Fresh vegetable sticks and dips arranged around the chicken create a complete and colorful presentation that looks professional but requires minimal effort.
Healthier Versions of Air Fryer Chicken
Keto-Friendly Air Fryer Chicken Thighs
This variation uses crushed pork rinds instead of flour for a zero-carb coating that’s perfect for anyone following a ketogenic diet. Mix the crushed pork rinds with the same seasonings, then coat your marinated chicken thighs as usual. The pork rinds create an incredibly crispy coating that’s even crunchier than traditional flour. Air fryer chicken thighs keto style stays juicy because dark meat has more fat, which fits perfectly into a high-fat, low-carb eating plan. The flavor is rich and satisfying, and you won’t miss the flour at all. My brother follows a keto diet and he actually prefers this version now.
Gluten-Free Buttermilk Air Fryer Chicken
Replace the all-purpose flour with your favorite gluten-free flour blend to make this recipe safe for those with celiac disease or gluten sensitivity. Rice flour, gluten-free all-purpose blends, or even crushed gluten-free cornflakes all work beautifully. The texture is nearly identical to the traditional version, and the flavor is just as delicious. Make sure your buttermilk and seasonings are certified gluten-free if you’re dealing with severe allergies. This version has become my go-to when I have friends with dietary restrictions coming over, and they’re always amazed that it’s gluten-free.
Spicy Marinated Chicken in Air Fryer
Add hot sauce, cayenne pepper, and a pinch of chili flakes to your buttermilk marinade for a chicken that packs serious heat. This variation is perfect for spice lovers who want more than just a hint of kick. The buttermilk helps temper the heat slightly while the chicken cooks, but you still get a nice burn that builds with each bite. I like serving this version with cooling sides like coleslaw or cucumber salad to balance the spiciness. My husband requests this version every time we have his friends over for game day.
Herb-Crusted Air Fryer Whole Chicken
For a showstopping centerpiece, try making an air fryer whole chicken with an herb-focused coating. Mix fresh or dried herbs like rosemary, thyme, sage, and parsley with your flour or skip the flour entirely and rub the herbs directly onto the buttered chicken skin. The result is aromatic, flavorful, and impressive looking. A whole chicken takes longer to cook, about 60 minutes, but it’s mostly hands-off time. This version is perfect for Sunday dinners when you want something special but don’t want to heat up your whole kitchen with the oven.
Asian-Inspired Marinated Chicken Wings
Create air fryer fried chicken wings with an Asian twist by marinating them in soy sauce, ginger, garlic, and sesame oil instead of buttermilk. Coat them lightly in cornstarch mixed with five-spice powder for a crispy coating with unique flavor. After cooking, toss them in a glaze made from honey, more soy sauce, and sriracha for sticky, sweet, and spicy wings that disappear fast. This variation is fantastic for parties and gatherings where you want to offer something different from traditional buffalo wings.
Lighter Chicken Breast Version
If you’re watching calories more carefully, air fryer fried chicken breast is your best option since white meat is leaner than dark meat. Pound the chicken breasts to an even thickness before marinating so they cook uniformly. Use a light spray of oil instead of brushing it on to reduce fat content even further. The buttermilk marinade is especially important here because chicken breast can dry out easily. This version is perfect for meal prep since you can slice the cooked breasts for salads, wraps, and sandwiches throughout the week.
Common Mistakes to Avoid
Mistake 1: Overcrowding the Air Fryer Basket
One of the biggest mistakes people make is trying to cook too much chicken at once. When the basket is crowded, the hot air can’t circulate properly around each piece, resulting in uneven cooking and a soggy coating instead of crispy perfection. The chicken pieces end up steaming rather than air frying, which defeats the whole purpose. I learned this the hard way during my first attempt at making air fryer fried chicken wings for a party. Half the batch was perfect while the other half was disappointingly soft. Always leave space between each piece, even if it means cooking in multiple batches. The extra time is worth it for consistently crispy results, and your air fryer will thank you for not overworking it.
Mistake 2: Skipping the Oil Completely
While air frying uses significantly less oil than deep frying, you still need some oil for that golden, crispy exterior. Some people think they can skip the oil spray entirely to make the dish even healthier, but this results in dry, pale chicken that lacks that appetizing crunch. The oil helps the coating brown properly and creates that fried texture we’re looking for. Just a light spray or brush of oil makes all the difference between okay chicken and amazing chicken. I use an oil mister that lets me control exactly how much I’m using, so I get the crispiness without overdoing the fat content. Think of it as essential for achieving the right texture, not as an optional step.
Mistake 3: Not Checking Internal Temperature
Relying solely on cooking time without checking the internal temperature can lead to undercooked or overcooked chicken. Air fryers vary in their actual temperatures, and chicken pieces differ in size and thickness. Undercooked chicken is a food safety issue, while overcooked chicken is dry and unpleasant to eat. Invest in a good instant-read thermometer and check that your chicken reaches 165°F in the thickest part. This is especially important when you’re learning how to cook chicken leg quarters in air fryer or making larger pieces. Insert the thermometer without touching bone for an accurate reading. This simple step ensures your chicken is both safe to eat and perfectly juicy every time.
Mistake 4: Using Chicken Straight from the Fridge
Putting ice-cold chicken directly into the air fryer leads to uneven cooking, with the outside getting too dark before the inside reaches a safe temperature. The sudden temperature change also causes the coating to cook too quickly and sometimes fall off in pieces. Let your marinated chicken sit at room temperature for about 15 to 20 minutes before coating and cooking. This small step helps the chicken cook more evenly and results in a better texture throughout. I set my chicken out while I’m mixing my coating ingredients and prepping my sides, which gives it just enough time to take the chill off without leaving it in the danger zone too long.
Mistake 5: Forgetting to Flip the Chicken
Some people set their air fryer and walk away, forgetting that flipping is necessary for even browning and crispiness on all sides. The bottom of the chicken gets more direct heat from the heating element, so if you don’t flip it, one side will be much crispier and darker than the other. Set a timer to remind yourself to flip the chicken about halfway through the cooking time. Use tongs to turn each piece gently so you don’t damage the coating. This ensures both sides get that beautiful golden color and crispy texture. It only takes a minute or two but makes a huge difference in the final result.
Frequently Asked Questions About Crispy Air Fryer Chicken
Can I make Crispy Air Fryer Chicken without buttermilk?
Yes, you can definitely make this recipe without buttermilk. Regular milk mixed with a tablespoon of lemon juice or white vinegar works as a great substitute. Let the mixture sit for about five minutes before using it to marinate your chicken. This creates a similar tangy flavor and tenderizing effect. You can also use plain yogurt thinned with a little milk for even more tanginess and tenderness. Some people use pickle juice as a marinade, which sounds weird but actually works amazingly well for adding flavor and moisture. The acid in these substitutes helps break down the proteins in the chicken just like buttermilk does, resulting in tender, juicy meat with great flavor.
How do I know when my air fryer chicken is done?
The most reliable way to check if your chicken is done is by using an instant-read meat thermometer inserted into the thickest part of the meat without touching bone. The internal temperature should reach 165°F for safe consumption. Visually, the chicken should have a deep golden-brown coating and the juices should run clear when pierced. If you cut into the thickest part, the meat should be white with no pink remaining. The coating should feel crispy and firm, not soft or soggy. Cooking times vary based on the size of your pieces and the specific air fryer model you’re using, so temperature is your best guide for perfect results every time.
Can I cook frozen chicken in the air fryer?
While you technically can cook frozen chicken in an air fryer, it’s not ideal for this particular recipe because the coating won’t adhere properly to frozen meat. For best results with Crispy Air Fryer Chicken, always thaw your chicken completely in the refrigerator before marinating. If you’re in a pinch and need to cook frozen chicken, skip the coating altogether and just season the frozen pieces, then cook them at 360°F for about 25 to 30 minutes, flipping halfway. Once cooked through, you could potentially add a coating and air fry again briefly, but the texture won’t be as good as starting with thawed chicken. Planning ahead and thawing overnight gives you much better results.
Why is my air fryer chicken not crispy?
Several factors can prevent your chicken from getting crispy. The most common issue is not using enough oil, as a light coating of oil is essential for browning and crisping. Overcrowding the basket prevents proper air circulation, causing steaming instead of crisping. Too much moisture on the chicken before coating can make the coating soggy, so pat your chicken dry after the buttermilk marinade. Not preheating the air fryer means the chicken sits in lower heat for too long before crisping starts. Also, opening the air fryer too frequently releases heat and steam, interfering with the crisping process. Make sure you’re flipping the chicken halfway through and giving it enough cooking time at the right temperature for your specific model.
What’s the best temperature for cooking chicken in an air fryer?
For Crispy Air Fryer Chicken with a coating, 380°F is the sweet spot that crisps the outside beautifully while cooking the inside thoroughly without drying it out. Some recipes call for 400°F, which works but can sometimes brown the coating too quickly before the inside is done. Lower temperatures around 350°F take longer and may not achieve the same level of crispiness. The temperature you choose may also depend on the size of your chicken pieces. Larger pieces like leg quarters benefit from starting at 380°F, while smaller pieces like air fried chicken tenders can handle 400°F for a shorter time. Every air fryer runs a bit differently, so you may need to adjust by 10 to 20 degrees based on your results.
Can I use the same recipe for different chicken cuts?
Absolutely! This Crispy Air Fryer Chicken recipe works beautifully with all different cuts of chicken. You’ll just need to adjust the cooking time based on the size and thickness of the pieces. Chicken wings take about 18 to 20 minutes, while drumsticks and thighs need about 22 to 25 minutes. Chicken breasts, especially if they’re large, may need up to 25 minutes or slightly more. Air fried chicken tenders cook the fastest at around 12 to 15 minutes total. Bone-in pieces take longer than boneless, and skin-on pieces crisp up better than skinless. The coating and seasoning stay the same regardless of the cut, which makes this recipe incredibly versatile for whatever you have on hand or whatever your family prefers.
How do I prevent the coating from falling off?
To keep your coating intact, make sure each piece of chicken is moist enough from the buttermilk marinade for the flour to stick, but not dripping wet. After coating, let the chicken rest for about 10 minutes before air frying, which allows the coating to adhere better. Don’t skip the light spray or brush of oil on top, as this helps seal the coating. Handle the chicken gently when flipping it halfway through cooking, using tongs rather than a fork that might pierce and damage the coating. Make sure your air fryer basket is lightly greased to prevent sticking. If you’re having consistent problems, try a double coating method where you dip the chicken back in buttermilk and flour a second time for an extra-thick, extra-secure coating.
Is air fryer chicken healthier than oven-baked chicken?
Both methods are healthier than deep frying, but air frying has a slight edge in certain ways. Air fryers cook faster than conventional ovens, which can help retain more moisture in the chicken. They also require less oil than some oven-baked recipes that call for coating the chicken in butter or oil. The rapid air circulation in an air fryer creates a crispier exterior with less fat than you’d typically use for oven baking. That said, both methods are significantly healthier than deep frying, reducing fat content by 70 to 80 percent. The nutritional difference between air frying and oven baking is minimal, so choose whichever method fits your lifestyle and equipment. I prefer the air fryer because it doesn’t heat up my whole kitchen and the cleanup is easier.
Can I make a large batch and reheat it later?
Yes, this recipe is perfect for meal prep and batch cooking. Make as much Crispy Air Fryer Chicken as you need and store the cooled chicken properly in the refrigerator for up to four days or freeze it for up to three months. The air fryer is actually the best tool for reheating because it brings back that crispy texture that microwaves destroy. Reheat refrigerated chicken at 350°F for 5 to 8 minutes, or frozen chicken for about 15 minutes. This makes weeknight dinners so much easier because you can cook once and eat multiple times. I often make a double batch on Sunday and use it throughout the week for quick dinners, lunch salads, and even breakfast sandwiches. The flavor and texture hold up remarkably well.
What sides go best with Crispy Air Fryer Chicken?
Classic Southern sides like coleslaw, mac and cheese, cornbread, and collard greens pair beautifully with this chicken. For lighter options, try a fresh green salad, roasted vegetables, or grilled corn on the cob. Mashed potatoes or sweet potato fries are always crowd-pleasers. My family loves pairing it with biscuits and honey butter for a complete comfort food meal. For a healthier spread, serve it with quinoa salad, steamed broccoli, or cauliflower rice. The beauty of this versatile chicken is that it goes with practically anything, from traditional comfort foods to lighter modern sides. Let your mood and the season guide your choices, and you really can’t go wrong.
Enjoying Your Perfect Air Fryer Chicken
Making Crispy Air Fryer Chicken at home is one of those cooking wins that makes you feel like a kitchen rockstar. You get all the crunch and flavor of your favorite fried chicken without the mess, the excess oil, or the guilt that usually comes with it. Whether you’re making air fried chicken tenders for the kids, preparing a buttermilk fried chicken air fryer feast for Sunday dinner, or experimenting with different cuts and flavors, this recipe delivers every single time.
The versatility of this recipe means you’ll never get bored. Try it with different seasonings, switch up the chicken cuts, make it keto-friendly or gluten-free, and discover your family’s favorite version. The air fryer makes it so easy to get dinner on the table quickly, even on your busiest days. Once you master this basic technique, you’ll find yourself reaching for your air fryer more and more often.
I hope this recipe becomes a regular in your dinner rotation like it has in mine. There’s something special about serving food that makes your family happy, and the looks on their faces when they bite into that crispy, juicy chicken never gets old. So grab your air fryer, pick up some chicken, and get cooking. Your taste buds will thank you, your family will love you even more, and you’ll wonder how you ever lived without this recipe. Happy cooking!
Crispy Air Fryer Chicken
Ingredients
Equipment
Method
- Pour buttermilk into a large bowl and add chicken pieces, ensuring they are fully submerged.
- Cover the bowl and refrigerate for at least one hour (overnight is preferred).
- In a shallow dish, mix flour, garlic powder, onion powder, paprika, salt, black pepper, cayenne pepper, thyme, and oregano.
- Remove chicken from buttermilk, letting excess drip off, then coat in the seasoned flour.
- Preheat air fryer to 380°F and lightly spray the basket with oil.
- Arrange chicken pieces in a single layer in the air fryer basket and spray tops with cooking oil.
- Air fry for 12 minutes, then flip the chicken, spray, and continue cooking for another 10-12 minutes until golden brown and cooked through.
- Transfer cooked chicken to a wire rack or paper towel-lined plate to rest for 5 minutes before serving.