The Ultimate Fudgy Vegan Brownies: Your New Go-To Treat
Let me tell you a secret: I used to think vegan brownies were just a compromise. A “good-for-you” treat that was never quite good. That all changed the day I pulled a pan of these from my oven. The kitchen smelled like a chocolatier’s dream, and when I finally cut into them? Pure, unadulterated, fudgy bliss. They disappeared faster than cookies at a bake sale. My most dedicated chocolate-loving friend didn’t even believe they were vegan. That’s the magic of this recipe.
A Bite of Chocolate History
The brownie itself is a wonderfully American invention, born from a happy kitchen accident over a century ago. The classic version, rich with butter and eggs, has long been a staple. This vegan brownie recipe is a modern twist on that beloved treat. It swaps traditional ingredients for clever, plant-based alternatives without losing an ounce of that decadent soul. It’s proof that comfort food can evolve with our kitchens, welcoming everyone to the table for a square of chocolate happiness.
Why You’ll Fall in Love With This Vegan Brownie Recipe
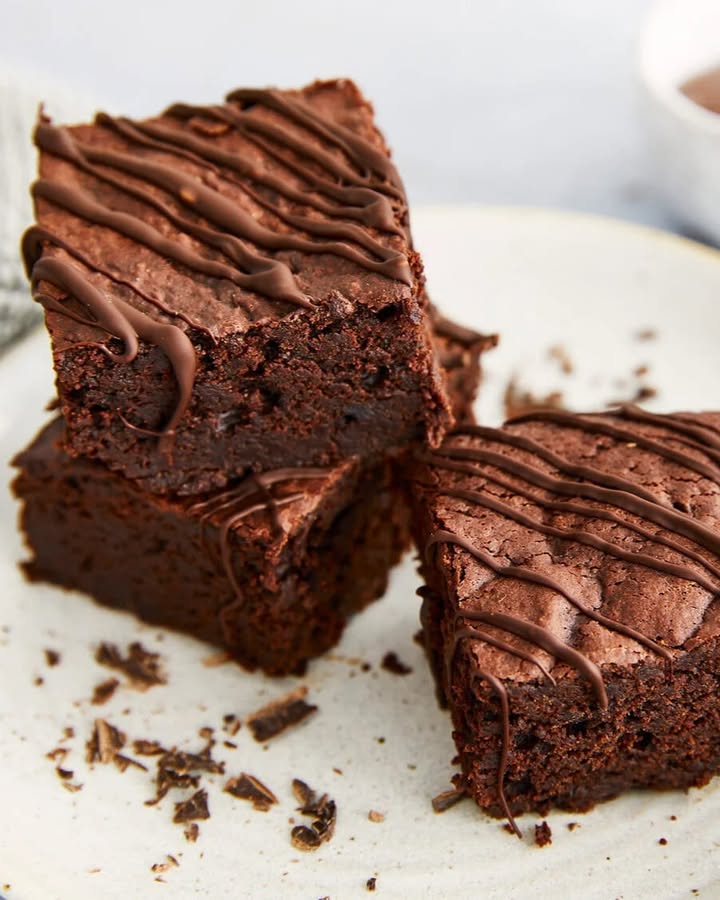
You’ll love this because it’s shockingly simple and impossibly rich. We’re talking crackly tops, dense fudgy centers, and deep chocolate flavor in every bite. These brownies are naturally egg-free and dairy-free, making them perfect for sharing with friends who have dietary needs. But truly, they’re so delicious that you’ll make them just for the taste. They’re my guaranteed crowd-pleaser for any gathering, and I know they’ll become yours too.
Perfect Occasions for a Pan of Vegan Brownies
- Potlucks & Parties: A guaranteed hit that everyone can enjoy.
- School Bake Sales: A safe and tasty option that stands out.
- Movie Night In: Pair with vegan ice cream for the ultimate cozy dessert.
- A Just-Because Treat: Sometimes, a Tuesday afternoon deserves chocolate.
Gathering Your Vegan Brownie Ingredients
Here’s what you’ll need to create this chocolate masterpiece. I promise, it’s all straightforward!
- 250 g vegan dark chocolate: The star of the show! Choose a bar you love to eat.
- 200 g all-purpose flour (Type 405): The structure for our fudgy base.
- 2 tsp baking powder: Our little lift for a perfect texture.
- 200 g sugar: For sweetness and that beautiful crinkly top.
- 50 g baking cocoa: Double the chocolate, double the fun!
- 5 tbsp unsweetened applesauce: Our magical egg replacer for moisture.
- 100 g sunflower oil: Adds richness and keeps things tender.
- 150 ml almond milk: Brings the batter together perfectly.
- A little sunflower oil for the pan: For easy release.
Handy Ingredient Substitutions
No stress if you’re missing something! Here are easy swaps:
- Applesauce: Sweetened applesauce works! Just reduce the sugar by 30-50g.
- Sunflower Oil: Any neutral oil like canola, melted coconut oil, or even light olive oil will do.
- Almond Milk: Any plant-based milk like oat, soy, or cashew milk is perfect.
- All-Purpose Flour: A 1:1 gluten-free flour blend can be used for a gluten-free version.
Let’s Bake! Your Step-by-Step Guide
Step 1: Melting Chocolate and Mixing Dry Goods
First, take a deep breath and enjoy the chocolatey journey! Roughly chop 200 grams of the dark chocolate. Melt it gently in a heatproof bowl over a pot of simmering water (a bain-marie). The chocolate will slowly turn into a glossy, silky pool. Set it aside to cool for about 10 minutes—this is key so it doesn’t cook the other ingredients. Meanwhile, in a large mixing bowl, whisk together the flour, baking powder, sugar, and cocoa powder. Watch as the white flour disappears into a deep, rich brown dust. It already smells amazing!
Step 2: Combining the Batter and Prepping the Pan
Now, preheat your oven to 180°C (350°F) for top/bottom heat, or 160°C (320°F) for a fan oven. Grab your baking pan (about 28×23 cm) and lightly grease it with oil or line it with parchment paper. To your bowl of dry ingredients, add the applesauce, sunflower oil, and almond milk. Stir until just combined—don’t overmix! The batter will be thick and inviting. Now, pour in that lovely cooled, melted chocolate. Stir again briefly until the batter becomes a uniform, dark, and dreamy brown. Pour it into your prepared pan and smooth the top with a spatula. Pro tip: A wet spatula helps spread the thick batter smoothly.
Step 3: Baking to Fudgy Perfection
Slide the pan into your preheated oven. Bake for 25-30 minutes. The true test? The toothpick test. Around the 25-minute mark, poke a toothpick into the center. You don’t want it to come out completely clean. You want a few moist, fudgy crumbs clinging to it. This is the secret to a moist, dense brownie, not a dry cake! Once perfect, pull the pan out and let the brownies cool completely in the pan. I know, the wait is torture, but it’s essential for clean cuts.
Step 4: The Chocolate Drizzle and Final Cut
While they cool, let’s make that pretty finish. Chop the remaining 50g of dark chocolate and melt it just like before. Using a spoon, drizzle the liquid chocolate in artistic stripes or zig-zags across the entire surface of the cooled brownies. Let the chocolate drizzle set until firm. For the cleanest cuts, take a sharp knife, run it under hot water, wipe it dry, and slice. The heat helps glide through the fudgy layers without tearing. You should get about 12 gorgeous squares of pure joy.
Chef’s tip: For super neat lines, score the brownies lightly with a knife before adding the melted chocolate drizzle. The chocolate will fill the lines, creating a beautiful pattern when you cut.
Your Vegan Brownie Timeline
- Prep Time: 20 minutes
- Baking Time: 25-30 minutes
- Cooling Time: 1 hour (patience is a virtue!)
- Total Time: About 1 hour 50 minutes
My Secret for Extra Fudginess
Here’s my little secret: under-baking is better than over-baking. Trust the moist crumb on the toothpick. The brownies will continue to set as they cool, locking in that incredible fudgy texture. If you wait for a clean toothpick, you’ve gone too far.
A Fun Fact About Vegan Baking
Did you know applesauce is one of the oldest natural baking hacks? Before commercial egg replacers, home bakers used mashed fruits like applesauce or banana to add moisture and bind ingredients. So when you use it here, you’re connecting with a long, delicious tradition of kitchen ingenuity!
Necessary Equipment
- Medium saucepan (for water bath)
- Heatproof mixing bowl
- Large mixing bowl
- Whisk and spatula
- 28×23 cm (approx. 11×9 inch) baking pan
- Toothpick or cake tester
How to Store Your Vegan Brownies
Once completely cool, the best way to store your brownies is in an airtight container. Layer them between sheets of parchment paper if you’re stacking them to prevent sticking. They will stay fresh and fudgy at room temperature for about 3-4 days.
For longer storage, these brownies freeze incredibly well! Wrap individual squares tightly in plastic wrap, then place them all in a freezer-safe bag or container. They can be frozen for up to 3 months. When a chocolate craving hits, just let a square thaw at room temperature for an hour or so.
Avoid storing them in the fridge unless your kitchen is very hot and humid. The fridge can dry them out and change their perfect texture. Room temperature is truly where they shine.
Tips and Advice for Brownie Success
- Measure your flour correctly: Spoon it into the measuring cup and level it off. Don’t scoop directly from the bag, as this packs in too much flour and leads to dry brownies.
- Let the melted chocolate cool: Adding hot chocolate to the batter can affect the other ingredients, especially the applesauce. Ten minutes makes a difference!
- Use a metal pan if possible: Metal conducts heat better than glass, giving you those nice crisp edges.
Presentation Ideas to Impress
- Dust with a little powdered sugar and cocoa powder mixed together.
- Serve warm with a scoop of vegan vanilla ice cream and a drizzle of raspberry sauce.
- Place each brownie square on a cute napkin or mini dessert plate for a party.
- Add a sprinkle of flaky sea salt right on the warm chocolate drizzle for a sweet-salty kick.
6 Delicious Vegan Brownie Variations to Try
- Peanut Butter Swirl: Drop spoonfuls of smooth peanut butter onto the batter and use a knife to swirl it in before baking.
- Mint Chocolate Chip: Add 1/2 tsp peppermint extract to the batter and fold in 1/2 cup of vegan dark chocolate chips.
- Orange Zest Infusion: Add the zest of one large orange to the dry ingredients for a bright, citrusy note.
- Nutty Crunch: Fold 3/4 cup of chopped walnuts or pecans into the batter for added texture.
- Espresso Kick: Dissolve 1 tablespoon of instant espresso powder into the almond milk for a deep mocha flavor.
- Blondie Version: Omit the cocoa powder and melted chocolate. Use brown sugar and fold in 1 cup of vegan white chocolate chips and macadamia nuts.
Common Mistakes to Avoid With Vegan Brownies
Over-Baking and Relying Only on Time
This is the number one brownie mistake! Ovens vary, so the bake time is a guide. Baking until a toothpick comes out totally clean means they’re overdone. You want a few moist crumbs. Start checking at 25 minutes. The brownies will firm up as they cool. This ensures a fudgy, not cakey, texture.
Not Letting the Melted Chocolate Cool
Adding piping hot melted chocolate to your batter can be a problem. It might “cook” the applesauce or cause the oil to separate. Letting it cool for about 10 minutes allows it to integrate smoothly. This step creates a stable, emulsified batter for the best results.
Over-Mixing the Batter
Once you add the flour, you want to mix just until you see no more dry streaks. Over-mixing develops the gluten in the flour. This can make your brownies tough and chewy instead of tender and fudgy. A few lumps are perfectly fine!
Using the Wrong Pan Size
Using a pan that’s too large will make thin brownies that bake quickly and dry out. A pan that’s too small means the center won’t cook before the edges burn. Stick close to the recommended 28×23 cm (11×9 inch) size for the perfect thick, fudgy square.
Your Vegan Brownie Questions, Answered
Can I make these brownies gluten-free?
Absolutely! The best results come from using a high-quality 1:1 gluten-free all-purpose flour blend (like those from Bob’s Red Mill or King Arthur). These blends contain xanthan gum, which replicates the binding property of gluten. Simply replace the regular flour with the same amount of GF blend. The texture might be slightly more delicate, but just as delicious.
My brownies are too cakey, not fudgy. What went wrong?
A cakey texture usually means too much flour or over-mixing. Make sure you’re measuring your flour correctly (spoon and level). Also, check that your baking powder is fresh. Most importantly, remember the toothpick test! If you baked them until the pick was clean, they were simply in the oven too long. Next time, pull them out earlier.
Can I use a different sweetener, like maple syrup or coconut sugar?
You can, but it will change the texture. Liquid sweeteners like maple syrup add extra moisture. You may need to reduce the almond milk slightly. Coconut sugar can make the brownies denser and darker. For your first try, I recommend sticking with regular granulated sugar to master the base recipe, then experiment.
Why did my brownies sink in the middle?
A slight dip is normal for fudgy brownies, but a big sink usually indicates under-baking. The structure wasn’t fully set before you took them out. Another cause could be accidentally using baking soda instead of baking powder, or using an expired leavener. Ensure your baking powder is fresh and you’re using the right one.
How do I get that shiny, crackly top on my vegan brownies?
The crackly top comes from dissolving the sugar properly. When you whisk the sugar into the wet ingredients (like the oil and applesauce), do it vigorously. This helps start the sugar dissolution process. Also, don’t skip the sugar amount; it’s key for that classic shiny crust.
Can I make these oil-free?
You can try, but the oil is important for richness and moisture. A common substitution is using more applesauce or mashed avocado. Start by replacing the oil with an equal amount of unsweetened applesauce. Be aware the texture will be more cake-like and they may stick to the pan more, so use good parchment paper.
What’s the best vegan dark chocolate to use?
Look for a bar that says “dark chocolate” and check the ingredients for no dairy (milk solids, whey). Many 70% dark chocolates are naturally vegan. Brands like Enjoy Life, Lindt 70% or higher, and Trader Joe’s Pound Plus 72% are great options. Choose one you enjoy eating plain!
Can I add mix-ins like chocolate chips or nuts?
Of course! That’s a great way to customize. Fold in up to 1 cup of your favorite add-ins after you’ve combined the batter. Try vegan chocolate chunks, walnuts, pecans, or even dried cherries. Just be gentle so you don’t over-mix.
How long do they really keep fresh?
In an airtight container at room temperature, they are best eaten within 4 days. After that, they start to dry out. If you need them to last longer, freezing is your best friend. They thaw beautifully and taste just-baked.
Can I double this recipe?
Yes, you can double all the ingredients. You will need a much larger baking pan, like a standard sheet pan (jelly roll pan). Keep a close eye on the baking time, as it may need a few extra minutes. Always rely on the toothpick test for doneness.
Ready, Set, Bake!
So there you have it—my all-time favorite vegan brownie recipe. It’s a recipe born from a desire for real, fudgy chocolate and tested with love in my own kitchen. These brownies prove that a plant-based treat can be just as indulgent, messy, and soul-warming as any other. I hope you give them a try. Grab your bowl, melt that chocolate, and get ready for the best vegan brownies you’ve ever tasted. Happy baking!
Cajun Beef Linguine
Ingredients
Equipment
Method
- Roughly chop 200 grams of the dark chocolate and melt it gently in a heatproof bowl over a pot of simmering water. Set aside to cool for about 10 minutes.
- In a large mixing bowl, whisk together the flour, baking powder, sugar, and cocoa powder.
- Preheat your oven to 180°C (350°F) and grease your baking pan (28x23 cm) with oil or line it with parchment paper.
- Add the applesauce, sunflower oil, and almond milk to the bowl of dry ingredients. Stir until just combined.
- Pour in the cooled melted chocolate and stir again briefly until the batter is uniform.
- Pour the batter into the prepared pan and smooth the top with a spatula.
- Bake for 25-30 minutes, checking with a toothpick around the 25-minute mark.
- Once done, let the brownies cool completely in the pan.
- Chop the remaining 50g of dark chocolate and melt it. Drizzle over the cooled brownies and let set.
- Cut the brownies into squares with a sharp knife.