The Magic of Perfectly Baked Chicken Drumsticks
Last Tuesday night, I found myself staring into my refrigerator at 5:30 PM with three hungry kids asking what’s for dinner. Sound familiar? I grabbed a pack of chicken drumsticks, and thirty minutes later, everyone was happily munching on crispy, golden drumsticks. That’s when I realized this recipe needed to be shared with the world.
Welcome to my kitchen! Today, I’m excited to share with you a simple and delicious recipe for baked chicken drumsticks. Whether you’re looking for a quick weeknight meal or a tasty dish for a gathering, this recipe is sure to please. The best part? You probably already have most of the ingredients in your pantry right now.
In this article, we’ll cover everything from preparing the perfect crispy skin to choosing the right chicken drumstick marinade and cooking times. I’ll answer common questions like “is it better to bake drumsticks at 350 or 400?” and “how long do chicken drumsticks take in the oven at 400 degrees?” Let’s dive in!
Why Baked Chicken Drumsticks Are a Great Choice
I’ve been making chicken drumsticks for my family for over ten years now. Through all those dinners, potlucks, and Sunday gatherings, I’ve learned something important. Baked chicken drumsticks are not only easy to make but also incredibly versatile. They can be seasoned in countless ways and are a hit with both kids and adults.
My daughter won’t touch most vegetables, but she’ll eat three drumsticks in one sitting. My husband loves them spicy. My youngest prefers them plain with just salt and pepper. The beauty of this recipe is that you can customize each batch to match everyone’s taste.
One of the key benefits is that they are a healthier alternative to fried chicken. Baking requires less oil and still gives you that crispy texture everyone craves. When you make oven fried chicken legs, you’re cutting out hundreds of calories without sacrificing flavor. Your waistline will thank you, and so will your family.
The Health Benefits You Need to Know
Let me be honest with you. I used to deep fry chicken drumsticks every single week. Then my doctor gave me some news I didn’t want to hear during my annual checkup. I needed to cut back on fried foods. I thought that meant saying goodbye to crispy chicken forever.
I was so wrong. Healthy chicken drumstick recipes can taste just as good as their fried cousins. Chicken drumsticks are packed with protein, which helps build muscle and keeps you feeling full longer. A single drumstick contains about 12 grams of protein and is rich in essential vitamins like B12 and minerals like iron.
When you bake instead of fry, you’re making a smart choice for your heart. Less oil means less saturated fat. Your cholesterol levels will improve. You’ll have more energy throughout the day. And here’s the kicker – baked drumsticks are easier to make than fried ones. No messy oil splatters. No burned fingers. No heavy pot to clean.
Why Drumsticks Beat Other Chicken Cuts
I love chicken breasts for certain recipes, but drumsticks have some serious advantages. First, they’re cheaper. You can usually find them on sale for half the price of boneless chicken. That’s a big deal when you’re feeding a family on a budget.
Second, drumsticks are almost impossible to overcook. The dark meat stays juicy even if you leave them in the oven a few extra minutes. Try that with a chicken breast and you’ll be chewing cardboard. The bone actually helps the meat cook evenly and adds extra flavor.
Third, kids can hold them. My toddler felt so proud when he could pick up his own drumstick and eat it without help. It made dinner time easier and more fun for everyone. Plus, there’s something satisfying about eating with your hands once in a while.
When you make baked chicken legs and thighs together, you’re giving people options. Some prefer the meatier thigh, while others love the classic drumstick shape. Both cook at the same temperature and time, making meal prep simple.
The Versatility Factor
Here’s where drumsticks really shine. You can take the same basic cooking method and create completely different meals just by changing your marinade or seasoning. Want Italian? Add garlic, oregano, and parmesan. Craving Asian flavors? Use soy sauce, ginger, and sesame oil. In the mood for barbecue? Your favorite BBQ sauce turns these into amazing baked BBQ chicken drumsticks.
I keep a rotating menu of about six different drumstick recipes. Monday might be lemon herb. Wednesday could be spicy Buffalo. Friday might feature honey garlic. My family never gets bored, and I’m using the same basic technique every time.
You can serve drumsticks hot out of the oven or cold the next day. They’re perfect for lunch boxes, picnics, and road trips. I’ve packed them for camping trips, beach days, and long car rides. They hold up well and taste great at any temperature.
Getting That Perfect Crispy Skin
Let me share a secret that changed everything for me. The key to crispy baked chicken drumsticks isn’t just the temperature. It’s about preparing the skin properly before the drumsticks even hit the oven.
Moisture is your enemy when you want crispy skin. I learned this the hard way after making soggy drumsticks for months. Now I always pat the drumsticks completely dry with paper towels before seasoning them. This one simple step makes a huge difference.
The second trick is giving the skin some time to dry out in the refrigerator. After seasoning your drumsticks, place them uncovered in the fridge for at least an hour. This air-drying process helps the skin crisp up beautifully in the oven. When I’m really organized, I prep them the night before.
Temperature matters too. Higher heat creates crispier skin. That’s why many recipes call for baking at 400 or even 425 degrees. The hot oven helps render the fat under the skin while crisping the outside to golden perfection.


Preparing Your Chicken Drumsticks for Maximum Flavor
Now that you understand why crispy skin matters so much, let’s talk about preparing those drumsticks before they go anywhere near your oven.
Every time I head to the grocery store, I see people just grabbing whatever drumsticks are closest. But here’s the thing – spending an extra two minutes selecting quality chicken makes a real difference. I always check the sell-by date first. Fresh chicken should still have at least three days before that date. The drumsticks should look plump, not shriveled. The skin should be light pink, not gray or splotchy.
Funny enough, my neighbor once asked me why her drumsticks always turned out tough. Turns out she’d been buying chicken that was already sitting in her fridge for five days. Freshness really is everything when it comes to texture and taste. If you’re buying from a butcher counter, ask them to pack it for last so it stays cold during your shopping trip.
Here’s something I wish someone had told me years ago – frozen drumsticks work just fine too. Just make sure you thaw them properly in the refrigerator for 24 hours. Never thaw on the counter. I learned that lesson after giving my whole family food poisoning one memorable Thanksgiving. Not my finest moment as a cook, let me tell you.
The Critical Cleaning and Drying Process
Once you get those drumsticks home, you need to give them proper attention. I rinse mine quickly under cold water, though I know some food safety experts say this step isn’t necessary. Old habits die hard, I guess. What really matters is what comes next.
Grab your paper towels. Not just one or two sheets – I’m talking about a good stack. You need to pat each drumstick completely dry. And I mean completely. Take your time with this. Press the paper towels all around each piece, getting into all the little crevices around the joint. When you think they’re dry, use fresh paper towels and do it again.
I used to rush through this step thinking it didn’t matter much. Then one day I compared two batches – one that I dried thoroughly and one that I barely patted down. The difference was shocking. The well-dried batch had skin that shattered when you bit into it. The other batch was rubbery and disappointing. My teenage son actually complained, which tells you everything you need to know.
After drying, I inspect each drumstick for any remaining pinfeathers or bits of fat that need trimming. Sometimes you’ll find little quills still stuck in the skin. Just pull those out with your fingers or tweezers. Nobody wants to bite into a feather during dinner.
Marinating Magic: My Favorite Techniques
Listen, you could just season your drumsticks with salt and pepper and call it a day. They’d still be good. But taking the time to create a proper chicken drumstick marinade transforms good into absolutely amazing. I’ve spent years testing different combinations, and I’m going to share what actually works.
My go-to marinade follows a simple formula that works for almost any flavor profile. You need something acidic (like lemon juice or vinegar), something fat-based (like oil), and your seasonings. The acid helps tenderize the meat while the oil carries flavors and helps with browning. For my basic marinade, I mix a quarter cup of olive oil, two tablespoons of lemon juice, four minced garlic cloves, a tablespoon of dried herbs, salt, and pepper.
The timing matters more than you might think. Thirty minutes is the bare minimum for any marinade to make a difference. Two to four hours is ideal. Overnight works great if you’re organized enough to plan ahead – which let’s be honest, I usually am not. I’ve got three kids and a full-time job. Most nights I’m marinating for maybe an hour while I help with homework.
One trick I discovered by accident – scoring the drumsticks with a sharp knife helps the marinade penetrate deeper. Just make two or three shallow cuts on the meatiest part of each drumstick. This also helps them cook more evenly. The first time I tried this technique, my husband asked if I’d changed my recipe because they tasted different. Nope, same marinade, just better penetration.
By the way, if you love experimenting with different proteins, you might enjoy trying this same marinating approach with perfectly cooked pork tenderloin. The technique translates beautifully across different meats.
Temperature Decisions That Make or Break Your Meal
Alright, here’s where things get interesting. You’ve probably noticed that every recipe out there seems to recommend a different temperature for baked chicken drumsticks. Some say 350°F, others swear by 400°F, and I’ve even seen recipes calling for 425°F. What gives?
So is it better to bake drumsticks at 350 or 400? I’ve cooked hundreds of batches at different temperatures, and here’s my honest answer – it depends on what you’re after. Baking at 350°F gives you more forgiving timing. The drumsticks cook more gently and evenly. You’re less likely to end up with burnt skin or dried-out meat. This is my temperature of choice when I’m making baked BBQ chicken drumsticks because the sugar in the sauce can burn at higher temps.
But 400°F? That’s where the magic happens for crispy skin. The higher heat renders the fat faster and creates that amazing golden-brown exterior that makes everyone reach for seconds. The trade-off is you need to pay closer attention. Leave them in five minutes too long at 400 and you might have problems.
If you want to know exactly how long to cook chicken legs in oven at 350, plan on 45 to 50 minutes. They take a bit longer at the lower temperature, but you’ll get tender, juicy meat every single time. I use this temperature when I’m multitasking and might get distracted by helping kids with homework or answering work emails.
Timing Your Drumsticks to Perfection
Here’s a question I get asked constantly – how long do chicken drumsticks take in the oven at 400 degrees? The general answer is 35 to 40 minutes, but let me give you the real answer. It depends on the size of your drumsticks, how cold they were when they went in, and how your particular oven runs.
My oven runs hot. I’ve learned this through trial and error – and one memorable batch of charcoal that used to be chicken. When a recipe says 40 minutes, my drumsticks are usually done at 35. Your oven might run cool and need 45 minutes. This is why I’m obsessed with my meat thermometer.
Never – and I mean never – rely on timing alone. I don’t care if you’ve made chicken a thousand times. Get a meat thermometer and use it. You’re looking for an internal temperature of 165°F measured at the thickest part of the drumstick, avoiding the bone. Insert the thermometer from the side rather than the top for the most accurate reading.
Here’s something I learned from making similar dishes like juicy pork chops with gravy – carry-over cooking is real. The internal temperature will continue rising about five degrees after you pull the meat from the oven. So if you want to be precise, you can pull them at 160°F and let them rest. They’ll hit 165°F while sitting on your counter.
The resting period matters too. I know everyone’s hungry and wants to eat immediately. I get it. But giving those drumsticks five minutes to rest makes them juicier. The meat fibers relax and reabsorb some of the moisture. When my kids were little, I’d use those five minutes to get everyone’s drinks poured and the table set. Perfect timing.
Oh, and here’s a fun trick for getting crispy skin with oven fried chicken legs – finish them under the broiler for two minutes at the end. Keep a close eye because they can go from perfect to burnt in seconds. But those two minutes under high heat creates an incredible crispy texture that rivals actual fried chicken. Just make sure your drumsticks are already cooked through before you broil them. The broiler is only for finishing, not cooking.
When you’re making a full dinner with baked chicken legs and thighs together, remember that thighs are meatier and might need an extra five minutes. Check them separately with your thermometer. I usually arrange the thighs toward the back of my oven where it runs slightly hotter, and the drumsticks toward the front. Works like a charm every time.
Sometimes I make a whole spread with these drumsticks alongside other crowd-pleasers like crispy ground beef quesadillas or a hearty bowl of turkey chili. The variety keeps everyone happy, and they all work well together for game day or casual gatherings.


Advanced Tricks for Ultra-Crispy Baked Chicken Drumsticks
You know what? After all these years of making chicken, I still get excited when I pull a batch of drumsticks out of the oven and hear that perfect crackle when I touch the skin. It’s become my little quality check – if the skin doesn’t make noise, something went wrong. Let me share some advanced techniques I’ve picked up that take your crispy baked chicken drumsticks from good to absolutely incredible.
First thing – and this is crucial – investing in a proper wire rack changed my chicken game completely. I used to just throw the drumsticks directly on a baking sheet. They’d sit in their own juices and steam instead of roast. The bottoms would be soggy while the tops got crispy. So frustrating. Then my sister-in-law showed me her setup with a wire cooling rack set inside a rimmed baking sheet. Total game changer.
The wire rack elevates the drumsticks about half an inch off the pan. Hot air circulates all around each piece, cooking them evenly on all sides. You get that golden-brown crispiness everywhere, not just on top. Plus, any fat that renders out drips down into the pan below instead of pooling around the chicken. Less grease on your chicken means crispier skin and a healthier meal. Win-win.
Here’s a pro tip I stumbled onto by accident. Spray your wire rack with cooking spray before arranging the drumsticks on it. Otherwise, the skin might stick when you try to remove them. I learned this the hard way when I basically destroyed the beautiful crispy skin on six drumsticks trying to pry them off a rack I forgot to spray. My kids still ate them, but I was so disappointed in myself.
The Secret Weapon: Baking Powder
Okay, this is where things get interesting. Want to know the secret restaurants use to get insanely crispy skin? Baking powder. Not baking soda – that’s completely different and will make your chicken taste weird. I’m talking about regular aluminum-free baking powder.
Mix about a teaspoon of baking powder with your seasoning blend for every pound of drumsticks. The baking powder raises the pH of the chicken skin, which helps it brown faster and get crispier. Something about breaking down the proteins – I’m not a food scientist, but I know it works like magic. The first time I tried this technique, my husband accused me of secretly deep-frying the chicken. Nope, just baking powder doing its thing.
Just make sure your baking powder is fresh. I once used baking powder that had been sitting in my pantry for probably three years. It didn’t do anything special. Turns out baking powder loses its effectiveness over time. Check the expiration date, and when in doubt, buy a fresh container. They’re only a couple bucks and make such a difference.
Pat the drumsticks dry, coat them lightly with oil, then sprinkle your baking powder and seasoning mixture all over. Really work it into the skin with your hands. Get messy. Make sure every inch is covered. This is actually part of proper ingredient preparation that helps ensure consistent results across your entire batch.
My Favorite Seasoning Combinations for Maximum Crispiness
While we’re talking about seasonings, let me share a few combinations that work beautifully for crispy skin baked chicken drumsticks. Remember that baking powder base I just mentioned? Build on that with these flavor profiles.
For classic crispy chicken, I mix two teaspoons of baking powder with two teaspoons of garlic powder, one teaspoon of onion powder, one teaspoon of paprika, half a teaspoon of black pepper, and a teaspoon of salt. Simple, but it delivers every single time. This is the recipe my kids request for birthday dinners, which says a lot considering I could make them anything they want.
If you’re into spicy food, try adding cayenne pepper or chili powder to the mix. Start with half a teaspoon and adjust from there. My neighbor can’t handle any heat at all, so when she comes for dinner I make a separate batch with zero spice. The beauty of drumsticks is you can season different batches differently and cook them all at once.
For baked BBQ chicken drumsticks, here’s a trick – season them with dry rub spices first and get the skin crispy, then brush on your BBQ sauce during the last ten minutes of cooking. If you coat them with sauce from the beginning, the sugar burns before the chicken cooks through. Trust me on this. I’ve made that mistake more times than I care to admit before I figured out the right timing.
The Flip Debate: To Turn or Not to Turn
People always ask me whether they need to flip drumsticks halfway through cooking. Honestly? It depends on your setup and preferences. If you’re using a wire rack like I recommended, flipping isn’t really necessary. The air circulation does the work for you. Everything crisps up evenly without any intervention.
But if you’re cooking directly on a baking sheet – maybe you don’t have a wire rack yet – then yes, flip them once at the halfway point. Otherwise the bottoms will be pale and rubbery while the tops are perfectly crispy. I usually set a timer to remind me because I’ll get distracted helping with homework or scrolling through my phone.
Some people like to start their drumsticks at a lower temperature and then crank up the heat at the end. I’ve tried this method several times. You bake at 375°F for about thirty minutes, then increase to 425°F for the last ten to fifteen minutes. The initial lower temperature cooks the meat gently, and the high heat finish crisps everything up. It works great, but I find it’s one extra step I don’t usually need if I’m using my wire rack setup.
Using Your Broiler for Restaurant-Quality Finish
I briefly mentioned the broiler trick earlier, but let me expand on that because it’s seriously one of my favorite techniques. After your drumsticks reach 165°F internally, switch your oven to broil and move the rack to the upper-middle position. Give them two to three minutes under that intense heat.
Watch them like a hawk during this step. The broiler is incredibly powerful and can turn your beautiful golden drumsticks into charcoal faster than you can answer a text message. I literally stand at the oven with the door cracked open, watching the whole time. The skin will start bubbling and darkening. When it looks gorgeously caramelized, pull them out immediately.
This broiling technique is especially amazing for oven fried chicken legs because it mimics that deep-fried crackle you can’t quite get from baking alone. My kids prefer these to actual fried chicken from the restaurant down the street. I’m not even exaggerating. They’ve told the restaurant owners this to their faces, which was slightly embarrassing but also kind of awesome.
Preventing Common Crispy Skin Mistakes
Let me tell you about some mistakes I’ve made so you don’t have to learn these lessons the hard way. First, overcrowding the pan is a huge problem. Leave space between each drumstick – at least an inch if possible. When they’re touching, steam gets trapped and ruins the crispiness you worked so hard to achieve.
Second, don’t open the oven door constantly to check on them. Every time you open that door, the temperature drops significantly. Your oven has to work harder to get back up to temp, and meanwhile your drumsticks are hanging out in cooler air, not crisping properly. Check them once at the halfway point if you’re flipping, and then not again until the timer goes off.
Third – and this is something I see people mess up all the time – using too much marinade. If your drumsticks are dripping wet when they go in the oven, the excess liquid will steam them instead of allowing them to roast. After marinating, pull the drumsticks out and let the excess drip off. You can even pat them with paper towels again if they seem really wet. The flavors have already penetrated the meat. You don’t need all that extra liquid on the surface.
What to Do with Leftover Drumsticks
Here’s the thing about making baked chicken drumsticks – they’re just as good cold as they are hot. Maybe even better, if I’m being honest. I deliberately make extra so we have leftovers for lunches throughout the week. My middle son takes two drumsticks in his lunch box every single day and his friends are super jealous.
Store them in an airtight container in the refrigerator. They’ll keep for four to five days, though they never last that long in my house. If you want to reheat them and restore some of that crispiness, here’s what I do: pop them in a 375°F oven for about ten minutes. Don’t use the microwave unless you want sad, rubbery skin. The oven brings back that crispy texture beautifully.
You can also strip the meat off the bones and use it in other dishes. I’ve made chicken salad, added it to pasta, topped salads with it, and even used it in quesadillas. The smoky, well-seasoned flavor adds so much to whatever dish you’re making. Nothing goes to waste in my kitchen.
Funny enough, I’ve even frozen cooked drumsticks with decent results. Wrap them individually in plastic wrap, then put them all in a freezer bag. They’ll keep for about three months. Thaw in the refrigerator overnight and reheat in the oven. The skin won’t be quite as crispy as fresh, but it’s still pretty good and super convenient when you need a quick protein option.
Pairing Your Drumsticks with the Perfect Sides
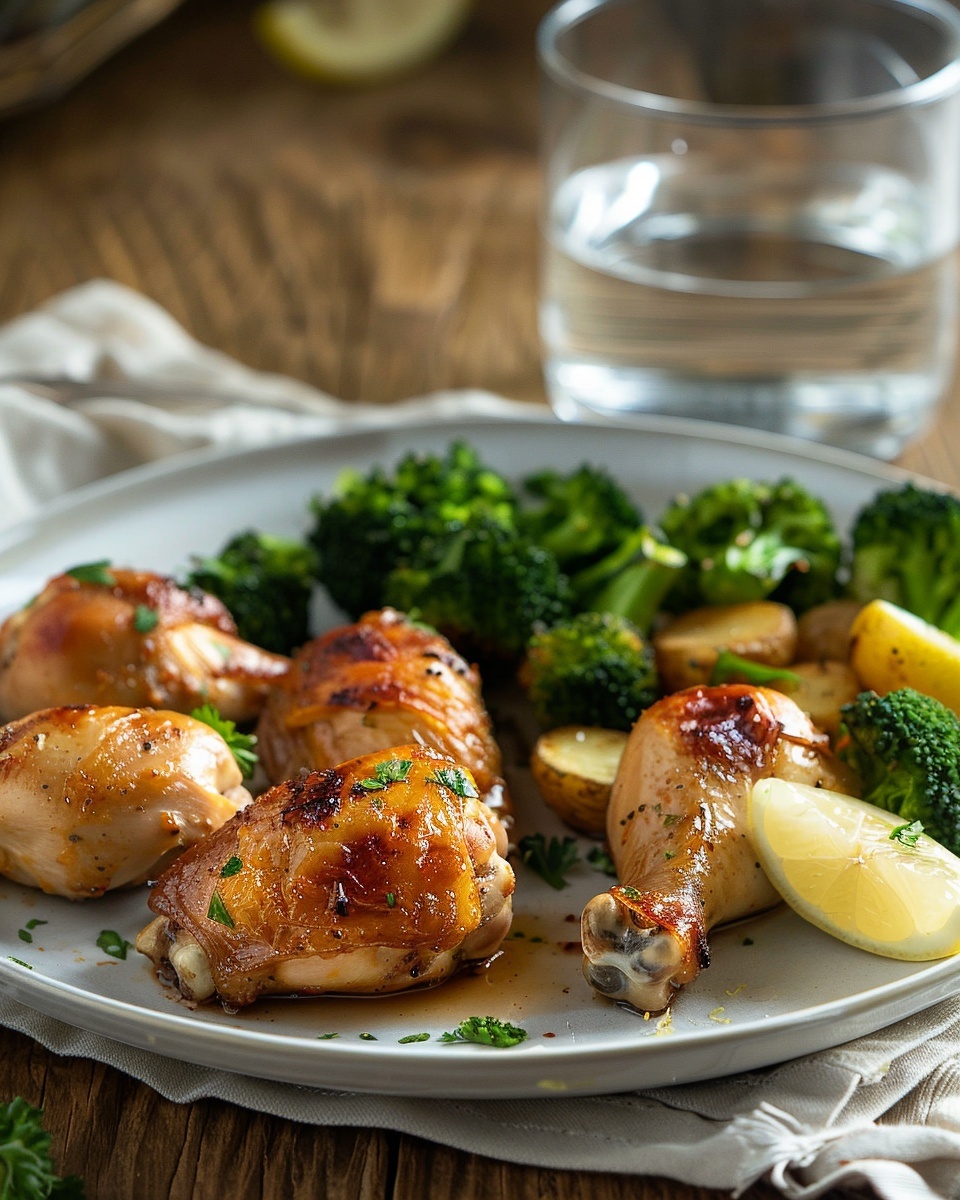
While the drumsticks are baking, you’ve got time to throw together some great side dishes. I like keeping things simple so I’m not overwhelmed. Roasted vegetables work perfectly – just toss whatever you have with olive oil, salt, and pepper, and roast them on a separate pan at the same temperature as your chicken.
My go-to sides include roasted Brussels sprouts, sweet potato wedges, or simple green beans. Sometimes I’ll make a quick salad or steam some broccoli. If I’m feeling ambitious, I’ll whip up some mashed potatoes or mac and cheese. The beauty of drumsticks is they’re not fussy – they go with pretty much anything.
For a complete meal experience, you might want to explore more options in the meat and poultry recipe collection where you’ll find complementary dishes and cooking techniques that work wonderfully alongside these drumsticks.
One trick I love is using the drippings from the baking sheet to make a quick pan sauce. After removing the drumsticks, place the pan on your stovetop over medium heat. Add a splash of chicken broth and scrape up all those browned bits. Let it reduce for a couple minutes, add a pat of butter, and you’ve got an amazing sauce to drizzle over everything. Takes maybe five minutes and elevates the whole meal.
Adjusting This Recipe for Different Occasions
The basic baked chicken drumsticks recipe I’ve been describing works for casual weeknight dinners, but you can dress it up for fancier occasions too. For a party, I’ll arrange them on a nice platter with fresh herbs scattered around. Suddenly they look restaurant-quality instead of like Tuesday night dinner.
Game day? Make a double batch with different flavors. Half with Buffalo seasoning and half with BBQ. Set out some ranch and blue cheese dressing for dipping. Your friends will think you spent hours preparing when really you just multiplied your usual recipe and used two different spice blends.
For meal prep, I’ll make twenty drumsticks on Sunday and portion them out into containers with different sides. Monday gets drumsticks with rice and broccoli. Wednesday gets them with quinoa and roasted vegetables. Friday they go on top of a big salad. Same protein, different presentations, and I only had to cook once.
Birthday parties for kids are perfect for drumsticks too. They’re easy to eat, not messy if you provide napkins, and kids actually enjoy them. Way better than trying to get a dozen seven-year-olds to eat chicken breasts or fish. I’ve served these at probably fifteen kids’ birthday parties over the years, and they always disappear first.
Taking the time to master this simple recipe will serve you well for years to come. Once you nail the technique – the drying, the seasoning, the temperature, the timing – you can confidently make perfect crispy skin baked chicken drumsticks any day of the week. You’ll stop ordering fried chicken from restaurants because yours tastes better and costs a fraction of the price. Your family will request these drumsticks for special occasions. And you’ll have one reliable, foolproof recipe that never lets you down.
Frequently Asked Questions About Baked Chicken Drumsticks
Is it better to bake drumsticks at 350 or 400?
For the crispiest skin, I recommend 400°F. The higher temperature renders the fat better and creates that golden, crunchy exterior everyone loves. However, 350°F works great if you’re multitasking or making BBQ drumsticks where the sauce might burn at higher temps. At 350°F, you’ll need to add about ten extra minutes to your cooking time. Both temperatures work – it just depends on your priorities and how closely you can monitor the oven.
How long do chicken drumsticks take in the oven at 400 degrees?
At 400°F, plan on 35 to 40 minutes for average-sized drumsticks. Larger ones might need up to 45 minutes. Always use a meat thermometer to check – you’re looking for 165°F at the thickest part, avoiding the bone. The exact timing can vary based on your specific oven and the size of your drumsticks. I’ve had batches finish in 33 minutes and others take 42 minutes using the same temperature.
Can I use different spices for the marinade?
Absolutely! That’s the beauty of this recipe – it’s incredibly versatile. Try Italian herbs like rosemary and thyme, or go Asian-inspired with ginger and five-spice powder. Cajun seasoning, lemon pepper, curry powder, and ranch seasoning mix all work wonderfully. I keep several spice blends in my pantry and rotate through them so my family doesn’t get bored. Just remember to include salt in whatever blend you choose, as it helps with both flavor and moisture retention.
What are some side dishes that go well with baked chicken drumsticks?
Roasted vegetables are my favorite pairing – Brussels sprouts, carrots, or sweet potatoes all work great. Classic sides like mashed potatoes, coleslaw, corn on the cob, or mac and cheese are always crowd-pleasers. For healthier options, try quinoa salad, steamed green beans, or a simple mixed greens salad. Rice pilaf and roasted potatoes are also excellent choices that cook at similar temperatures, so you can make them alongside the chicken.
Should I cover drumsticks with foil while baking?
No, don’t cover them with foil if you want crispy skin. Foil traps steam and moisture, which makes the skin soggy instead of crispy. The only time I use foil is if the skin is browning too quickly before the meat is cooked through – then I’ll loosely tent them for the last ten minutes. Otherwise, leave them uncovered for the entire cooking time. The exposed skin is what gets that beautiful golden-brown color and satisfying crunch.
Can I make these drumsticks ahead of time?
You can definitely prep them ahead by marinating and seasoning them up to 24 hours before cooking. Just keep them covered in the refrigerator until you’re ready to bake. Cooked drumsticks also reheat well – store them in the fridge for up to five days and warm them in a 375°F oven for ten minutes. I don’t recommend cooking them fully and then holding them warm in the oven, as the skin will lose its crispiness. Fresh from the oven is always best.
Why are my baked drumsticks rubbery instead of crispy?
This usually happens because of excess moisture. Make sure you’re patting the drumsticks completely dry before seasoning them. Using a wire rack instead of placing them directly on the pan also helps significantly. Another common cause is cooking at too low a temperature – bump it up to at least 400°F for crispy results. Finally, check that you’re not overcrowding the pan, as drumsticks need space for air to circulate around them.
How do I know when drumsticks are done without a thermometer?
While I strongly recommend using a meat thermometer for safety, you can check by piercing the thickest part with a knife. The juices should run clear, not pink. The meat should also pull away from the bone easily. If you wiggle the drumstick and the meat slides around loosely on the bone, it’s done. However, these visual methods aren’t as reliable as a thermometer, which you can buy for less than ten dollars and will ensure perfectly cooked chicken every time.
Can I use this recipe for frozen drumsticks?
You need to thaw the drumsticks completely before using this recipe. Never put frozen chicken directly in the oven at these temperatures – the outside will overcook before the inside thaws and cooks through. Thaw drumsticks in the refrigerator for 24 hours, then pat them dry and proceed with the recipe as normal. If you’re in a rush, you can thaw them in cold water (changing the water every 30 minutes), but refrigerator thawing is safest.
What’s the best way to get BBQ sauce to stick without burning?
Bake the drumsticks with dry seasonings for the first 30 minutes, then brush on your BBQ sauce and return them to the oven for the final ten minutes. This prevents the sugar in the sauce from burning while allowing it to caramelize beautifully. You can also reduce the oven temperature to 350°F when adding the sauce if your BBQ sauce is particularly sweet. Apply a second coat of sauce right before serving for extra flavor and a glossy appearance.
Baked Chicken Drumsticks
Ingredients
Equipment
Method
- Preheat the oven to 400°F (205°C).
- Pat the chicken drumsticks completely dry with paper towels.
- If desired, score the drumsticks with a knife to help the marinade penetrate.
- In a bowl, mix olive oil, lemon juice, minced garlic, dried herbs, salt, and pepper.
- Marinate the drumsticks in the mixture for at least 30 minutes, ideally 2-4 hours or overnight.
- Arrange a wire rack on a rimmed baking sheet and spray it with cooking spray.
- Place the marinated drumsticks on the rack, ensuring they are not overcrowded.
- If using, sprinkle the baking powder over the drumsticks for extra crispiness.
- Bake in the preheated oven for 35-40 minutes or until the internal temperature reaches 165°F (74°C).
- For an extra crispy finish, broil the drumsticks for 2-3 minutes at the end of cooking.
- Let the drumsticks rest for about 5 minutes before serving.