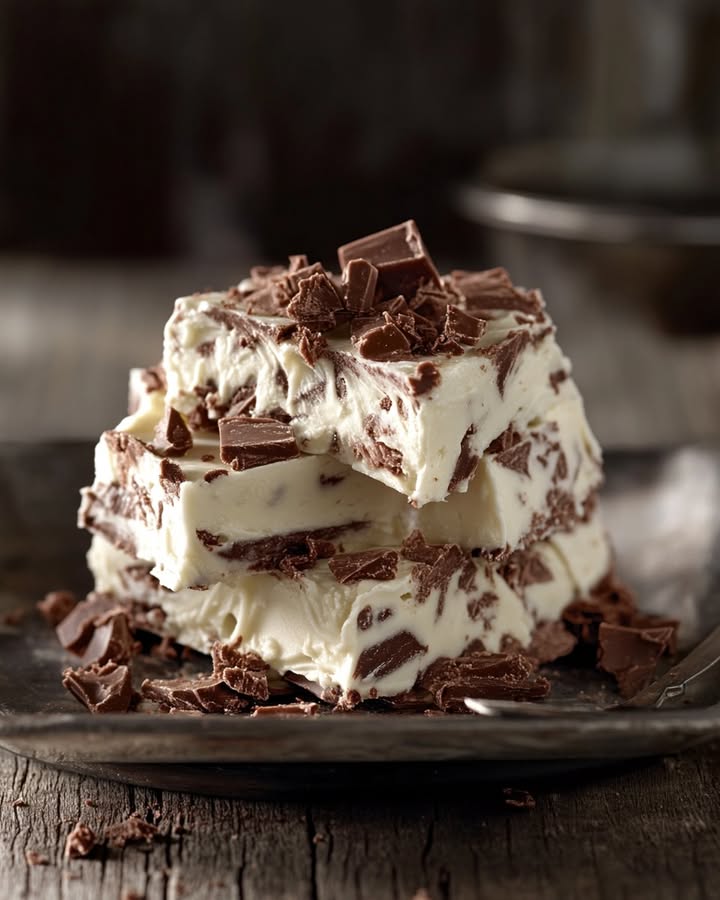
Paula Deen’s 5-Minute Fudge: Your New Favorite Quick Treat
Have you ever needed a last-minute dessert that looks like you spent all day in the kitchen? I’ve been there more times than I can count. Maybe the kids just announced a bake sale, or friends are popping over unexpectedly. My secret weapon? This magical little recipe for what I lovingly call my Ultimate Chocolate Squares. With just five ingredients and a microwave, you can make the creamiest, dreamiest fudge you’ve ever tasted. It’s the kind of recipe that makes you look like a superhero without breaking a sweat.
A Sweet Slice of History: The Tale of the 5-Minute Fudge
Fudge has a long, lovely history. It’s often linked to college sweet shops and holiday gift-giving. The traditional method involves candy thermometers and a lot of patient stirring. Then along came smart cooks who discovered a wonderful shortcut: sweetened condensed milk. This thick, sweet liquid gold is the key to no-fail, no-thermometer fudge. Paula Deen, the queen of Southern comfort, perfected this easy version. Her recipe embraces modern convenience without sacrificing that old-fashioned, melt-in-your-mouth quality. It’s a beautiful blend of tradition and today’s busy lifestyle. Anyone can make a batch of these perfect little squares.
Why You’ll Fall in Love With This Chocolate Fudge Recipe
Let me count the ways! First, it’s stupidly easy. You won’t believe something this good comes together so fast. Second, it’s wildly customizable. Don’t like butterscotch? Use all chocolate! Need it nut-free? Just leave them out. The texture is unbelievably smooth and rich. It’s the perfect balance of sweet and chocolatey. Every time I make this easy fudge recipe, I get asked for the recipe. It’s that reliable and that delicious. It’s a guaranteed crowd-pleaser every single time.
Perfect Occasions for Your Homemade Fudge Squares
This recipe is your new go-to for almost any event! Here are a few of my favorites:
- Holiday Gifting: Pack these squares in a cute tin—it’s a heartfelt homemade gift.
- Potlucks & Parties: Need to bring a dessert? This is it. It travels like a dream.
- After-School Treat: Surprise the kids with a special sweet snack.
- Movie Night: Skip the store-bought candy and make these instead.
- Just Because: Sometimes, a Tuesday afternoon needs a little chocolate joy.
What You’ll Need: The Fudge Ingredients
Gather these simple items. That’s it! The magic is in the combination.
- 1 (14 ounce) can of sweetened condensed milk
- 2 cups of semi-sweet chocolate chips
- 1 cup of butterscotch chips
- 1 teaspoon of pure vanilla extract
- 1 cup of chopped pecans (this is optional, but so good!)
No Stress Substitutions
Out of something? No worries! This recipe is very forgiving.
- Butterscotch Chips: Use peanut butter chips, white chocolate chips, or just use 3 total cups of chocolate chips.
- Pecans: Walnuts, almonds, or even pretzel pieces add a great crunch. Or skip nuts entirely.
- Chocolate Chips: Milk chocolate chips make a sweeter fudge. Dark chocolate chips are fantastic for a richer taste.
- Add-Ins: Try folding in mini marshmallows, crushed peppermint candies, or a handful of toffee bits after you take it off the heat.
How to Make the Ultimate Chocolate Squares
Get ready for the easiest dessert of your life. Let’s make some fudge!
Step 1: Prep Your Pan
First, grab your 8×8-inch baking dish. Lining it is the best trick for perfect, easy-to-remove squares. Take a sheet of parchment paper and lay it in the dish, letting the extra hang over the sides. This creates little “handles” that will let you lift the whole slab of fudge out later. No more wrestling with a stuck pan! A little spritz of cooking spray on the pan first helps the paper stick in place. Pro tip: If you don’t have parchment, you can use aluminum foil, but parchment works best.
Step 2: Melt the Goodness Together
Now, for the fun part. In a medium saucepan, pour in the entire can of sweetened condensed milk. See how it’s thick and creamy? That’s your fudge foundation. Add the chocolate chips and butterscotch chips right on top. Turn your stove to low heat. This is crucial. We want everything to melt slowly and smoothly. Stir almost constantly with a wooden spoon or silicone spatula. Watch as the chips soften, blend, and swirl into the milk, creating a glossy, dark, irresistible river of chocolate. The aroma is heavenly!
Step 3: Stir in the Flavor Boosters
Once the mixture is completely smooth with no lumps, take the pan off the heat. The residual heat is enough for the next step. Stir in the vanilla extract. That splash of vanilla wakes up all the chocolate flavor. Then, if you’re using them, fold in the chopped pecans. Listen to that satisfying crunch as you stir them through the warm, velvety fudge. They add a wonderful texture and a buttery taste that pairs perfectly with the sweet chocolate.
Step 4: Spread and Smooth
Working quickly, pour the warm fudge mixture into your prepared pan. Use your spatula to spread it into an even layer, pushing it gently into the corners. You can give the pan a few gentle taps on the counter to help settle the fudge and remove any air bubbles. Aim for a nice, smooth top—it makes for prettier squares later. It should look like a perfect, shiny chocolate pond.
Step 5: The Hardest Part—Letting it Set!
Here is where patience comes in. You can let the pan sit at room temperature for about 2 hours until firm. If you’re in a hurry (I usually am!), pop it into the refrigerator. It will set up in about 1 hour. The fridge gives it a slightly firmer bite, which I love. You’ll know it’s ready when you can gently press the top and it feels firm and doesn’t give way.
Step 6: Slice and Celebrate!
Time for the grand finale! Use the parchment paper handles to lift the entire block of fudge out of the pan and onto a cutting board. Peel the paper away from the sides. Using a sharp knife, cut the fudge into squares. For clean cuts, you can run the knife under hot water and wipe it dry between slices. Arrange your beautiful Ultimate Chocolate Squares on a plate and get ready for the compliments to roll in.
Time Breakdown for Your Easy Fudge Recipe
This is why I call it a lifesaver!
- Prep Time: 5 minutes (really!)
- Setting Time: 1-2 hours
- Total Time: About 1 hour 5 minutes (with fridge setting)
- Servings: Makes about 16 generous squares
Chef’s Secret for the Best Texture
My one secret trick? A tiny pinch of flaky sea salt sprinkled over the top right after you spread the fudge in the pan. Don’t stir it in. Let it sit on top. The salt crystals won’t fully melt. They give you little bursts of salty flavor that make the chocolate taste even deeper and more complex. It’s a simple trick that takes your fudge from great to “Oh my goodness, what did you put in this?”
A Fun Fudge Fact
Did you know the first known sale of fudge in the U.S. was at a Baltimore grocery store for 40 cents a pound? That was back in 1886. I think those shoppers would have gone crazy for this easy microwave version. It’s amazing how a simple treat can connect us through time!
Necessary Equipment
You likely have everything already:
- 8×8 inch baking dish
- Parchment paper
- Medium saucepan
- Wooden spoon or silicone spatula
- Measuring cups
- Sharp knife for cutting
How to Store Your Homemade Fudge
Store your fudge squares in an airtight container. You can layer them with parchment paper in between if you’re stacking them. They will keep beautifully at room temperature in a cool spot for about 1 week.
If your kitchen is warm, or if you prefer a firmer fudge, store the container in the refrigerator. They will last for up to 2 weeks there. The cold makes the fudge delightfully chewy.
Yes, you can freeze fudge! Wrap the whole block or individual squares tightly in plastic wrap, then place them in a freezer bag. They will keep for up to 3 months. Thaw overnight in the fridge or for an hour at room temperature.
Tips and Advice for Fudge Success
- Low Heat is Key: Don’t rush the melting process. High heat can cause the chocolate to seize or burn.
- Stir, Stir, Stir: Constant stirring ensures even melting and a perfectly smooth texture.
- Get Creative: This recipe is a blank canvas. Try different chip combinations and mix-ins each time.
- Clean Cuts: A hot, dry knife is the secret to getting those picture-perfect squares without crumbling.
Presentation Ideas for Your Fudge Squares
Make your dessert table shine!
- Place them in mini paper cupcake liners for a festive, party-ready look.
- Stack them on a elegant cake stand for a special occasion.
- For gifts, pack them in a cellophane bag tied with a pretty ribbon.
- Drizzle the tops with a little melted white chocolate for a fancy touch.
Healthier & Fun Variations to Try
Want to mix it up? Here are six delicious twists on the classic chocolate fudge recipe:
- Dark Chocolate Sea Salt: Use all dark chocolate chips and top with flaky sea salt.
- Cookies & Cream: Stir in 1 cup of crushed Oreo cookies after removing from heat.
- Peanut Butter Swirl: Drop spoonfuls of peanut butter on top of the spread fudge and use a knife to swirl it in.
- Christmas Mint: Use 3 cups of Andes mint baking chips instead of chocolate/butterscotch.
- Tropical Twist: Omit nuts and vanilla. Stir in 1/2 cup chopped dried cherries and 1/2 cup shredded coconut.
- Rocky Road: Fold in 1 cup mini marshmallows and 1/2 cup chopped almonds with the nuts.
Common Mistakes to Avoid
Avoid these pitfalls for perfect fudge every single time.
Mistake 1: Using High Heat to Melt the Chocolate
This is the biggest mistake. If your stove is too hot, the chocolate can “seize.” This means it turns into a grainy, stiff mess instead of staying smooth. Always use low heat. Be patient. Let the gentle warmth of the sweetened condensed milk slowly melt the chips while you stir. If things seem to be getting too hot, just lift the pan off the burner for a moment while stirring.
Mistake 2: Not Lining the Pan
Skipping the parchment paper seems like a time-saver, but it isn’t. Trying to dig stubborn fudge out of a bare pan leads to broken squares and a big mess. Taking 30 seconds to line your pan guarantees you can lift out a perfect, intact block of fudge. This makes slicing and serving so much easier and prettier.
Mistake 3: Cutting Before it’s Fully Set
I know it’s tempting to slice into that gorgeous chocolate as soon as it looks firm on top. But if it’s still soft inside, your knife will drag and make messy, squished squares. Let it set for the full time, either at room temp or in the fridge. A properly set fudge will cut cleanly and hold its beautiful shape.
Mistake 4: Using Old or Improper Chips
Baking chips are formulated to melt smoothly. Using chocolate bars meant for eating or chocolate that’s been in your pantry for years can lead to poor texture. Always use fresh, good-quality chocolate or butterscotch chips for the best results. Check the expiration date on that bag in the back of the cupboard!
Frequently Asked Questions
Can I make this fudge in the microwave?
Absolutely! This is my preferred method for ultimate ease. Combine the sweetened condensed milk and chips in a large microwave-safe bowl. Heat on high for 1 minute. Stir well. Then heat in 30-second intervals, stirring after each, until completely smooth and melted. It usually takes 1.5 to 2 minutes total. Then proceed with the recipe as written.
Why is my fudge too soft or greasy?
If your fudge is too soft, it may not have set long enough. Pop it back in the fridge. A greasy texture can happen if the chocolate got too hot during melting, causing the cocoa butter to separate. Always use low, gentle heat and stir constantly to keep everything blended beautifully.
Can I double this recipe?
Yes, you can easily double it. Use a 9×13 inch baking pan instead of the 8×8. All the other steps are exactly the same. A double batch is perfect for big holiday parties or when you need lots of gifts.
What can I use instead of butterscotch chips?
If you’re not a fan of butterscotch, don’t worry. You can use an extra cup of chocolate chips (for a total of 3 cups). Peanut butter chips are a fantastic alternative. White chocolate chips also work wonderfully and create a beautiful swirled look when mixed with the dark chocolate.
How do I get my fudge super creamy?
The key to creamy fudge is in the melting. Don’t let the mixture boil or simmer. You just want it hot enough to melt the chips. Stirring constantly also incorporates air and ensures no part gets overheated. Using name-brand chocolate chips often gives a more reliable creamy result.
Can I make this without nuts?
Of course! Simply leave them out. The fudge will be just as delicious and wonderfully smooth. You can also replace nuts with other crunchy mix-ins like pretzel pieces, toasted coconut, or even crispy rice cereal for a different texture.
How long does homemade fudge last?
Stored properly in an airtight container, your fudge will stay fresh and tasty for about 1-2 weeks at room temperature, or 2 weeks in the fridge. Because it’s so good, it rarely lasts that long in my house!
Is this the same as traditional cooked fudge?
It’s very similar in taste and texture, but the process is much simpler. Traditional fudge requires cooking sugar, butter, and milk to a specific temperature. This recipe uses sweetened condensed milk as a shortcut, eliminating the need for a candy thermometer and precise temperature control.
My fudge is grainy. What went wrong?
Graininess usually means the sugar has crystallized. This can happen if you stirred too vigorously once the mixture was very hot, or if a sugar crystal from the side of the pan fell in. To avoid this, stir gently but constantly with a clean spoon or spatula from the start of melting.
Can I add liquor to this fudge?
You can add a tablespoon of your favorite liquor, like bourbon, rum, or Irish cream, for an adult twist. Add it with the vanilla extract. Be aware that adding too much liquid can affect the setting ability, so stick to about 1 tablespoon.
Your New Go-To Dessert
And there you have it! Paula Deen’s 5-minute fudge, or as I like to call them, my Ultimate Chocolate Squares, are truly a kitchen miracle. They prove that you don’t need fancy skills or all day to make something incredibly special and delicious. Whether you’re gifting them, sharing them, or just keeping them all for yourself (no judgment here!), this easy fudge recipe is one you’ll come back to again and again. So go ahead, grab that can of sweetened condensed milk, and whip up some happiness. You deserve it!
Ultimate Chocolate Squares
Ingredients
Equipment
Method
- Prep your 8x8-inch baking dish by lining it with parchment paper and spritzing with cooking spray.
- In a medium saucepan, combine the sweetened condensed milk, chocolate chips, and butterscotch chips over low heat.
- Stir constantly until the mixture is completely smooth and melted.
- Remove the pan from heat and stir in the vanilla extract and chopped pecans if using.
- Pour the fudge mixture into the prepared pan and spread it evenly.
- Let the fudge set at room temperature for about 2 hours, or refrigerate for about 1 hour.
- Once set, lift the fudge out of the pan using the parchment paper and slice into squares.