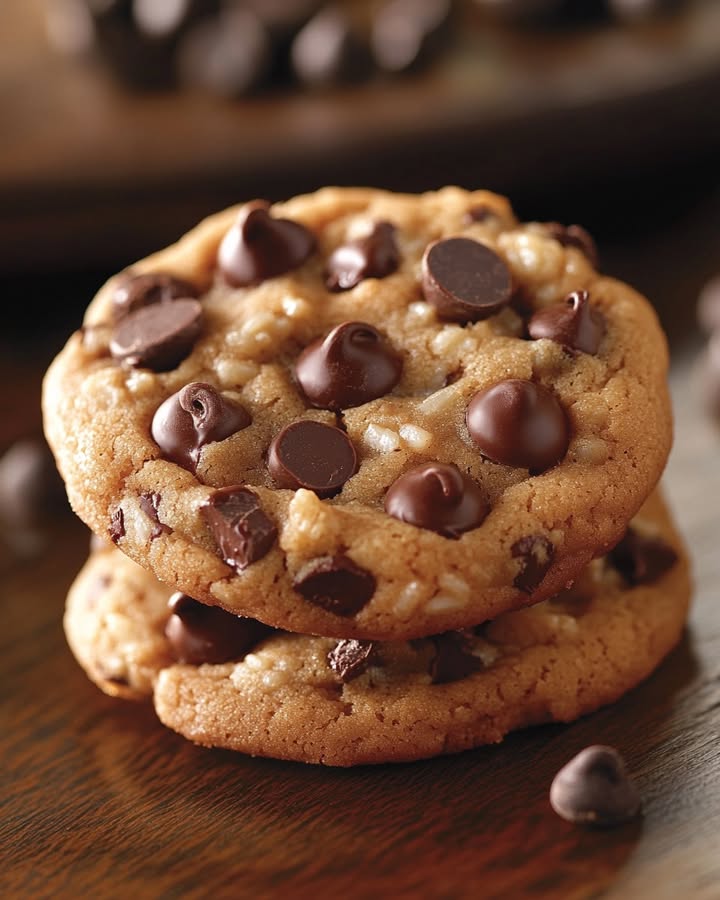
The Ultimate Heavenly Rice Krispie Chocolate Chip Cookies
You know that moment when you take a bite of a cookie and it’s so good you just have to close your eyes? That’s what I was chasing in my kitchen last Tuesday. I wanted the chewy comfort of a chocolate chip cookie but with a little extra magic. So I grabbed a classic recipe and did the unthinkable. I tossed in a big handful of Rice Krispies. Friends, let me tell you, the first batch vanished before they even cooled. These Heavenly Rice Krispie Chocolate Chip Cookies are a game of texture and taste you absolutely need in your life.
A Cookie Born from Happy Accident
Every family recipe box has that one “oops” that turned into a legend. For me, this is it. I was making my go-to chocolate chippers for a school bake sale, and my son knocked over a box of Rice Krispies right next to my mixing bowl. Instead of getting mad, I was curious. What if we mixed them in? The result was a revelation. The traditional soft cookie got this incredible, delicate crunch. It’s like the cookie is whispering sweet nothings of crispy, airy cereal with every bite. It’s a modern twist on two American classics—the chocolate chip cookie and the no-bake Rice Krispie treat—all rolled into one perfect, bakeable delight.
Why You’ll Fall Head Over Heels for This Recipe
If you need a reason beyond “they are ridiculously delicious,” I have a few. First, the texture is everything. You get chewy centers, crispy edges, and that light, crackly crunch from the cereal. Second, they are impossibly easy. No chilling the dough, no fancy techniques. Third, they are a total crowd-pleaser. Kids go wild for the familiar cereal, and adults appreciate the sophisticated texture. It’s the cookie that bridges generations and satisfies every sweet tooth at the table.
Perfect Occasions for These Heavenly Cookies
These cookies are your new best friend for any gathering. They are sturdy enough for a lunchbox but special enough for a party. Bring them to a potluck and watch them disappear first. Pack them for a picnic—they travel like a dream. They are the ultimate after-school snack that makes you “Mom of the Year.” Seriously, bake a batch for a book club, a birthday, or just a Tuesday. Any day is better with a Heavenly Rice Krispie Chocolate Chip Cookie.
Gathering Your Ingredients
Here’s what you’ll need to make about 24 glorious cookies:
- 1 cup butter, softened to room temperature – This is key for a fluffy dough.
- 1 cup brown sugar – For that deep, molasses-like moisture.
- 1/2 cup granulated sugar – Adds just the right sweetness and spread.
- 2 large eggs – Your binding agents, bringing it all together.
- 1 tsp vanilla extract – The flavor booster.
- 2 cups all-purpose flour – The foundation of our cookie.
- 1 tsp baking soda – Our leavening agent for the perfect rise.
- 1/2 tsp salt – Balances all that sweetness beautifully.
- 1 cup chocolate chips – I use semi-sweet, but milk chocolate works too!
- 2 cups Rice Krispies cereal – The star of the show for that heavenly crunch.
Handy Substitution Options
Out of something? Don’t worry, here are some easy swaps:
- Butter: You can use salted butter; just omit the extra 1/2 tsp salt from the recipe.
- Sugar: You can use all brown sugar for a chewier, more caramel-like cookie.
- Chocolate Chips: Try M&Ms, chopped dark chocolate, or even white chocolate chips for a change.
- Gluten-Free: Use a 1-to-1 gluten-free flour blend and ensure your Rice Krispies are a gluten-free version.
- Add-Ins: Feel free to add 1/2 cup of chopped nuts like pecans or walnuts for extra crunch.
Baking Your Way to Heaven: Step-by-Step
Step 1: Preheat and Prep
Start by turning your oven on to 350°F (175°C). This gives it plenty of time to reach the perfect temperature. Grab your baking sheets and line them with parchment paper. Trust me, this little step is a lifesaver. It prevents sticking and makes cleanup an absolute breeze. There’s nothing worse than losing a piece of your beautiful cookie to a sticky pan.
Step 2: Cream the Butter and Sugars
In a large mixing bowl, add your softened butter, brown sugar, and granulated sugar. Using a hand mixer or stand mixer, beat them together on medium speed. Watch as the mixture transforms from grainy to light, fluffy, and pale. This takes about 2-3 minutes. You’re incorporating air, which is the secret to a cookie with a wonderful texture. Pro tip: Your butter is perfectly softened when you can gently press your finger into it and leave a clear indent without it being melted or greasy.
Step 3: Incorporate Eggs and Vanilla
Now, add your eggs and that precious teaspoon of vanilla extract to the fluffy butter mixture. Mix on medium-low until everything is fully combined. The mixture might look a little curdled at first, but just keep mixing. It will become smooth, creamy, and beautifully fragrant. The vanilla scent will start to fill your kitchen, signaling that something delicious is underway.
Step 4: Combine the Dry Ingredients
In a separate bowl, whisk together your flour, baking soda, and salt. This sifting step isn’t just busywork. It ensures the baking soda and salt are evenly distributed, so every bite is consistent. Gradually add this dry mixture to your wet ingredients, mixing on low speed just until no white streaks remain. Be careful not to overmix here, as that can lead to tough cookies.
Step 5: The Grand Finale Fold-In
This is the fun part! Take your cup of chocolate chips and your two cups of Rice Krispies cereal. Dump them right into the dough. Now, put the mixer away. Use a sturdy spatula or wooden spoon to gently fold these ingredients in. You’ll hear the gentle rustle and crackle of the cereal. Fold just until everything is evenly distributed. You want every scoop to be loaded with both chocolate and crispy bits.
Step 6: Scoop and Space
Using a cookie scoop or a tablespoon, drop rounded balls of dough onto your prepared baking sheets. Give each one about 2 inches of breathing room. They need space to spread out and become perfect cookie puddles of joy. If you love a thinner, crispier cookie, you can gently press the dough balls down slightly with your palm or the bottom of a glass. Chef’s tip: For perfectly uniform cookies that all bake evenly, a medium cookie scoop (about 1.5 tablespoons) is your best friend.
Step 7: Bake to Golden Perfection
Slide your cookie sheets into the preheated oven. Bake for 10-12 minutes. You’re looking for golden brown edges while the centers might still look a little soft. That’s perfect! They will continue to cook on the hot sheet. Pull them out and let them cool right on the baking sheet for a full 5 minutes. This rest period is crucial—it lets them set up so they don’t fall apart when you move them. Then, transfer them to a wire rack to cool completely.
Your Recipe Timing Breakdown
This recipe is wonderfully quick from craving to eating!
- Prep Time: 10 minutes
- Cooking Time: 12 minutes per batch
- Cooling Time: 15 minutes
- Total Time (for first batch): About 37 minutes
- Servings: Makes about 24 delicious cookies
Chef’s Secret for the Best Cookies
My biggest secret? Underbake them, just a little. When you pull the cookies out, the centers should look slightly underdone. They will finish cooking on the hot baking sheet outside the oven. This guarantees a chewy, soft center contrasted with those glorious crispy edges and the Rice Krispie crunch. It’s the holy grail of cookie textures.
A Little Cookie Lore
Did you know the chocolate chip cookie itself was invented by accident? In 1938, Ruth Wakefield ran out of baker’s chocolate for her cookies and chopped up a Nestlé semi-sweet chocolate bar, expecting it to melt. It didn’t, and an icon was born. I like to think my little Rice Krispie addition is a happy accident in that same spirit of kitchen creativity!
Equipment You’ll Need
You don’t need any fancy gear. Just gather:
- Large mixing bowl
- Medium bowl for dry ingredients
- Hand mixer or stand mixer
- Measuring cups and spoons
- Rubber spatula or wooden spoon
- Baking sheets
- Parchment paper or silicone baking mats
- Cookie scoop (optional but helpful)
- Wire cooling rack
Storing Your Heavenly Creations
If, by some miracle, you have cookies left over, storing them correctly is key. First, make sure they are completely cooled to room temperature. Any residual warmth will create steam in a closed container and turn your crispy treats soggy.
Once cool, place them in an airtight container. A cookie tin or a tupperware with a tight-sealing lid works perfectly. You can layer them with sheets of parchment paper in between. Stored this way at room temperature, they will stay fresh and delicious for up to a week.
For longer storage, these cookies freeze beautifully. Place them in a single layer in a freezer bag or airtight container, separating layers with parchment. They can be frozen for up to 3 months. Thaw at room temperature for an hour, or pop a frozen one in the microwave for 10 seconds for a warm, gooey treat.
Tips and Advice for Cookie Success
- For consistently sized cookies, use a scoop. It also makes the process faster and cleaner.
- If your dough seems too soft after mixing, you can chill it for 15-20 minutes. This helps prevent over-spreading.
- Rotate your baking sheets halfway through baking if your oven has hot spots for even browning.
- Use fresh baking soda. If it’s old, your cookies won’t rise properly.
Presentation Tips for Wow Factor
- Stack them on a cute cake stand for a party.
- Drizzle melted white chocolate over the cooled cookies for a fancy look.
- Pack them in a cellophane bag tied with a ribbon for a lovely homemade gift.
- Serve them warm with a small scoop of vanilla ice cream for an epic sundae.
Healthier Alternative Recipe Variations
Want to mix it up? Here are six fun twists on the classic:
- Oatmeal Rice Krispie Cookies: Substitute 1 cup of the flour with 1 cup of old-fashioned rolled oats. You get a heartier, chewier cookie with all the crunch.
- Peanut Butter Chocolate Crunch: Reduce the butter to 3/4 cup and add 1/4 cup of creamy peanut butter with the wet ingredients. A dream for PB lovers.
- Double Chocolate Rice Krispie Cookies: Add 1/2 cup of cocoa powder to the dry ingredients and use dark chocolate chips for an intense chocolate experience.
- Funfetti Celebration Cookies: Omit the chocolate chips and fold in 1/2 cup of rainbow sprinkles along with the Rice Krispies. Perfect for birthdays!
- Coconut Almond Delight: Fold in 1/2 cup of toasted shredded coconut and 1/2 cup of sliced almonds with the cereal. It adds wonderful flavor and texture.
- Salty-Sweet Pretzel Cookies: Add 1/2 cup of crushed pretzel pieces with the chocolate chips. The salty punch with the sweet cookie is incredible.
Common Mistakes to Avoid
Mistake 1: Using Melted or Cold Butter
Butter temperature is everything in cookies. Cold butter won’t cream properly with the sugar, leading to dense cookies. Melted butter will make your cookies spread too thin and become greasy. Always use butter softened to room temperature. It should be cool to the touch but yield easily when pressed. Plan ahead and take it out of the fridge an hour before you start baking.
Mistake 2: Overmixing the Dough After Adding Flour
Once you add the flour, you need to be gentle. Mixing too much develops the gluten in the flour. This can make your cookies tough and cakey instead of tender and chewy. Mix just until you see no more dry flour streaks. Then, when adding the chocolate chips and Rice Krispies, fold them in by hand with a spatula. This protects the delicate cereal from being crushed.
Mistake 3: Overbaking the Cookies
It’s tempting to wait for a cookie that looks completely set in the oven. Resist! Cookies continue to cook on the hot baking sheet after you take them out. Pull them when the edges are golden brown but the centers still look slightly soft and underdone. They will firm up perfectly as they cool. This is the secret to a soft, chewy center.
Mistake 4: Skipping the Parchment Paper
Greasing a pan with butter or spray seems easier, but it can cause the cookies to spread unevenly and the bottoms to brown too much. Parchment paper or a silicone baking mat creates a non-stick surface that promotes even baking and easy removal. It also makes cleanup a simple matter of tossing the paper. It’s a small step with a huge payoff.
Frequently Asked Questions (FAQ)
Can I make the cookie dough ahead of time?
Absolutely! You can prepare the dough, cover the bowl tightly with plastic wrap, and refrigerate it for up to 48 hours. Chilling the dough actually deepens the flavors and can give you a slightly thicker cookie. Just let it sit at room temperature for about 15-20 minutes before scooping if it’s too firm. You can also scoop the dough balls onto a sheet, freeze them solid, then transfer to a freezer bag. Bake frozen dough balls by adding 1-2 extra minutes to the baking time.
Why are my cookies coming out flat?
Flat cookies can happen for a few reasons. The most common culprit is butter that is too soft or even melted. Using a hot baking sheet for multiple batches can also cause the dough to spread too fast. Always let your cookie sheets cool completely between batches, or use cool, fresh sheets. Also, check that your baking soda is fresh and not expired, as it won’t provide the necessary lift if it’s old.
Can I use a different cereal instead of Rice Krispies?
You can experiment, but the result will be different. Rice Krispies are light, airy, and neutral in flavor. Heavier or sweeter cereals like Corn Flakes or Frosted Flakes will add more bulk and sweetness, changing the texture and taste profile. For a similar effect, look for other “crisped rice” cereals. Just know that the classic, delicate crunch of the original comes from the specific texture of Rice Krispies.
My Rice Krispies got soggy in the baked cookie. What did I do wrong?
This usually happens if the cereal is folded into very wet dough or if the baked cookies are stored while still warm. Make sure your dough is properly mixed and not overly wet. More importantly, let the cookies cool completely on a wire rack before putting them in a storage container. Trapped steam is the enemy of crispiness. Storing them properly in an airtight container at room temperature will help maintain their crunch for days.
Can I make these cookies gluten-free?
Yes, you can! Use a reputable 1-to-1 gluten-free all-purpose flour blend in place of the regular flour. Also, you must ensure your Rice Krispies cereal is a certified gluten-free version, as standard Rice Krispies contain malt flavoring derived from barley, which contains gluten. With those two swaps, you’ll have delicious gluten-free Rice Krispie chocolate chip cookies.
What’s the best type of chocolate chip to use?
This is a matter of personal taste! Semi-sweet chocolate chips are the classic choice and provide a perfect balance to the sweet cookie dough. Milk chocolate chips will make a sweeter cookie, while dark chocolate chips offer a richer, less sweet flavor. You can also use chocolate chunks for bigger, gooier pockets of chocolate. I love mixing semi-sweet and dark chips for a complex chocolate flavor.
How do I get my cookies to be soft and chewy, not cakey?
The keys to a chewy cookie are using more brown sugar (which has more moisture), not overmixing the flour, and slightly underbaking as mentioned in the chef’s secret. The brown sugar and the bit of underbaking keep moisture locked in. A cakey texture often comes from using too much flour or overmixing, which incorporates too much air. Measure your flour by spooning it into the cup and leveling it off, don’t scoop directly from the bag.
Can I add nuts or other mix-ins?
Please do! This recipe is wonderfully adaptable. You can add up to 1 1/2 cups total of mix-ins. Try adding 1/2 cup of chopped walnuts, pecans, or even dried cranberries along with the chocolate chips and cereal. Just be mindful that adding too many heavy mix-ins can weigh down the dough and you might get fewer cookies. Fold them in gently at the end.
Why do I need to let the cookies cool on the baking sheet?
This is a critical resting period. When the cookies first come out of the oven, they are very soft and fragile. The hot baking sheet provides residual heat that allows them to finish setting up without overcooking in the oven. Moving them immediately to a rack can cause them to break apart. The 5-minute wait gives them time to firm up just enough to handle the transfer safely.
How can I make my cookies look more professional?
For bakery-style looks, use a cookie scoop for perfect round shapes. Immediately after taking the cookies out of the oven, you can take a round cookie cutter slightly larger than the cookie and swirl it around the edge to “tuck” any uneven edges in for a perfect circle. Also, press a few extra chocolate chips or a sprinkle of cereal onto the top of each dough ball right before baking for a gorgeous, loaded appearance.
The Final, Delicious Word
There you have it—my not-so-secret, utterly heavenly recipe. These Rice Krispie Chocolate Chip Cookies are more than just a dessert. They are a little bit of magic, a whole lot of crunch, and a guaranteed smile-maker. They prove that the best recipes often come from simple, happy accidents in the kitchen. So preheat that oven, grab your mixing bowl, and get ready to make a batch of pure joy. I promise your kitchen will smell amazing, and everyone who gets a cookie will be asking for the recipe. Happy baking!
Loaded Bacon Burger
Ingredients
Equipment
Method
- Preheat the oven to 350°F (175°C) and line baking sheets with parchment paper.
- In a large mixing bowl, cream together softened butter, brown sugar, and granulated sugar until light and fluffy (about 2-3 minutes).
- Add eggs and vanilla extract to the butter mixture and mix until well combined.
- In a separate bowl, whisk together flour, baking soda, and salt, then gradually add to the wet mixture until just combined.
- Fold in chocolate chips and Rice Krispies cereal gently until evenly distributed.
- Using a cookie scoop or tablespoon, drop rounded balls of dough onto prepared baking sheets, spacing them about 2 inches apart.
- Bake for 10-12 minutes until golden brown around the edges and slightly soft in the center. Let cool on the baking sheet for 5 minutes before transferring to a wire rack to cool completely.