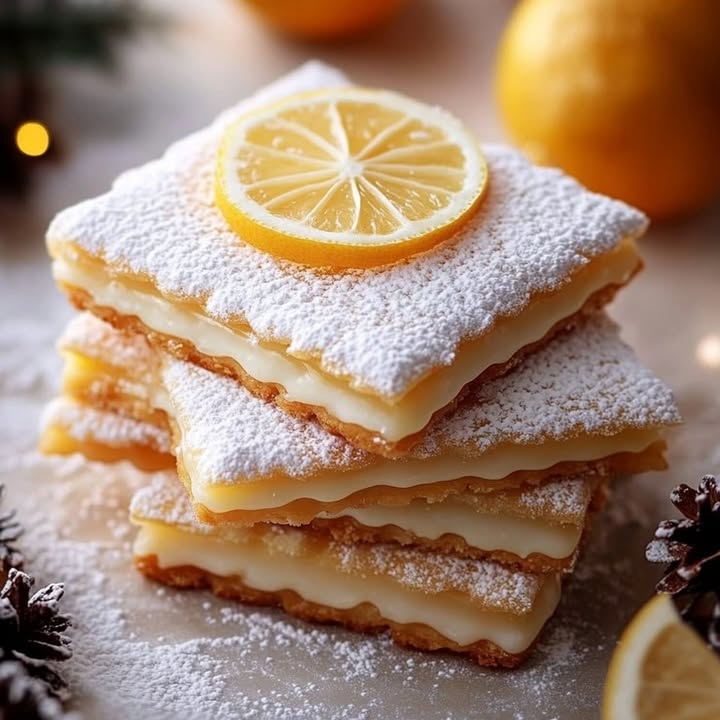

Is there anything that says “holiday magic” more than a plate of homemade Christmas cookies? My grandmother always said the scent of baking was the first decoration to go up in December. Of all the treats we made, these Delicious Lemon Sablés de Noël hold a special place. They’re buttery, zesty, and melt-in-your-mouth tender. Making them fills my kitchen with a sunny citrus aroma that somehow feels perfectly festive. It’s my little secret for bringing a burst of sunshine to the wintery holiday table.
A Slice of Buttery History
The word “sablé” means “sandy” in French. It perfectly describes the cookie’s wonderfully crumbly texture. These shortbread-style treats hail from Normandy, a region famous for its gorgeous butter. Traditionally, they are simple and elegant, often flavored with vanilla or a pinch of salt. My twist with fresh lemon zest is a nod to modern tastes. It brightens the rich butteriness in the most delightful way. Today, shaping them with holiday cutters turns a classic French pâtisserie into a joyful Christmas tradition anyone can adopt.
Why You’ll Fall in Love with These Lemon Christmas Cookies
You’ll adore this recipe for so many reasons! First, the flavor is a perfect balance of rich and refreshing. Second, the dough is incredibly forgiving and easy to work with, even for new bakers. They require no fancy piping or tempering. Just mix, roll, cut, and bake! The recipe makes a generous batch, perfect for gifting or feeding a crowd. Finally, that crisp, sandy texture that shatters delicately with each bite is pure cookie heaven. They are elegant enough for a party but simple enough for a cozy Tuesday snack.
Perfect Occasions for These Festive Sablés
These lemon cookies are wonderfully versatile. Here are my favorite times to make them:
- Christmas Cookie Swap: They always stand out on a platter full of chocolate and spices.
- Holiday Gift Giving: Pack them in a cute tin or cellophane bag with a ribbon. A homemade gift from the heart!
- Afternoon Tea or Coffee: They are the perfect companion to a hot drink on a cold day.
- Christmas Eve Dessert: Serve them alongside a slice of bûche de Noël or a scoop of sorbet for a light finish.
- Fun Family Baking Day: Kids love picking out shapes and pressing the cookie cutters.
Gathering Your Ingredients for Delicious Lemon Sablés
Great ingredients make great cookies. Here is your simple shopping list:
- 250g of unsalted butter (softened)
- 100g of powdered sugar (also called icing or confectioners’ sugar)
- 1 large egg (at room temperature)
- 400g of all-purpose flour
- The zest of 2 fresh, unwaxed lemons
- A generous pinch of fine sea salt
Smart Substitution Options
No worries if you’re missing something! You can easily adapt this recipe.
- Butter: Salted butter can be used. Just omit the extra pinch of salt in the recipe.
- Lemon Zest: Try orange zest for a different citrus twist. For a non-citrus version, use 2 teaspoons of pure vanilla extract.
- Gluten-Free: Use a 1:1 gluten-free all-purpose flour blend. The texture might be slightly more delicate.
- Topping: Instead of powdered sugar, try a simple lemon glaze made with powdered sugar and fresh lemon juice.
Crafting Your Delicious Lemon Sablés de Noël
Ready to bake? Let’s create some magic together. Follow these simple steps for perfect cookies every time.
Step 1: Cream the Butter and Sugar
In a large mixing bowl, combine your softened butter and powdered sugar. Use a hand mixer or a sturdy whisk. Beat them together for 2-3 minutes. You want the mixture to become pale, fluffy, and very creamy. This step is crucial. It incorporates air, which gives the sables their lovely light texture. Pro tip: Your butter should be soft enough to leave a fingerprint when pressed, but not melted or greasy.
Step 2: Add the Egg and Lemon Zest
Crack your egg into the bowl. Then, zest your two lemons right over it. You’ll see little golden flecks of zest fall into the creamy mixture. The smell is incredible! Mix everything on medium speed until it is fully combined. The mixture might look a bit curdled at first, but that’s okay. Just keep mixing until it smooths out again. This is where the sunny lemon flavor gets locked in.
Step 3: Bring in the Flour and Salt
Now, add the all-purpose flour and that important pinch of salt to the bowl. Start mixing on a low speed. This prevents a cloud of flour from poofing up all over your kitchen! Mix just until the flour disappears and a soft dough forms. It will come together in a ball and pull away from the sides of the bowl. Don’t overmix here, as that can make the cookies tough.
Chef’s Tip: For an extra-special touch, add a teaspoon of your favorite holiday spice to the flour. A bit of ground cardamom or ginger pairs beautifully with lemon.
Step 4: Let the Dough Chill Out
Turn the dough out onto a piece of plastic wrap. Shape it into a flat disc. Wrap it up tightly. Now, the hard part: patience! Let the dough rest in the fridge for at least 30 minutes. Chilling firms up the butter. This prevents the cookies from spreading too much in the oven. It also makes the dough much easier to roll out neatly.
Step 5: Preheat and Prepare
While the dough chills, preheat your oven to 350°F (180°C). This ensures it’s perfectly hot and ready when you are. Line your baking sheets with parchment paper. This is my secret for no-stick baking and easy cleanup. No greasing required! Get your favorite holiday cookie cutters ready too.
Step 6: Roll and Cut Your Shapes
Lightly flour your work surface and rolling pin. Take out your chilled dough and roll it to about a 1/4-inch thickness. If the dough cracks, it’s too cold. Let it sit for 5 minutes. Then, press your cookie cutters firmly into the dough. Dip the cutters in flour if they start to stick. Carefully transfer the shapes to your prepared baking sheets, leaving a little space between them.
Step 7: Bake to Golden Perfection
Place the baking sheets in your preheated oven. Bake for 10 to 12 minutes. Watch them closely toward the end. They are done when the edges are just barely starting to turn a light golden brown. The centers should still look soft and set, but not colored. They will firm up as they cool. This is the key to a tender, not crunchy, sable.
Step 8: Cool and Add a Festive Touch
Let the cookies cool on the baking sheet for 5 minutes. Then, move them to a wire rack to cool completely. This stops the cooking process. Once they are completely cool, you can dust them with a snowfall of powdered sugar. I use a fine-mesh sieve for a light, even dusting. It makes them look so pretty and festive!
Your Baking Timeline
- Prep Time: 30 minutes (plus chilling)
- Cook Time: 12 minutes per batch
- Chill Time: 30 minutes
- Total Time: About 1 hour and 15 minutes
- Yield: Approximately 30-36 cookies, depending on cutter size
Chef’s Little Secret
For the most vibrant lemon flavor, zest your lemons directly into the butter-sugar mixture. The essential oils in the zest spray into the fats. This captures every bit of that bright, aromatic citrus magic. Don’t zest onto a cutting board first—too much flavor gets left behind!
A Fun Cookie Fact
Did you know the “sablés de Noël” tradition is very strong in France? Bakeries and families make them in all shapes: stars, trees, bells, and even Santas. They are often enjoyed after the “Réveillon,” the big Christmas Eve dinner. Sharing these buttery cookies is a simple, sweet way to celebrate the season’s joy.
Necessary Equipment
You don’t need any fancy tools! Just gather these kitchen basics:
- Large mixing bowl
- Hand mixer or stand mixer (a wooden spoon and strong arm will work too!)
- Measuring cups and spoons or a kitchen scale
- Plastic wrap
- Rolling pin
- Assorted holiday cookie cutters
- Baking sheets
- Parchment paper
- Wire cooling rack
- Fine mesh sieve (for dusting sugar)
Storing Your Delicious Lemon Sablés
These cookies store beautifully. Once they are completely cooled, place them in an airtight container. You can separate layers with parchment paper. They will stay fresh and delicious at room temperature for up to one week.
For longer storage, you can freeze the baked cookies. Put them in a single layer in a freezer-safe container or bag. They will keep for up to 2-3 months. Thaw them at room temperature for an hour before serving.
You can also freeze the dough! Wrap the dough disc tightly in plastic, then in foil. It freezes well for up to 3 months. Thaw it overnight in the fridge before rolling and baking.
Helpful Tips and Advice
- Use real, fresh lemons. Bottled lemon juice or dried zest won’t give the same bright flavor.
- If your dough gets too soft while rolling, pop it back in the fridge for 10 minutes.
- Re-roll the dough scraps only once or twice. Overworking can make the final cookies tough.
- For a shiny finish, you can brush the cookies with an egg wash (1 egg beaten with 1 tbsp water) before baking.
Presentation Ideas to Wow Your Guests
- Stack them in a clear glass jar tied with a red ribbon.
- Arrange different shapes on a vintage cake stand for a centerpiece.
- Package small bundles in cellophane bags as party favors.
- Serve on a platter with other contrasting cookies, like dark chocolate ones.
- Place a few next to a cup of tea or coffee as a welcoming gesture for visitors.
Healthier Alternative Recipes & Fun Variations
Love the idea but want to mix it up? Try one of these six delicious twists on the classic lemon sable.
- Almond-Lemon Sables: Replace 100g of the all-purpose flour with finely ground almond flour. It adds a wonderful nutty richness and makes them even more tender.
- Lavender & Lemon Sables: Add 2 teaspoons of culinary dried lavender to the flour. It creates a beautifully floral and sophisticated cookie perfect for a holiday tea.
- Spiced Citrus Sables: Add 1 teaspoon of ground ginger or cardamom along with the lemon zest. The warm spice and bright citrus are a magical winter combination.
- Chocolate-Dipped Sables: Melt some dark chocolate. Dip half of each cooled cookie in it. Let them set on parchment paper for an elegant and decadent treat.
- Whole Wheat & Honey Sables: Use half whole wheat pastry flour. Substitute the powdered sugar with ¾ cup of mild honey, but reduce the egg to just a yolk. The flavor is deeper and wonderfully rustic.
- Vegan Lemon Sables: Use a high-quality vegan butter stick and a “flax egg” (1 tbsp ground flax mixed with 2.5 tbsp water). The texture will be slightly different but still deliciously crumbly.
Common Mistakes to Avoid
Avoid these easy pitfalls for the best lemon holiday cookies possible.
Mistake 1: Using Cold, Hard Butter
If your butter is straight from the fridge, it won’t cream properly with the sugar. You’ll end up with a dense, greasy dough. Your cookies won’t have that lovely light, sandy texture. Always plan ahead. Take your butter out at least an hour before you start baking. It should be soft and spreadable.
Mistake 2: Skipping the Chill Time
I know waiting is tough! But if you skip chilling the dough, you’ll have a sticky mess on your hands. The cookies will spread way too much in the oven. You’ll lose your pretty shapes. Chilling solidifies the butter so the cookies hold their form. Set a timer for 30 minutes and use that time to clean up or preheat the oven.
Mistake 3: Overbaking the Cookies
Sables are done when they are just set. They should be pale with only the faintest hint of gold on the bottom edges. If you wait for them to brown on top, they are overbaked. They will be hard and dry, not tender and melt-in-your-mouth. Start checking at 10 minutes and pull them out as soon as they look set.
Mistake 4: Measuring Flour Incorrectly
Scooping flour directly from the bag packs it down. You end up with too much flour. This makes the dough dry and crumbly. The cookies will be tough. For best results, spoon the flour lightly into your measuring cup. Then level it off with a knife. For total accuracy, use a kitchen scale.
Mistake 5: Rolling the Dough Too Thin or Thick
Rolling to an uneven thickness leads to uneven baking. Some cookies will burn while others are underdone. Aim for a consistent 1/4-inch thickness. Using rolling pin guides or even two wooden dowels on either side of the dough can help you get it perfect.
Frequently Asked Questions
Can I make the dough ahead of time?
Absolutely! You can prepare the dough, wrap it well, and refrigerate it for up to 3 days before rolling and baking. You can also freeze it for up to 3 months. Just let it thaw in the refrigerator overnight before you plan to use it. This makes holiday prep so much easier. You can bake fresh cookies in minutes when guests arrive.
Why are my cookies tough and not crumbly?
This usually happens from overmixing the dough once the flour is added. Mixing develops gluten, which makes cookies tough. Mix just until the flour disappears and a dough forms. Also, check your flour measurement. Too much flour is a common cause of tough, dry cookies. Using a scale is the most reliable way to get it right.
My dough is too crumbly and won’t hold together. What did I do wrong?
A crumbly dough often needs more moisture. Did you use a large egg? A small egg might not provide enough liquid. Another possibility is you measured too much flour. Try kneading the dough with your hands for a few seconds. The warmth from your hands can help bring it together. If it’s truly dry, add a teaspoon of cold water and mix it in.
Can I use lemon extract instead of fresh zest?
I really don’t recommend it. Fresh lemon zest provides an essential oil that gives a true, bright lemon flavor. Extracts can taste artificial and sometimes bitter. If you’re in a pinch, use a very small amount—about 1/4 teaspoon—and taste the dough. But fresh is always best for these delicate cookies.
How do I prevent the cookies from sticking to the cutter?
Dip the edges of your cookie cutter in flour before each cut. This creates a light barrier. If the dough is sticking, it might be too warm. Pop the cut-out sheet of cookies back in the fridge for 5-10 minutes to firm up. They will then release from the cutter much more cleanly.
What’s the best way to zest a lemon for this recipe?
Use a fine microplane zester. It creates fluffy zest full of oils. Wash and dry your lemon first. Gently rub the lemon against the zester. Only take off the bright yellow outer skin. Stop when you see the white pith underneath. The pith is bitter. The goal is to get just the fragrant, flavorful oils from the skin’s surface.
Can I decorate these with icing?
Of course! A simple royal icing or a glaze made of powdered sugar and lemon juice works beautifully. Let the cookies cool completely first. You can outline and flood with icing, or just drizzle it artfully over the top. Add sprinkles or edible glitter while the icing is still wet for extra holiday sparkle.
Are these cookies suitable for freezing?
Yes, they freeze perfectly. Make sure they are 100% cooled after baking. Place them in a single layer in an airtight, freezer-safe container. Separate layers with parchment paper. They will keep for 2-3 months. Thaw at room temperature. You can dust them with powdered sugar after they have thawed.
What can I do with the leftover lemon juice?
Don’t waste it! You can use it in the glaze for the cookies if you’re making one. Or, mix it into a salad dressing, add it to water or tea, or use it in another recipe like lemon bars or a chicken marinade. Fresh lemon juice is a wonderful ingredient to have on hand.
My cookies puffed up and lost their sharp shape. Why?
This is usually a sign that your dough wasn’t chilled enough before baking. The butter was too soft and melted quickly, causing the cookies to puff and spread. Next time, ensure the dough is firm from its fridge rest. Also, make sure your oven is fully preheated before the tray goes in.
Final Thoughts from My Kitchen to Yours
Baking these Delicious Lemon Sablés de Noël is more than just making cookies. It’s about creating moments. The scent that fills your home, the fun of cutting out shapes, the joy of sharing them… that’s the real holiday magic. This recipe is my gift to you. It’s simple, reliable, and always brings smiles. I hope it becomes a cherished part of your holiday traditions, just like it is in mine. Now, go preheat that oven and get baking. Your kitchen is about to smell amazing!
Baked Honey Salmon
Ingredients
Equipment
Method
- In a large mixing bowl, cream together the butter and powdered sugar until pale and fluffy.
- Add the egg and lemon zest, mixing until fully combined.
- Gradually add the all-purpose flour and salt, mixing until a soft dough forms.
- Shape the dough into a flat disc, wrap it in plastic wrap, and refrigerate for at least 30 minutes.
- Preheat your oven to 350°F (180°C) and line baking sheets with parchment paper.
- Roll the chilled dough to about 1/4-inch thickness and cut out shapes with cookie cutters.
- Place the cut shapes on the prepared baking sheets, leaving space in between.
- Bake for 10 to 12 minutes, or until the edges are lightly golden.
- Cool on the baking sheet for 5 minutes, then transfer to a wire rack to cool completely before dusting with powdered sugar.
Nutrition
Notes
If dough is too soft while rolling, chill for an additional 10 minutes.
You can freeze both the baked cookies and the dough; they stay fresh for weeks.
Experiment with variations like almond or lavender flavors for a unique twist.