Fait Maison et Régal Ta Famille avec Ces Délicieux Biscuits au Beurre
You know that feeling when your home fills with the warm, buttery, and slightly sweet smell of cookies baking? It’s like a hug for your soul. I remember my grandma’s kitchen always smelling like this. Today, I’m sharing that same magic with you. These easy butter biscuits are your ticket to creating happy memories and winning hearts, one simple, crunchy bite at a time.
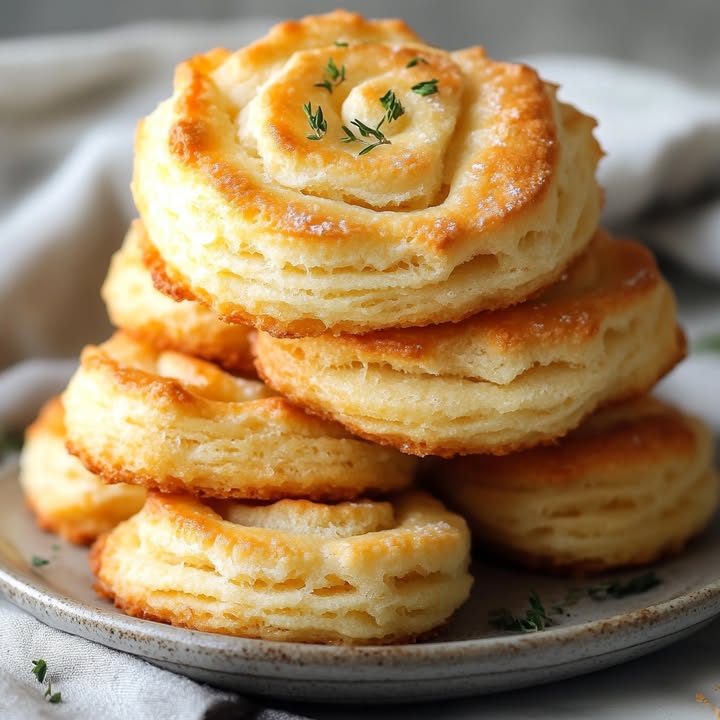
The Simple Joy of Butter Biscuits
Butter biscuits, or “sablés,” are a classic. Their history is humble, born from the need to use simple pantry staples: flour, butter, sugar. In France, they are a tea-time staple. In my home, they are a love language. My version is the modern, foolproof one I’ve perfected over countless batches. It’s faster than traditional methods but loses none of that melt-in-your-mouth charm that makes everyone ask for the recipe.
Why You’ll Absolutely Adore This Recipe
First, it’s incredibly simple. No fancy tools needed. Second, the dough is forgiving – perfect for little helping hands in the kitchen. Third, the flavor is pure comfort: rich butter, a hint of vanilla, and a delightful crunch. These cookies are like edible sunshine. They are the treat you can whip up when surprise guests call or when you just need a little moment of sweet, homemade joy.
Perfect Occasions for These Homemade Treats
- Family Movie Night: Serve a plate instead of store-bought snacks.
- Lunchbox Surprise: Tuck a few in a lunchbox for a sweet note from home.
- After-School Snack: Have them ready when the kids burst through the door.
- Weekend Baking Project: A fun and easy activity to do with children.
- Thoughtful Gift: Package them prettily in a jar or box – homemade gifts are the best!
Gathering Your Ingredients
Here is your simple shopping list for buttery bliss:
- 250 g all-purpose flour
- 125 g unsalted butter, softened
- 100 g granulated sugar
- 1 sachet (about 1 tbsp) vanilla sugar or 1 tsp vanilla extract
- 1 large egg
- 1 pinch of fine salt
- 1/2 sachet (about 1 tsp) baking powder
No Problem! Handy Substitution Options
Out of something? Don’t worry, here are some easy swaps:
- Butter: You can use salted butter. Just omit the pinch of salt in the recipe.
- Vanilla Sugar: Replace with regular sugar plus 1 teaspoon of pure vanilla extract.
- All-purpose flour: For a slightly denser texture, you can use cake flour.
- Sugar: Light brown sugar can be used for a hint of caramel flavor.
Let’s Make Some Magic: Step-by-Step Instructions
Step 1: Preheat and Prepare
Start by preheating your oven to 180°C (350°F). This gives it plenty of time to reach the perfect temperature. Line a baking sheet with parchment paper. There’s no need to grease it – the butter in the cookies will do that job! This little step is a lifesaver for easy cleanup.
Step 2: Cream the Butter and Sugar
Take your softened butter and sugar. Put them in a large mixing bowl. Use a wooden spoon or an electric hand mixer. Beat them together until the mix turns pale, fluffy, and creamy. You’ll see the color lighten beautifully. This step is key for a light cookie texture. Pro tip: Your butter should be soft but not melted. Press it with your finger – it should leave an indent easily.
Step 3: Add the Egg and Vanilla
Crack in the egg and add your vanilla sugar or extract. Mix again until everything is perfectly combined. The mixture might look a little curdled at first, but keep mixing. It will become smooth and homogenous. That gorgeous vanilla aroma will start to fill your kitchen. It’s the smell of good things to come!
Step 4: Bring in the Dry Ingredients
Sift your flour, baking powder, and salt right into the wet mixture. This prevents lumps and ensures an even rise. Now, use a gentle hand. Fold everything together with a spatula. Stop as soon as you no longer see streaks of flour. You want a soft, pliable dough that holds together. Overmixing can make tough cookies.
Step 5: Shape Your Cookies
Time to get your hands a little dusty! Take small portions of dough, about a heaping teaspoon each. Roll them gently between your palms to form smooth balls. Place them on your prepared baking sheet. Leave about 2 inches between each. They will spread a little as they bake. This is also the fun part where kids can help.
Step 6: Bake to Golden Perfection
Slide the tray into your preheated oven. Bake for 12 to 15 minutes. Watch them carefully. You want the edges to be a light, golden brown, while the centers might still look a tiny bit soft. They firm up as they cool. This is the secret to a crisp edge and a tender middle. Pro tip: Ovens vary, so check at the 10-minute mark.
Step 7: The Crucial Cool Down
Once out of the oven, let the cookies sit on the hot tray for 5 minutes. They are too fragile to move right away. Then, use a spatula to transfer them to a wire rack. Let them cool completely. This final step allows them to crisp up properly. I know it’s hard to wait, but trust me, it makes all the difference!
Chef’s Tip: The Chill Factor
For an even better shape and texture, try this: after shaping the dough balls, pop the whole baking sheet into the fridge for 15-20 minutes before baking. This chills the butter, which helps the cookies keep their lovely round shape and prevents excessive spreading.
Your Time Investment
This recipe is wonderfully quick. You’ll spend about 15 minutes on preparation and another 15 minutes on baking. The cooling time adds about 30 minutes. So, in just over an hour total, you’ll have a batch of homemade goodness ready to enjoy.
A Little Secret for Extra Flavor
Want to make them next-level? Add the zest of one lemon or orange to the sugar in Step 2. Rub the zest into the sugar with your fingers before creaming it with the butter. This releases the citrus oils and infuses the whole batch with a bright, fragrant note that pairs wonderfully with the butter.
Fun Fact: The Humble Butter Cookie
Butter cookies are a global star! In Denmark, they are “småkager.” In Scotland, “shortbread.” The high butter content is what gives them that tender, crumbly texture known as “short” in baking terms. My recipe adds a touch of baking powder for a slight lift, making them a delightful hybrid of a classic sable and an American-style cookie.
What You’ll Need in Your Kitchen
- Large mixing bowl
- Wooden spoon or electric hand mixer
- Measuring cups and spoons or a kitchen scale
- Baking sheet
- Parchment paper
- Spatula
- Wire cooling rack
Keeping Your Cookies Fresh
Once completely cool, store your butter biscuits in an airtight container. A cookie tin or a glass jar with a tight seal works perfectly. Place a sheet of parchment paper between layers if you stack them. At room temperature, they will stay fresh and crisp for up to 5 days.
If you want to keep them longer, you can freeze the baked cookies. Make sure they are in a single layer in a freezer-safe bag or container. They can be frozen for up to 2 months. Thaw them at room temperature for an hour before serving.
You can also freeze the unbaked dough balls! Arrange them on a tray, freeze until solid, then transfer to a bag. Bake directly from frozen, adding 1-2 extra minutes to the baking time. This means fresh, warm cookies anytime the craving strikes.
My Best Tips and Advice
- Always use good quality butter. It’s the star of the show, so its flavor matters.
- Weigh your flour if possible. Cup measurements can vary, and too much flour makes dry cookies.
- Don’t skip the salt! It balances the sweetness and enhances all the other flavors.
- If your dough feels too sticky to roll, wrap it and chill it in the fridge for 20 minutes.
- For uniform cookies, use a small ice cream scoop or a tablespoon measure.
Pretty Presentation Ideas
- Dust cooled cookies with a light shower of powdered sugar.
- Drizzle with melted chocolate or a simple vanilla glaze.
- Serve on a vintage cake stand for a charming afternoon tea.
- Pack them in a cellophane bag tied with a ribbon for a lovely homemade gift.
- Pair with a cup of cold milk, hot tea, or coffee for the perfect snack.
Healthier Twist? Try These Variations!
Want to mix it up? Here are six delicious twists on the classic:
- Whole Wheat Honey Biscuits: Swap half the all-purpose flour for whole wheat flour and replace the sugar with honey. They have a lovely nutty, wholesome taste.
- Lemon Poppy Seed Delights: Add the zest of two lemons and two tablespoons of poppy seeds to the dry ingredients. Refreshing and crunchy!
- Almond Butter Crisps: Replace half the butter with almond butter. Add 1/2 teaspoon of almond extract. You get a rich, nutty flavor that’s incredible.
- Oatmeal Spice Cookies: Reduce flour to 200g and add 50g of quick oats. Mix in a teaspoon of cinnamon and a pinch of nutmeg. Hearty and fragrant.
- Chocolate Chip Butter Biscuits: Fold in 100g of mini chocolate chips after combining the dry and wet ingredients. A classic combo everyone loves.
- Gluten-Free Version: Use a 1-to-1 gluten-free flour blend. Ensure your baking powder is gluten-free. The texture will be slightly more delicate but just as tasty.
Common Mistakes to Avoid
Mistake 1: Using Butter Straight from the Fridge
If your butter is too cold and hard, you can’t cream it properly with the sugar. This results in a dense, flat cookie. Your butter should be softened. Leave it on the counter for about 30-60 minutes before you start. It should yield easily to gentle pressure but not be oily or melted.
Mistake 2: Overmixing the Dough
Once you add the flour, mixing too much develops gluten. Gluten makes cookies tough and chewy instead of tender and crumbly. Mix only until you see no more dry flour streaks. It’s okay if the dough looks a bit shaggy. It will come together as you roll the balls.
Mistake 3: Overbaking the Cookies
These cookies continue to cook on the hot tray after you take them out of the oven. If you wait for them to look completely firm and golden all over in the oven, they will be overdone and hard once cooled. Take them out when the edges are lightly golden but the centers still look soft and slightly underdone.
Mistake 4: Not Letting Them Cool on the Tray
Moving cookies immediately from the baking sheet to a rack can cause them to break. They are very soft and fragile when hot. Let them rest on the sheet for 5 minutes. This allows them to set and firm up just enough to handle the move without falling apart.
Frequently Asked Questions
Can I make the dough ahead of time?
Absolutely! You can prepare the dough, wrap it tightly in plastic wrap, and keep it in the fridge for up to 3 days. Let it soften a bit at room temperature before rolling into balls. You can also freeze the dough log or balls for up to 3 months. This makes spontaneous cookie baking a breeze!
Why are my cookies flat and spread out too much?
This usually happens if the butter was too warm or melted when you creamed it, or if your baking sheet was still warm from a previous batch. Always use cool baking sheets. Also, try chilling the shaped dough balls for 15 minutes before baking. This solidifies the butter, so the cookies hold their shape better in the oven’s heat.
Can I use margarine instead of butter?
You can, but I don’t recommend it. Butter gives the cookies their signature rich flavor and tender texture. Margarine often contains more water and less fat, which can change the texture and taste. For the best, most delicious results, real butter is always the winner.
My dough is too sticky to handle. What do I do?
Don’t add more flour right away! Adding too much flour makes cookies dry. Instead, wrap the sticky dough in plastic and chill it in the refrigerator for 20-30 minutes. The butter will firm up, making the dough much easier to roll and shape without sticking to your hands.
How do I know exactly when the cookies are done?
Look for visual cues, not just the timer. The edges should be set and have a light golden-brown color. The tops may no longer look wet or shiny. The centers will still feel soft if you gently touch them, but they shouldn’t look raw. They will firm up perfectly during the cooling period.
Can I add nuts or dried fruit to this recipe?
Yes, of course! This is a great base recipe. You can fold in up to 100g of mix-ins after combining the dry and wet ingredients. Chopped pecans, walnuts, or almonds add crunch. Dried cranberries, raisins, or chopped apricots add a chewy, sweet touch. Just make sure any add-ins are dry and not too large.
What’s the difference between these and American chocolate chip cookies?
These French-style butter biscuits are more delicate and crumbly, like a shortbread. They rely on the pure flavor of butter, sugar, and vanilla. American chocolate chip cookies are typically chewier, thicker, and feature chocolate chips. Both are delicious, but they offer different textures and eating experiences.
Can I make these cookies without an electric mixer?
Definitely! I often make them by hand. Use a wooden spoon and some elbow grease to cream the butter and sugar. It’s a great workout and feels very traditional. Just make sure your butter is properly softened to make the job easier. It works perfectly well.
How can I make the cookies softer?
For a softer, more cake-like texture, reduce the baking time by 1-2 minutes. Take them out when they are just starting to color at the edges. Also, you can replace 25g of the sugar with brown sugar. Brown sugar retains more moisture, which helps keep the cookies softer for longer.
Are these cookies suitable for freezing?
They freeze beautifully. Once the baked cookies are completely cool, store them in a freezer-safe container with layers separated by parchment paper. Freeze for up to 2 months. Thaw at room temperature. You can also freeze the unbaked dough balls and bake them directly from frozen, adding a couple of minutes to the bake time.
Go Bake a Batch of Happiness
And there you have it. Your guide to making the simplest, most satisfying butter biscuits right at home. This recipe is more than just instructions; it’s an invitation to create a moment of pure, buttery joy. The process is relaxing, the smell is heavenly, and the result is always met with smiles. So, tie on your apron, preheat that oven, and get ready to fill your kitchen with love and the incredible aroma of fait maison goodness. Don’t forget to share them – and this recipe – with someone you love. Happy baking!
Pumpkin Pecan Cheesecake
Ingredients
Equipment
Method
- Preheat your oven to 180°C (350°F) and line a baking sheet with parchment paper.
- Cream the softened butter and sugar together in a large mixing bowl until pale and fluffy.
- Add in the egg and vanilla, mixing until well combined.
- Sift the flour, baking powder, and salt into the wet mixture and fold gently until combined.
- Take small portions of dough, shape into balls, and place them on the prepared baking sheet.
- Bake in the preheated oven for 12-15 minutes until the edges are lightly golden.
- Allow cookies to cool on the baking tray for 5 minutes, then transfer to a wire rack to cool completely.