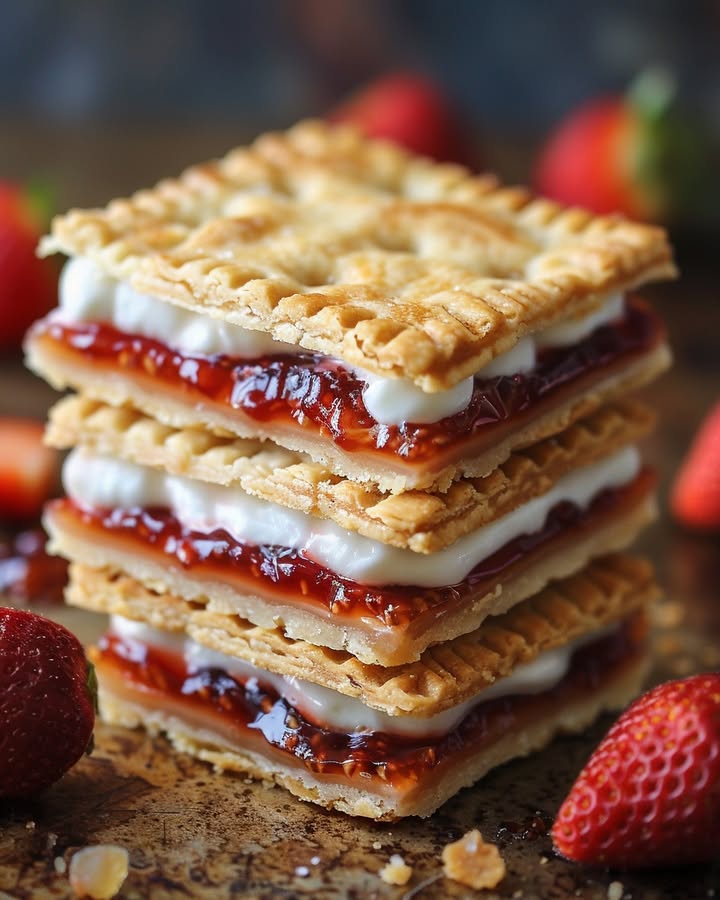
Better Than the Box: Easy Homemade Pop Tarts
Remember Saturday mornings as a kid? The best part was often that sweet, toaster-tart from a foil pouch. I do. And let me tell you, making them from scratch is a game I wish I’d started sooner. The smell of buttery crust and warm jam filling your kitchen? It beats any cartoon! My own kids now crowd the counter, fighting over who gets to crimp the edges with a fork. These homemade pop tarts with pie crust are our little weekend tradition. They’re surprisingly simple, endlessly customizable, and taste like pure, happy nostalgia.
A Brief, Sugary History of Pop Tarts
Pop Tarts hit grocery shelves back in 1964, a space-age invention meant for the toaster. They were an instant hit for their convenience. My version, however, takes a trip back even further—to the good old-fashioned hand pie. Think of it as a jam turnover’s fun, rectangular cousin. By using a classic pie crust, we’re blending modern convenience with timeless, from-scratch baking. It’s a beautiful mash-up of pastry history, and you get to be the chef!
Why You’ll Fall in Love With This Recipe
You’ll love this recipe because it’s foolproof fun. First, the flavor is incredible—real fruit jam bursting through a flaky, golden crust. Second, it’s a fantastic project to do with little helpers. They can spoon jam and poke fork holes. Third, you control everything. No mystery ingredients, just pure, delicious components. Plus, the icing? It’s a sparkly, sweet blanket that makes everything better. Trust me, one bite and you’ll never look at the boxed version the same way again.
Perfect Times to Whip Up a Batch
- Weekend Breakfast Surprise: Turn an ordinary Saturday into something special.
- Playdate or Sleepover Treat: Kids go crazy for them, and parents will ask for the recipe.
- Bake Sale Star: Wrap them in cute parchment paper bags—they’ll sell out first.
- Fun Family Activity: A rainy day project that ends with a delicious reward.
- Thoughtful Gift: A small box of homemade pop tarts says “I care” in the sweetest way.
Gathering Your Homemade Pop Tart Ingredients
This list is short and sweet, just like the treats you’re about to make. I bet you have most of it already!
- 1 package rolled pie crust (7.5 oz pack), or homemade crust if you’re feeling fancy
- 1 cup plus 2 tablespoons jam or preserves (your choice! Strawberry, raspberry, apricot—all work)
- 1 large egg (for that beautiful golden shine)
- For the Icing:
- 1 cup powdered sugar
- 2-3 tablespoons milk or cream
- 2 tablespoons jam (same flavor as the filling)
- 1/2 teaspoon vanilla extract
No-Stress Ingredient Substitutions
Don’t worry if you’re missing something. Baking should be fun, not stressful!
- Pie Crust: Use a homemade crust, puff pastry for an extra flaky result, or even a gluten-free store-bought crust.
- Jam: Swap for lemon curd, Nutella, peanut butter, or a mix of cream cheese and brown sugar.
- Egg Wash: A little milk or cream brushed on works in a pinch, though the egg gives the best color.
- Icing Liquid: Use the juice from the jam jar, orange juice, or even a bit of lemon juice instead of milk.
Let’s Make Some Magic: Pop Tart Instructions
Roll up your sleeves, and let’s create some kitchen joy. Follow these simple steps for perfect pastries every time.
Step 1: Preheat and Prep
First things first, get your oven hot and ready. Preheat it to 400°F (200°C). This high heat is key for a quick, flaky bake. While it warms up, line a baking sheet with parchment paper. This little step is a lifesaver. It prevents sticking and makes cleanup a breeze. No more scrubbing pans! Get your rolling pin and work surface ready, too.
Step 2: Roll and Cut the Crust
Now, unroll your pie crusts onto a clean surface or right on the parchment. If they seem a bit stiff, let them sit at room temperature for 10 minutes. Using a pizza cutter or sharp knife, cut the dough into rectangles. Aim for about 3 by 5 inches. Don’t stress about perfect rulers! Just get them roughly the same size. You should get about 8-10 rectangles from two crusts. The smell of the dough is already promising.
Step 3: Spoon on the Sweet Filling
Here’s the fun part—the filling! Lay half of your dough rectangles on the prepared baking sheet. Leave a little space between them. Grab your jam. Spoon about 1 1/2 tablespoons onto the center of each rectangle. Gently spread it out, but leave a good half-inch border all around. This clean edge is your glue zone. Pro tip: If your jam is very runny, mix in a tiny teaspoon of cornstarch to thicken it and prevent leaks.
Step 4: Seal with an Egg Wash
Crack your egg into a small bowl and beat it well with a fork until it’s smooth. This is your “glue.” Using a pastry brush or even your finger, lightly paint the bare edges of each jam-covered rectangle. The egg wash acts like edible glue. It helps the top crust stick securely. This seal is what keeps all that gorgeous jam inside the pastry, instead of on your baking sheet.
Step 5: Top, Press, and Crimp
Carefully place the remaining dough rectangles on top of the filled ones. Gently press down on the edges with your fingertips to seal them. Now, take a fork and press down firmly all around each pop tart. This crimping action is both practical and pretty. It makes that classic ridged edge. Finally, use the fork to poke 3-4 small holes in the top of each tart. These are steam vents so your pastries don’t puff up like balloons!
Step 6: Bake to Golden Perfection
Slide your baking sheet into the hot oven. Bake for 12-15 minutes. You’re looking for a lovely, even golden brown color. Watch for the edges to crisp up and the tops to look set. The amazing smell will fill your house. Once they’re beautifully golden, take them out and let them cool on the pan for 5 minutes. Then, move them to a wire rack to cool completely. Patience is hard, but warm icing is messy!
Step 7: Whip Up the Glossy Icing
While the pop tarts cool, make the icing. In a medium bowl, whisk together the powdered sugar, 2 tablespoons of milk, the 2 tablespoons of jam, and the vanilla. Whisk until it’s completely smooth. If it seems too thick, add the extra tablespoon of milk, a tiny bit at a time. You want a thick but pourable consistency, like pancake batter. The jam gives the icing flavor and a pretty, pastel color.
Step 8: The Grand Finale: Ice and Decorate!
This is where they become true pop tarts. Once the pastries are totally cool, spoon or drizzle the icing over the top of each one. Spread it almost to the edges. Now, immediately add sprinkles, sanding sugar, or even a little drizzle of more jam. The icing sets quickly, so decorate fast! Let the icing set for about 15 minutes. Then, they are ready to serve and devour.
Your Homemade Pop Tart Timeline
Here’s a quick breakdown of how your time will be spent. Perfect for planning your baking adventure!
- Prep Time: 20 minutes (faster with a helper!)
- Cooking Time: 15 minutes
- Cooling & Icing Time: 30 minutes
- Total Time: About 1 hour 5 minutes
- Yield: 4-5 generous homemade pop tarts
Chef’s Secret for the Flakiest Crust
My secret? Keep everything cold. If you’re using homemade dough, chill it again after you cut the rectangles before you fill and bake. If your kitchen is warm and the dough gets soft, slide the whole baking sheet into the fridge for 10 minutes before it goes in the oven. A cold crust hitting a hot oven makes the butter steam. That steam creates those magical, tender, flaky layers we all dream of.
A Fun Fact About Jam
That jar of jam is more than just fruit and sugar. The pectin in the fruit is what makes it gel. When you bake it, the pectin breaks down a little, making the filling wonderfully oozy. That’s why using a high-quality jam with real fruit makes such a difference in flavor and texture. It’s a little science lesson you can eat!
Helpful Equipment for Your Baking
You don’t need fancy tools for this recipe. Here’s what makes the job easier:
- Baking Sheet
- Parchment Paper
- Rolling Pin (or a clean wine bottle!)
- Pizza Cutter or Sharp Knife
- Pastry Brush (a clean paintbrush from the craft store works too)
- Fork (for crimping and venting)
- Wire Cooling Rack
- Small Bowls for egg wash and icing
Storing Your Homemade Treasures
These pop tarts are best enjoyed the day they are made. The crust is at its peak flakiness, and the icing is fresh. If you have leftovers, store them in a single layer in an airtight container at room temperature. Place parchment paper between layers if you must stack them. They will keep well for about 2 days.
For longer storage, you can freeze them! Freeze the un-iced, baked pop tarts on a tray until solid. Then, wrap them tightly in plastic wrap and place them in a freezer bag. They’ll keep for up to 2 months. When you’re ready, thaw at room temperature and make a fresh batch of icing to top them. This is a fantastic make-ahead trick.
I do not recommend storing them in the fridge. The cold environment can make the crust soggy and the icing weep. The counter (in an airtight container) is the perfect spot for short-term keeping. If you need to refresh them, a quick 5-10 seconds in the toaster oven works wonders.
My Best Tips for Pop Tart Success
- Don’t overfill! Too much jam leads to leaks during baking.
- Seal the edges very well. Take your time with the fork crimping.
- Let them cool completely before icing. Otherwise, the icing will just melt and slide right off.
- Experiment with fillings! My family loves a cinnamon-sugar butter mix, or even a dollop of apple butter.
- If your dough scraps, re-roll them once to make a few extra, smaller tarts.
How to Serve Them in Style
- Stack them on a cute vintage plate for a rustic feel.
- Drizzle different colored icings and make a rainbow assortment.
- Serve with a side of fresh berries and a dollop of whipped cream for a fancier dessert.
- Pack them in individual cellophane bags tied with ribbon for a sweet gift.
- For a party, cut them into smaller “pop tart bites” before icing.
6 Delicious Recipe Variations to Try
Once you master the basic jam version, the fun really begins! Here are six tasty twists.
1. Brown Sugar Cinnamon Classic
Mix 1/2 cup brown sugar with 1 1/2 teaspoons cinnamon and 1 tablespoon flour. Add 2 tablespoons of softened butter to make a crumbly paste. Use this instead of jam. Top with a simple vanilla or cinnamon icing.
2. Nutella & Banana Dream
Spread a tablespoon of Nutella on the bottom crust, add a few thin slices of fresh banana, then seal and bake. The banana gets soft and sweet inside. A chocolate glaze made with powdered sugar and cocoa powder is perfect on top.
3. S’mores Sensation
Fill with a layer of chocolate chips and mini marshmallows. Bake as usual. The marshmallows will puff and toast slightly. Finish with a chocolate icing and a sprinkle of crushed graham cracker crumbs.
4. Lemon Berry Burst
Use lemon curd as the filling. After baking and cooling, top with a simple powdered sugar and lemon juice glaze. Add a few fresh raspberries or blueberries on top of the wet icing for a fresh, tart flavor.
5. Maple Bacon Brunch Tart
For a savory-sweet twist, fill with a mix of cream cheese, a little maple syrup, and cooked, crumbled bacon. Skip the sweet icing. Instead, drizzle with a simple maple glaze after baking. This one is a total crowd-pleaser for brunch.
6. Funfetti Birthday Pop Tart
Add a teaspoon of rainbow sprinkles to your dough before you roll it out. Fill with vanilla cake frosting or a white chocolate spread. Top with a vanilla icing and, you guessed it, more sprinkles! It’s a birthday in pastry form.
Common Mistakes to Avoid
Even the best bakers can make a simple slip. Avoid these common pitfalls for perfect pop tarts.
Mistake 1: The Great Jam Flood
This happens when you use too much jam or spread it too close to the edge. When the jam heats up, it bubbles and can burst through weak seals. It makes a sticky mess on your pan. To avoid it, measure your filling. Keep a clean border for sealing. For very runny jam, mix it with a thickener like cornstarch first.
Mistake 2: Skipping the Steam Vents
Forgetting to poke holes in the top crust is a big one. Steam builds up inside the pastry as it bakes. With no way to escape, the steam will push the layers apart or cause a tear. Always poke a few holes with a fork. This lets the steam out gently so your pop tart bakes flat and even.
Mistake 3: Icing a Warm Tart
We are all impatient, but this is crucial. If you spread icing on a warm pop tart, it will instantly melt. It becomes a transparent, sticky syrup that drips everywhere. It won’t look pretty. Let your pastries cool on a wire rack until they are completely room temperature. Your patience will be rewarded with a beautiful, set frosting.
Mistake 4: A Soggy Bottom Crust
Nobody wants a soggy bottom! This can happen if the jam leaks or if the pop tarts cool in their own steam on the hot pan. To prevent it, make sure your seal is tight. Also, transfer the baked tarts to a cooling rack after 5 minutes. This lets air circulate underneath and keeps the crust crisp.
Your Pop Tart Questions Answered
Can I make homemade pop tarts ahead of time?
Absolutely! You have two great options. First, you can assemble the pop tarts (unbaked) and freeze them on a sheet pan. Once frozen solid, transfer them to a freezer bag. Bake from frozen, adding a few extra minutes to the baking time. Second, you can bake them, let them cool completely, and freeze them without icing. Thaw at room temperature and add fresh icing when you’re ready to serve. This makes for a super quick and special breakfast.
What’s the best jam to use for filling?
The best jam is one you love to eat! Thicker preserves or fruit spreads often work better than very runny jellies, as they are less likely to leak. My personal favorites are strawberry, raspberry, and apricot. For a less sweet option, try a high-quality tart cherry or blackberry jam. If your chosen jam is thin, just mix a teaspoon of cornstarch into it before filling to thicken it up.
Can I use homemade pie crust instead of store-bought?
Yes, and it will be delicious! A homemade all-butter pie crust will give you an incredible, flaky texture. Just make sure you roll it out to about 1/8-inch thickness. The process is exactly the same. Using store-bought crust is a wonderful shortcut that gives fantastic results, so don’t feel guilty about it. Both methods end with a wonderful homemade treat.
Why did my pop tart filling leak out everywhere?
Leaks usually come from two issues: overfilling or a poor seal. Make sure you are leaving a good half-inch border of clean dough around the jam. When you brush the egg wash on that border, it helps create a glue. Then, press the top crust on firmly and really take your time crimping the edges tightly with the fork. A good seal locks the jam inside.
How do I get my icing to be white, not pink?
The jam in the icing gives it flavor and a lovely pastel hue. If you want pure white icing, simply omit the jam. Instead, use just milk or cream, powdered sugar, and vanilla. You may need a tiny bit more liquid to get the right consistency. For color, you can use food coloring or naturally colored sprinkles on top of the white icing.
Are these pop tarts suitable for freezing?
They freeze beautifully! The key is to freeze them before you add the icing. Let the baked pop tarts cool completely. Place them in a single layer on a baking sheet to flash-freeze for an hour. Then, wrap each one tightly in plastic wrap and place them all in a freezer-safe bag. They’ll keep for 1-2 months. Thaw at room temperature and ice fresh.
Can I make these without an egg wash?
You can, but the egg wash does two important jobs. It helps seal the edges shut, and it gives the baked crust a beautiful, shiny golden brown color. If you need to avoid egg, you can use a little milk or cream to brush the edges for sealing. The color just won’t be as deep and glossy. The taste will still be great.
What can I use if I don’t have a pastry brush?
No pastry brush? No problem. Your fingers work perfectly well to dab the egg wash onto the dough edges. You can also use the back of a spoon or even a folded paper towel. The goal is just to get a thin layer of the “glue” on the sealing surface. Don’t let a missing tool stop you from baking.
How can I make a healthier version of this recipe?
For a healthier twist, try using a whole wheat pie crust or a crust made with almond flour. Use a reduced-sugar or all-fruit spread for the filling. For the icing, mix powdered sugar with a little Greek yogurt or a milk alternative. You can also skip the icing altogether and just dust the baked tarts with a light sprinkle of powdered sugar.
Can I make mini pop tarts instead?
Mini pop tarts are adorable and perfect for parties! Just cut your dough into smaller rectangles or even use a square or circle cookie cutter. Reduce the amount of filling to about a teaspoon for minis. They will need less baking time, so start checking them at around 8-10 minutes. Watch them closely until they are lightly golden.
Ready, Set, Bake!
There you have it! Everything you need to make incredible homemade pop tarts that will wow your family and friends. This recipe is more than just instructions. It’s an invitation to have fun, get a little messy, and create something truly special from simple ingredients. So grab that pie crust and your favorite jam. Preheat your oven. It’s time to make memories that are as sweet as the treats you’ll pull from the oven. Happy baking!
Tender Pork Mignon Boursin
Ingredients
Equipment
Method
- Preheat the oven to 400°F (200°C) and line a baking sheet with parchment paper.
- Unroll the pie crusts and cut the dough into rectangles (about 3 by 5 inches).
- Lay half of the rectangles on the baking sheet and spoon 1 1/2 tablespoons of jam onto the center of each.
- Brush the edges of the dough with beaten egg wash to act as glue.
- Place the remaining rectangles on top, press the edges to seal, and crimp with a fork. Poke holes in the top for steam vents.
- Bake for 12-15 minutes until golden brown, then let them cool for 5 minutes before transferring to a wire rack.
- While cooling, whisk together the icing ingredients until smooth.
- Once cooled, drizzle or spoon the icing over the pastries, then add sprinkles or toppings if desired.