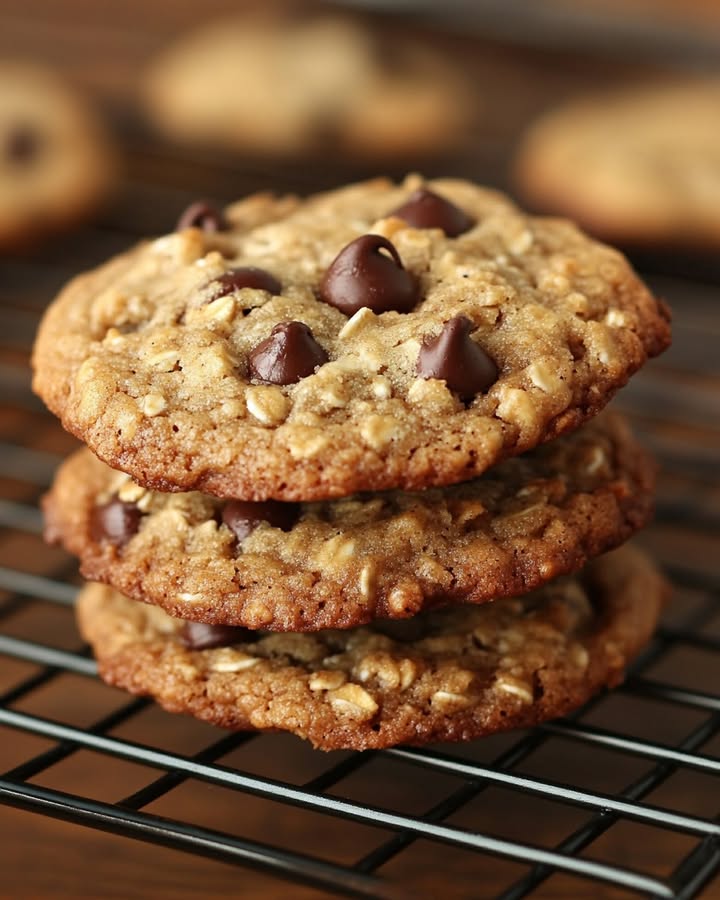
Banana Oatmeal Chocolate Chip Cookies: A Hug in Cookie Form
You know those days when everyone in the house seems to be hangry at the same time? I had one of those afternoons last week. The kids wanted a treat, I wanted something easy, and my better half wanted a snack that wouldn’t derail his day. Then I spotted three bananas on the counter, so speckled they were almost black. Eureka! My favorite Banana Oatmeal Chocolate Chip Cookies to the rescue. In about twenty minutes, the smell of warm bananas and melting chocolate filled the kitchen, and peace was restored. These are the cookies that make you feel like a superhero, honestly.
A Little Backstory on My Favorite Chewy Cookies
I wasn’t always a confident baker. My early cookie attempts were often hockey pucks or sugary soup! I started digging into more wholesome recipes when my niece, who has food sensitivities, came to visit. I wanted her to feel included in our cookie-decorating chaos. That’s when I fell in love with the magic of fruit-sweetened baking. These banana oatmeal cookies are inspired by that journey—a modern, health-conscious twist that still delivers all the cozy, chewy comfort of a classic treat. They’re what happens when a traditional oatmeal cookie and a wholesome breakfast muffin fall in love and have a delicious baby.
Why You’ll Absolutely Adore This Healthy Cookie Recipe
Let me count the ways! First, these cookies are naturally sweetened by those overripe bananas you were about to toss. No refined sugar needed! They come together in one bowl (okay, maybe two, but we can keep it simple). They are soft, chewy, and satisfying. Plus, they’re packed with good-for-you stuff like hearty oats and healthy fats. Think of them as a healthy breakfast cookie or the perfect after-school snack. They’re forgiving, fast, and a guaranteed crowd-pleaser.
The Perfect Moments for These Wholesome Cookies
This recipe is my secret weapon for so many occasions! I whip up a batch for quick breakfast on the go during busy school weeks. They’re a star in lunchboxes. Need a last-minute offering for a playdate or book club? These cookies say, “I’m thoughtful but not stressed.” I love bringing them on road trips or hikes—they’re sturdy and energizing. Honestly, any time you need a little boost of sweet, substantial joy is the right time for these.
Gathering Your Ingredients
Here’s everything you’ll need. The beauty is in its simplicity!
- 2 large ripe bananas, mashed (approx. 3/4 cup) – The spottier, the sweeter!
- 1/2 cup almond butter or peanut butter – For richness and binding.
- 3 tbsp maple syrup – A touch of natural sweetness.
- 1 tsp vanilla extract – The flavor booster.
- 2 cups rolled oats (gluten-free if needed) – The hearty base.
- 1/4 tsp salt – Makes all the flavors pop.
- 1/2 tsp cinnamon (optional) – Adds a warm, cozy note.
- 1/4 cup chocolate chips – Because life needs chocolate.
- 1/3 cup chopped walnuts – For a delightful crunch.
Easy Swaps for Your Pantry
No almond butter? Peanut butter works perfectly. Out of maple syrup? Honey or agave nectar are fine substitutes. For nut-free cookies, use sunflower seed butter. Not a walnut fan? Try pecans, raisins, or just more chocolate chips! If you only have quick oats, the texture will be softer but still tasty.
Let’s Make Some Cookie Magic!
Ready? Let’s turn those mushy bananas into cookie gold. It’s easier than you think.
Step 1: Prep Your Kitchen
First, get your oven humming at 350°F (175°C). Line a baking sheet with parchment paper. This little step is a lifesaver for cleanup and prevents sticking. While the oven heats, grab your bananas. Peel them and mash them in a medium bowl until you have a chunky, sweet-smelling puree. You’ll love the aroma of ripe banana—it smells like promise! Pro tip: A fork or a potato masher does the job in seconds.
Step 2: Create the Wet Mixture
To your banana mash, add the almond butter, maple syrup, and vanilla extract. Now, stir it all together. Watch as the nut butter swirls into the banana, creating a creamy, glossy, caramel-colored blend. The smell at this point is already incredible—nutty, sweet, and inviting. Make sure everything is fully incorporated. No streaks of nut butter left behind!
Step 3: Combine the Dry Goodies
In a larger bowl, let’s mix our dry ingredients. Add the rolled oats, salt, optional cinnamon, chocolate chips, and chopped walnuts. Give this a good stir with a spoon. You’ll see the dark chocolate chips and walnut pieces tumbling through the pale oats. This mix is full of texture and potential! Chef’s tip: Tossing the chips and nuts with the oats first helps distribute them evenly later.
Step 4: Bring It All Together
Pour your gorgeous wet mixture into the bowl of dry ingredients. Use a sturdy spatula or spoon to fold everything together. The oats will drink up the moisture, and a thick, sticky cookie dough will form. It should hold together when you pinch it. Don’t overmix—just combine until no dry oat pockets remain. The dough will be fragrant and speckled with chocolate.
Step 5: Shape Your Cookies
Using a spoon or a cookie scoop, drop mounds of dough onto your prepared baking sheet. These cookies don’t spread much, so gently press down on each one with the back of a fork or your palm to flatten slightly. Aim for cookie shapes, not perfect circles. A little rustic is charming! Leave a little space between them, but they won’t run into each other.
Step 6: Bake to Golden Perfection
Slide the baking sheet into your preheated oven. Bake for 12 to 15 minutes. You’re looking for the edges to turn a beautiful golden brown and the tops to look set. Your kitchen will smell absolutely heavenly. Pro tip: They might seem soft when they come out—that’s perfect! They firm up as they cool on the sheet.
Timing is Everything
- Prep Time: 10 minutes
- Cook Time: 15 minutes
- Cooling Time: 10 minutes
- Total Time: About 35 minutes
A Chef’s Secret for the Best Cookies
Here’s my little secret: let the dough sit for 5 minutes after mixing. This gives the oats a chance to absorb the liquid fully. It makes the dough easier to handle and results in the perfect chewy, not-gummy, texture. It’s a tiny wait for a big payoff!
A Fun Fact About Your Main Ingredient
Those overripe bananas aren’t just “past their prime.” They’re actually at their peak for baking! As bananas ripen, the starches convert to sugars, making them naturally sweeter and easier to mash. So, next time you see brown spots, don’t think trash—think cookie treasure!
What You’ll Need to Make Them
- Mixing bowls (2)
- Fork or potato masher
- Measuring cups and spoons
- Sturdy spatula or mixing spoon
- Baking sheet
- Parchment paper or a silicone baking mat
Keeping Your Cookies Fresh and Happy
Once completely cool, these cookies are best stored in an airtight container. At room temperature, they’ll stay soft and delicious for up to 2 days. Our household never manages that!
For longer freshness, pop the container in the fridge. They’ll keep well for 5 to 6 days. I love the slightly firmer, chewy texture they get when chilled.
These cookies are also freezer champions. You can freeze the baked cookies for up to 3 months. Or, freeze scoops of the raw dough on a tray, then transfer to a bag. Bake straight from frozen, adding a minute or two to the baking time. Instant fresh cookies!
My Best Tips and Advice
- Texture is Key: Use old-fashioned rolled oats for the perfect chew. Quick oats can get too mushy.
- Sweetness Level: The riper the banana, the sweeter the cookie. Adjust the maple syrup up or down by a tablespoon based on your tooth.
- No-Stick Trick: If the dough is super sticky on your spoon, wet your hands slightly when shaping the cookies.
- Cool Completely: I know it’s hard, but let them cool on the sheet for 10 minutes. They finish setting up and are much easier to move.
Pretty Presentation Ideas
- Stack them on a cute vintage plate with a small bowl of milk for dipping.
- Pack them in a clear cellophane bag tied with a ribbon for a lovely homemade gift.
- Serve them alongside a fruit platter for a stunning brunch spread.
- For a party, make mini cookie versions and call them “energy bites.”
6 Delicious Recipe Variations to Try
- Tropical Bliss Cookies: Swap walnuts for chopped macadamia nuts and add 2 tablespoons of shredded coconut to the dry mix.
- Double Chocolate Chip Cookies: Add 2 tablespoons of cocoa powder to the dry ingredients and use dark chocolate chips for an intense chocolate fix.
- Berry Banana Oatmeal Cookies: Replace chocolate chips with dried cranberries or chopped dried cherries for a tart, fruity twist.
- Sunflower Seed Crunch Cookies: For a nut-free, school-safe version, use sunflower seed butter and replace walnuts with pumpkin seeds.
- Apple Pie Spice Cookies: Omit cinnamon and use 1 teaspoon of apple pie spice blend. Add 1/4 cup of finely chopped dried apples.
- Protein-Packed Power Cookies: Stir 2 scoops of your favorite vanilla or chocolate protein powder into the wet ingredients. You may need a splash of milk if the dough gets too thick.
Common Mistakes to Avoid
Mistake 1: Using Underripe Bananas
Pale yellow, firm bananas don’t mash well and lack sweetness. Your cookies will be bland and the texture might be off. Always wait for those bananas to get plenty of brown speckles. They should smell sweet even before you peel them. If you’re in a pinch, you can bake whole bananas at 300°F for 15-20 minutes to soften and sweeten them quickly.
Mistake 2: Substituting Quick Oats 1-for-1
Quick oats are cut smaller and absorb liquid faster. If you use the full 2 cups of quick oats, your dough can become dry and pasty, leading to dense cookies. If you must use quick oats, try reducing the amount by 1/4 cup. For the best, chewiest texture, rolled oats are truly the way to go.
Mistake 3: Overbaking the Cookies
These are soft, cake-like cookies. If you bake them until they look “done” in the center like a traditional cookie, they’ll be dry. They continue to set as they cool. Pull them out when the edges are lightly golden and the tops look just set, even if the center seems a bit soft. They will be perfect after cooling.
Mistake 4: Skipping the Press-and-Flatten Step
This dough doesn’t spread much on its own. If you just plop mounds on the sheet, you’ll end up with domed, muffin-top-like cookies that might be undercooked inside. Taking 2 seconds to gently press each one ensures even baking and the perfect cookie shape. Use damp fingers or a fork.
Frequently Asked Questions
Can I make these cookies vegan?
Absolutely! This recipe is already nearly vegan. Just double-check your chocolate chips to ensure they’re dairy-free (many semi-sweet chips are). Use maple syrup and a plant-based nut butter. You’ll have delicious vegan banana oatmeal cookies that everyone can enjoy.
My dough seems too wet or too dry. What happened?
Banana sizes and nut butter consistencies can vary. If it’s too wet and sticky, add an extra 2-3 tablespoons of oats. If it’s too dry and crumbly, add a teaspoon of milk (any kind) or a bit more maple syrup until it comes together. The dough should be thick and hold its shape when scooped.
Why are my cookies not sweet enough?
The main source of sweetness is the banana. If your bananas weren’t super ripe, they contributed less sugar. Next time, let them ripen more or add an extra tablespoon of maple syrup. Also, using a bit of cinnamon enhances the perception of sweetness.
Can I omit the nuts for an allergy?
Of course! Simply leave out the walnuts. The recipe works fine without them. You could add a few extra chocolate chips or some rolled oats in their place for texture. For a nut-free butter, use sunflower seed butter.
How do I know when the cookies are done baking?
Watch for visual cues, not just the timer. Perfect cookies have lightly browned edges. The tops will lose their wet shine and look matte and set. If you gently press the top, it should spring back slightly. Remember, they firm up a lot as they cool on the hot baking sheet.
What’s the best way to mash bananas?
A simple fork in a bowl works great. For very ripe bananas, they practically mash themselves! You can also use a potato masher for a smoother puree. I don’t recommend a blender or food processor, as they can make the bananas too liquidy.
Can I use steel-cut oats instead?
I don’t recommend it. Steel-cut oats are very hard and won’t soften enough during baking. You’d end up with crunchy, tooth-breaking cookies. Stick with old-fashioned rolled oats or, in a pinch, quick oats for the right texture.
Are these cookies considered healthy?
They are a healthier alternative to traditional cookies! They’re sweetened with fruit, contain whole grains and healthy fats, and have no refined sugar or flour. They provide fiber and protein. Think of them as a nutritious snack or breakfast cookie, but yes, they still contain calories and chocolate—everything in moderation!
Can I add other mix-ins?
Please do! This is a very flexible recipe. Try adding shredded coconut, dried fruit like raisins or chopped apricots, different nuts like pecans or almonds, or even seeds like chia or flax. Keep the total volume of add-ins around 1/2 to 2/3 cup so the dough holds together.
How long do they stay fresh?
Stored properly in an airtight container, they are best eaten within 2 days at room temperature for optimal softness. In the fridge, they last 5-6 days. They also freeze beautifully for up to 3 months, making them a fantastic make-ahead treat.
Final Thoughts from My Kitchen to Yours
There you have it—my beloved, no-fuss recipe for Banana Oatmeal Chocolate Chip Cookies. They’ve saved my sanity on hectic days and brought smiles to so many faces. I love that something so simple can feel so special and nourishing. So, grab those spotty bananas and give it a try. I have a feeling this recipe will become a favorite in your home, too. Happy baking, friends!
Grilled Chicken Bowl
Ingredients
Equipment
Method
- Preheat your oven to 350°F (175°C) and line a baking sheet with parchment paper.
- Mash the ripe bananas in a medium bowl until you have a chunky puree.
- Add the almond butter, maple syrup, and vanilla extract to the banana mash and stir until well combined.
- In a larger bowl, combine the rolled oats, salt, optional cinnamon, chocolate chips, and chopped walnuts, stirring well.
- Pour the wet mixture into the bowl of dry ingredients and fold together until fully combined.
- Drop mounds of dough onto the prepared baking sheet and gently flatten each cookie with a fork or your palm.
- Bake for 12 to 15 minutes until the edges are golden brown and the tops look set.