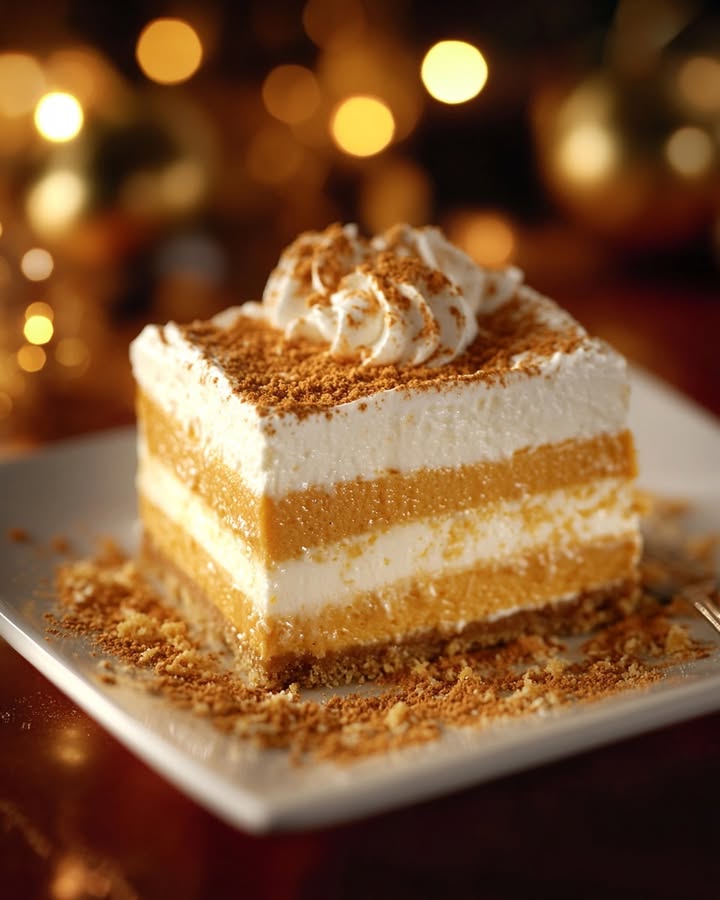
Have You Ever Tasted a Cloud Made of Pumpkin?
That first crisp morning when you need a sweater with your coffee? That’s the feeling this dessert captures in a dish. Let me tell you, friends, the search for the perfect fall treat in my kitchen was a serious mission. I wanted more than a pie, but less fuss than a full cheesecake. After what my family calls “The Great Pumpkin Experiment of Last October,” we landed on this: the Heavenly Layered Pumpkin Cheesecake Dessert. It’s a symphony of textures—creamy, airy, crunchy, and spiced just right. One bite and my nephew declared, “Auntie, this tastes like Halloween happiness.” I think you’ll agree.
The Story Behind the Layers
This recipe is my love letter to two classic American desserts: the sturdy, comforting cheesecake and the beloved pumpkin pie. I grew up watching my grandma make her famous “pumpkin fluff” salad for holidays, a light and sweet concoction. This dessert takes that idea of airy pumpkin and marries it with the rich depth of a New York-style cheesecake layer. The graham cracker crust? Non-negotiable. It’s the cozy, familiar foundation that holds all the magic together. It’s a modern twist that feels wonderfully traditional, perfect for today’s potlucks and family dinners.
Why This Pumpkin Cheesecake Dessert Will Steal Your Heart
You’ll adore this recipe because it delivers restaurant-quality wow factor without the stress. It’s make-ahead, so you’re not slaving in the kitchen while guests arrive. The flavor balance is perfect: not too sweet, with the warm spices complementing the tangy cream cheese. And that texture! You get the satisfying crunch of buttery graham, the dense cream cheese layer, and the impossibly light, mousse-like pumpkin topping. It’s three incredible desserts in one, and it always, always gets requests for the recipe.
The Perfect Moments for This Showstopper
This layered dessert isn’t just for Thanksgiving, though it certainly deserves a spot on that table! I’ve served it at a fall book club meeting (major hit), as the grand finale for a Halloween dinner party, and even as a “just because” treat to brighten a rainy Tuesday. It’s elegant enough for a fancy Friendsgiving but homey enough for a casual weekend family gathering. Anytime you want to spread a little autumnal joy, this is your secret weapon.
Gathering Your Ingredients
Simple, quality ingredients make all the difference. Here’s what you’ll need:
- For the Crust: 1 ½ cups graham cracker crumbs, ¼ cup sugar, 1 tsp ground cinnamon, ⅓ cup melted butter
- For the Cheesecake Layer: 1 (12 oz) package cream cheese (softened), ½ cup sugar, 3 large eggs
- For the Pumpkin Layer: 1 can (15 oz) solid-pack pumpkin, 3 large eggs (separated), ½ cup sugar (divided), ½ cup 2% milk, 2 tsp ground cinnamon, ½ tsp salt, 1 packet unflavored gelatin, ¼ cup cold water
- For the Topping: 1 cup heavy whipping cream, 3 tbsp sugar, 1 tsp vanilla extract
No Stress Substitutions
Out of something? Don’t worry! Here are some easy swaps:
- Graham Cracker Crumbs: Try gingersnap crumbs for a spicier kick, or even crushed vanilla wafers.
- Cream Cheese: Full-fat is best for texture, but reduced-fat will work in a pinch.
- Heavy Cream: For the topping, a store-bought whipped topping can be used, though homemade tastes far better.
- Milk: Any milk you have on hand—whole, skim, or even a non-dairy alternative like almond milk—will work fine in the pumpkin layer.
Crafting Your Heavenly Layers
Let’s build this beauty step-by-step. I promise, it’s easier than it looks!
Step 1: The Foundation (The Crust)
Preheat your oven to 350°F (175°C). Grab a 13×9-inch baking dish—no need to grease it. In a medium bowl, mix the graham cracker crumbs, sugar, and cinnamon. Pour in the melted butter and stir until every crumb is coated and the mixture looks like wet sand. Dump it into your dish and press it down firmly and evenly with your fingers or the bottom of a measuring cup. This compact layer is what will support all the deliciousness above. You want it to hold together when you cut a slice later.
Pro tip: For a super even crust, use a flat-bottomed glass to press and smooth it into the corners.
Step 2: The Rich Cheesecake Heart
Now, for that creamy center! In a large bowl, beat the softened cream cheese with an electric mixer until it’s completely smooth and lump-free. This is crucial for a silky texture. Scrape down the sides, then add the sugar and the 3 eggs. Beat on medium-high until the mixture is fluffy and light, about 2 minutes. It should look pale and almost doubled in volume. Pour this lovely, thick batter over your waiting crust and spread it gently to the edges. Bake for 15-20 minutes. It’s done when the center looks just set—a slight jiggle is okay, as it will firm up as it cools. Let this layer cool completely on a rack. Patience here is key!
Chef’s Tip: To avoid cracks in your cheesecake layer, don’t overbeat the eggs. Just mix until everything is beautifully combined.
Step 3: The Spiced Pumpkin Base
This step is like making a luxurious pumpkin custard. You’ll need a double boiler, or make one by setting a heatproof bowl over a pot of simmering water (make sure the bowl doesn’t touch the water). In the bowl, whisk together the pumpkin puree, egg yolks (save the whites!), ¼ cup of the sugar, milk, cinnamon, and salt. Cook this mixture, stirring often, until it thickens and reaches 160°F on a thermometer. This cooks the egg yolks safely and develops the flavor. Meanwhile, sprinkle the gelatin over the cold water in a small dish and let it sit to “bloom.” Once the pumpkin mix is hot, stir in the bloomed gelatin until it’s completely dissolved. Take the bowl off the heat and let this cool to room temperature. It will start to thicken slightly.
Step 4: The Airy Pumpkin Mousse Magic
Time to add the cloud-like texture! Clean your mixer bowl or grab another one. Place the reserved egg whites and the remaining ¼ cup sugar in the bowl. Set it over the same pot of simmering water (low heat!). Whisk constantly for 3-5 minutes until the sugar dissolves and the mixture reaches 160°F. This makes the egg whites safe to eat and helps them whip up stable and glossy. Now, transfer the bowl to your mixer and beat on high until stiff, glossy peaks form. This is your meringue! Gently fold this bright white fluff into the cooled pumpkin mixture until no white streaks remain. The color will lighten to a beautiful pale orange. Spread this dreamy fluff evenly over the completely cooled cheesecake layer. Pop the whole dish into the refrigerator to chill for at least 4 hours, or until very firm.
Step 5: The Final, Fluffy Crown
You’re in the home stretch! Just before you’re ready to serve, make the whipped cream topping. Chill your mixing bowl and beaters for 10 minutes for best results. Pour the heavy cream, sugar, and vanilla into the cold bowl. Beat on medium-high until soft peaks form, then increase speed until you have firm peaks. Be careful not to overbeat into butter! Dollop and spread this billowy, vanilla-scented cream over the top of the chilled pumpkin layer. It’s the perfect, light finish to this decadent dessert.
Your Game Plan: Timing is Everything
This is a perfect make-ahead dessert. Here’s how the clock runs:
- Prep Time: 30 minutes (hands-on mixing and assembling)
- Cook Time: 20 minutes (just for the cheesecake layer)
- Chill Time: 4 hours minimum (overnight is ideal)
- Total Time: About 5 hours (mostly hands-off chilling)
- Servings: 12 generous squares
- Calories: Approximately 350 per serving
The Secret for Supreme Sliceability
My absolute best trick? Chill the entire assembled dessert overnight. This gives the gelatin in the pumpkin layer maximum time to set up firmly. When you go to cut it the next day, you’ll get stunning, clean layers in every single square. Run your sharp knife under hot water and wipe it dry between each cut for the most professional-looking slices.
A Little Pumpkin Fact for Fun
Did you know pumpkin puree is a fantastic, low-fat way to add moisture and richness to baked goods? That’s part of why this dessert feels so indulgent without being overly heavy. The can of solid-pack pumpkin you’re using is typically just cooked, mashed squash—no added sugar or spices. It’s a wholesome canvas for our cinnamon and cream!
Tools You’ll Need
You likely have everything already:
- 13×9-inch baking dish (glass or metal)
- Electric mixer (stand or hand-held)
- Mixing bowls (a few sizes)
- Double boiler or a heatproof bowl and saucepan
- Whisk and spatula
- Instant-read thermometer (helpful, but not mandatory if you follow timing cues)
Storing Your Masterpiece
This dessert must be stored in the refrigerator due to the dairy and egg content. Cover the baking dish tightly with plastic wrap or transfer individual slices to an airtight container. It will keep beautifully for 3-4 days. The whipped cream topping may soften slightly over time, but the flavor will still be fantastic.
I do not recommend freezing the fully assembled dessert with the whipped cream topping, as the cream can become grainy when thawed. However, you can freeze the dessert (without the final whipped cream layer) for up to 1 month. Wrap the entire dish very well in plastic wrap and then foil. Thaw overnight in the fridge before adding fresh whipped cream and serving.
For individual portions, you can place sliced pieces (without topping) on a parchment-lined tray, freeze until solid, then wrap each piece individually. This lets you thaw a single serving whenever a pumpkin cheesecake craving strikes!
My Best Tips for Guaranteed Success
- Softened Cream Cheese is Key: Take it out of the fridge an hour ahead. This prevents lumps and ensures a smooth layer.
- Cool Completely: Let the cheesecake layer cool fully before adding the pumpkin. A warm base will melt the delicate pumpkin mousse.
- Chill Your Bowl for Whipping Cream: A cold bowl and beaters help the cream whip up faster and higher.
- Garnish Simply: A light dusting of cinnamon or a few pecan halves right before serving adds a lovely touch.
Making it Look as Good as it Tastes
- Dust the top with cinnamon or pumpkin pie spice using a small sieve for a snowy, pretty effect.
- Pipe the whipped cream on with a star tip for extra elegance.
- Serve on a plate drizzled with a little caramel sauce and a tiny mint leaf.
- For a party, cut into smaller, bite-sized squares for easy grabbing.
Mix It Up! Healthier & Fun Variations
Love the idea but want to tweak it? Here are six fantastic spins:
- Gluten-Free Delight: Use certified gluten-free graham crackers or almond flour mixed with a little butter and sugar for the crust base.
- Lower-Sugar Version: Reduce the sugar in the cheesecake and pumpkin layers by 1/4 cup each. Use a sugar substitute that bakes well, like erythritol, and lightly sweeten the whipped cream.
- Ginger Snap Crunch: Swap the graham cracker crust for one made from crushed gingersnap cookies. It adds a wonderful spicy warmth that pairs perfectly with pumpkin.
- Chocolate Swirl Fantasy: Before baking the cheesecake layer, dollop it with a few spoonfuls of chocolate hazelnut spread and use a knife to swirl it gently. A dream for chocolate-pumpkin fans.
- Individual Servings: Make the recipe in a muffin tin lined with parchment liners for perfect personal desserts. Just reduce the baking time for the cheesecake layer slightly.
- Dairy-Free Adaptation: Use dairy-free cream cheese, a plant-based butter for the crust, and coconut cream (chilled) whipped for the topping. Choose a non-dairy milk for the pumpkin layer.
Common Mistakes to Avoid
Mistake 1: Using Cold Cream Cheese
This is the number one culprit for a lumpy cheesecake layer. Cold cream cheese will never blend smoothly with the eggs and sugar, no matter how long you beat it. You’ll end up with tiny bits of cream cheese throughout, ruining that velvety mouthfeel. Always plan ahead and let your cream cheese sit on the counter for at least an hour until it’s soft to the touch. If you’re short on time, you can microwave it on a plate for 10-15 seconds, but do not let it get hot or melted.
Mistake 2: Adding the Pumpkin Layer Too Soon
Impatience can lead to a runny mess! If you spread the pumpkin mousse onto the cheesecake layer while it’s still even slightly warm, the heat will start to melt the delicate structure. This can cause the layers to bleed together and prevent the pumpkin from setting properly. You must let the baked cheesecake layer cool completely to room temperature. This takes about an hour. Give it the time it needs—it’s the secret to those beautiful, distinct layers.
Mistake 3: Not Whipping the Egg Whites Enough (Or Over-whipping!)
The egg whites are what give the pumpkin layer its magical, cloud-like lift. If you don’t whip them to stiff peaks, they won’t hold enough air and your pumpkin layer will be dense and flat. On the flip side, if you whip them until they look dry, chunky, and separated, they’ve gone too far and won’t fold in smoothly. You want glossy peaks that hold their shape firmly when you lift the beater. A pro tip: Ensure your bowl and beaters are completely clean and free of any grease, as even a little fat can prevent whites from whipping up.
Mistake 4: Skimping on Chill Time
You’ve spent all this time building layers—don’t cheat the finish line! The pumpkin layer relies on dissolved gelatin to set. Gelatin needs adequate time in the cold to work its magic. If you try to cut it after only 2 hours, it will be soft and messy. Four hours is the minimum, but I truly recommend the full overnight chill. This ensures every slice is perfectly firm, clean, and holds its gorgeous shape on the plate.
Your Pumpkin Cheesecake Questions, Answered
Can I use fresh pumpkin instead of canned?
You absolutely can, but it requires an extra step. You’ll need to roast a sugar pumpkin (not a carving pumpkin), scoop out the flesh, puree it until smooth, and then strain it to remove excess water. Canned pumpkin is consistently thick and dry, which is key for this recipe. If your fresh puree is too wet, it can make the pumpkin layer runny. For best results, spread the fresh puree on a baking sheet and bake it at 350°F for 15-20 minutes to evaporate some moisture before using, then measure out 15 ounces.
What’s the difference between solid-pack pumpkin and pumpkin pie mix?
This is super important! Solid-pack pumpkin (or 100% pure pumpkin) is just cooked, pureed squash with nothing added. Pumpkin pie mix already has sugar, spices, and other additives mixed in. For this recipe, you must use solid-pack pumpkin. We are adding our own specific amounts of sugar and spices. Using pie mix would make the dessert far too sweet and throw off the spice balance completely. Always check the label carefully!
My cream cheese layer cracked a little. Did I ruin it?
Not at all! A few small cracks are purely cosmetic and won’t affect the taste one bit. They will be completely covered by the pumpkin and whipped cream layers, so no one will ever know. Cracks often happen from over-beating the batter (incorporating too much air) or a slight temperature shock. To minimize them next time, avoid over-mixing after adding the eggs and make sure all your ingredients are at similar room temperatures.
Can I make this without a double boiler?
Yes, you can improvise easily. Find a heatproof bowl (like glass or stainless steel) that fits snugly on top of one of your saucepans. Fill the saucepan with an inch or two of simmering water, making sure the bottom of the bowl does NOT touch the water. The steam from the water will gently and evenly heat the contents of the bowl. This prevents the egg mixtures from scrambling or cooking too quickly. Just be careful when handling the hot bowl—use oven mitts!
Why do I have to heat the egg whites with sugar?
Heating the egg whites to 160°F with the sugar serves two key purposes. First, it pasteurizes the egg whites, making them safe to eat without fully baking them. Second, the heat helps dissolve the sugar completely, creating a stable, glossy meringue that’s less prone to collapsing or weeping. This step, called making a Swiss meringue, gives our pumpkin layer its stable, melt-in-your-mouth texture that holds up for days in the fridge.
How far in advance can I make this dessert?
This is a fantastic make-ahead dessert! You can assemble the entire thing (including the pumpkin layer) up to two days before serving. Keep it covered in the fridge. I recommend waiting to add the final whipped cream topping until the day you plan to serve it, ideally within a few hours. This keeps the whipped cream looking and tasting its freshest. The dessert actually tastes better the second day as the flavors have more time to meld.
Is there a substitute for the gelatin?
The gelatin is essential for giving the pumpkin mousse layer its firm, sliceable structure. Omitting it will result in a soft, spoonable pudding layer. If you need a vegetarian alternative, you can try agar-agar, but it requires different preparation (it needs to be boiled to activate). Follow the package instructions to substitute for one packet of gelatin. Note that the setting texture of agar can be slightly different.
My whipped cream turned grainy or buttery. What happened?
You over-whipped it! Heavy cream goes from soft peaks to stiff peaks to butter very quickly. Graininess is the first sign it’s going too far. To fix it, you can try gently folding in another tablespoon or two of cold liquid cream to soften it. For best results, whip on medium-high speed and watch closely. Stop as soon as the beaters leave firm tracks and the peaks hold their shape when lifted.
Can I use a springform pan instead of a 13×9 dish?
You can, but the serving style will change. A 9-inch springform pan will create a taller, more traditional cheesecake look. You will likely have some extra crust and filling, as the volumes are different. The baking time for the cheesecake layer may also increase to 25-35 minutes. Be sure to wrap the bottom of the springform pan in foil if you’re using a water bath (not required here, but prevents leaks).
This seems complex. Is it really worth it?
I hear you! Looking at the steps, it might seem like a project. But I promise, broken down section by section, it’s very manageable. Most of the time is inactive chilling. Think of it as building three simple components: a no-bake crust, a simple baked cheesecake layer, and a stovetop pumpkin mousse. The payoff is enormous. The “wow” factor and the incredible combination of textures and flavors you get are unlike any single dessert. It’s absolutely worth the effort for a special occasion!
Go Create Some Autumn Magic!
So there you have it—my cherished recipe for Heavenly Layered Pumpkin Cheesecake Dessert. It’s the treat that turns my kitchen into the heart of fall. The moment you see those clean layers on a plate and watch your friends’ eyes light up with that first bite, you’ll know every step was worth it. It’s more than a dessert; it’s a memory in the making. So put on your cozy socks, play some fall tunes, and get ready to bake up a storm of happiness. Don’t forget to tag me if you share a picture—I love seeing your creations! Happy baking!
Rustic Chicken Casserole
Ingredients
Equipment
Method
- Preheat your oven to 350°F (175°C) and prepare a 13x9-inch baking dish.
- Mix the graham cracker crumbs, sugar, and cinnamon in a medium bowl; add melted butter and mix until combined, then press into the baking dish.
- Beat the softened cream cheese until smooth, then add the sugar and eggs and mix until fluffy; pour over the crust and bake for 15-20 minutes.
- For the pumpkin layer, create a double boiler and whisk together pumpkin puree, egg yolks, ¼ cup sugar, milk, cinnamon, and salt until thickened.
- Bloom gelatin in cold water, then dissolve in hot pumpkin mixture; cool to room temperature.
- Whisk egg whites with remaining sugar over simmering water until sugar dissolves; whip until stiff peaks form and gently fold into the pumpkin mixture.
- Spread the pumpkin mousse over the cooled cheesecake layer, then refrigerate for at least 4 hours.
- Before serving, whip heavy cream with sugar and vanilla until peaks form; spread over pumpkin layer and serve.