The Simple Joy of Homemade Butter Cookies
Have you ever had one of those days where you just need a little hug from the kitchen? For me, that hug almost always comes in the form of a warm, crumbly butter cookie. There’s a magic in that rich, vanilla scent filling the house. It takes me right back to my grandmother’s kitchen. Her secret weapon for any celebration, from a Tuesday to a Christmas party, was her tin of melt-in-your-mouth butter cookies. Today, I’m sharing my version of her classic recipe. It’s deceptively simple, endlessly adaptable, and guaranteed to bring smiles.
A Tin Full of History
The humble butter cookie is a global citizen with deep roots. You might know them as Danish butter cookies, Scottish shortbread, or French sablés. Their story is one of delicious practicality. Before fancy ingredients were common, home bakers made magic with what they had: rich butter, sugar, and flour. My grandmother’s “recipe” was really just her hands knowing the perfect texture. She’d roll the dough into logs, just like I do now, and slice off perfect rounds. It’s a tradition I cherish. While today we have fancy piping tips and sprinkles, the soul of the cookie remains the same. It’s pure, comforting, and speaks the universal language of butter.
Why You’ll Fall in Love With This Recipe
If you’re looking for a recipe that is forgiving, fast, and fantastically delicious, you’ve found it. First, the flavor is pure nostalgia. That rich, buttery taste with a hint of vanilla is simply unbeatable. Second, this dough is your canvas. You can slice it, shape it, press it with a fork, or even pipe it for fancy swirls. Third, they’re the perfect “make-ahead” treat. The dough log can live in your freezer for weeks, ready to slice and bake for unexpected guests or a sudden cookie craving. They’re the little black dress of the cookie world—always appropriate and always a hit.
Perfect Occasions for Butter Cookies
These cookies don’t need a reason, but they certainly make any occasion better. Here are a few of my favorites:
- Holiday Cookie Trays: They are the elegant, buttery base of any festive platter. Dress them up with a dip in melted chocolate or a sprinkle of colored sugar.
- Afternoon Tea or Coffee: Pair a few cookies with a hot cup of tea or coffee for a perfect little break in your day.
- Lunchbox Surprises: Tuck a couple into a lunchbox for a homemade sweet treat that beats any store-bought snack.
- Welcome Wagon Gift: A beautifully wrapped tin of these cookies is the best way to say “hello” to new neighbors.
- Just Because It’s Tuesday: Honestly, a Tuesday is reason enough. Celebrate the simple joy of baking.
Gathering Your Ingredients
You only need four simple pantry staples to create this magic. Quality matters most with so few ingredients!
- 200 grams of softened butter (at room temperature, this is non-negotiable!)
- 120 grams of sugar (white granulated sugar gives that classic crisp edge)
- 280 grams of wheat flour (all-purpose flour works perfectly)
- 1 teaspoon of vanilla essence (pure extract or a good quality essence for the best aroma)
Clever Substitution Options
Out of something? Want to mix it up? No problem! This recipe is wonderfully flexible.
- Butter: For a deeper flavor, try using European-style butter. It has a higher fat content. For a dairy-free version, a high-quality vegan butter block works well.
- Sugar: Swap white sugar for fine caster sugar for a finer texture. For a subtle caramel note, use light brown sugar.
- Flour: To make them gluten-free, use a reliable 1:1 gluten-free flour blend. The texture will be slightly more crumbly but just as delicious.
- Vanilla: Don’t have essence? Use the seeds from half a vanilla bean pod for incredible flecked cookies. Or, try almond extract for a marzipan-like twist.
Let’s Make Some Magic: The Preparation
Clear your counter, put on some happy music, and let’s get our hands in the dough. The process is as soothing as the result is tasty.
Step 1: Creaming the Butter and Sugar
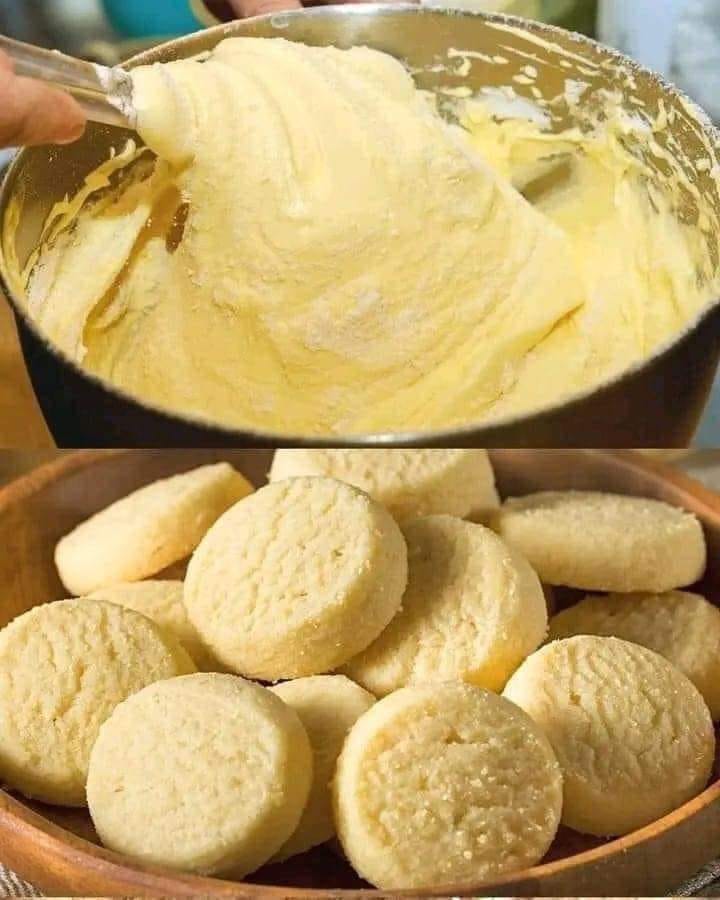
This is where the magic starts! In a large mixing bowl, combine your softened butter and sugar. Use a hand mixer or a sturdy spoon. You want to beat them together until the mixture turns pale, fluffy, and almost creamy. This incorporates air, which gives the cookies a lovely tender crumb. You should see the color lighten noticeably. Pro tip: Your butter is ready when you can easily press a finger into it and leave a deep indentation. If it’s too cold, you’ll struggle. If it’s melted, the cookies will spread too much.
Step 2: The Aromatic Addition
Now, add that glorious teaspoon of vanilla essence. Mix it in thoroughly. As you stir, the sweet, warm fragrance will begin to bloom. It smells like home and happiness all at once. This is the moment the simple butter and sugar transform into something special. If you’re using any other extracts or citrus zests, add them now too.
Step 3: Bringing in the Flour
Here’s a key step for delicate cookies: always sift your flour. I use a fine-mesh sieve held over the bowl. Gently tap it and watch the flour snow down lightly. This prevents lumps and ensures your dough won’t be overworked. Now, mix it in. Start slowly so you don’t get a flour cloud! Mix just until the flour disappears and a soft dough forms. It will look shaggy at first, then come together into a beautiful, pliable ball. Chef’s tip: Overmixing at this stage develops gluten, which can make cookies tough. Mix with a gentle hand.
Step 4: Shaping and Chilling
You have a few options here. For the classic slice-and-bake style, lay out a large piece of plastic wrap. Place your dough in the center and shape it into a log about 2 inches in diameter. Use the wrap to help you roll it nice and smooth. Twist the ends tight. This log now needs a nap in the fridge for at least 1 hour. This chills the butter back down, which is crucial. It ensures your cookies keep their shape and don’t melt into flat puddles in the oven.
Step 5: Baking to Golden Perfection
Preheat your oven to 180°C (350°F). Line a baking tray with parchment paper. Take your chilled log and unwrap it. Using a sharp knife, slice it into rounds about 1 cm thick. Place them on the tray, leaving a little space between each. They won’t spread a ton. Bake for about 11-12 minutes. Watch them like a hawk! They are done when the edges just begin to turn a light golden brown. The centers may still look soft. This is perfect! Pro tip: They firm up as they cool. If you wait for the centers to look done in the oven, you’ll have over-baked, hard cookies. Trust the process!
Your Baking Timeline
- Prep Time: 15 minutes (plus 1 hour chilling)
- Cook Time: 12 minutes per batch
- Resting Time: 15 minutes cooling on the tray
- Total Time: About 1 hour 45 minutes start to finish
The Chef’s Secret
For the most incredibly rich and flavorful butter cookies, make the dough a day ahead. Let the shaped log chill overnight in the fridge. This longer rest allows the flour to fully hydrate and the vanilla flavor to deepen throughout the dough. The difference in taste and texture is subtle but wonderful. It’s my go-to trick for “special occasion” batches.
A Pinch of Extra Info
Did you know the iconic blue tin of Danish butter cookies isn’t usually from Denmark? That famous “Royal Dansk” tin is made by a company based in… Denmark! But it’s become such a global symbol that many brands worldwide mimic the look. Still, nothing beats the taste and pride of your own homemade version. Plus, you get to keep all the cookies for yourself (or, you know, share).
Necessary Equipment
- Large mixing bowl
- Hand mixer or wooden spoon
- Fine-mesh sieve or sifter
- Plastic wrap or parchment paper
- Baking tray
- Oven (of course!)
Storing Your Delicious Creations
Proper storage keeps your butter cookies tasting fresh and crumbly for days. Once the cookies are completely cooled to room temperature, transfer them to an airtight container. A cookie tin with a tight seal or a glass jar works beautifully. If you layer them, place a sheet of parchment paper between layers to prevent them from sticking together or getting damaged.
These cookies can be stored at room temperature for up to one week. They actually taste best within the first 3-4 days, when the buttery flavor is at its peak. Keep the container in a cool, dry spot away from direct sunlight. Avoid storing them in the fridge, as the humidity can make them soften and lose their delightful texture.
For longer storage, the dough itself is your best friend! The shaped dough log can be tightly wrapped in plastic wrap and then placed in a freezer bag. It will keep well in the freezer for up to 3 months. When you’re ready to bake, simply slice the frozen log (no need to thaw) and add a minute or two to the baking time. You can also freeze baked cookies for up to 2 months in an airtight container.
My Best Tips and Advice
- Weigh your flour. Using a kitchen scale is the most accurate way to measure flour. If you use cups, fluff your flour with a spoon, lightly spoon it into the cup, and level it off. Don’t scoop directly from the bag—you’ll pack in too much!
- Rotate your tray. Ovens have hot spots. Halfway through baking, rotate your baking tray to ensure even browning.
- Let them cool on the tray. When you take the cookies out, leave them on the hot baking tray for 5-10 minutes. They will continue to firm up perfectly before you move them to a cooling rack.
Presentation Ideas That Shine
Making them look pretty is half the fun!
- The Elegant Dip: Melt some dark or white chocolate and dip half of each cooled cookie. Place on parchment to set.
- Sparkly Sweets: Before baking, brush cookie slices with a little milk or beaten egg and sprinkle with sparkling sugar or sanding sugar.
- Jam Thumbprints: After slicing, use your thumb or the back of a spoon to make an indent in the center of each cookie. Fill with a tiny bit of raspberry or apricot jam before baking.
- Gifted in a Tin: Layer different variations (some plain, some chocolate-dipped, some with sprinkles) in a decorative tin. Tie with a ribbon for a heartfelt gift.
Healthier & Fun Variations
Once you master the basic dough, a world of variations opens up! Here are six ideas to get you started.
- Lemon Poppy Seed: Add the zest of one lemon and a tablespoon of poppy seeds to the dough with the vanilla. Bright and cheerful!
- Chocolate Chip Butter Cookies: Gently fold in 100 grams of mini chocolate chips after the flour. A classic twist everyone loves.
- Almond Spice: Replace 50 grams of flour with finely ground almonds. Add a half teaspoon of cinnamon and a quarter teaspoon of cardamom.
- Whole Wheat & Honey: Use half whole wheat flour. Replace half the white sugar with honey (you may need a touch less flour as honey is wetter).
- Earl Grey Tea Cookies: Grind the leaves from 2-3 Earl Grey tea bags into a fine powder. Add it to the flour before mixing. Sophisticated and fragrant.
- Orange-Cardamom: Add the zest of one orange and a half teaspoon of ground cardamom. The citrus and spice combo is divine with the butter.
Common Mistakes to Avoid
Even easy recipes have pitfalls. Avoid these, and you’re guaranteed success.
Mistake 1: Using Cold or Melted Butter
This is the number one error. Butter that’s straight from the fridge won’t cream properly with the sugar. You’ll end up with a crumbly, greasy dough. Melted butter will make your cookies spread too thin and lose their shape. The fix is easy. Plan ahead! Take your butter out 1-2 hours before you bake. It should be soft but still cool to the touch, easily indentable but not shiny or oily.
Mistake 2: Skipping the Chill Time
I know, you’re excited to bake! But slicing and baking soft, warm dough is a recipe for flat cookies. The chilled butter in the firm dough takes time to melt in the oven, letting the cookies set their structure first. If you skip chilling, the butter melts instantly, and your perfect rounds will become cookie puddles. Set a timer for that hour. Use the time to clean up or read a book. It’s worth the wait.
Mistake 3: Overbaking the Cookies
Butter cookies go from perfect to overdone in a flash. They continue to cook on the hot tray after you take them out. If you wait for them to look fully golden and firm in the center inside the oven, they will be hard and dry once cooled. Pull them out the moment you see a hint of gold around the very edge. The centers will look underdone, but they will set up perfectly as they cool. This gives you that classic tender, crumbly texture.
Mistake 4: Overmixing the Dough
Once you add the flour, a gentle hand is key. Vigorous mixing develops the gluten in the wheat flour. Gluten is great for bread, but it makes cookies tough and chewy. Mix just until you no longer see streaks of white flour and a cohesive dough forms. It’s okay if it seems a bit soft; the chilling will firm it up. Think of it as bringing the ingredients together, not beating them into submission.
Butter Cookie FAQ
Can I use salted butter?
You can, but I recommend using unsalted butter. This lets you control the exact amount of salt in your recipe. Most baking recipes are designed with unsalted butter in mind. If you only have salted butter on hand, simply omit any added salt the recipe might call for (this one doesn’t have added salt). The cookies will still be delicious, but the flavor might be slightly different.
Why did my cookies spread too much?
This usually points to two issues: butter temperature or oven temperature. If your butter was too soft or almost melted, the cookies will spread. If your dough log wasn’t chilled long enough, the same thing happens. Also, make sure your oven is fully preheated before the cookies go in. An oven that’s too cool lets the butter melt before the structure sets. Using a light-colored baking sheet lined with parchment paper also helps prevent excessive spreading and browning on the bottom.
Can I pipe this dough for spritz cookies?
This specific dough, as written, is meant for slice-and-bake and is a bit firm for piping. To make a pipe-able spritz cookie dough, you would typically use a higher ratio of butter to flour and possibly add an egg yolk for extra richness and pliability. You can try softening this dough slightly after chilling, but a dedicated spritz recipe will give you easier, more reliable results for those beautiful shapes.
My dough is too crumbly and won’t come together. What do I do?
Don’t panic! This can happen if you measured your flour a bit heavy or if your kitchen is very dry. The fix is easy. Add moisture back in slowly. Try adding 1/2 to 1 teaspoon of cold milk or cream. Mix it in with your hands. Sometimes, just the warmth and pressure from your hands kneading the dough briefly is enough to bring it together. Add liquid very sparingly—you want a dough that holds together when squeezed, not a sticky one.
How can I make my cookies extra soft?
For a softer, more cake-like butter cookie, you can try a couple of tweaks. Add one large egg yolk to the creamed butter and sugar. The extra fat and moisture from the yolk contributes to a tender crumb. You can also slightly reduce the baking time by a minute, keeping them even paler. Finally, storing them in an airtight container with a piece of plain bread can help keep them soft; the cookies will absorb moisture from the bread.
Can I add mix-ins like nuts or dried fruit?
Absolutely! This is a great way to customize. Fold in up to 100 grams of finely chopped nuts (like pecans, walnuts, or almonds), dried cranberries, or even chopped crystallized ginger after you’ve mixed in the flour. Just make sure any add-ins are small and dry. If using wet fruit like raisins, pat them dry first or they might make the dough soggy.
Is there a difference between vanilla essence and vanilla extract?
Yes, there is a subtle difference. Pure vanilla extract is made by soaking vanilla beans in alcohol and water. It has a complex, true vanilla flavor. Vanilla essence is often a synthetic version, though it can be a blend of natural and artificial flavors. For the very best, richest flavor, pure vanilla extract is superior. However, in a buttery cookie like this, a good quality essence works perfectly well and is often more affordable. Use what you have and prefer!
Can I make the dough in a food processor?
You can, but be very careful. A food processor can overwork the dough in seconds. If you use one, pulse the flour into the butter mixture in short bursts. Stop as soon as the dough begins to clump together. It’s often easier and gives you more control to just use a bowl and a mixer or spoon. The food processor method is fast, but the hand-mixing method is more forgiving for beginners.
My cookies browned unevenly. Why?
Uneven browning is almost always an oven issue. Most ovens have hot spots. To combat this, rotate your baking sheet halfway through the baking time. Also, make sure you’re using a light-colored, heavy baking sheet. Dark sheets absorb more heat and can cause the bottoms to over-brown before the tops are done. Lining your sheet with parchment paper is a great buffer against excessive heat on the bottom.
How do I get my sugar cookie slices perfectly round?
Two tricks help here. First, when you form the log, roll it tightly in the plastic wrap. Then, place the wrapped log inside an empty paper towel or toilet paper tube that has been slit lengthwise. This helps it keep a perfect cylinder shape in the fridge. Second, use a sharp, thin-bladed knife to slice. Clean the knife blade between cuts if dough starts to stick. A slow, gentle sawing motion works better than pushing straight down.
The Final, Buttery Word
And there you have it—everything you need to make a perfect batch of butter cookies. This recipe is more than just a list of steps. It’s a passport to a quiet moment of baking joy and the happy faces of those you share them with. They may be simple, but that’s their superpower. In a world of complicated desserts, a classic butter cookie stands tall. So, soften that butter, preheat your oven, and create a little delicious magic today. Your kitchen (and your taste testers) will thank you. Happy baking!
Butter Cookie Recipe
Ingredients
Equipment
Method
- In a large mixing bowl, cream together the softened butter and sugar until pale and fluffy.
- Add the vanilla essence and mix thoroughly until combined.
- Sift the flour into the bowl and gently mix until a soft dough forms.
- Shape the dough into a log about 2 inches in diameter and wrap it tightly in plastic wrap.
- Chill the dough log in the refrigerator for at least 1 hour.
- Preheat the oven to 180°C (350°F) and line a baking tray with parchment paper.
- Unwrap the chilled log and slice it into rounds about 1 cm thick.
- Place the slices on the prepared baking tray, leaving space between them.
- Bake for about 11-12 minutes, until the edges are just turning golden brown.
- Allow the cookies to cool on the tray for 5-10 minutes before transferring them to a cooling rack.