Little Bites of Heaven: Your New Favorite Apple Treat
I have a confession. I’m the person who carefully picks around the edges of a pie to get the perfect crust-to-filling ratio in every bite. If you understand that, then my friends, these Little Bites of Heaven were made for us. Imagine a buttery oatmeal cookie hugging a warm, spiced apple center, all in one perfect, pop-in-your-mouth size. I first made these for my book club, and let’s just say the discussion about the novel was very brief. All anyone wanted to talk about was how to get the recipe! They are that good, and honestly, even easier than baking a whole pie.
A Bite-Sized Slice of Comfort Food History
While I can’t trace these exact bites to a specific grandmother’s cookbook, they are my own fun twist on classic American dessert flavors. They combine the homey, wholesome goodness of an oatmeal cookie—a staple in lunchboxes since the early 1900s—with the timeless comfort of apple pie. I wanted to capture that feeling of a crisp autumn day in a treat you could share without needing plates and forks. It’s a modern, portable take on dessert that honors the simple, well-loved ingredients we all have in our pantries. Whether you use fresh apples or a trusty can of filling, the result is pure, nostalgic joy.
Why You’ll Fall in Love With These Mini Apple Pies
You will love this recipe because it solves so many problems! First, no fussy pie crust. The crust is a simple press-in situation—no rolling pin needed. Second, portion control is built-in (though you’ll probably eat three… or four). They are perfect for parties, potlucks, or just satisfying a sweet craving without committing to a giant dessert. The smell of cinnamon and brown sugar wafting from your oven is a bonus form of aromatherapy. Trust me, your kitchen will smell like a hug.
Perfect Occasions for These Heavenly Bites
These little gems are incredibly versatile. I’ve brought them to:
- School bake sales: They are a guaranteed sell-out and easy for kids to eat.
- Thanksgiving dessert spread: They offer a cute alternative to pie for guests who want to try a little of everything.
- Morning coffee with friends: They pair perfectly with a hot cup of coffee.
- Holiday cookie plates: They add a wonderful fruity variety next to all the chocolate and gingerbread.
- Just because it’s Tuesday: Sometimes a Tuesday deserves a bite of heaven.
Gathering Your Ingredients for Success
You likely have most of this in your kitchen already! Here’s what you need for the from-scratch version:
For the Oatmeal Cookie Crust:
- 1 cup all-purpose flour
- 1 cup rolled oats (old-fashioned)
- 3/4 cup packed brown sugar
- 12 tablespoons (1 1/2 sticks) butter, softened
For the Homemade Apple Filling:
- 2 tablespoons butter
- 3-4 medium apples (like Granny Smith or Honeycrisp), peeled and finely diced
- 1/3 cup packed brown sugar
- 1 teaspoon ground cinnamon
- 1/8 teaspoon ground nutmeg
- 3 tablespoons water
- 1 tablespoon + 1 teaspoon cornstarch mixed with 2 tablespoons water
Shortcut Option: 1 can of apple pie filling, finely chopped.
Easy Ingredient Swaps and Substitutions
Don’t stress if you’re missing something! Cooking should be fun.
- Butter: I use unsalted, but salted works. Just skip adding any extra salt.
- Flour: A 1-to-1 gluten-free baking blend can work for the crust.
- Oats: Use quick oats if that’s what you have. The texture will be slightly less chewy but still delicious.
- Apples: For the filling, a can of apple pie filling is a fantastic, time-saving cheat. Just give it a rough chop so the pieces are small enough for the mini cups.
- Spices: No nutmeg? Use all cinnamon. Add a pinch of cardamom or allspice for a different twist.
How to Make Your Little Bites of Heaven
Let’s get baking! This process is simple and satisfying.
Step 1: Prep and Cook Your Apple Filling
First, get your apples ready. Peeling and dicing them into small, uniform cubes is key. You want them to cook evenly and fit nicely into the cups. In a medium pan, melt the butter over medium heat. Listen for that gentle sizzle. Add your diced apples, brown sugar, cinnamon, nutmeg, and the 3 tablespoons of water. Stir it all together until the sugar melts and coats the apples. The smell is incredible! Let this cook for 4-6 minutes until the apples just start to soften. Now, give your cornstarch-and-water slurry a final stir and pour it in. Keep stirring! You’ll see the cloudy liquid turn clear and thicken into a glossy glaze around the apples in about 4-5 minutes. Pro tip: Let this filling cool completely before assembling. A hot filling will melt your crust mixture.
Step 2: Create the Magical Oatmeal Cookie Crust
While the filling cools, make the crust. Preheat your oven to 350°F (175°C). Grease a 24-cup mini muffin tin very well. In a large bowl, combine the flour, rolled oats, and brown sugar. Use a fork to break up any lumps of sugar. Now, add the softened butter. Using a pastry cutter, two forks, or even your clean fingers, work the butter into the dry ingredients. Keep going until the mixture looks like coarse, crumbly sand. Some larger pea-sized clumps are perfectly fine. This mixture is your crust and your crumble topping!
Step 3: Assemble the Mini Pies
Here’s the fun part. Take a heaping tablespoon of your crust mixture and press it into a mini muffin cup. Use your fingers or a small shot glass to press it firmly into the bottom and up the sides, creating a little cup. It should be about 1/8-inch thick. You will have crust mixture left over—don’t worry, that’s for the topping! Now, spoon about one tablespoon of your cooled apple filling into each crust cup. Don’t overfill them. Finally, sprinkle a teaspoon or so of the reserved crust mixture over the top of each filled cup, like a crumbly hat.
Step 4: Bake, Cool, and Enjoy!
Slide your muffin tin into the preheated oven. Bake for 15 to 20 minutes. You’re looking for the tops and edges to turn a beautiful golden brown. Once done, let them cool in the pan for a full 10 minutes. This is crucial! It lets the crust set and firm up. After 10 minutes, carefully run a small knife or offset spatula around the edge of each bite to loosen it, then gently pop them out onto a wire rack. If you want to go all out, drizzle them with a little caramel topping while they’re still slightly warm. Chef’s tip: For super clean removal, make sure you grease the top surface of the muffin tin, not just the cups.
Your Recipe Timetable
Prep Time: 25 minutes
Cook Time: 18 minutes
Cooling Time: 10 minutes (in pan)
Total Time: About 53 minutes
A Little Secret for the Best Texture
My secret is all in the butter temperature for the crust. Using properly softened butter (you can make a slight dent with your finger, but it’s not melted or greasy) is what creates that perfect, crumbly, cookie-like texture. If the butter is too cold, the crust will be dry and won’t press together well. If it’s melted, the crust can become greasy and tough. Room temperature butter is the sweet spot for heavenly bites.
A Fun Fact About Apples
Did you know there are over 7,500 different varieties of apples grown around the world? For baking, I love a mix. I might use one tart Granny Smith for structure and one sweeter Fuji or Honeycrisp for flavor. Using a blend can create a more complex and delicious filling than just one type alone. It’s your own secret blend!
What You’ll Need to Make Them
- 24-cup mini muffin tin
- Medium saucepan
- Mixing bowls (medium and large)
- Pastry cutter or two forks
- Measuring cups and spoons
- Small knife or offset spatula for removal
- Wire cooling rack
How to Keep Your Little Bites Heavenly
Once completely cooled, store your Little Bites of Heaven in a single layer in an airtight container at room temperature. They will stay fresh and delicious for up to 3 days. If you stack them, put a piece of parchment paper between layers to prevent them from sticking together.
For longer storage, these freeze wonderfully! Place the cooled bites in a single layer on a baking sheet and freeze until solid (about 2 hours). Then, transfer them to a freezer-safe bag or container. They can be frozen for up to 2 months. This is perfect for getting a head start on holiday baking.
When you’re ready to enjoy frozen bites, you can thaw them at room temperature for an hour or warm them up. Pop them on a baking sheet in a 300°F oven for about 10 minutes to bring back that fresh-from-the-oven warmth and crispness.
My Best Tips for Guaranteed Success
- Grease generously: Don’t be shy with the cooking spray or butter on that muffin tin. It ensures easy release.
- Cool the filling: I can’t say it enough. A warm filling will make your crust soggy before it even bakes.
- Press the crust firmly: A firm, compact crust cup holds together better when you bite into it.
- Let them rest: Those 10 minutes of cooling in the pan are non-negotiable for structural integrity.
Pretty Ways to Serve Your Creation
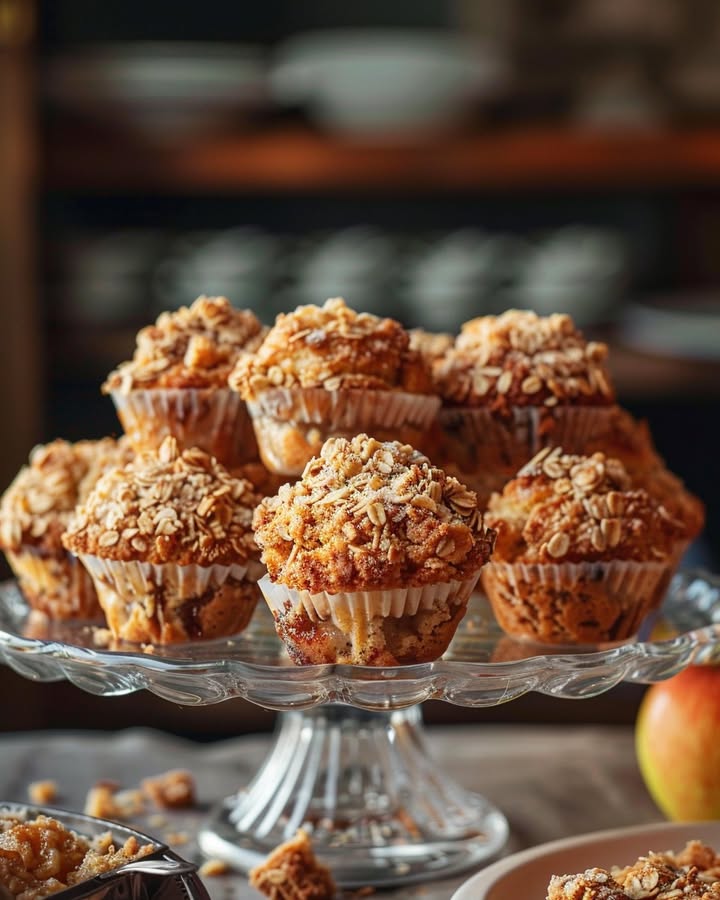
- Arrange them on a pretty cake stand dusted with powdered sugar.
- For a party, place each bite in a mini parchment paper liner.
- Serve warm with a scoop of vanilla ice cream and extra caramel drizzle for a decadent dessert.
- Pack them in a cute box tied with a ribbon for a lovely homemade gift.
6 Delicious Ways to Mix Things Up
Once you master the basic recipe, try these fun variations!
- Pear Ginger: Swap apples for diced ripe pears. Add 1 teaspoon of grated fresh ginger to the filling.
- Mixed Berry Bliss: Use a mix of blueberries, raspberries, and blackberries instead of apples. Toss them with a little extra cornstarch as they are juicier.
- Pumpkin Spice Cookie Cups: Oh, this is a good one! Add 1 teaspoon of pumpkin pie spice to the oatmeal crust mixture. Fill with a spoonful of canned pumpkin pie mix (not puree) for a fall-inspired twist.
- Cherry Almond: Use cherry pie filling and add 1/2 teaspoon of almond extract to the crust mixture.
- Chocolate Peanut Butter: For a non-fruit version, fill the cups with a small chunk of peanut butter cup or a dollop of peanut butter mixed with chocolate chips.
- Savory Cheddar Apple: Add 1/2 cup of sharp shredded cheddar cheese to the crust for a surprising and delicious appetizer version.
Common Mistakes to Avoid
Mistake 1: Using Melted Butter in the Crust
This is the biggest culprit for a greasy, hard crust. When butter is melted, it soaks into the flour and oats differently. It creates a dense texture instead of the light, crumbly cookie feel we want. Always let your butter sit out until it’s just soft to the touch. Quick fix: If your butter is too hard, cut it into small cubes. It will soften faster on the counter.
Mistake 2: Skipping the Cornstarch Slurry
If you just cook the apples with sugar, they will release a lot of juice and make a runny filling. This liquid can soak into the crust and make it soggy. The cornstarch mixed with cold water is essential. It thickens those delicious juices into a glossy, stable glaze that holds the apples together. Don’t skip this step for the perfect bite.
Mistake 3: Overfilling the Crust Cups
It’s tempting to pack in as much filling as possible. But if you overfill, the filling will bubble over during baking. It can stick to the pan and make a mess. It also makes the bites harder to remove cleanly. One level tablespoon is plenty. Remember, you want a balance of crust and filling in every mouthful.
Mistake 4: Trying to Remove Them From the Pan Too Soon
Patience is a virtue here! When the bites first come out of the oven, the crust is soft and fragile. If you try to pop them out immediately, they will break apart. Letting them cool for 10 minutes in the pan allows the crust to set and firm up. Then, they will hold their shape when you slide a knife around them.
Your Questions, Answered
Can I make these ahead of time?
Absolutely! You can prepare them up to two days in advance. Let them cool completely after baking, then store them in an airtight container at room temperature. They also freeze beautifully for up to two months. Just thaw at room temperature or warm them gently in the oven. You can also prepare the components ahead—make the filling and keep it refrigerated for 2 days, and mix the dry crust ingredients. Combine and bake when you’re ready.
What are the best apples to use for baking?
You want apples that hold their shape and offer a balance of sweet and tart. My top choices are Granny Smith for their tart firmness, Honeycrisp for their sweet crunch, or Braeburn. I often use a mix of two kinds. Avoid very soft apples like Red Delicious, as they can turn mushy. A firmer apple gives your filling the perfect tender-yet-substantial bite.
Can I use a regular muffin tin instead?
Yes, you can use a standard 12-cup muffin tin. The bites will be larger, like mini hand pies. You will need to press more crust mixture into each cup (about 2 tablespoons) and adjust the baking time. Start checking at 20-25 minutes. They are done when the edges are deep golden brown. The yield will be about 12 larger bites instead of 24 mini ones.
My filling is too runny. What did I do wrong?
A runny filling usually means the cornstarch slurry wasn’t cooked long enough, or it wasn’t mixed well before adding. Cornstarch needs to come to a simmer for a minute or two to reach its full thickening power. Make sure to stir constantly after adding the slurry. Also, ensure your cornstarch is fresh. If it’s old, it may have lost its potency. Letting the filling cool completely before assembling also helps it thicken further.
Can I make these gluten-free or vegan?
For a gluten-free version, use a certified gluten-free 1-to-1 baking flour blend and certified gluten-free oats. The recipe should work beautifully. For a vegan version, swap the butter for a high-quality plant-based butter (the kind that comes in sticks, not tubs). The results should be very similar. Just make sure your sugar is vegan-friendly, as some brown sugars are processed with bone char.
Why did my crust cups fall apart when I took them out?
This typically happens if the crust wasn’t pressed firmly enough into the cups, or if they were removed from the pan while still too hot. Make sure you really pack that crust mixture in when forming the cups. And remember the cooling time! Letting them set in the pan is the key to them holding together.
Do I have to peel the apples?
You don’t have to, but I recommend it. The apple peels can separate from the flesh during cooking and create little tough pieces in the smooth filling. Peeling gives you a more uniform, velvety texture inside each bite. It’s a little extra step, but it makes a difference in the final result.
What can I use instead of a pastry cutter?
No problem! Two forks work perfectly. Just use them to “cut” the butter into the dry ingredients by pressing and pulling. You can also use your clean fingers. Pinch the butter and dry mixture together until it looks like coarse crumbs. Some people even grate cold butter on a box grater for an easy mix-in method.
Can I use quick oats instead of rolled oats?
Yes, you can. Rolled oats (old-fashioned) give a chewier, more textured crust. Quick oats are cut smaller, so they will create a more uniform, slightly softer texture. Both will work, so use what you have on hand. Avoid using instant oatmeal packets, as they have added sugar and flavorings.
How do I know when they are done baking?
Look for visual cues. The crumble topping and the edges of the crust cups will turn a lovely golden brown. The filling might be bubbling a little at the edges. If they still look pale, give them another 2-3 minutes. They continue to set as they cool, so it’s better to pull them out when they are just golden than to overbake them.
The Final Word on These Perfect Little Bites
There you have it! My go-to recipe for a dessert that never fails to impress. These Little Bites of Heaven are more than just a treat; they’re a little package of joy. They combine simplicity with amazing flavor, and they make everyone feel special. Whether you’re baking them for a crowd or just for yourself with a cup of tea, I hope they bring as much happiness to your kitchen as they have to mine. Now, go preheat that oven! Your own bite of heaven awaits.
Pumpkin Spice Cookies
Ingredients
Equipment
Method
- Prepare apples by peeling and finely dicing them.
- In a medium pan, melt butter over medium heat. Add diced apples, brown sugar, cinnamon, nutmeg, and water. Stir until sugar melts and coats apples.
- Cook for 4-6 minutes until apples start to soften. Stir in cornstarch-and-water slurry and cook until thickened, about 4-5 minutes. Allow filling to cool completely.
- Preheat oven to 350°F (175°C). Grease a 24-cup mini muffin tin.
- In a large bowl, combine flour, rolled oats, and brown sugar. Add softened butter and mix until it resembles coarse crumbs.
- Press heaping tablespoons of the crust mixture into mini muffin cups to create cups.
- Spoon one tablespoon of cooled apple filling into each cup and sprinkle reserved crust mixture on top.
- Bake for 15-20 minutes until tops are golden brown. Cool in the pan for 10 minutes before removing.