Your Tropical Escape Awaits: Pineapple Coconut Dream Cake
Picture this: you close your eyes and take a bite. Suddenly, you’re on a sun-drenched beach, not in your kitchen. That’s the magic of this Pineapple Coconut Dream Cake! It’s my go-to recipe when I need to bring a little vacation to our table, especially after a long winter. My family actually started calling it the “Happiness Cake” because it never fails to make everyone smile.
A Slice of Sunshine: The Story Behind the Dream
This cake is my personal tribute to tropical flavors. While it’s not rooted in one specific tradition, it combines the classic pairing found in treats like Piña Coladas and Hawaiian haupia pie. I wanted to create a layer cake that captured that blissful, creamy, and fruity feeling in every forkful. The modern twist? Using creamy coconut milk in the batter itself for unbelievable moisture. I tested it three times for my book club, and the version with cream cheese frosting was the unanimous winner—it adds the perfect tangy balance.
Why You’ll Adore This Pineapple Coconut Cake
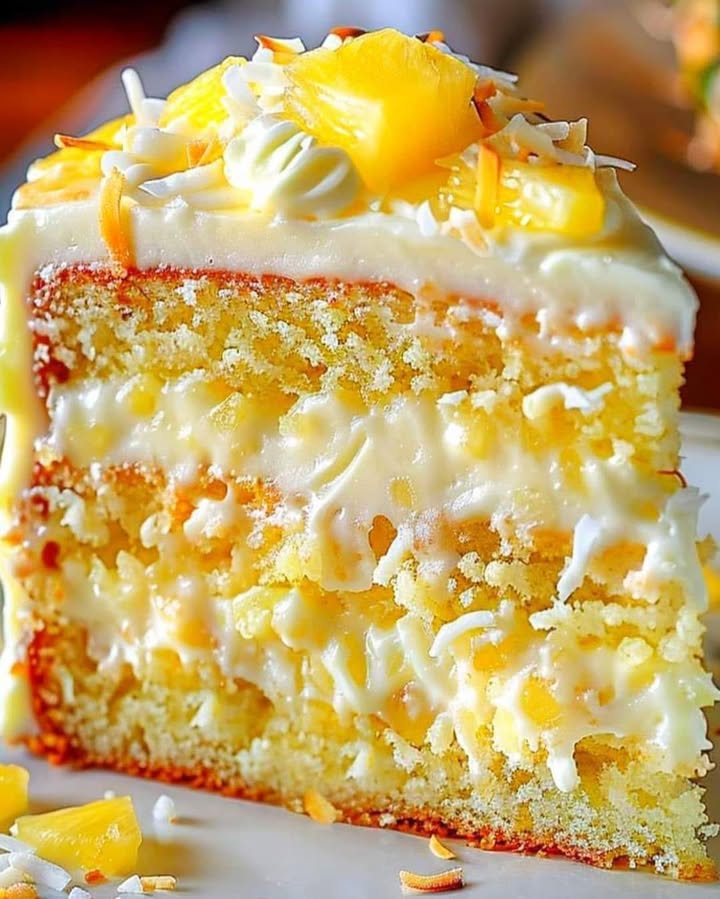
You will love this recipe because it’s surprisingly simple but tastes like you spent all day in the kitchen. The crumb is incredibly tender, the pineapple gives little juicy bursts, and the toasted coconut on top adds a wonderful crunch. It’s a one-way ticket to flavor town! Plus, it’s a total crowd-pleaser. I’ve never brought home a single slice from any potluck.
When to Serve Your Dreamy Creation
This cake is perfect for turning ordinary days into celebrations. Here are my favorite times to make it:
- Summer BBQs & Potlucks: It’s a refreshing alternative to heavy chocolate desserts.
- Birthdays: For the friend or family member who loves tropical vibes.
- Baby Showers or Bridal Showers: Its light, sweet flavor and beautiful look fit the party perfectly.
- Just Because: Sometimes, a Tuesday needs a cake to make it special.
Gathering Your Tropical Ingredients
Here’s what you’ll need to build your dream. Make sure everything is at room temperature for the best mix!
- 3 cups all-purpose flour
- 2 1/2 teaspoons baking powder
- 1/2 teaspoon salt
- 1 cup unsalted butter, room temperature
- 1/2 cup granulated sugar
- 5 large eggs
- 2 teaspoons vanilla extract
- 1 cup coconut milk (the canned, full-fat kind)
- 1 cup crushed pineapple, well-drained
- 1 cup shredded coconut (sweetened or unsweetened)
- 1/2 cup pineapple chunks for garnish
- 1/2 cup toasted coconut flakes for garnish
- 3 cups cream cheese frosting (store-bought or homemade)
Easy Ingredient Swaps (No Stress!)
Don’t have something? No problem! Cooking is about creativity.
- All-Purpose Flour: You can use a 1:1 gluten-free baking blend for a GF version.
- Coconut Milk: Full-fat gives the richest flavor, but “lite” canned coconut milk will work in a pinch.
- Shredded Coconut: Use unsweetened if you want less overall sweetness. Flaked coconut works too.
- Cream Cheese Frosting: A simple vanilla buttercream or even a whipped coconut frosting would be delicious.
Baking Your Pineapple Coconut Dream Cake: Step-by-Step
Step 1: Preheat and Prepare Your Pans
First, get your oven heating to 350°F (175°C). This makes sure it’s perfectly hot when your batter is ready. While it warms up, generously grease your three 9-inch round cake pans. Then, dust them with a little flour, tapping out the excess. This simple step is your best insurance policy against stuck cakes! Lining the bottoms with parchment paper circles is a pro trick I always use.
Step 2: Whisk the Dry Team Together
Grab a medium bowl and your whisk. Add the flour, baking powder, and salt. Give them a good whisk for about 30 seconds. This isn’t just mixing; it’s aerating the flour and making sure the baking powder is evenly distributed. You’ll see the mixture look light and uniform. This ensures your cake rises evenly in the oven for a beautiful, level layer.
Step 3: Cream the Butter and Sugar Until Fluffy
In your large mixing bowl, beat the soft butter and granulated sugar together. Use a hand mixer or stand mixer on medium speed. Keep going for 3-4 minutes until the mixture is pale, light, and fluffy. It should look almost like whipped cream. This step creates tiny air pockets that give the cake its wonderful texture. Then, add the eggs one at a time, beating well after each one. Pour in the vanilla and mix just to combine. The aroma is already heavenly!
Step 4: Gently Combine Wet and Dry
Now, we bring it all together. With your mixer on low speed, add about one-third of your flour mixture. Mix until it’s just barely combined. Next, pour in half of the coconut milk. Mix, then repeat with another third of flour, the rest of the milk, and finally the last of the flour. Stop mixing as soon as you no longer see dry flour streaks. A slightly lumpy batter is better than an overmixed one! Overmixing leads to a tough cake.
Step 5: Fold in the Tropical Stars
This is the fun part! Take your well-drained crushed pineapple and shredded coconut. Use a flexible spatula to gently fold them into the batter. Use a broad, sweeping motion to incorporate them without deflating all the air you worked so hard to create. You’ll see the batter become speckled with white coconut and bits of golden pineapple. The smell will make your mouth water.
Chef’s Tip: To get the most flavor from your coconut, toast the cup for the batter on a sheet pan for 5-7 minutes at 350°F before folding it in. It adds a deeper, nuttier flavor to the cake crumb itself.
Step 6: Bake to Golden Perfection
Carefully divide the batter evenly between your three prepared pans. A kitchen scale is perfect for this, but you can also eyeball it. Smooth the tops with your spatula. Place them in the center of your preheated oven. Bake for 25-30 minutes. The cakes are done when they are golden, pull away from the pan’s edges slightly, and a toothpick inserted in the center comes out clean or with a few moist crumbs.
Step 7: The Crucial Cool Down
Patience is key here! Let the cakes cool in their pans on a wire rack for exactly 10 minutes. This allows them to set enough to handle. Then, run a knife around the edges, place a rack on top, and flip. Gently lift the pan away. Let them cool completely on the racks. Frosting a warm cake is a recipe for a melted, sliding mess.
Step 8: Frost, Stack, and Garnish
Time for the final assembly! Place your first cake layer on a plate or cake stand. Spread a generous, even cup of cream cheese frosting over the top. Place the second layer on and repeat. Add the final layer. Now, frost the top and sides with the remaining frosting. Don’t worry about it being perfectly smooth—a rustic, “naked” look is charming! Finally, decorate the top with pineapple chunks and a generous sprinkle of toasted coconut flakes.
Timing Your Tropical Baking Adventure
Prep Time: 30 minutes (includes gathering, measuring, and mixing)
Cook Time: 30 minutes
Cooling Time: 1 hour (very important!)
Total Time: About 2 hours from start to finish.
My Secret for the Ultimate Dream Cake
Here’s my not-so-secret secret: drain the pineapple TWICE. After taking it out of the can, let it sit in a fine-mesh strainer. Then, press it gently with paper towels. Removing that extra juice prevents a soggy cake batter and ensures your layers are firm and moist, not wet.
A Fun Fact About Our Star Ingredients
Did you know pineapples were such a symbol of wealth and hospitality in the 1700s that people would rent one for a party to display as a centerpiece? Thankfully, today we can all enjoy them in our baking! Combining them with coconut, which grows on palm trees often found on the same tropical shores, is a match made in island heaven.
Kitchen Tools You’ll Need
- Three 9-inch round cake pans
- Mixing bowls (large and medium)
- Hand mixer or stand mixer
- Whisk and flexible spatula
- Measuring cups and spoons
- Wire cooling racks
- Toothpick or cake tester
Storing Your Pineapple Coconut Dream Cake
Because of the cream cheese frosting and moist fruit, this cake needs to be stored in the refrigerator. Cover it with a cake dome or loosely with plastic wrap. It will stay fresh and delicious for up to 4-5 days. The flavors actually meld and get even better on day two!
If you need to store it longer, you can freeze individual slices. Wrap each slice tightly in plastic wrap, then in aluminum foil. Place them in a freezer bag. They will keep for up to 2 months. Thaw overnight in the fridge when you’re ready for a treat.
For the best taste and texture, let the cake sit at room temperature for about 20-30 minutes before serving after refrigeration. This takes the chill off and lets the frosting soften up perfectly.
Tips for Cake Baking Success
- Use room temperature ingredients! This helps everything emulsify and blend smoothly for a uniform texture.
- Don’t overmix the batter after adding the flour. Mix until just combined to keep the cake tender.
- Toast your own coconut for garnishing. It takes 5 minutes in the oven and adds a huge flavor and texture boost.
- If your cakes dome a bit in the center, you can level them with a serrated knife for a flat, professional stack.
Presentation Ideas to Wow Your Guests
- Serve on a simple white cake stand with a few fresh orchid blooms or hibiscus flowers nearby.
- Create a “drip” effect with a little warmed pineapple jam thinned with water over the top before adding garnish.
- For a party, add little paper umbrellas or cocktail flags to each slice.
- Dust the plate with a light sprinkle of cinnamon or cocoa powder for a pretty contrast.
Dreamy Variations to Try
Love this cake? Here are six fun ways to mix it up:
- Pina Colada Cake: Add 1-2 tablespoons of rum or rum extract to the batter and use a rum-infused simple syrup to brush the layers.
- Vegan Dream Cake: Use vegan butter, flax eggs, and a vegan cream cheese frosting. Ensure your sugar is vegan-friendly.
- Pineapple Coconut Cupcakes: Bake the batter in lined muffin tins for 18-22 minutes. Frost and garnish for perfect individual treats.
- Tropical Bundt Cake: Pour all the batter into a greased and floured Bundt pan. Bake for 45-55 minutes. Drizzle with a simple glaze instead of frosting.
- Toasted Macadamia Nut Cake: Fold in 3/4 cup of chopped, toasted macadamia nuts with the pineapple for a delightful crunch.
- Chocolate-Dipped Dream Cake: Add 1/2 cup of mini chocolate chips to the batter. Garnish with chocolate shavings alongside the coconut.
Common Mistakes to Avoid
Mistake 1: Not Draining the Pineapple Enough
This is the biggest culprit for a dense, gummy cake. Canned crushed pineapple holds a lot of liquid. If you add it straight from the can, all that extra juice throws off your careful wet-to-dry ratio. The batter becomes too wet, leading to a sunken center and a heavy texture. Always drain it in a strainer and then press it gently with paper towels to remove as much moisture as possible.
Mistake 2: Using Cold Ingredients
Starting with cold butter and eggs straight from the fridge is a problem. Cold butter won’t cream properly with the sugar, so you won’t get enough air into your batter. Cold eggs can also cause the creamed mixture to break or look curdled. Plan ahead! Take your butter, eggs, and coconut milk out about an hour before you start baking. Room temperature ingredients blend together seamlessly for a smoother, higher-rising cake.
Mistake 3: Overmixing the Batter
Once you add the flour, your mixing should be gentle and brief. Overmixing develops the gluten in the flour. This makes the cake tough, chewy, and rubbery instead of soft and tender. Mix on low speed and only until you no longer see streaks of dry flour. It’s okay if the final batter with the pineapple and coconut looks a little lumpy—that’s perfect!
Mistake 4: Frosting a Warm Cake
I know it’s tempting to put the cake together right away. But if the layers are even slightly warm, the cream cheese frosting will melt, slide right off, and become a soupy mess. The cake can also tear easily. Be patient. Let the layers cool completely in the pans, then on the wire racks. This can take a full hour. Use this time to clean up and toast your coconut garnish.
Your Pineapple Coconut Cake Questions Answered
Can I use fresh pineapple instead of canned?
You absolutely can! Fresh pineapple will give a brighter, tangier flavor. The key is to crush it finely and, just like with canned, drain off any excess juice really well. You might need to press it even more firmly. Be aware that fresh pineapple contains an enzyme called bromelain that can prevent gelatin from setting, but it won’t affect your baked cake.
Can I make this cake ahead of time?
Yes, this cake is fantastic for making ahead. You have a couple of options. You can bake the cake layers up to two days in advance. Let them cool completely, then wrap each layer tightly in plastic wrap and store at room temperature. You can also frost the entire cake the day before your event. Just keep it covered in the refrigerator. Let it sit out for 20-30 minutes before serving to take the chill off.
My cake is browning too fast on top. What should I do?
Ovens can have hot spots. If you notice the top getting dark brown before the center is cooked, tent the cakes with aluminum foil. Loosely place a sheet of foil over the top of the pans. This will shield them from direct heat and allow the centers to finish baking without burning the tops. Check for doneness with a toothpick as usual.
Can I use a different size pan?
You can, but the baking time will change. For a 9×13 inch rectangular pan, bake for 35-40 minutes. For two 8-inch round pans, the layers will be thicker, so bake for 30-35 minutes. For cupcakes, fill liners 2/3 full and bake for 18-22 minutes. Always use the toothpick test to know when it’s done.
Why did my cake sink in the middle?
A sunken cake usually points to a few issues: too much liquid (like undrained pineapple), underbaking, or opening the oven door too early. Make sure your baking powder is fresh and you’ve measured your flour correctly (spoon it into the cup, don’t scoop). Also, avoid opening the oven door during the first 20 minutes of baking, as the rush of cold air can cause the cake to fall.
What’s the best way to toast coconut?
It’s so easy! Spread your shredded or flaked coconut in a thin layer on a dry baking sheet. Bake it in your preheated 350°F oven for 5-7 minutes. Stay close and stir it once or twice. It can go from golden brown to burnt very quickly. You’ll know it’s done when it’s fragrant and lightly toasted in color.
Can I make this recipe dairy-free?
You sure can. Use a high-quality vegan butter stick for the batter and a dairy-free cream cheese alternative for the frosting. Make sure the coconut milk you use is also certified dairy-free. The result will be a delicious vegan cake that everyone can enjoy.
How do I get my cake layers perfectly level for stacking?
If your cakes dome a bit, use a long serrated bread knife. Once the cakes are completely cool, hold the knife parallel to the counter and gently saw off the domed top. You can save these scraps to make a trifle or just snack on them! This simple step makes frosting and stacking much easier and gives you a professional look.
Is there a way to make the cake less sweet?
If you prefer a less sweet cake, try these tweaks. Use unsweetened shredded coconut instead of sweetened. You can also slightly reduce the granulated sugar in the batter to 1/3 cup. For the frosting, choose a less sweet brand or make your own, controlling the amount of powdered sugar you add.
The frosting is too soft. How can I fix it?
If your cream cheese frosting is too runny to spread, the cake or your kitchen is probably too warm. Pop the frosting bowl in the refrigerator for 20-30 minutes to firm up. Also, make sure you beat the butter and cream cheese well before adding sugar, and use full-fat brick cream cheese, not the spreadable kind in a tub.
Ready to Bake Some Sunshine?
And there you have it! Your complete guide to creating a stunning Pineapple Coconut Dream Cake. This recipe is more than just a list of steps—it’s an invitation to create a moment of pure, sweet joy. Whether it’s for a special someone or just because you deserve it, this cake is a guaranteed hit. So preheat that oven, put on your favorite music, and get ready to bake a tropical dream. I can’t wait for you to taste it! Happy baking
Balsamic Caprese Steak
Ingredients
Equipment
Method
- Preheat your oven to 350°F (175°C) and grease three 9-inch round cake pans, dusting with flour.
- In a medium bowl, whisk together flour, baking powder, and salt for 30 seconds.
- In a large mixing bowl, cream the butter and sugar together until fluffy, about 3-4 minutes.
- Add the eggs one at a time, beating well after each addition, then mix in the vanilla.
- With the mixer on low, add one-third of the flour mixture, followed by half of the coconut milk, and mix until just combined. Repeat with the remaining flour and coconut milk.
- Gently fold in the crushed pineapple and shredded coconut using a spatula.
- Divide the batter evenly among the prepared pans and smooth the tops. Bake for 25-30 minutes.
- Allow the cakes to cool in the pans for 10 minutes before transferring them to wire racks to cool completely.
- Frost the first layer with cream cheese frosting, add the second layer, and repeat. Frost the top and sides and garnish with pineapple chunks and toasted coconut flakes.