
Why This Recipe Is a Must-Try
Picture this: it’s a busy Tuesday evening, and you want something quick, healthy, and delicious for dinner. That’s when I turned to my go-to Baked Tilapia with Garlic Butter. It’s the kind of dish that makes your kitchen smell like a fancy restaurant but only takes 30 minutes from start to finish. The first time I made it, my husband said, “You should open a restaurant!” (Okay, maybe he was just being sweet, but still.) This recipe is simple enough for a weeknight but elegant enough to impress guests.
The Story Behind Baked Tilapia with Garlic Butter
Tilapia has been a staple in kitchens for centuries, especially in regions near freshwater lakes where it’s abundant. While some people think tilapia is plain, adding garlic butter transforms it into something magical. My version of this dish came about after a trip to a seafood restaurant where I fell in love with the buttery, garlicky flavors. I decided to recreate it at home, and after a few tries, I nailed it. Now, it’s a family favorite!
Why You’ll Love This Recipe
This Baked Tilapia with Garlic Butter is perfect if you’re looking for a dish that’s light yet satisfying. The fish stays tender and flaky, while the garlic butter adds richness without overpowering. Plus, it’s super easy to make—no fancy techniques required. Whether you’re cooking for yourself or feeding a crowd, this dish delivers on flavor and simplicity.
Perfect Occasions to Prepare This Dish
Need dinner ideas? This recipe works for so many occasions! Serve it on a weeknight for a stress-free meal, bring it to a potluck, or wow your friends at a dinner party. I’ve even made it for holidays like Easter because it pairs beautifully with roasted veggies or a fresh salad. It’s versatile enough to fit any menu.
Ingredients
- 4 tilapia fillets (about 6 ounces each)
- 4 tablespoons unsalted butter, melted
- 3 cloves garlic, minced
- Juice of 1 lemon
- 1 teaspoon salt
- ½ teaspoon black pepper
- 1 tablespoon fresh parsley, chopped (optional, for garnish)
- Lemon wedges, for serving
Substitution Options
- If you don’t have tilapia, try cod, haddock, or even salmon.
- Swap fresh garlic for ½ teaspoon garlic powder if you’re out.
- Use lime juice instead of lemon for a slightly different tang.
- Replace butter with olive oil for a dairy-free option.
Preparation Section
Step 1: Preheat Your Oven
Start by preheating your oven to 400°F (200°C). This high heat ensures the fish cooks quickly and gets a nice golden touch. Grab a baking sheet and line it with parchment paper or aluminum foil for easy cleanup. Trust me, you’ll thank yourself later.
Step 2: Prepare the Garlic Butter Sauce
In a small bowl, mix the melted butter, minced garlic, and lemon juice. Give it a good stir so all the flavors come together. The aroma of garlic hitting warm butter will make your mouth water—it’s one of those moments that reminds you why cooking is so rewarding.
Step 3: Season and Arrange the Fish
Rinse the tilapia fillets under cold water and pat them dry with paper towels. Place them on the prepared baking sheet. Sprinkle both sides with salt and pepper, then brush generously with the garlic butter mixture. Pro tip: Let the fish sit for 5 minutes to soak up the flavors before baking.
Step 4: Bake the Tilapia
Pop the baking sheet into the oven and bake for 12–15 minutes, depending on the thickness of your fillets. You’ll know it’s done when the fish flakes easily with a fork and turns opaque. Watch closely—you don’t want to overcook it, or it might dry out.
Chef’s Tip
To elevate the dish, sprinkle fresh parsley over the baked tilapia right before serving. Not only does it add color, but it also brings a pop of freshness that balances the rich garlic butter. A squeeze of lemon juice on top? Chef’s kiss!
Timing
- Prep Time: 10 minutes
- Cooking Time: 12–15 minutes
- Total Time: 25–30 minutes
Chef’s Secret
Here’s a little secret: always let your fish rest for 2–3 minutes after baking. This allows the juices to redistribute, keeping the tilapia moist and flavorful. Patience pays off!
Extra Info
Did you know tilapia is one of the most sustainable fish choices? It grows quickly and doesn’t require much feed, making it eco-friendly. Plus, it’s budget-friendly, which is a win-win for your wallet and the planet.
Necessary Equipment
- Baking sheet
- Parchment paper or aluminum foil
- Small mixing bowl
- Measuring spoons
- Brush (for the garlic butter)
Storage
Let’s talk leftovers. Store any extra Baked Tilapia with Garlic Butter in an airtight container in the fridge for up to 2 days. Reheat gently in the microwave or oven to avoid drying out the fish. For longer storage, freeze individual portions in freezer-safe bags for up to 3 months.
If reheating from frozen, thaw overnight in the fridge first. This helps maintain the texture of the tilapia. And remember, it tastes best when enjoyed fresh!
Avoid freezing tilapia with sauces already added, as they can separate during thawing. Instead, store the sauce separately and reapply when reheating.
Tips and Advice
Want to take your dish to the next level? Use freshly minced garlic instead of pre-minced—it makes a huge difference in flavor. Another tip: choose thin, evenly sized fillets for consistent cooking. Lastly, don’t skip the resting step; it keeps the fish juicy and tender.

Presentation Tips
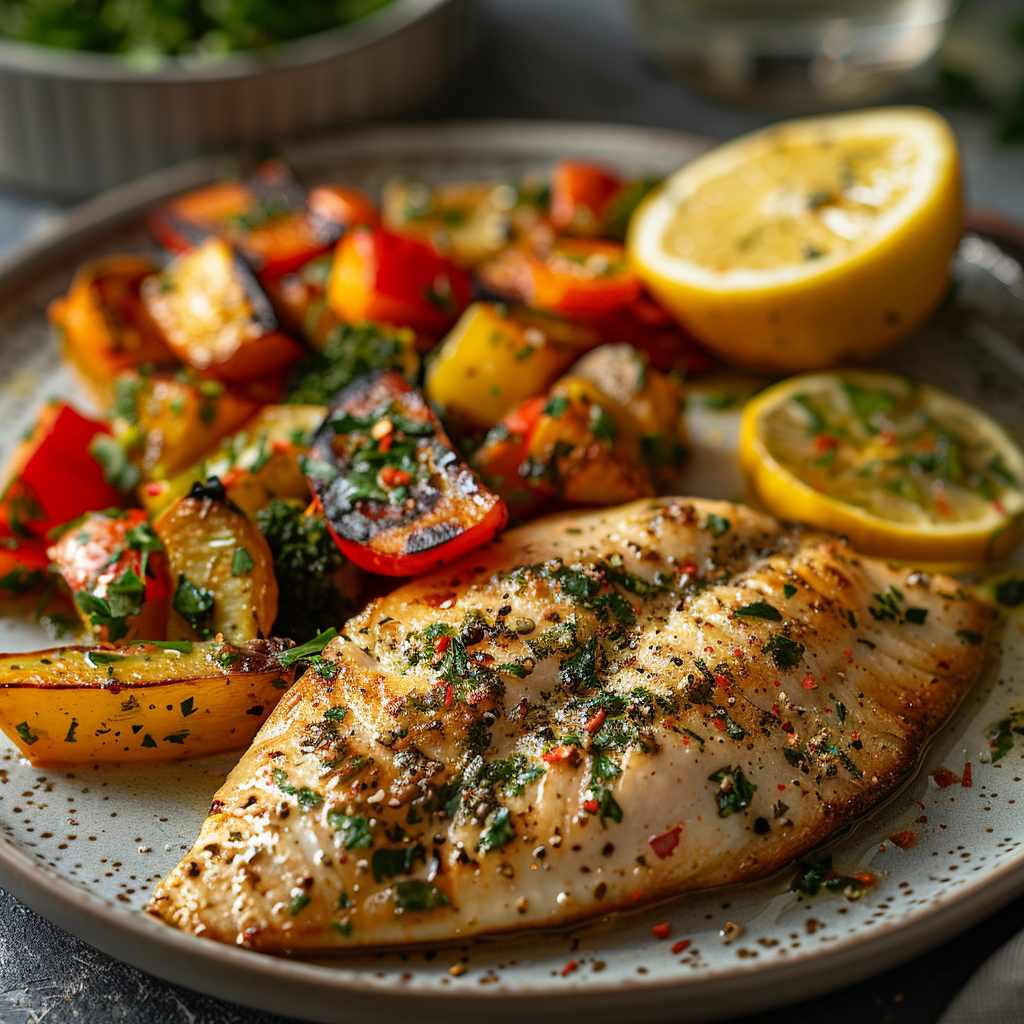
- Garnish with lemon slices and fresh herbs for a pop of color.
- Serve on a platter with roasted asparagus or green beans.
- Pair with a crisp white wine for an elevated dining experience.
Healthier Alternative Recipes
Looking for ways to tweak this dish? Here are six variations:
- Grilled Version: Grill the tilapia instead of baking for a smoky twist.
- Herb-Crusted: Coat the fillets with breadcrumbs mixed with herbs like thyme and oregano.
- Low-Sodium Option: Skip the added salt and use a splash of low-sodium soy sauce.
- Vegan Substitute: Swap tilapia for tofu or cauliflower steaks.
- Spicy Kick: Add red pepper flakes to the garlic butter for heat.
- Dairy-Free Delight: Replace butter with coconut oil or ghee.
Common Mistakes to Avoid
Mistake 1: Overcooking the Fish
One of the biggest blunders is leaving tilapia in the oven too long. It dries out fast! Set a timer and check early. Remember, the fish continues cooking slightly even after you remove it.
Mistake 2: Skipping the Resting Step
Resting isn’t just for meat—it’s crucial for fish too. Cutting into it immediately lets all the juices escape. Be patient; it’s worth it.
Mistake 3: Using Old Garlic
Garlic that’s been sitting around loses its punch. Fresh garlic gives the dish its signature zing. If yours smells dull, it’s time to restock.
FAQ
Can I use frozen tilapia?
Absolutely! Just thaw it completely in the fridge beforehand. Pat it dry with paper towels to remove excess moisture, ensuring it bakes evenly.
What sides go well with this dish?
Roasted vegetables, quinoa, or a simple salad pair beautifully. The lightness of the tilapia complements hearty sides without overwhelming.
Is tilapia a healthy choice?
Yes! Tilapia is low in calories and fat but packed with protein. However, opt for responsibly sourced fish to ensure quality and sustainability.
Can I double the recipe?
Of course! Just adjust the amounts accordingly and use two baking sheets if needed. Keep an eye on the cooking time to prevent overcrowding.
How do I know when the fish is done?
Look for flaky, opaque flesh. Insert a fork—it should glide through easily. If it resists, give it another minute or two.
Can I prep this ahead of time?
You can season the tilapia and refrigerate it for up to 2 hours before baking. Any longer, and the acid in the lemon juice may start “cooking” the fish.
What if I don’t have fresh parsley?
No worries! Dried parsley works fine, or skip it altogether. The dish will still shine thanks to the garlic butter.
Can kids enjoy this dish?
Kids often love the mild flavor of tilapia. Pair it with fun sides like sweet potato fries or corn on the cob to make it kid-approved.
Does this dish work for meal prep?
It’s great for meal prep! Divide portions into containers with veggies or grains for a complete lunch or dinner throughout the week.
What’s the best way to clean up?
Line your baking sheet with foil for minimal mess. Once cooled, toss the foil and wash the brush and bowls—easy peasy!
Final Thoughts
There you have it—a foolproof guide to making Baked Tilapia with Garlic Butter that’s sure to become a staple in your kitchen. Whether you’re a seasoned cook or a beginner, this recipe proves that simplicity and flavor can go hand in hand. So grab some tilapia, melt that butter, and get ready to impress everyone at the table. Happy cooking!

Baked Tilapia with Garlic Butter
Ingredients
Equipment
Method
- Preheat your oven to 400°F (200°C) and line a baking sheet with parchment paper or aluminum foil.
- In a small bowl, mix melted butter, minced garlic, and lemon juice.
- Rinse tilapia fillets under cold water and pat dry with paper towels. Place on the prepared baking sheet.
- Season both sides of the fish with salt and pepper, then brush with the garlic butter mixture.
- Let the fish sit for 5 minutes to absorb the flavors.
- Bake for 12–15 minutes, or until the fish flakes easily with a fork and turns opaque.
- Garnish with fresh parsley and serve with lemon wedges.