
Homemade Vanilla Ice Cream: A Taste of Pure Summer Joy
Is there anything more downright happy than the sound of an ice cream churn whirring on a warm afternoon? It’s the sound of anticipation. You know what’s coming: that first, impossibly creamy spoonful of vanilla ice cream you made yourself. Forget the store-bought tub with its long list of ingredients. This recipe is your golden ticket to classic, rich, real vanilla ice cream. It’s the taste of childhood summers, backyard barbecues, and pure, simple joy. Let’s get churning!
From Royalty to Your Backyard: A Scoop of History
Ice cream’s story is a cool one! It’s said that a form of iced desserts was enjoyed by Roman emperors and Chinese kings. But the kind we love, made with milk and eggs, started taking shape in Italy during the Renaissance. It was a fancy treat for the wealthy. Fast forward to the 1840s, when a woman named Nancy Johnson invented a hand-cranked ice cream freezer. That changed everything! Suddenly, families could make it at home. My grandma had one of those old wooden buckets, and I can still hear the crunch of the ice and salt. This recipe is a nod to that beautiful simplicity. It skips the custard base for an easier, “Philadelphia-style” ice cream that’s all about letting the vanilla sing.
Why You’ll Fall in Love With This Vanilla Ice Cream
You’ll adore this recipe because it’s incredibly forgiving and endlessly rewarding. First, it uses just five basic ingredients you probably already have. There’s no cooking involved, so no worrying about scrambled eggs! This means you can go from “I want ice cream” to “I’m making ice cream” in about ten minutes flat. The flavor is pure magic – the clean, sweet creaminess is the perfect backdrop for the warm, floral notes of real vanilla. It’s the ultimate base for every sundae, pie à la mode, or float you can dream up. Plus, that proud feeling when you serve your own homemade ice cream? That’s the best ingredient of all.
The Perfect Occasion for Homemade Vanilla Bliss
This isn’t just a dessert; it’s an event maker. It’s perfect for turning an ordinary Tuesday into a celebration. Here are some of my favorite times to whip it up:
- Fourth of July BBQ: Serve it alongside a warm berry cobbler. The red, white, and blue never tasted so good.
- Birthday Parties: Set up a sundae bar with sprinkles, hot fudge, and chopped nuts. Let the kids (and adults!) create their own masterpiece.
- Date Night In: Drizzle it with a fancy salted caramel sauce and share a bowl. So much more romantic than a store-bought pint!
- Potluck Hero: Bring a tub of this and a warm apple pie. You will be the most popular person there. I promise.
Gathering Your Simple, Dreamy Ingredients
This is where magic starts. You only need a handful of things for that perfect, velvety scoop.
- 2 Cups Heavy Cream: This is the star. It gives the ice cream its luxurious, rich mouthfeel and prevents ice crystals. Full fat is your friend here.
- 2 Cups Whole Milk: Using whole milk adds to the creamy texture while providing the perfect liquid base.
- A Pinch of Salt: Don’t skip this! Salt is a flavor enhancer. It makes the sweet taste sweeter and the vanilla more vibrant.
- 3/4 Cup Granulated Sugar: This sweetens the mix and also helps keep the ice cream soft and scoopable.
- 2 Tablespoons Pure Vanilla Extract: This is your chance to shine. Use the best pure vanilla extract you can find. It makes all the difference.
Easy Ingredient Swaps (Don’t Worry, Be Happy!)
Out of something? No panic! Here’s how to adapt:
- Heavy Cream Substitute: You can use half-and-half for a slightly lighter ice cream. The texture will be a bit less rich, but still delicious.
- Milk Swap: For a dairy-free version, use full-fat canned coconut milk for both the milk and cream. The flavor will be coconut-vanilla (which is amazing!).
- Vanilla Options: If you have a vanilla bean, even better! Split one bean, scrape the seeds, and add both seeds and pod to the warm milk (let it steep and cool). Remove the pod before churning.
- Sweetener Change: You can use cane sugar or even a liquid sweetener like maple syrup. If using maple, reduce the milk by 1/4 cup as it adds liquid.
Let’s Make Some Ice Cream! Your Step-by-Step Guide
Step 1: The Simple Mix
This is the easiest part. Grab a large mixing bowl. Pour in the cold heavy cream and the whole milk. The cream will be thick and luxurious, while the milk is lighter. Add the sugar and that all-important pinch of salt. Now, take your vanilla extract. Smell it – that’s the aroma of happiness! Pour it in. Grab a whisk and stir everything together gently. You don’t need to whip it, just combine it until the sugar is completely dissolved. The mix will look like a sweet, fragrant, creamy soup. Pro tip: To check if the sugar is dissolved, dip a clean spoon in the back of the mixture and taste a tiny bit. There should be no gritty texture.
Step 2: Chill Out (The Mix, Not You!)
Once everything is smoothly combined, cover the bowl with plastic wrap. You can also pour the mixture into a large pitcher if that’s easier. Tuck it into the refrigerator for at least one hour, but up to four hours is even better. This chilling step is crucial. It ensures your ice cream base is very cold before it goes into the machine. A colder base freezes faster in the churn, which leads to a smoother, creamier final texture with fewer icy bits. While you wait, you can prepare your ice cream machine’s freezer bowl if it needs to be frozen.
Step 3: The Magical Churn
This is the fun part! Take your chilled mixture out of the fridge. Give it a quick stir. Now, set up your ice cream maker according to the manufacturer’s instructions. Turn the machine on and slowly pour the creamy vanilla liquid into the churning bowl. As it churns, you’ll witness pure magic. The liquid slowly thickens, expands, and transforms into soft-serve ice cream. This usually takes about 20-30 minutes. You’ll know it’s ready when it’s the consistency of a thick soft-serve, clinging to the dasher. Chef’s tip: If you’re adding mix-ins like chocolate chips or chopped nuts, add them in the last 2-3 minutes of churning so they get evenly distributed.
Step 4: The Big Freeze (For Perfect Scoops)
Your churned ice cream is still quite soft. For that perfect, scoopable consistency we all love, we need to “ripen” it. Carefully transfer the soft ice cream into a freezer-safe container. A loaf pan works great! Use a spatula to smooth the top. Press a piece of parchment paper directly onto the surface of the ice cream. This is a KEY step! It prevents ice crystals from forming on top. Then, seal the container with its lid. Place it in the coldest part of your freezer and let it firm up for at least 4-6 hours, or ideally overnight. Patience is a virtue that pays off in perfect scoops.
Your Homemade Vanilla Ice Cream Timetable
| Activity | Time Needed |
|---|---|
| Preparation & Mixing | 10 minutes |
| Chilling the Base | 1 – 4 hours |
| Churning in Machine | 25-30 minutes |
| Freezing to Firm Up | 4-6 hours (best overnight) |
| Total Time (Hands-on) | About 35 minutes |
My Can’t-Miss Chef’s Secret
Want an extra layer of flavor that will make people ask, “What is your secret?” Before mixing your base, warm one cup of the milk just until it’s steaming (not boiling). Add a tablespoon of good quality honey and stir to dissolve. Let this milk-honey mixture cool completely, then add it to the rest of your ingredients. The honey adds a subtle, floral sweetness that pairs beautifully with vanilla and keeps the ice cream incredibly soft and scoopable, even straight from the freezer.
A Sweet, Cool Fact
Did you know vanilla is the world’s second most expensive spice, right after saffron? The beans come from a specific orchid that only blooms for one day a year and must be pollinated by hand in many regions. That’s why pure vanilla extract can be pricey. But just a little creates that iconic flavor we associate with love, warmth, and comfort. Using it in homemade ice cream is a wonderful way to honor that amazing journey from flower to freezer.
What You’ll Need to Make It
- Large Mixing Bowl
- Whisk
- Measuring Cups & Spoons
- Ice Cream Maker (the kind with a pre-frozen bowl is super easy)
- Freezer-Safe Container with Lid (like a loaf pan or airtight plastic tub)
- Spatula
- Parchment Paper
Storing Your Homemade Treasure
The key to storing homemade ice cream is fighting freezer burn. After the ripening freeze, your ice cream is ready to enjoy. Make sure your container is airtight. That layer of parchment paper pressed on the surface is your best defense. It creates a barrier against the dry air of the freezer.
For the best texture and flavor, try to enjoy your homemade vanilla ice cream within one to two weeks. Unlike commercial ice creams packed with stabilizers, homemade ice cream will gradually form more ice crystals over time. It will still taste wonderful, but the texture will become harder and a bit more crystalline.
If you find your ice cream is too hard to scoop straight from the freezer, don’t worry! Let the container sit on your counter for 5-10 minutes before serving. This slight softening makes it perfect for getting those beautiful, round scoops without breaking your wrist.
My Best Tips for Ice Cream Success
- Chill Everything: Cold mixture + cold machine bowl = faster freezing = smoother ice cream.
- Don’t Overfill: Your ice cream will expand as it churns. Leave about 1/4 of your machine’s bowl empty to allow for this.
- Experiment with Mix-Ins: Add crushed cookies, swirl in peanut butter, or fold in fresh berries after churning for a custom flavor.
- Label It: Trust me, write “HOMEMADE VANILLA” and the date on your container. Future-you will be grateful.
Making Your Scoops Look Stunning
We eat with our eyes first! Here are some easy ways to make your simple vanilla ice cream look like it came from a gourmet shop.
- The Classic Sundae: Use a tall, clear glass. Start with a scoop, drizzle chocolate sauce, add another scoop, drizzle caramel, top with whipped cream, a cherry, and a sprinkle of chopped pecans.
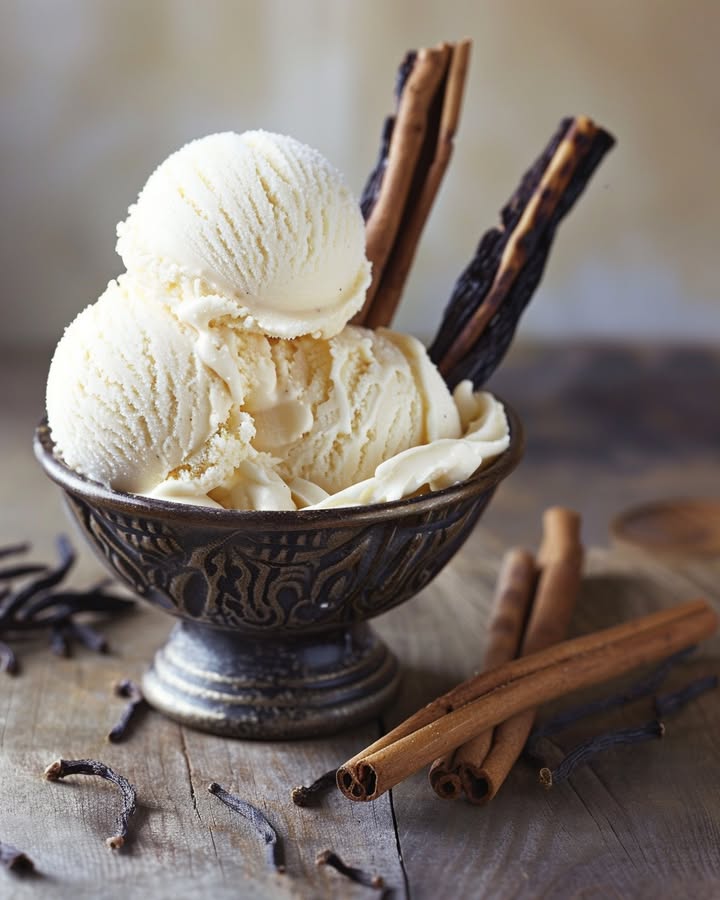
- Elegant Bowl: Warm a scoop or two of your ice cream slightly to create a soft pool in the bottom of a shallow bowl. Place a perfect, firm scoop in the center and garnish with a single, delicate edible flower or a fresh mint leaf.
- Ice Cream Sandwiches: Press a scoop between two soft chocolate chip cookies, roll the edges in mini chocolate chips, and wrap in parchment paper.
6 Delicious & Healthier Twists on Classic Vanilla
Want to mix it up? This base recipe is your playground. Here are six tasty variations.
- Fresh Strawberry Swirl: Mash 1 cup of fresh strawberries with 1 tablespoon of sugar. After churning, layer the ice cream and strawberry mash in your container and give it one gentle swirl.
- Decadent Chocolate Chip: Use high-quality dark chocolate chopped into small chunks. Fold them in during the last minute of churning for melty pockets of chocolate.
- Banana Walnut: Mash one very ripe banana into the base before chilling. Churn as usual, then fold in 1/2 cup of toasted, chopped walnuts at the end.
- Honey & Cinnamon: Replace 1/4 cup of the sugar with 1/4 cup of honey. Add 1 teaspoon of ground cinnamon to the base. This is wonderfully cozy.
- Coffee Toffee: Dissolve 2 tablespoons of instant espresso powder into the milk before mixing. After churning, fold in 1/2 cup of crushed toffee bits or Heath bar pieces.
- Cookies & Cream: This is a kid (and adult!) favorite. After churning, gently fold in 1 1/2 cups of roughly crushed Oreo cookies. The black and white contrast is gorgeous.
Common Mistakes to Avoid for Perfect Ice Cream
Mistake 1: Using Warm Ingredients in the Machine
This is the number one reason for icy, grainy ice cream. If your mixture is warm or even room temperature, the machine has to work too hard. The fat can separate, and large ice crystals form before it freezes solid. Always, always chill your base in the fridge first. A colder base freezes quickly, trapping tiny air bubbles and creating that smooth, creamy texture we love.
Mistake 2: Skipping the Ripening Freeze
It’s so tempting to eat the soft-serve straight from the churn! It’s delicious, but it won’t hold a scoop shape. The ripening freeze in a proper container is what gives your ice cream its final, firm body. Without it, you’ll have a melty mess. Be patient and let it firm up. Your perfect scoops are worth the wait.
Mistake 3: Forgetting to Protect the Surface
You put your beautiful ice cream in the freezer, and a day later there’s a tough, frosty layer on top. That’s freezer burn, caused by air exposure. The simple fix is to press parchment paper or wax paper directly onto the surface of the ice cream before sealing the lid. This creates a barrier and keeps your ice cream tasting fresh and creamy for days longer.
Mistake 4: Using Imitation Vanilla Flavoring
This recipe has so few ingredients that each one truly shines. Imitation vanilla is often made with synthetic vanillin and can have a harsh, chemical aftertaste. Pure vanilla extract, while more expensive, is made from real vanilla beans. Its complex, warm flavor is the star of the show here. It’s worth the splurge for this simple, classic recipe.
Your Homemade Vanilla Ice Cream Questions, Answered!
Can I make this ice cream without an ice cream maker?
Yes, you can, but it takes more effort! This is called the “still-freeze” method. Pour your chilled base into a shallow, freezer-safe dish (a metal loaf pan is ideal). Freeze for 45-60 minutes until the edges start to freeze. Take it out and use a whisk or hand mixer to break up all the ice crystals. Return to the freezer. Repeat this process every 30 minutes for about 3-4 hours until it’s fully frozen. It will be a bit denser than churned ice cream, but still very tasty.
Why is my homemade ice cream so hard?
Homemade ice cream freezes harder than store-bought because it lacks commercial stabilizers and emulsifiers. Sugar and fat are natural softeners. Make sure you’re using the full amount of sugar and heavy cream in the recipe. Also, letting it sit on the counter for 5-10 minutes before scooping makes a world of difference. My honey tip (in the Chef’s Secret section) also helps keep it softer.
How can I make my ice cream creamier?
Creaminess comes from fat, tiny air bubbles, and small ice crystals. Ensure your base is very cold before churning. Don’t skimp on the heavy cream—it’s your main source of fat. Churning incorporates air (called overrun), which lightens the texture. Finally, the speed of freezing matters; a pre-frozen machine bowl freezes the mix fast, leading to smaller ice crystals and a smoother mouthfeel.
Can I use low-fat milk to make it lighter?
You can, but the texture will change dramatically. The fat in the heavy cream and whole milk gives ice cream its rich, creamy body and prevents it from turning into an icy block. If you use low-fat or skim milk, your final product will be icy and lack that luxurious melt-in-your-mouth quality. For a lighter option, try the half-and-half substitution mentioned earlier, but embrace the richness for the classic experience.
My ice cream is too sweet. What can I do?
Personal taste varies! If you found this batch too sweet, you can absolutely reduce the sugar next time. Try using 1/2 or 2/3 cup instead of 3/4 cup. Be aware that sugar doesn’t just add sweetness; it also contributes to a softer texture. Less sugar might mean a slightly harder final ice cream. You could also balance sweetness by adding a pinch more salt, which enhances other flavors and cuts perceived sweetness.
How do I add mix-ins like cookie dough or brownie pieces?
Mix-ins are the best part! The golden rule is to add them at the very end of the churning process. Wait until your ice cream has reached a thick soft-serve consistency. Turn off the machine, and with a spatula, gently fold in your chopped, crushed, or swirled additions. Then transfer it to your container to freeze. This ensures they get evenly distributed without getting pulverized by the dasher.
Can I double or triple this recipe?
Absolutely! This recipe is incredibly easy to scale up for a crowd. Just remember the capacity of your ice cream maker. Most home machines make between 1.5 and 2 quarts. If you double the recipe, you will likely need to churn it in two separate batches. It’s better to do two perfect batches than to overfill the machine, which can prevent proper churning and freezing.
What’s the difference between this and custard-based ice cream?
This is a “Philadelphia-style” ice cream, meaning it has no eggs. Custard-based (or French-style) ice cream uses egg yolks cooked into a custard with the milk and cream. It’s richer, denser, and has a distinct cooked custard flavor. Our recipe is lighter in color and flavor, letting the vanilla and cream take center stage. It’s also much faster and easier, with no risk of curdling eggs.
How long does homemade ice cream last in the freezer?
For the best flavor and texture, try to enjoy it within 1-2 weeks. It will still be safe to eat for a month or more if stored properly with the parchment paper barrier, but the quality will decline. Ice crystals will gradually grow larger, making it grainier. Honestly, in my house, it never lasts more than a few days anyway!
My ice cream tastes great but has a lot of air pockets. Is that normal?
Yes, that’s normal and actually desirable! The churning process whips air into the base. This is called “overrun.” It makes the ice cream lighter, creamier, and easier to scoop. Commercial ice creams often have very high overrun (lots of air). Homemade versions usually have less, making them denser. Some small air pockets are a sign of good churning. If it seems overly foamy or bubbly, you may have churned it a bit too long.
Ready, Set, Scoop!
There you have it! Everything you need to know to make the creamiest, dreamiest homemade vanilla ice cream. This isn’t just a recipe; it’s a little container of happiness you made yourself. It’s about the joy of the process, the whir of the machine, and the smiles around the table when you bring out that frosty tub. So go grab that cream and vanilla. Your perfect scoop of summer is waiting. Now, who’s ready for a taste?
Cajun Garlic Linguine
Ingredients
Equipment
Method
- In a large mixing bowl, combine cold heavy cream and whole milk.
- Add sugar and a pinch of salt to the mixture.
- Pour in the vanilla extract and stir gently until the sugar is dissolved.
- Cover the bowl with plastic wrap and chill in the refrigerator for at least 1 hour.
- Prepare the ice cream maker according to the manufacturer's instructions.
- Pour the chilled mixture into the ice cream maker and churn for 20-30 minutes until it reaches soft-serve consistency.
- Transfer the churned ice cream to a freezer-safe container and smooth the top.
- Press parchment paper onto the surface of the ice cream and seal with a lid.
- Freeze for at least 4-6 hours, or ideally overnight, to firm up.