Make Homemade Honey Buns: A Taste of Warm, Gooey Sunshine
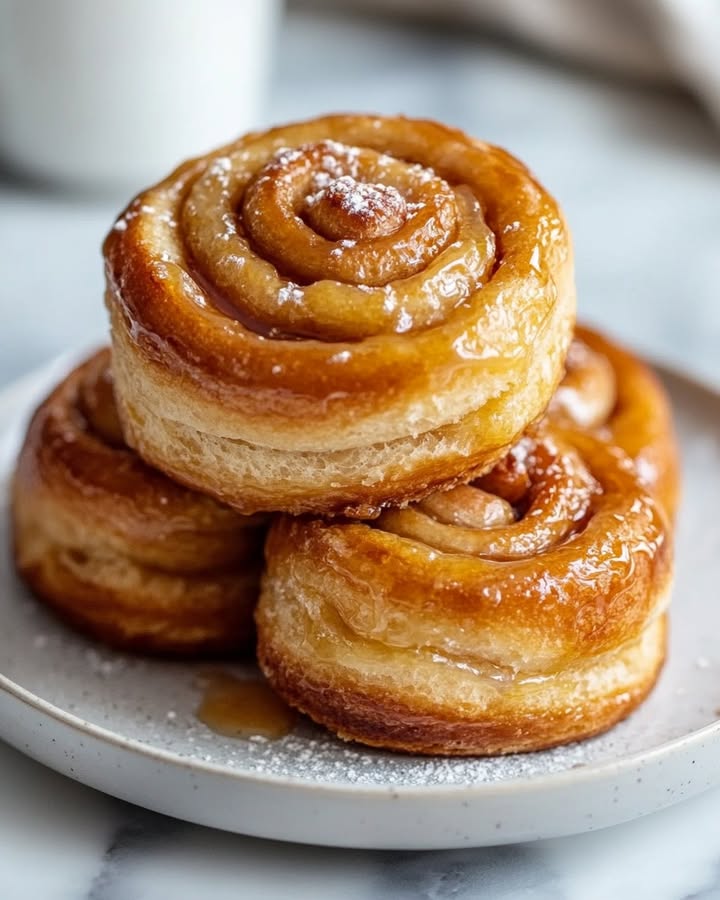
You know that magical feeling when you walk into a bakery and get hit by the smell of something sweet frying? That’s the feeling we’re bringing into your kitchen today. Forget the plastic-wrapped version from the store aisle. I’m talking about homemade honey buns—pillowy fried dough spiraled with cinnamon and draped in a sweet, honey-kissed glaze. The first time I made these for my family on a lazy Sunday, they disappeared faster than I could say “coffee’s ready!” There’s just something special about pulling apart a warm, sticky bun you made yourself.
The Sweet Story of the Honey Bun
The honey bun is a bit of a baking folk hero. It likely evolved from European fried dough traditions like Dutch oliebollen. But the version we dream of—the soft, spiral pastry often found in vending machines—became an American classic in the 20th century. It was a clever baker’s answer to creating a portable, sweet, and decadent treat that stayed soft. My version takes us back to the heart of it: from-scratch dough, real cinnamon, and honest-to-goodness homemade icing. It’s a nod to tradition with the love only a home kitchen can provide.
Why You’ll Absolutely Adore This Recipe
Why go to the trouble of making them from scratch? Because the difference is everything. The texture is incredibly soft and airy, not dense or chewy. The cinnamon flavor is warm and real, not artificial. And that icing? It’s a silky river of sweetness with the distinct floral note of real honey. Plus, the process of kneading, rolling, and seeing the dough rise is wonderfully satisfying. It’s a fun baking project that ends with the best reward: a plate of warm, fragrant buns perfect for sharing (or not!).
Perfect Occasions for Homemade Honey Buns
These buns turn any moment into a celebration. They’re the ultimate weekend breakfast treat, especially for holidays or birthdays. Imagine serving them at a brunch with friends—they’ll be the star of the table. They’re also a fantastic “just because” treat for your kids after school or a cozy dessert for a family movie night. Anytime you want to spread a little extra joy and sweetness, these honey buns are your answer.
What You’ll Need: The Honey Bun Ingredients
Gathering simple, quality ingredients is the first step to bliss. Here’s your shopping list:
For the Honey Buns:
- 2 cups all-purpose flour
- ¼ cup granulated sugar
- ½ tsp salt
- ¾ cup whole milk, warmed
- 1 packet (2¼ tsp) instant yeast
- ¼ cup butter, melted and cooled
- 1 large egg, at room temperature
- 2 tsp pure vanilla extract
- 1 tsp vegetable oil (for greasing)
- 2 tsp ground cinnamon
- 2-3 cups vegetable oil, for frying
For the Icing:
- 3 tbsp butter, melted
- 1 cup powdered sugar, sifted
- 2 tbsp milk
- 2 tsp honey
- ½ tsp vanilla extract
Handy Substitution Options
No worries if you’re missing something! Here are some easy swaps:
- Milk: You can use 2% milk or even a dairy-free alternative like almond or oat milk.
- Butter: For a dairy-free version, use a plant-based butter substitute in both the dough and icing.
- Instant Yeast: If you only have active dry yeast, that’s fine! Just mix it with the warmed milk and a pinch of sugar and let it foam for 5-10 minutes before adding the other wet ingredients.
- Frying Oil: Canola or peanut oil are great neutral-flavored alternatives to vegetable oil.
Let’s Get Baking: How to Make Homemade Honey Buns
Ready for some kitchen magic? Follow these steps for perfect, golden buns every time.
Step 1: Make the Dough
In the bowl of your stand mixer fitted with the dough hook, combine the flour, sugar, and salt. In a separate bowl, warm your milk until it feels like a nice bath—about 110°F. To this warm milk, add the yeast, melted butter, egg, and vanilla. Give it a good whisk until it looks creamy and combined. Pour this lovely wet mixture into the dry ingredients. Turn the mixer on medium and let it knead for a full 10 minutes. The dough will transform from shaggy to smooth and elastic, pulling away from the sides of the bowl. Pro tip: Use a spatula to scrape down the sides halfway through to ensure everything is perfectly incorporated.
Step 2: The First Rise
Take a large bowl and lightly grease it with that teaspoon of vegetable oil. Form your smooth dough into a neat ball and place it in the bowl. Cover the bowl tightly with plastic wrap. Now, find a warm, draft-free spot for it to rest. I like to put mine in a turned-off oven with the light on. Let it rise for about 1 to 1.5 hours, or until it has beautifully doubled in size. This waiting time is perfect for a cup of tea!
Step 3: Shape and Fill the Buns
Once your dough is puffy and proud, gently press it down with clean hands. Turn it out onto a lightly floured surface. Using your hands or a rolling pin, press and shape the dough into a rectangle, roughly 15 inches long by 8 inches wide. You’ll see the soft, pillowy texture ready to hold our cinnamon. Sprinkle the cinnamon evenly over the entire surface. Now, starting from one of the longer sides, begin tightly rolling the dough into a log. When you reach the end, use a little water on your fingertips to moisten the edge—this acts like glue. Pinch the seam firmly to seal your cinnamon spiral inside.
Step 4: Cut and Proof the Buns
Here’s a neat trick: use unscented dental floss to cut your log! Slide the floss under the log about 1 inch from the end, cross the ends over the top, and pull. This gives clean cuts without squashing the dough. Place each 1-inch bun on a sheet of parchment or wax paper, leaving space between them. Lightly spray the tops with nonstick spray and loosely cover them with plastic wrap. Let them rise again for about 30 minutes. They’ll get even puffier and relaxed.
Step 5: Fry to Golden Perfection
While the buns proof, pour 2-3 inches of vegetable oil into a large, heavy pot or deep skillet. Heat it over medium heat until it reaches 350-375°F. If you don’t have a thermometer, a small piece of dough should sizzle and float to the top immediately. Carefully place a few buns in the hot oil—don’t crowd the pan. Fry for 1-2 minutes per side until they are a deep, glorious golden brown. Transfer them to a plate lined with paper towels to drain. The smell in your kitchen right now is pure happiness.
Step 6: Create the Honey Icing
While the buns are still warm, make the icing. Simply whisk together the melted butter, sifted powdered sugar, milk, honey, and vanilla in a small bowl. Keep whisking until it’s completely smooth and glossy. If it seems too thick, add a tiny splash more milk. The warmth from the buns will help this icing melt into every nook and cranny.
Step 7: The Grand Finale
Take a warm bun and dunk the top straight into the bowl of icing. Swirl it around to get a good, generous coating. Place it icing-side-up on a wire rack or parchment paper. Repeat with all your beautiful buns. Let the icing set for a few minutes—if you can wait that long! Then, it’s time to enjoy your homemade masterpiece. Chef’s tip: For an extra honey punch, warm the honey slightly before adding it to the icing. It blends more easily and the flavor shines brighter.
Your Homemade Honey Bun Timeline
Here’s a quick breakdown of the time investment for these sweet treats:
- Prep Time: 30 minutes
- Rise Time: 1.5 – 2 hours total
- Frying Time: 15-20 minutes
- Total Time: About 2.5 hours
Most of the time is hands-off while the dough rises, so you can do other things.
The Secret to the Softest Buns
My biggest secret? Don’t skip the double rise. That first long rise develops incredible flavor and texture. The second, shorter rise (called proofing) right before frying is what gives you those super light, airy buns that are crispy outside and tender inside. Rushing this process means denser buns. Patience is the key ingredient!
A Sweet Little Extra Fact
Did you know cinnamon was once more valuable than gold? It was a prized spice traded along ancient routes. When you sprinkle that fragrant brown spice over your dough, you’re taking part in a history of flavor that spans thousands of years. It makes that simple sprinkle feel a bit more magical, doesn’t it?
Essential Kitchen Equipment
You don’t need fancy gear. Here’s what will help:
- Stand mixer with dough hook (or strong arms for hand-kneading!)
- Large mixing bowls
- Rolling pin
- Large, heavy-bottomed pot or Dutch oven for frying
- Candy/deep-fry thermometer (highly recommended)
- Slotted spoon or spider strainer
- Wire rack or paper towels for draining
How to Store Your Homemade Honey Buns
These buns are truly best enjoyed the day they are made, while the exterior is still slightly crisp and the interior is cloud-soft. The icing will set into a beautiful, crackly glaze.
If you have leftovers, store them in an airtight container at room temperature for up to 2 days. Be aware that they will soften considerably overall, becoming more cake-like. You can refresh them by warming them briefly in a toaster oven or air fryer.
I do not recommend freezing the iced buns, as the icing can become messy. You can, however, freeze the un-iced, fried and cooled buns in a single layer on a baking sheet, then transfer to a freezer bag. Reheat from frozen in a 350°F oven until warm, then ice them fresh.
Pro Tips for Honey Bun Success
- Temperature is Key: Ensure your milk is warm, not hot. Hot milk will kill the yeast. 110°F is perfect—it should feel warm to the touch but not scalding.
- Don’t Crowd the Fryer: Frying too many buns at once drops the oil temperature. This makes them greasy instead of crisp. Fry in small batches.
- Icing Consistency: Your icing should be thick but pourable. If it’s too runny, add a bit more powdered sugar. If it’s too thick, add milk a teaspoon at a time.
- Work with Confidence: When handling the risen dough, be gentle but decisive. You don’t want to deflate all the beautiful air pockets.
Fun Presentation Ideas
Make your honey buns the star of the show!
- Stack them on a vintage cake stand for a classic bakery feel.
- Drizzle extra honey over the iced buns and add a tiny sprinkle of sea salt for a gourmet touch.
- Serve them on individual small plates with a dollop of whipped cream or a side of fresh berries.
- For a party, skewer mini honey bun pieces with fruit for a fun dessert kabob.
Healthier & Delicious Honey Bun Variations
Love the idea but want to mix it up? Try one of these twists!
- Baked Honey Buns: Skip the frying! After the second rise, brush the buns with melted butter and bake at 375°F for 18-22 minutes until golden. Then ice as usual.
- Whole Wheat Honey Buns: Substitute half of the all-purpose flour with whole wheat flour for a nuttier flavor and extra fiber.
- Apple Cider Honey Buns: Replace the milk in the dough with warmed apple cider. Add a pinch of nutmeg to the cinnamon filling for a fall-inspired treat.
- Chocolate Swirl Buns: Swap the cinnamon filling for a mixture of cocoa powder, sugar, and a little butter. Drizzle the icing with chocolate sauce.
- Orange Cardamom Buns: Add the zest of one orange to the dough and ½ teaspoon of ground cardamom to the sugar filling. Use orange juice in the icing instead of milk.
- Vegan Honey Buns: Use plant-based milk and butter, and a “flax egg” (1 tbsp ground flax + 3 tbsp water) instead of the egg. Use maple syrup or agave in the icing instead of honey.
Common Mistakes to Avoid
Avoid these pitfalls for perfect honey buns on your first try.
Mistake 1: Using Milk That’s Too Hot
This is the number one yeast killer. If your milk is too hot, it will deactivate the yeast and your dough won’t rise. Your buns will be dense and heavy. Always use a thermometer if you have one. If not, test the milk on the inside of your wrist. It should feel pleasantly warm, not hot. A good rule of thumb is that if it’s uncomfortable to hold your finger in it, it’s too hot.
Mistake 2: Skipping the Double Rise
It’s tempting to rush after the first rise, but patience pays off. The first long rise develops the dough’s structure and flavor. The second, shorter rise (proofing) after shaping allows the gluten to relax. This makes the buns lighter and fluffier. If you skip the proofing, the buns will be tight and won’t expand properly in the hot oil.
Mistake 3: Frying at the Wrong Temperature
Frying at oil that’s too cool makes the buns absorb oil and become greasy. Frying at oil that’s too hot burns the outside before the inside cooks. Investing in a simple candy thermometer is a game-changer. Aim for a steady 350-375°F. If you don’t have one, do the “dough test”: a tiny piece of dough should sizzle vigorously and float to the top within a few seconds.
Mistake 4: Overcrowding the Pan
When you add too many buns to the oil at once, the temperature plummets. This leads to uneven cooking and oily buns. Fry in small batches, usually 3-4 buns at a time depending on your pot size. This keeps the oil temperature stable and ensures each bun gets its moment to shine.
Mistake 5: Icing Cold Buns
The icing is designed to slightly melt and soak into the warm, porous surface of the bun. If you let the buns cool completely before icing, the glaze will just sit on top and can slide right off. For that perfect bakery-style finish, make your icing while the last batch is frying and dip the buns while they’re still warm to the touch.
Your Homemade Honey Bun Questions, Answered
Can I make the dough ahead of time?
Absolutely! You can prepare the dough through the first rise (Step 2). After the dough has doubled, punch it down, wrap it tightly in plastic, and place it in the refrigerator overnight. The next day, let it sit at room temperature for about 30 minutes, then proceed with rolling, filling, cutting, and the second rise. The cold ferment can actually develop even more flavor.
What’s the best oil for frying honey buns?
You want a neutral-flavored oil with a high smoke point. Vegetable, canola, and peanut oil are all excellent choices. Avoid strong-tasting oils like extra virgin olive oil, as they will alter the delicate flavor of the buns. Make sure you have enough to fill your pot 2-3 inches deep.
My dough didn’t rise. What went wrong?
There are three likely culprits. First, your milk was too hot and killed the yeast. Second, your yeast was old and inactive (always check the expiration date!). Third, your rising environment was too cold. Yeast loves a warm, draft-free spot. Try placing your covered bowl in an oven that’s been turned off but has the light on—the slight warmth is perfect.
Can I bake these instead of frying them?
Yes, you can! After the second rise, brush the buns with an egg wash (1 egg + 1 tbsp water) for shine. Bake in a preheated 375°F oven for 18-22 minutes, or until they are golden brown. The texture will be more like a soft dinner roll than a classic fried honey bun, but they will still be delicious. Ice them after they come out of the oven.
How do I get the icing to be smooth and not lumpy?
The key is to sift your powdered sugar. This breaks up any hard clumps. Also, make sure your butter is fully melted and slightly cooled. Whisk everything together vigorously until no lumps remain. If you still have a few, you can press the icing through a fine-mesh sieve.
Can I use active dry yeast instead of instant yeast?
Yes, you can. The process is just slightly different. For active dry yeast, dissolve it in the warm milk along with a pinch of the recipe’s sugar. Let it sit for 5-10 minutes until it becomes frothy and bubbly. This “proofs” the yeast. Then, add the rest of the wet ingredients (butter, egg, vanilla) and proceed with the recipe as written.
Why use floss to cut the buns?
Unflavored dental floss (or thin, un-waxed kitchen twine) is a baker’s secret for cutting soft, risen doughs. A knife can press down and squish the beautiful spiral you just created. Floss slides underneath and cuts cleanly by pulling it through, preserving that perfect round shape.
How do I know when the buns are cooked through?
The outside should be a deep, even golden brown. This usually takes 1-2 minutes per side at the right oil temperature. If you’re unsure, you can always sacrifice one bun as a tester. Cut it open after frying—the interior should be cooked, with no raw, doughy streaks.
My icing is too thin/too thick. How can I fix it?
Icing consistency is easy to adjust. If it’s too thin and runny, whisk in more sifted powdered sugar, a tablespoon at a time. If it’s too thick and pasty, add more milk or cream, just a teaspoon at a time, until it reaches a thick but pourable consistency.
Can I add other flavors to the filling?
Please do! The cinnamon-sugar base is a perfect canvas. Try adding a tablespoon of cocoa powder for a hint of chocolate. Mix in some finely chopped nuts like pecans or walnuts. A little grated apple or a pinch of pumpkin pie spice can be wonderful for the holidays. Get creative and make it your own!
The Sweetest Reward Awaits
Making homemade honey buns is more than following a recipe. It’s about creating a warm, fragrant memory in your kitchen. It’s the pride of presenting a plate of golden, glazed perfection you made with your own hands. Sure, it takes a little time, but every bite—the soft pull of the dough, the sweet-cinnamon aroma, the crackle of the icing—is worth it. So gather your ingredients, clear your counter, and get ready to bake up some pure, sticky joy. Your family and friends are going to be so glad you did. Now, go make some magic!
Cheesecake Pops Delight
Ingredients
Equipment
Method
- In a bowl, combine flour, sugar, and salt.
- Warm the milk to about 110°F, then add yeast, melted butter, egg, and vanilla.
- Pour the milk mixture into the dry ingredients and knead for 10 minutes until smooth and elastic.
- Grease a large bowl with vegetable oil, form the dough into a ball, and let it rise covered in a warm spot for 1 to 1.5 hours.
- Flatten the risen dough and shape it into a rectangle, then sprinkle with cinnamon.
- Roll the dough tightly into a log, sealing the edge with water.
- Cut the log into 1-inch pieces using unscented dental floss and place them on parchment paper to rise for another 30 minutes.
- Heat 2-3 inches of vegetable oil in a pot to 350-375°F.
- Fry the buns for 1-2 minutes per side until golden brown, then drain on paper towels.
- Whisk together the icing ingredients until smooth and glossy.
- Dunk the warm buns into the icing and let them set before enjoying.