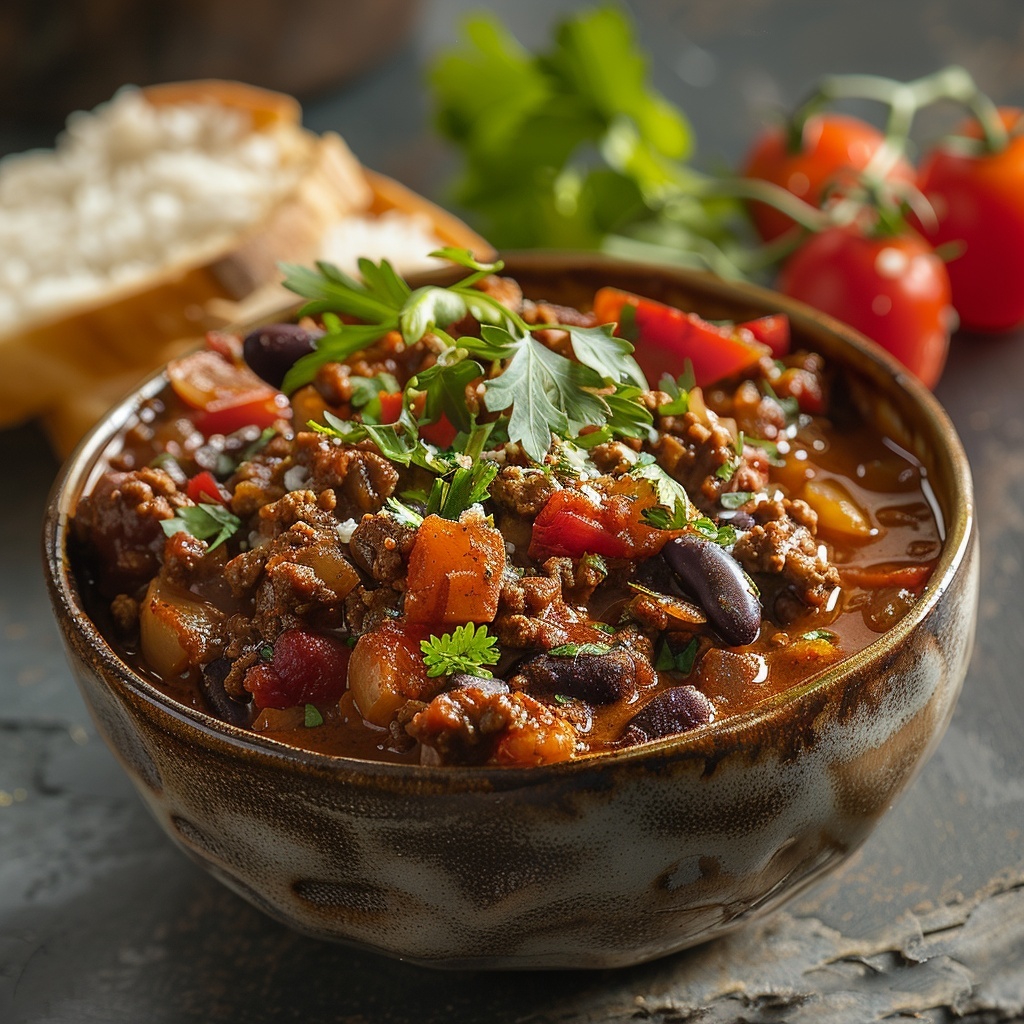
Last Tuesday, my teenage son Jake walked into the kitchen, sniffed the air like a cartoon character following a scent trail, and declared, “Mom, if you ever stop making this chili, I’m moving back in just to protest.” I couldn’t help but laugh because I remember the first time I attempted Chili Con Carne years ago—it was a culinary disaster that involved burned beans and enough cayenne pepper to launch a small rocket. But here’s the thing: this hearty, soul-warming dish has since become my secret weapon for everything from game day gatherings to those chilly evenings when my family needs something that feels like a warm hug in a bowl. The rich, meaty sauce mingled with spices and that perfect hint of heat creates magic that brings everyone running to the dinner table, and I’m about to share every single trick I’ve learned along the way.
The Fascinating Chili Con Carne Origin Story
The history of Chili Con Carne is honestly more colorful than my kitchen walls after my niece’s last “cooking experiment.” While many people assume this dish comes straight from Mexico, the truth is a bit more complicated and way more interesting. The Texas chili con carne version we know today actually developed along the Texas-Mexico border in the 1800s, where cultures collided and created something entirely new. Spanish settlers brought their love of spiced stews, while indigenous people contributed chili peppers and local cooking techniques.
The “chili queens” of San Antonio played a huge role in popularizing this dish during the late 1800s. These entrepreneurial women set up outdoor chili stands in the city’s plazas, serving steaming bowls to workers, travelers, and anyone with a few coins in their pocket. Their recipes were closely guarded secrets passed down through generations. When you dig into the chili con carne origin, you’ll find it’s truly a Tex-Mex creation rather than a purely Mexican dish, which explains why traditional Mexican cuisine doesn’t really feature it the same way.
Over the decades, this humble stew evolved into countless variations. Some purists insist on the chili con carne no beans approach, arguing that authentic Texas chili should only contain meat, chili peppers, and spices. Others happily toss in kidney beans, black beans, or pinto beans because let’s be honest—they make the dish stretch further and add wonderful texture. Even celebrity chefs like Jamie Oliver have put their own spin on it, with the chili con carne jamie oliver version incorporating unique ingredient combinations that honor tradition while adding modern flair.
Why This Chili Con Carne Recipe Will Become Your Go-To
I’ve tested at least a dozen different chili con carne recipes with ground beef over the years, and this one consistently wins hearts and appetites. The flavors develop into this complex, layered taste that makes people ask for seconds before they’ve finished their first bowl. Unlike those watery, bland versions you might’ve suffered through at poorly planned potlucks, this recipe delivers a thick, rich consistency with meat that’s tender and sauce that clings to everything beautifully.
The best part? This isn’t some fussy recipe that requires culinary school training or ingredients you can only find at specialty stores three towns over. Everything comes together in one pot, which means less cleanup and more time enjoying the company of people you actually like. My friend Sarah, who claims she “can’t cook to save her life,” made this recipe and sent me a photo with the caption “I’M A CHEF NOW.” That’s the kind of confidence-building dish we’re talking about here.
The mexican chili con carne recipe approach I use balances traditional spices with practical cooking methods that work for busy families. You get that deep, smoky flavor without standing over the stove all day. The chili con carne sriracha variation adds an extra kick that my husband absolutely loves, though I keep the sriracha on the side for the kids who prefer their food without the fire alarm going off in their mouths. Whether you follow the chili con carne simply recipes philosophy of straightforward cooking or want to experiment with slow cooker methods, this base recipe adapts beautifully to whatever your schedule demands.
Perfect Moments to Serve This Hearty Chili
Chili Con Carne shines during football season like my neighbor’s over-the-top Christmas light display shines in December. There’s something about watching the game with a bowl of steaming chili that just feels right. I’ve brought this dish to more Super Bowl parties than I can count, and it always disappears faster than the guacamole—which is saying something in my crowd.
Cold weather practically demands this comfort food. When the temperature drops and everyone’s bundled up like Arctic explorers, a big pot of chili transforms an ordinary weeknight into something special. I make double batches during winter months because my kids’ friends have developed a sixth sense for when I’m cooking chili, and they mysteriously show up right around dinner time.
This recipe also saves the day during casual gatherings where you need to feed a crowd without maxing out your credit card or your sanity. Birthday parties, casual barbecues, neighborhood potlucks, and even those “we should get together sometime” moments that actually happen—chili works for all of them. You can make it ahead, keep it warm in a slow cooker, and let people serve themselves while you actually enjoy your own party instead of being chained to the kitchen.
Everything You’ll Need for Perfect Chili Con Carne
Gathering your ingredients before you start cooking makes the whole process smoother than my daughter’s excuses for not doing homework. Here’s what you’ll need to create this crowd-pleasing dish:
- 2 pounds ground beef (80/20 blend works best for flavor and texture)
- 2 large yellow onions, diced
- 4 cloves garlic, minced
- 2 bell peppers (red or green), chopped
- 2 cans (15 oz each) kidney beans, drained and rinsed
- 1 can (28 oz) crushed tomatoes
- 1 can (15 oz) tomato sauce
- 1 cup beef broth
- 3 tablespoons chili powder
- 2 teaspoons ground cumin
- 1 teaspoon smoked paprika
- 1 teaspoon dried oregano
- 1/2 teaspoon cayenne pepper (adjust to your heat preference)
- 2 tablespoons tomato paste
- 2 tablespoons vegetable oil
- 2 teaspoons salt
- 1 teaspoon black pepper
- 1 tablespoon brown sugar
- 1 tablespoon apple cider vinegar
- Optional: 2 tablespoons sriracha for extra heat
Smart Ingredient Swaps That Actually Work
Life happens, and sometimes you’re missing ingredients or need to accommodate different dietary needs. Here are substitutions I’ve tested that won’t compromise your chili:
- Ground beef alternatives: Ground turkey, ground chicken, or ground pork work well. You can also use a combination of different meats for deeper flavor.
- Bean options: Black beans, pinto beans, or even chickpeas can replace kidney beans. For chili con carne no beans purists, just omit them entirely and add an extra pound of meat.
- Fresh versus canned tomatoes: Use 3 pounds fresh tomatoes (blanched, peeled, and crushed) if you prefer, though canned tomatoes actually work better because they’re picked at peak ripeness.
- Beef broth replacements: Chicken broth, vegetable broth, or even water with a beef bouillon cube will work in a pinch.
- Spice substitutions: If you don’t have smoked paprika, regular paprika plus a tiny drop of liquid smoke creates a similar effect. No cumin? Add extra chili powder and a pinch of coriander.
- Heat adjustments: Swap cayenne pepper for jalapeños, serrano peppers, or your favorite hot sauce. For a milder version, use only bell peppers and skip the spicy elements entirely.
- Sugar alternatives: Honey, maple syrup, or even a grated carrot can replace brown sugar to balance the acidity.
How to Make Chili Con Carne Like a Pro
Step 1: Prepare Your Ingredients and Workspace
Before you turn on a single burner, get everything chopped, measured, and ready to go like you’re hosting your own cooking show. Dice those onions into roughly half-inch pieces—they don’t need to be perfect since they’ll soften and blend into the sauce anyway. Mince the garlic finely so it distributes evenly throughout the dish, releasing its aromatic oils when it hits the hot oil. Chop your bell peppers into bite-sized chunks that will add pops of color and sweetness to the finished chili. This preparation step, which fancy chefs call “mise en place,” prevents that panicky moment when something’s burning while you’re frantically searching for the cumin.
Pro tip: Keep a damp towel nearby to wipe your cutting board between ingredients. It prevents cross-contamination and keeps your workspace tidier than my teenager’s bedroom.
Step 2: Brown the Ground Beef Properly
Heat your large pot or Dutch oven over medium-high heat and add the vegetable oil, swirling it around to coat the bottom evenly. Once the oil shimmers like a desert highway in summer, add the ground beef and break it up with a wooden spoon or spatula. You want to hear that satisfying sizzle when the meat hits the pan—if it’s silent, your pan isn’t hot enough yet. Let the beef cook undisturbed for 2-3 minutes to develop a nice brown crust on the bottom before stirring. Continue cooking, breaking up larger chunks, until the meat is completely browned with no pink remaining, which takes about 8-10 minutes total.
The smell at this stage is absolutely incredible—rich, savory, and promising. You’ll notice the beef releases some fat and liquid, which is exactly what you want because it builds flavor for the entire dish. Don’t drain off too much fat if you’re using 80/20 ground beef; leave about 2 tablespoons in the pot since it carries flavor and helps cook the vegetables in the next step.
Pro tip: If you’re using leaner ground beef (90/10 or higher), you might need to add an extra tablespoon of oil to prevent the vegetables from sticking later.
Step 3: Build the Flavor Base with Aromatics
Add the diced onions and chopped bell peppers to the pot with the browned beef, stirring everything together so the vegetables are coated in those delicious beef drippings. The onions will start releasing moisture immediately, and you’ll hear the sizzle calm down a bit as they begin to soften. Cook this mixture for about 5-7 minutes, stirring occasionally, until the onions turn translucent and start developing golden edges. The bell peppers will soften slightly but should still have some texture—they’ll continue cooking later in the process.
Now add the minced garlic and tomato paste, stirring constantly for about 1-2 minutes until the garlic becomes fragrant and the tomato paste darkens slightly. This step is important because cooking the tomato paste removes its raw, tinny taste and concentrates its flavors into something deeper and sweeter. The mixture will look a bit dry and might start sticking to the bottom of the pot, which is actually creating fond—those browned bits that add incredible depth to your chili.
Pro tip: If things start sticking too much, add a splash of beef broth to deglaze the pan, scraping up all those flavorful browned bits with your wooden spoon.
Step 4: Add the Spices and Toast Them
Time to wake up those spices and release their essential oils, which is where this dish transforms from ordinary to extraordinary. Sprinkle the chili powder, cumin, smoked paprika, oregano, cayenne pepper, salt, and black pepper over the meat and vegetable mixture. Stir everything together vigorously, coating every piece of beef and every vegetable chunk with the spice blend. Let this cook for about 2 minutes, stirring frequently to prevent burning, and your kitchen will smell like a dream—earthy, warm, with that distinctive chili aroma that makes everyone ask when dinner will be ready.
Toasting the spices like this, which is called “blooming,” intensifies their flavors dramatically compared to just dumping them in with the liquid ingredients. You’ll notice the color deepens to a rich, rusty red, and the spices will become fragrant enough to make your mouth water. If you’re adding the optional sriracha for the chili con carne sriracha version, stir it in at this stage so it blends with the other spices.
Step 5: Add Liquids and Bring to a Simmer
Pour in the crushed tomatoes, tomato sauce, and beef broth, stirring everything together until well combined. The liquid should cover most of the meat mixture, though it’ll look thinner than your final chili at this stage—don’t worry, it’ll thicken beautifully as it cooks. Add the brown sugar and apple cider vinegar, which might seem odd but these ingredients balance the acidity of the tomatoes and create a more rounded, complex flavor profile. Increase the heat to high and bring the mixture to a vigorous boil, which should take about 5 minutes.
Once you see big bubbles breaking the surface, reduce the heat to low and partially cover the pot with a lid, leaving a small gap for steam to escape. This gentle simmer is where the magic happens—the flavors will meld together, the sauce will thicken, and the beef will become incredibly tender. The surface should show just a few lazy bubbles rather than a rolling boil. If you’re making the chilli con carne slow cooker version, this is when you’d transfer everything to your slow cooker and let it work its magic on low for 6-8 hours.
Pro tip: Set a timer for every 15 minutes to give the chili a quick stir, which prevents sticking and ensures even cooking throughout.
Step 6: Add Beans and Continue Simmering
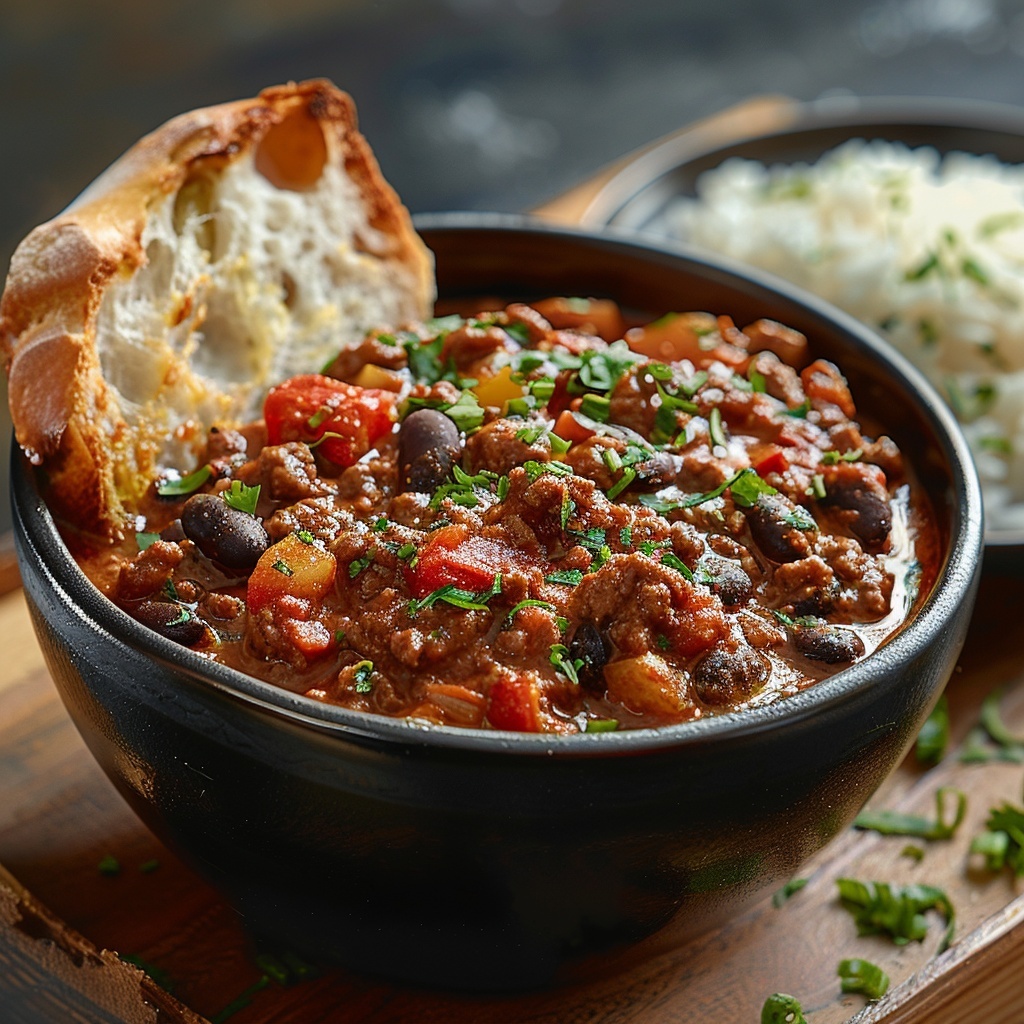
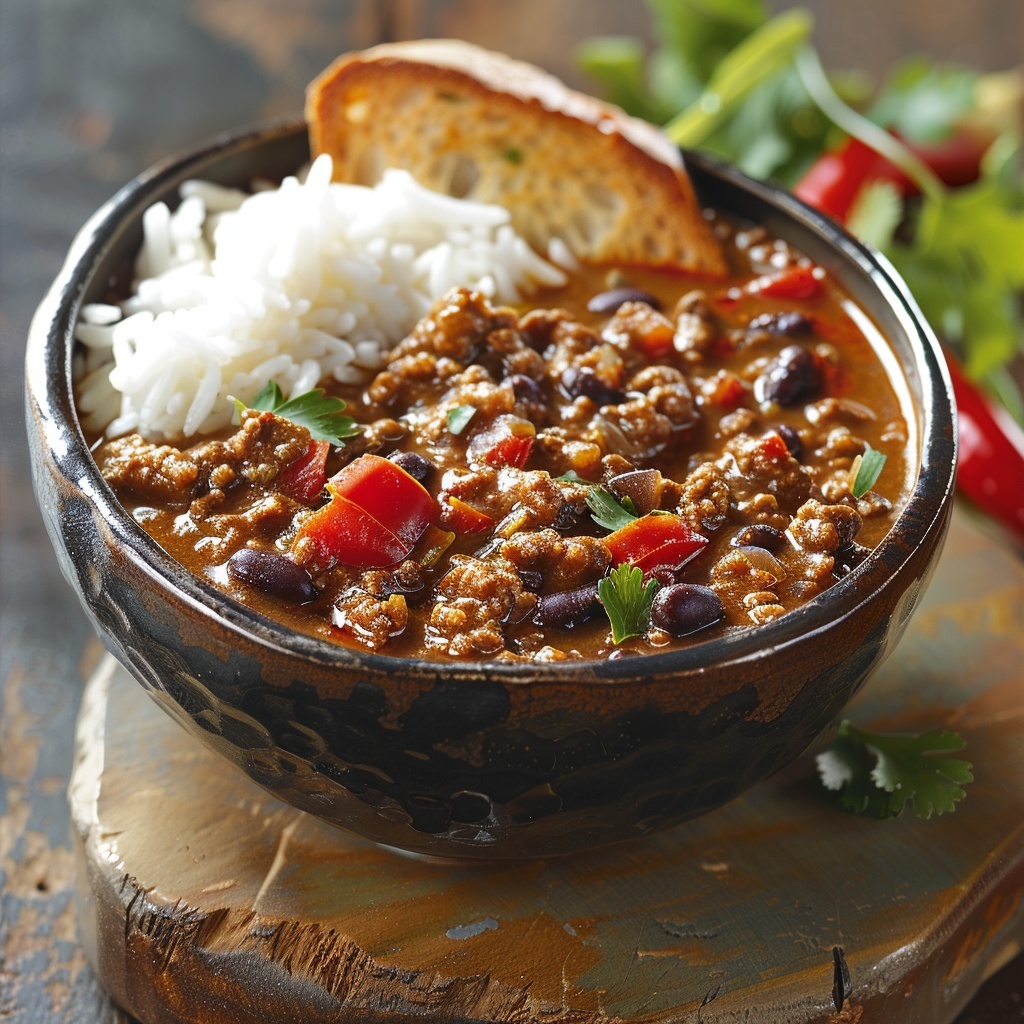
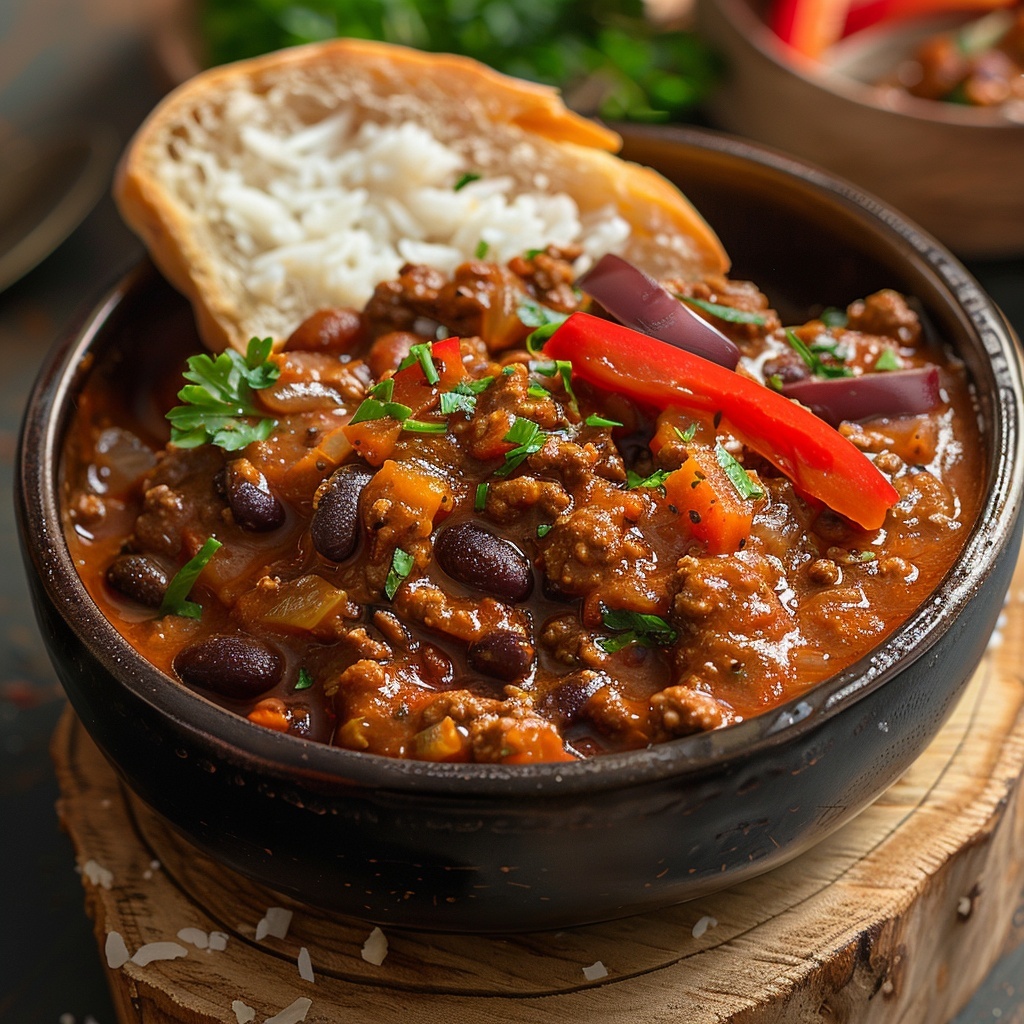
After the chili has simmered for about 45 minutes, stir in the drained and rinsed kidney beans. They’ll heat through quickly and absorb some of that incredible sauce while adding their own creamy texture to the dish. Continue simmering for another 30 minutes, stirring occasionally and watching as the chili transforms from a somewhat soupy mixture into a thick, hearty stew that clings to your spoon. The beans should be tender but not falling apart, and the sauce should have reduced enough that it’s no longer watery.
This is a good time to taste and adjust your seasoning—add more salt if it tastes flat, more chili powder if you want extra warmth, or a pinch of brown sugar if it’s too acidic. Remember that you can always add more seasoning but you can’t take it away, so adjust gradually and taste between additions. If you’re firmly in the chili con carne no beans camp, skip this step entirely and let your all-meat chili continue simmering until it reaches your desired thickness.
Step 7: Final Adjustments and Rest
After a total cooking time of about 1.5 hours, your Chili Con Carne should be thick, richly colored, and aromatic enough to make the neighbors jealous. Turn off the heat and let it rest for about 10 minutes before serving, which allows the flavors to settle and the temperature to come down to something that won’t burn the roof of your mouth. During this resting period, the sauce will thicken just a bit more and everything will taste even better as the flavors continue mingling.
Give it one final taste test and make any last-minute adjustments to the seasoning. The chili should taste balanced—savory with a hint of sweetness, spicy but not overwhelming, and rich with that deep, slow-cooked flavor that only comes from patient simmering. If it’s too thick for your liking, thin it with a splash of beef broth or water. If it’s too thin, let it simmer uncovered for an additional 10-15 minutes.
Chef’s tip: Chili always tastes better the next day after the flavors have had even more time to develop, so don’t hesitate to make this a day ahead of when you need it. Just reheat gently on the stove or in a slow cooker before serving.
Timing Your Chili Con Carne Perfectly
Understanding the time commitment helps you plan your cooking day without stress. Here’s the complete breakdown of how long each stage takes:
- Prep time: 15-20 minutes for chopping vegetables, measuring spices, and organizing ingredients
- Browning time: 10-12 minutes for cooking the ground beef until no pink remains
- Sautéing time: 7-10 minutes for cooking onions, peppers, garlic, and tomato paste
- Active cooking time: 15-20 minutes for bringing to a boil and adding initial seasonings
- Simmering time: 75-90 minutes for developing flavors and thickening the sauce
- Resting time: 10 minutes before serving to allow flavors to settle
- Total time: Approximately 2.5 hours from start to serving
For the chilli con carne slow cooker method, you’ll spend the same 15-20 minutes on prep and about 20 minutes browning the meat and sautéing vegetables, then 6-8 hours on low or 3-4 hours on high in the slow cooker. This hands-off approach works perfectly when you want to start dinner in the morning and come home to a house that smells absolutely amazing.
My Secret Weapon for Next-Level Chili
After years of perfecting this recipe, I discovered something that transforms good chili into spectacular chili: a piece of dark chocolate. I know it sounds weird—my husband gave me the side-eye the first time he saw me unwrap a chocolate square and drop it into the pot. But here’s what happens: the chocolate adds depth and richness without making the chili taste sweet or chocolatey. It rounds out the flavors, balances any bitterness from the chili powder, and creates this silky texture in the sauce that makes people wonder what your secret ingredient is.
Add one ounce of dark chocolate (70% cacao or higher) during the last 30 minutes of simmering. Just drop it in, stir until it melts completely, and watch it disappear into the sauce like a delicious magic trick. This trick comes from traditional Mexican mole sauces, which use chocolate to add complexity to savory dishes. It’s the kind of technique that makes people think you’re a genius in the kitchen when really you’re just following one simple tip.
Here’s something that blew my mind when I learned it: the chili con carne origin story includes a connection to the California Gold Rush. When thousands of prospectors headed west in search of fortune during the 1840s and 1850s, they passed through Texas and fell in love with this hearty, inexpensive dish that could be made in large batches over campfires. These miners spread the recipe throughout the American West, adapting it with whatever ingredients they could find in mining camps and frontier towns.
By the 1880s, chili con carne had become so popular that companies started selling “chili powder” as a premixed spice blend specifically designed for making this dish. A German immigrant named William Gebhardt in New Braunfels, Texas, created the first commercial chili powder in 1894, which revolutionized home cooking by making this complex-tasting dish accessible to anyone with a pot and some ground meat. That convenience factor helped spread the chili con carne recept across America and eventually around the world.
Kitchen Tools You’ll Need for Success
Having the right equipment makes cooking easier and more enjoyable than trying to assemble IKEA furniture without instructions. Here’s what you’ll want on hand:
- Large Dutch oven or heavy-bottomed pot: At least 6-quart capacity with a tight-fitting lid to prevent burning and ensure even heat distribution
- Wooden spoon or sturdy spatula: For stirring and breaking up the ground beef without scratching your pot
- Sharp chef’s knife: Makes chopping onions, peppers, and garlic quick and safe
- Cutting board: Preferably a large one so you have plenty of workspace
- Can opener: Unless all your cans are the pull-tab kind (lucky you)
- Measuring spoons and cups: For accurate seasoning and liquid measurements
- Ladle: For serving without making a mess all over your counter
- Slow cooker (optional): If you’re making the chilli con carne slow cooker version, you’ll need at least a 6-quart capacity
I’ve made this recipe in everything from a fancy Le Creuset Dutch oven to a basic stainless steel pot I got at a discount store, and honestly, as long as your pot has a heavy bottom that distributes heat evenly, you’ll be fine. The slow cooker method works wonderfully for busy days when you want to prep everything in the morning and come home to dinner basically ready.
Storing Your Chili Con Carne Properly
One of the best things about Chili Con Carne is how beautifully it stores, which makes it perfect for meal prep or making ahead for parties. Let your chili cool to room temperature before storing—leaving it out for about 30-45 minutes works well, though don’t leave it longer than 2 hours to stay within food safety guidelines. Transfer the cooled chili to airtight containers, leaving about an inch of space at the top because liquids expand slightly when cold. Store these containers in your refrigerator where they’ll keep perfectly for 4-5 days, getting tastier each day as the flavors continue developing and melding together.
For longer storage, freezing is your best friend and turns this recipe into the ultimate convenience food. Portion the cooled chili into freezer-safe containers or heavy-duty freezer bags, removing as much air as possible to prevent freezer burn. I like using both quart-sized containers for family meals and smaller pint containers for individual lunches—it’s like creating your own frozen dinner section customized exactly to your taste. Label everything with the date and contents because trust me, three months from now you won’t remember if that container holds chili or spaghetti sauce. Properly frozen chili stays delicious for up to 3 months, though I’ve never had a batch last that long because someone always raids the freezer stash.
When you’re ready to enjoy your stored chili, thaw refrigerated portions in the microwave or on the stovetop over low heat, stirring occasionally and adding a splash of broth or water if it’s thickened too much. For frozen chili, the safest method is thawing overnight in the refrigerator, though I’ll admit to the occasional emergency defrost in the microwave when I forget to plan ahead. Reheat your chili gently to avoid scorching the bottom—medium-low heat on the stovetop works better than high heat, and stirring every few minutes ensures even heating throughout. The beauty of this dish is that it actually improves with reheating, developing even deeper flavors that make day-three chili potentially better than day-one chili.
Expert Tips for Outstanding Results
After making countless batches of chili, I’ve learned tricks that consistently elevate this dish from good to absolutely crave-worthy. First, resist the urge to skip browning the meat properly—that caramelization creates deep flavors that you simply can’t replicate any other way. Take your time with this step even when you’re hungry and impatient, because those extra few minutes pay off tremendously in the final taste.
Season in layers rather than dumping all your spices in at once. Adding some spices early when you’re cooking the aromatics and then adjusting near the end creates more complex flavor than a single seasoning addition. This technique, which professional chefs use constantly, builds depth that makes people wonder why your chili tastes different from everyone else’s. Also, don’t be afraid of that pinch of brown sugar and splash of vinegar—these balancing ingredients brighten the flavors without making the chili taste sweet or sour.
Let your chili simmer low and slow rather than rushing it on high heat. I know waiting is hard, especially when the house smells incredible and everyone’s asking when dinner will be ready, but patience truly is a virtue when making chili. The low simmer allows flavors to develop gradually, the meat to become tender, and the sauce to thicken naturally without reducing so much that it becomes paste-like. If you’re really short on time, the chilli con carne slow cooker approach lets you set it and forget it while you handle other life responsibilities.
Finally, make extra. This is not one of those dishes where you should precisely calculate servings and make exactly enough. Double the batch and freeze half, or plan for leftovers that get better each day. Your future self will thank you when you’re exhausted on a Wednesday night and discover ready-made dinner waiting in the freezer like a gift from the past.
Making Your Chili Con Carne Look As Good As It Tastes
Presentation might seem unnecessary for a casual dish like chili, but taking two extra minutes to make it look appealing transforms it from weeknight dinner to something special. Here are my favorite ways to serve this crowd-pleaser:
- Build-your-own chili bar: Set out bowls of toppings like shredded cheddar cheese, sour cream, diced avocado, sliced jalapeños, chopped cilantro, crushed tortilla chips, and diced red onions so everyone can customize their bowl exactly how they like it.
- Bread bowl presentation: Hollow out round sourdough loaves and fill them with hot chili for an edible bowl that looks impressive and tastes amazing when you eat the chili-soaked bread.
- Loaded chili fries: Serve the chili over a bed of crispy french fries or baked potato wedges, topped with melted cheese and your favorite garnishes for a hearty meal that’ll feed hungry teenagers or adults with teenager-sized appetites.
- Cornbread pairing: Place a square of warm, buttered cornbread on the side of each bowl, maybe with a drizzle of honey, creating that classic combination of flavors and textures.
- Mason jar layers: For parties or meal prep, layer chili with toppings in clear mason jars so you can see the colorful strata of ingredients—it’s Instagram-worthy and practical.
- Skillet service: Serve individual portions in small cast-iron skillets topped with melted cheese and fresh cilantro for a rustic, restaurant-style presentation that keeps everything hot longer.
Healthier Chili Con Carne Variations Worth Trying
While traditional Chili Con Carne is already pretty balanced with protein, vegetables, and fiber from beans, sometimes you want to adjust the recipe for specific dietary needs or health goals. Here are six variations I’ve tested that maintain the delicious spirit of the original while offering different nutritional profiles.
Turkey and White Bean Chili Con Carne
This lighter version swaps ground beef for lean ground turkey and replaces kidney beans with white beans like cannellini or great northern beans. The result is a milder, slightly lighter chili that’s lower in fat and calories but still satisfying and flavorful. I boost the flavor by adding an extra tablespoon of chili powder and some smoked paprika since turkey is naturally less rich than beef. This variation works beautifully for the chili con carne recipes with ground beef category—well, technically ground poultry, but you get the idea. Add some fire-roasted green chiles for extra depth and a touch of lime juice at the end to brighten everything up.
Vegetarian Chili Con Carne with Plant-Based Protein
You can create a completely meatless version that’s so hearty even confirmed carnivores enjoy it. Replace the ground beef with a combination of plant-based crumbles, diced mushrooms, and extra beans—using three different types of beans (kidney, black, and pinto) creates interesting texture variations. The mushrooms add umami depth that mimics the savory quality of meat, especially if you use cremini or portobello mushrooms chopped small. Increase the smoked paprika and add a tablespoon of soy sauce or tamari to boost the savory notes. This version is higher in fiber and significantly lower in saturated fat while still delivering that satisfying, stick-to-your-ribs feeling.
Paleo-Friendly Texas Chili Con Carne No Beans
This variation honors both the texas chili con carne tradition and paleo dietary guidelines by eliminating beans and focusing entirely on meat and vegetables. Use a combination of ground beef and cubed beef chuck for varied textures, and add extra diced bell peppers, zucchini, and cauliflower to replace the volume and texture that beans normally provide. The vegetables break down slightly during the long simmer, thickening the sauce naturally without needing starches. Skip the brown sugar and use a small amount of date paste instead for paleo-compliant sweetness. This version is lower in carbohydrates and great for anyone following grain-free or legume-free eating patterns.
Slow Cooker Chili Con Carne with Extra Vegetables
The chilli con carne slow cooker method adapts perfectly to a veggie-packed version that sneaks extra nutrition into every bowl. After browning your meat, add diced carrots, celery, and even some finely chopped spinach or kale that wilts down and becomes almost invisible in the finished dish. Sweet potato cubes add natural sweetness and extra vitamins while thickening the sauce as they break down. This is my go-to when I want to feed my family something that feels indulgent but secretly delivers a huge serving of vegetables. The slow cooker breaks down all the vegetables until they meld seamlessly with the meat and sauce, creating a nutritionally supercharged version that tastes just as comforting as the original.
Spicy Sriracha and Chicken Chili Con Carne
For a lighter protein that still packs serious flavor, try this chili con carne sriracha variation using ground chicken or diced chicken thighs. The chicken takes on the spices beautifully and provides lean protein without the heaviness of beef. Add extra sriracha along with some fresh jalapeños for heat that builds gradually rather than overwhelming your taste buds immediately. Using chicken broth instead of beef broth keeps the flavor profile cohesive, and adding some fire-roasted tomatoes instead of regular crushed tomatoes adds smokiness that compensates for the lighter meat. This version is lower in saturated fat and calories but still delivers that spicy, warming satisfaction you want from chili.
Low-Sodium Heart-Healthy Chili Con Carne
If you’re watching sodium intake for heart health or blood pressure concerns, you can still enjoy this dish with some smart modifications. Use no-salt-added canned tomatoes and beans, low-sodium beef broth, and skip the added salt entirely—instead, rely on spices, fresh herbs, and aromatics for flavor. Toast your spices as directed in the recipe to maximize their impact, and add fresh cilantro, a squeeze of lime, and some diced fresh tomatoes as garnish to provide brightness without sodium. The chili con carne simply recipes philosophy of straightforward, quality ingredients works perfectly here because you’re letting the natural flavors shine without relying on salt as a crutch. You’ll be surprised how flavorful this version tastes when you build layers of flavor through proper technique rather than just salting heavily.
Common Mistakes That Sabotage Your Chili
Mistake 1: Using Ground Beef That’s Too Lean
I see so many people reach for 93/7 or even 96/4 ground beef thinking they’re making a healthier choice, but this actually backfires when making Chili Con Carne. Super lean beef doesn’t have enough fat to carry flavors and create that rich, satisfying texture you want in chili. The meat ends up dry and crumbly, and your sauce lacks the body and depth that makes chili taste hearty and comforting. Instead, use 80/20 ground beef which provides enough fat to keep the meat tender and flavorful without making your chili greasy. If you’re concerned about fat content, you can skim off excess fat after browning the meat, but starting with some marbling makes all the difference in the final taste and texture.
Mistake 2: Rushing the Simmering Process
The biggest temptation when making chili is cranking up the heat to make it cook faster, especially when you’re hungry and the house smells amazing. But this completely ruins the dish because flavors need time to develop and meld together into that complex, layered taste that separates great chili from mediocre chili. High heat also causes the bottom to scorch while the top stays undercooked, and the meat can become tough instead of tender. Commit to the low, slow simmer even though it tests your patience—set a timer, leave the kitchen, and resist checking it every five minutes. The chili will reward your patience by transforming into something far more delicious than a rushed version could ever be.
Mistake 3: Adding All Your Spices at the Wrong Time
Dumping all the spices in with the liquid ingredients is a common shortcut that costs you flavor. Spices need to be bloomed in fat to release their essential oils and develop their full aromatic potential, which is why the recipe directs you to toast them with the meat and vegetables before adding liquids. When you skip this step and just stir spices into the sauce, they taste flat and one-dimensional instead of rich and complex. Take those extra two minutes to toast your spices properly after the vegetables soften, stirring them constantly so they don’t burn. Your nose will tell you when it’s working—the aroma should intensify dramatically and make your mouth water.
Mistake 4: Forgetting to Taste and Adjust Seasonings
Following a recipe exactly is great for your first attempt, but every batch of chili is slightly different depending on your tomatoes’ acidity, your chili powder’s heat level, and even your altitude. Not tasting as you go means you might serve chili that’s too bland, too spicy, or unbalanced in some way that a simple adjustment could have fixed. Taste your chili after it’s simmered for about an hour and again before serving, adjusting salt, heat, or acidity as needed. Keep in mind that flavors intensify as the chili cooks down, so something that tastes perfect at the beginning might need adjusting later. Trust your taste buds more than the recipe—they know what you like better than I do.
Mistake 5: Overcrowding the Pot When Browning Meat
When you dump all the ground beef into the pot at once, it releases so much moisture that it steams instead of browns, leaving you with gray, boiled-looking meat instead of the caramelized, flavorful beef you want. This happens because the temperature drops dramatically when you add cold meat to the pot, and if it’s piled too high, the moisture can’t evaporate quickly enough. Brown your beef in two batches if necessary, giving each portion enough space to actually make contact with the hot surface of the pot. You’ll know you’re doing it right when you hear aggressive sizzling and see deep brown color developing on the meat—that’s the sound and color of flavor being created through the Maillard reaction.
Your Chili Con Carne Questions Answered
What is the difference between chili and chili con carne?
The term “chili” is actually a broad category that includes many different types of spiced stews, while Chili Con Carne specifically means “chili with meat” in Spanish. Traditional chili can be vegetarian or made with different proteins, but chili con carne always contains meat—typically beef—as a main component along with chili peppers and spices. The texas chili con carne version is particularly specific about containing chunks or ground beef, chili peppers, and seasonings, traditionally without beans, though modern American versions often include them. So essentially, all chili con carne is chili, but not all chili is chili con carne.
What ingredients are in a chili con carne?
The essential ingredients in authentic Chili Con Carne include ground or cubed beef, chili peppers (or chili powder), tomatoes, onions, garlic, and various spices like cumin and paprika. Most american versions, like this chili con carne recipes with ground beef approach, also include beans (usually kidney beans), bell peppers, tomato sauce, and beef broth for a heartier, thicker consistency. The spice blend typically features chili powder, cumin, paprika, oregano, cayenne pepper, salt, and black pepper. Optional ingredients that add depth include tomato paste for richness, brown sugar to balance acidity, apple cider vinegar for brightness, and even dark chocolate or coffee for complex undertones that enhance the savory flavors.
What do Americans call chilli con carne?
Most Americans simply call this dish “chili” in everyday conversation, dropping the “con carne” part entirely since the meat version is so standard in American cuisine. You might hear regional variations like “Texas chili,” “bowl of red” (particularly in Texas), or “chili with beans” versus “chili without beans” depending on local preferences and traditions. The spelling also varies—some people write “chili” while others use “chilli,” though “chili” is more common in American English. When ordering at restaurants or discussing recipes, Americans typically just say “chili” and everyone understands they’re talking about this hearty, spiced meat stew rather than the pepper itself.
How do Mexicans eat chili con carne?
Here’s an interesting fact: traditional Mexican cuisine doesn’t really feature chili con carne the way Americans know it because the dish actually developed in Texas rather than Mexico. However, similar Mexican dishes like carne con chile (meat with chile sauce) are served differently than American-style chili. Mexicans might serve spiced meat stews with warm corn or flour tortillas for scooping, rice on the side, fresh lime wedges, chopped white onions, cilantro, and sometimes crumbled queso fresco. The dish is often thinner and saucier than American chili, more like a stew to be eaten with tortillas rather than a thick mixture served in a bowl with toppings, reflecting different culinary traditions and eating styles between the two cultures.
Can I make Chili Con Carne without beans?
Absolutely, and in fact, the chili con carne no beans approach is considered more authentic to original Texas-style chili, which traditionally contained only meat, chili peppers, and spices. Purists argue that beans were added later as an economical way to stretch the dish, not because they’re essential to the recipe. If you’re making bean-free chili, you might want to increase the amount of ground beef to 3 pounds to maintain a hearty consistency, or add extra vegetables like diced bell peppers and tomatoes to provide bulk and texture. The cooking time remains essentially the same, though you’ll skip the step where beans are added. This version is particularly popular among low-carb and paleo diet followers who avoid legumes.
How can I make my Chili Con Carne thicker?
If your chili is too thin or soupy, the easiest solution is to simmer it uncovered for an additional 15-30 minutes, allowing excess liquid to evaporate and the sauce to reduce naturally. You can also mash some of the beans against the side of the pot with your spoon, which releases their starches and thickens the sauce without changing the flavor. Another technique is mixing 2 tablespoons of cornmeal or masa harina (corn flour used for tortillas) with a bit of water to make a slurry, then stirring it into the chili during the last 15 minutes of cooking—this thickens the sauce while adding a subtle corn flavor that’s traditional in some southwestern chili recipes. Avoid adding flour directly to hot liquid as it creates lumps that are nearly impossible to smooth out.
What’s the best way to reduce spiciness if my chili is too hot?
If you’ve accidentally created fire in a pot, don’t panic because several ingredients can tone down excessive heat without ruining the entire batch. Adding a tablespoon or two of brown sugar or honey helps counteract spiciness by balancing the heat with sweetness—our taste buds register these flavors differently, and sweet notes make heat less aggressive. Stirring in sour cream, plain yogurt, or even a splash of heavy cream creates a cooling effect because dairy proteins bind to capsaicin (the compound that makes peppers hot) and wash it away. Increasing the volume by adding more tomatoes, tomato sauce, or additional beans dilutes the spiciness across more ingredients, effectively reducing the heat level per serving without changing the flavor profile dramatically.
Is Chili Con Carne better the next day?
Yes, and this isn’t just in your imagination—there’s actual science behind why chili tastes better as leftovers. As the chili sits in the refrigerator, the flavors continue to meld and develop through a process where spices and seasonings permeate the meat and beans more thoroughly. The fat solidifies slightly and redistributes when reheated, carrying flavors more effectively throughout the dish. Acids from tomatoes and vinegar continue breaking down proteins, making the meat more tender, while the starch from beans continues thickening the sauce even when cold. Many chili enthusiasts, including myself, intentionally make the dish a day ahead of when they need it specifically because day-two chili is noticeably richer and more complex than freshly made chili, making it perfect for meal prep or advance party preparation.
Can I use different types of meat in Chili Con Carne?
While the mexican chili con carne recipe traditionally calls for beef, this dish is surprisingly adaptable to different proteins based on your preferences or what’s available. Ground turkey or chicken creates a lighter version that’s lower in fat, though you should add a bit more oil and extra seasoning since these meats are less rich than beef. Ground pork adds wonderful flavor and fat content similar to beef, or try a combination of beef and pork for interesting depth. For a more upscale version, use cubed beef chuck roast instead of ground meat—it takes longer to become tender but creates incredibly rich, fall-apart pieces of meat. Venison, bison, or other game meats work beautifully if you have access to them, though they’re leaner and benefit from added fat like bacon or extra oil during cooking.
What toppings go best with Chili Con Carne?
The right toppings transform a simple bowl of chili into a customizable experience where everyone gets exactly what they want. Classic options include shredded cheddar or Monterey Jack cheese that melts into the hot chili, sour cream or Greek yogurt for cooling creaminess, diced raw onions (red or white) for sharp crunch, fresh cilantro for herbal brightness, and sliced jalapeños if you want extra heat. Crushed tortilla chips or corn chips add satisfying crunch and help scoop up every last bit, while diced avocado or guacamole provides rich, creamy contrast to the spicy meat. Other popular choices include sliced scallions, a squeeze of fresh lime juice, hot sauce for heat enthusiasts, or even a fried egg on top for breakfast-style chili that’s unexpectedly delicious.
How do I prevent my chili from burning on the bottom?
Scorched chili is heartbreaking because that burned flavor permeates the entire pot and can’t be removed, but this problem is completely preventable with proper technique. Always use a heavy-bottomed pot or Dutch oven that distributes heat evenly rather than creating hot spots where burning occurs. Keep the heat low during the simmering phase—you should see just occasional gentle bubbles, not a rolling boil. Stir your chili every 15-20 minutes, making sure to scrape the bottom of the pot where ingredients tend to settle and stick. If you notice anything starting to stick, immediately reduce the heat and add a splash of broth or water to loosen it. The chilli con carne slow cooker method completely eliminates this concern since slow cookers provide gentle, even heat that won’t scorch, making them foolproof for anyone who’s burned chili before.
Bringing It All Together in Your Kitchen
Making Chili Con Carne is more than just following a recipe—it’s creating a dish that brings people together around the table, warms them from the inside out, and makes your house smell like the best restaurant in town. Whether you’re exploring the chili con carne origin story, trying the texas chili con carne no-beans version, or adapting the chili con carne jamie oliver style with your own creative touches, this dish rewards both tradition and experimentation.
The beauty of chili is that it’s forgiving enough for beginners but complex enough to keep experienced cooks interested in perfecting their technique. It scales up beautifully for crowds, stores like a dream for meal prep, and adapts to countless dietary needs and taste preferences without losing its essential character. From game day gatherings to weeknight family dinners, from the chilli con carne slow cooker approach for busy days to the labor-of-love stovetop method for lazy Sundays, this recipe fits into your life however you need it.
So grab your biggest pot, gather your ingredients, and don’t be afraid to make this recipe your own. Add that extra jalapeño if you love heat, throw in the chili con carne sriracha for kick, or follow the chili con carne simply recipes philosophy and keep things straightforward. The most important ingredient isn’t listed in the recipe at all—it’s the love and attention you bring to cooking, and the joy of sharing good food with people who matter to you. Now get in that kitchen and make some magic happen.
Chili Con Carne
Ingredients
Equipment
Method
- Prepare all ingredients by chopping, dicing, and measuring them out.
- Heat a large pot or Dutch oven over medium-high heat and add vegetable oil.
- Once the oil is shimmering, add the ground beef, breaking it up with a wooden spoon and cooking until browned (8-10 minutes).
- Add diced onions and chopped bell peppers to the pot, cooking until softened (5-7 minutes).
- Stir in minced garlic and tomato paste, cooking until fragrant (1-2 minutes).
- Sprinkle in the chili powder, cumin, smoked paprika, oregano, cayenne pepper, salt, and black pepper; stir to combine and toast the spices (about 2 minutes).
- Pour in the crushed tomatoes, tomato sauce, and beef broth; stir well and bring to a boil.
- Once boiling, reduce heat to low, cover partially, and let simmer for 75-90 minutes.
- Stir in drained and rinsed kidney beans; continue simmering for an additional 30 minutes.
- After cooking, let the chili rest for about 10 minutes before serving.