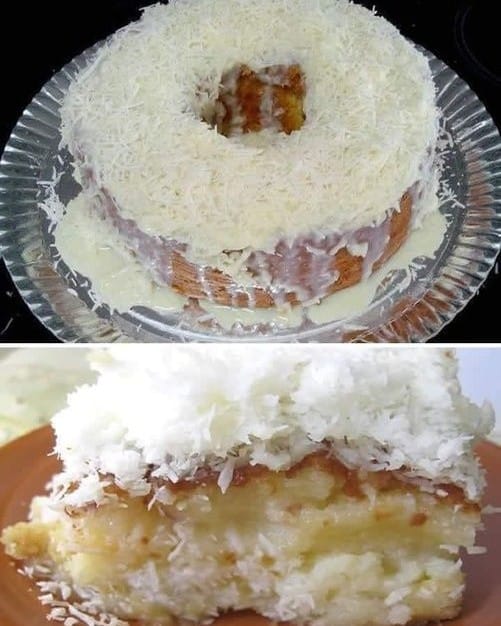
The Iced Coconut Cake That Saved My Summer
Have you ever had one of those days where the heat just melts your will to do anything, especially bake? I was having exactly that kind of day when my neighbor dropped off a slice of the most fabulous cake. It was cold, creamy, and tasted like a tropical vacation. I begged her for the recipe right then and there! This Iced Coconut Cake is my absolute go-to dessert for warm weather now. It’s wonderfully moist, ridiculously easy, and that no-cook icing? Pure genius.
From Tropical Treats to Your Table
While coconut cake has roots in many tropical cuisines, this particular version feels like a beautiful shortcut to paradise. The method is wonderfully simple, blending the batter for ease and skipping a cooked frosting altogether. It’s a modern take that respects the classic flavors—the sweet, nutty taste of coconut paired with creamy richness—but gets you to the finish line much faster. I think of it as “chef-approved laziness.” It delivers all the sophistication of a layered bakery cake without any of the fuss.
Why You’ll Fall in Love With This Cake
First, it’s a one-bowl wonder for the batter, making cleanup a breeze. Second, the “icing” is simply a mix-and-pour situation. No thermometers, no fussy spreading. You pour it over the warm cake and watch it soak in, creating this magical, moist layer. And third, it *must* be frozen. Yes, frozen! This gives it an incredible, firm-yet-soft texture that’s utterly refreshing. It’s a dessert that’s both impressively delicious and deceptively simple.
Perfect Occasions for This Frozen Delight
This cake is a superstar for any event where you need a make-ahead, crowd-pleasing dessert.
- Summer BBQs & Picnics: It’s cold and refreshing, a perfect foil for grilled foods.
- Potlucks: Travels beautifully in its pan and serves a lot of people.
- Birthdays: For anyone who loves coconut, this is a unique and memorable birthday “cake.”
- Just Because: Sometimes a Tuesday afternoon deserves a slice of frozen coconut heaven.
What You’ll Need: The Ingredients
For the Cake (Pasta):
- 2 cups of granulated sugar
- 2 cups of all-purpose wheat flour
- 4 large eggs
- 1 cup of whole milk
- 2 tablespoons of grated coconut (unsweetened or sweetened, your choice!)
- 1 tablespoon of baking powder
- 2 tablespoons of unsalted margarine (or softened butter)
For the Syrup (Roof):
- 1 can (14 oz) of sweetened condensed milk
- 1 glass (200ml) of coconut milk
- 1 cup of grated coconut (for mixing into the syrup and sprinkling)
No-Problem Substitutions
Don’t feel a trip to the store! Here are some easy swaps:
- Milk: Any fat percentage works, but whole milk gives the richest texture.
- Unsalted Margarine: An equal amount of softened butter is a perfect substitute.
- Grated Coconut: Use unsweetened for less sugar, or sweetened for extra sweetness. Freshly grated coconut is a lovely treat if you have it.
- Coconut Milk: Canned full-fat coconut milk yields the creamiest result, but “lite” coconut milk will work in a pinch.
How to Make Your Iced Coconut Cake
Follow these steps for a foolproof, amazing cake every single time.
Step 1: Blend Your Wet Ingredients
Grab your blender! Crack in the four eggs, then add the milk, margarine (or butter), sugar, and the two tablespoons of grated coconut. Blend this on high speed until everything is completely smooth and beautifully combined. You’ll see a pale, creamy liquid that already smells wonderful. This blending step is our secret for a perfectly even cake batter with no lumpy sugar.
Step 2: Combine Wet and Dry
Take out a large mixing bowl and pour in your two cups of flour. Make a little well in the center. Now, slowly pour your blended liquid mixture into the flour. Use a spatula or a whisk to gently fold everything together. Keep mixing until you can’t see any more dry flour pockets. It will be a thick, smooth, and inviting batter.
Step 3: Fold in the Coconut and Yeast
Here’s where we boost that coconut flavor! Sprinkle in your remaining grated coconut (from the cake ingredients list) and fold it in gently. Finally, sprinkle the tablespoon of baking powder over the top. Fold it in *very* gently and just until incorporated. Over-mixing after adding the baking powder can deflate it, and we want a nice, light rise.
Pro tip: Make sure your baking powder is fresh for the best lift. If it doesn’t fizz when you drop a bit in hot water, it’s time for a new can!
Step 4: Bake to Golden Perfection
Preheat your oven to 350°F (175°C). Grease and flour a standard 9×13 inch baking pan very well. Pour your lovely batter into the prepared pan, smoothing the top with your spatula. Place it in the middle of your preheated oven. Bake for about 40 minutes. You’ll know it’s done when the top is a deep golden brown and a toothpick inserted in the center comes out clean.
Step 5: Create the Magical Icing
While the cake is baking, make your syrup. In a medium bowl, simply whisk together the entire can of condensed milk and the glass of coconut milk. Stir in one cup of grated coconut. That’s it! No cooking required. The mixture will be gloriously thick, shiny, and sweet.
Step 6: Ice It Hot and Freeze It Cold
As soon as the cake comes out of the oven, use a skewer or fork to poke holes all over the hot surface. Don’t be shy! Now, immediately pour your cold syrup mixture evenly over the top. Watch as it seeps down into those holes. Sprinkle the top generously with a little extra grated coconut. Let the cake cool completely in the pan, then cover it and place it in the freezer. Freeze for at least 6 hours, or overnight for the best texture.
Chef’s tip: For clean slices, use a sharp knife dipped in hot water and wiped dry between each cut.
Timing is Everything
Here’s your simple timeline:
- Prep Time: 15 minutes
- Cook Time: 40 minutes
- Cooling & Freezing Time: 6+ hours (overnight is best)
- Total Time: About 7 hours (mostly hands-off freezing)
My Little Secret for Extra Moisture
My neighbor’s secret trick? Let the cake sit out for just 5 minutes after baking, then poke the holes and add the syrup. This tiny pause lets the structure settle just enough so it doesn’t collapse under the liquid, but it’s still plenty hot to drink in every last drop of that creamy icing.
A Coconutty Fact for Fun
Did you know coconut is technically a drupe, not a nut? It’s a one-seeded fruit, just like a peach or plum! That hard, hairy shell is like the pit. Thinking of my cake as a “tropical fruit cake” makes me feel a tiny bit healthier about having a second slice.
Necessary Kitchen Equipment
- Blender
- Large mixing bowl
- 9×13 inch baking pan
- Whisk and spatula
- Measuring cups and spoons
- Toothpick or cake tester
How to Store Your Masterpiece
This cake lives in the freezer. Once it’s fully frozen after preparation, you can keep it covered tightly in its pan with plastic wrap or aluminum foil for up to 2 weeks. The freezer lock ensures it stays moist and prevents it from picking up any other food odors.
When you’re ready to serve, you can take the whole cake out and let it sit at room temperature for about 10-15 minutes before slicing. This slight thaw makes it easier to cut and gives it the perfect semi-frozen, creamy texture. I don’t recommend storing it in the fridge for more than a day, as it can become too soft and lose its unique frozen character.
Leftover slices can be individually wrapped in plastic and returned to the freezer. They make for a fantastic instant dessert straight from the freezer any time a coconut craving hits!
Tips and Advice for Cake Success
- Always preheat your oven. Putting the cake in a cold oven changes the rise.
- Grease and flour your pan. The flour creates a barrier for easy release.
- Don’t open the oven door during the first 30 minutes of baking. This can cause the cake to fall.
- Use full-fat coconut milk for the richest, most luxurious syrup texture.
Presentation Ideas to Impress
- Serve each slice on a plate drizzled with a little extra coconut milk.
- Garnish with a few toasted coconut flakes for color and a nutty flavor contrast.
- Add a few fresh berries like raspberries or mango slices on the side for a pop of color.
- For a party, cut it into small squares and serve as frozen “cake bites.”
Delicious Recipe Variations
Feel like mixing it up? Here are six tasty twists:
- Chocolate-Coconut: Add 1/2 cup of cocoa powder to the dry ingredients for a chocolate base.
- Pina Colada Cake: Add 1/2 cup of crushed pineapple (drained) to the cake batter.
- Toasted Almond: Substitute 1/2 cup of the grated coconut with toasted sliced almonds in the batter and topping.
- Lime Zest: Add the zest of two limes to the batter and the syrup for a bright, tropical zing.
- Coconut Rum: Add a tablespoon of dark rum or rum extract to the syrup for an adult twist.
- Dairy-Free Version: Use plant-based milk, vegan butter, and a vegan condensed milk alternative.
Common Mistakes to Avoid
Mistake 1: Not Freezing the Cake
This is the biggest one! If you just refrigerate this cake, it will be a soggy, overly sweet mess. The freezing step is non-negotiable. It firms up the syrup-soaked cake, giving it a perfect, sliceable texture that’s cool and refreshing. Think of it like an ice cream cake, not a regular cake. Plan ahead and give it those full 6 hours in the freezer.
Mistake 2: Over-mixing After Adding Baking Powder
Baking powder starts working as soon as it gets wet. If you stir and stir the batter after adding it, you’re knocking out all the little air bubbles it creates. This leads to a dense, flat cake instead of a light and tender one. Gently fold in the baking powder until *just* combined, then stop and get it right into the oven.
Mistake 3: Skipping the Hole-Poking Step
This might seem like a small thing, but it’s crucial for flavor in every bite. If you don’t poke holes in the hot cake, the thick, delicious syrup will just sit on top. Poking those holes creates channels for the syrup to flow down into the body of the cake. This makes every single mouthful moist and infused with that creamy coconut flavor.
Mistake 4: Using Cold Ingredients
Using eggs and milk straight from the fridge can make your margarine or butter seize up a bit when blended. It can also affect how everything incorporates. For a smoother, more homogenous batter, let your eggs and milk sit out on the counter for about 15-20 minutes before you start blending. Room temperature ingredients are a baker’s best friend.
Frequently Asked Questions
Can I bake this cake in a different pan size?
Yes, but timing will change. For two 8-inch round pans, check for doneness at 25-30 minutes. For a Bundt pan, grease and flour it extremely well, and bake for 45-50 minutes. Always use the toothpick test to be sure it’s cooked through. Remember, the syrup step will be the same no matter the pan shape.
My syrup seems very thin, is that okay?
It should be fairly thick, like a heavy cream. If it’s runny like water, you might have used “coconut water” or a very light coconut milk by mistake. For the best results, use canned coconut milk, and make sure your condensed milk is fresh. A thin syrup will still taste good but might not soak in as well.
How long can I leave the cake out after freezing?
For serving, I take it out of the freezer and let it sit for 10-15 minutes. This makes it easier to slice but keeps it deliciously cold. Don’t leave it out for more than an hour, as it will become very soft and difficult to handle. It’s meant to be eaten cold!
Can I use fresh coconut instead of packaged grated coconut?
Absolutely! Freshly grated coconut will give you an amazing texture and a more subtle, natural flavor. You’ll need about one medium coconut to get the amount needed for both the cake and the syrup. Just be sure to drain any excess liquid from the fresh coconut before adding it to the batter.
Why did my cake sink in the middle?
A sunken cake is usually due to underbaking or too much leavening. Make sure your baking powder is fresh and you measured it correctly. Also, avoid opening the oven door too early. The cake needs steady heat to set its structure. Use a toothpick to test – it should come out clean, with no wet batter clinging to it.
Can I make this cake ahead of time?
It’s the perfect make-ahead dessert! In fact, I strongly recommend it. Bake and freeze the cake at least one day before you need it. This allows the flavors to meld perfectly and gives you one less thing to worry about on the day of your event. It will keep beautifully in the freezer for up to two weeks.
Is it normal for the syrup to pool a little at the edges?
Yes, that’s completely normal. The cake absorbs an incredible amount, but a little pooling around the very edges can happen. Don’t worry about it. When you serve, you can scoop up that pooled syrup and drizzle it right back over the slices for extra goodness.
Can I add other flavors to the cake batter?
You sure can! A teaspoon of vanilla or almond extract added to the blender with the wet ingredients is lovely. For a citrus twist, add some lemon or lime zest. Just be cautious with adding liquid extracts, as too much extra liquid can change the batter’s consistency.
What’s the best way to cut a frozen cake cleanly?
A sharp, thin-bladed knife is key. Run it under very hot water for a minute, then wipe it completely dry with a towel. Make a smooth, firm cut. Wipe the blade clean, reheat it under the water, dry it, and make the next cut. Repeat this process for perfectly clean slices that won’t stick or tear.
I don’t have a blender. Can I mix by hand?
You can, but you’ll need to work a bit more. Cream the softened margarine and sugar together first until light. Then beat in the eggs one at a time. Alternate adding the flour mixture and the milk, starting and ending with flour. Finally, fold in the coconut and baking powder. The texture might be slightly different, but it will still be delicious.
Time to Freeze and Please!
And there you have it! My beloved, foolproof Iced Coconut Cake. It’s the recipe I turn to when I want to bring a taste of something special, cold, and utterly satisfying to the table without spending all day in the kitchen. The magic is in that simple pour-over icing and the mandatory freezer time. Trust me on that part! So, preheat that oven, grab your blender, and get ready to make a dessert that will have everyone asking for the recipe. Don’t forget to save a slice for yourself before the crowd descends!
Creamy Cajun Tortellini
Ingredients
Equipment
Method
- Blend the eggs, milk, margarine (or butter), sugar, and grated coconut until smooth.
- In a large mixing bowl, pour in the flour and make a well in the center.
- Slowly combine the blended liquid with the flour, folding until smooth.
- Fold in the remaining grated coconut and sprinkle the baking powder, mixing gently.
- Preheat the oven to 350°F (175°C). Grease and flour a 9x13 inch baking pan.
- Pour the batter into the prepared pan and bake for about 40 minutes or until golden brown.
- While baking, whisk together the condensed milk, coconut milk, and grated coconut to create the syrup.
- Once the cake is baked, poke holes all over the surface and pour the syrup over it while hot. Let it cool completely.
- Cover the cake and freeze for at least 6 hours or overnight before serving.