The Magic of a Simple Creamy Yogurt Cake
Have you ever stared into your fridge, seen a few lonely yogurts, and thought, “What can I possibly make?” I’ve been there too. Then, I remembered a recipe my grandma used to whisper about: a cake measured with a yogurt pot. No scales, no fuss, just creamy, dreamy results. This Creamy Yogurt Cake is that magical recipe. It’s the cake you whip up when you need something comforting, impressive, and incredibly easy. Let’s bake some happiness!
A Slice of History: The Humble Yogurt Cake
This recipe has roots in French home cooking, often called “Gâteau au Yaourt.” It’s a classic taught in schools and passed down through families. The unique part? The empty yogurt pot becomes the measuring cup for other ingredients. My version uses three pots’ worth of yogurt for an extra creamy texture. It’s a testament to thrifty, beautiful cooking. This cake proves that the simplest traditions often create the most beloved treats on our tables today.
Why You’ll Fall in Love With This Creamy Yogurt Cake
You will adore this recipe because it’s incredibly forgiving and always delicious. The three yogurts make the crumb unbelievably moist and tender. It has a subtle tang that balances the sweetness perfectly. It comes together in one bowl in about 15 minutes. No fancy mixer needed! It’s a recipe that builds confidence. Every time I make it, my kitchen smells like a cozy bakery, and smiles appear when I serve it. It’s a guaranteed crowd-pleaser.
Perfect Occasions for Your Creamy Yogurt Cake
This versatile cake fits any moment! It’s perfect for a last-minute school bake sale or a weeknight dessert. I love serving it at brunch with fresh berries. It’s a stellar picnic companion because it travels so well. For birthdays, I dress it up with a simple glaze and sprinkles. My book club ladies always ask for it! It’s also the ideal “welcome to the neighborhood” gift. This cake turns ordinary days into little celebrations.
Gathering Your Ingredients for Creamy Yogurt Cake
Let’s gather our simple, wholesome ingredients. You likely have most of these in your pantry right now!
- 3 plain yogurts (375g total, about 1 ½ cups)
- 2 large eggs
- 100g (½ cup) granulated sugar
- 80g (⅔ cup) all-purpose flour
- 1 packet (about 1 tbsp) vanilla sugar or 1 tsp vanilla extract
- 1 tsp baking powder
- 50g (¼ cup) melted butter, slightly cooled
Simple Substitutions for Your Pantry
No worries if you’re missing something! Here are easy swaps: Use Greek yogurt for a richer texture. Coconut oil or a neutral vegetable oil works instead of butter. For a lighter touch, swap half the flour for whole wheat. No vanilla sugar? Use a teaspoon of good vanilla extract. You can even use a dairy-free yogurt alternative—just ensure it’s plain and unsweetened. Baking is about creativity!
Crafting Your Dreamy Creamy Yogurt Cake: Step-by-Step
Step 1: Preheat and Prepare
Start by turning your oven to 180°C (350°F). This gives it time to reach the perfect temperature. While it heats, take your cake pan. Gently butter it and dust it with a little flour, tapping out the excess. This little ritual ensures your beautiful creamy cake will release perfectly later. I use an 8-inch round pan, but a loaf pan works wonderfully too.
Step 2: Create the Creamy Base
In a large mixing bowl, plop in your three yogurts. Crack in the two eggs. Their bright yellow yolks look so cheerful against the white yogurt! Add the granulated sugar and the vanilla sugar. Now, take a whisk and stir it all together. Watch as the ingredients blend into a smooth, pale, creamy liquid. The smell is already promising! Pro tip: Whisk by hand until just combined to avoid overworking the batter.
Step 3: Incorporate the Dry Ingredients
Place a sieve over your bowl. Add the all-purpose flour and baking powder into the sieve. Gently tap and shake the sieve. It’s like a soft snow of flour falling into your creamy mixture. This sifting step prevents lumps and aerates the flour for a lighter cake. Now, fold everything together with a spatula. You’ll see the batter thicken beautifully into a lovely, smooth, pourable consistency.
Step 4: The Butter Embrace
Ensure your melted butter has cooled a bit. You don’t want it to cook the eggs! Pour the golden liquid into the batter. Fold it in gently. This is where the magic happens. The butter brings a rich flavor and ensures a gorgeously tender crumb. The batter will become shiny and luxurious. Chef’s tip: A dash of lemon or orange zest added here gives a wonderful, fragrant twist.
Step 5: Into the Pan it Goes
Pour your lovely, smooth batter into your prepared pan. Use a spatula to scrape every last bit out. Gently tilt the pan to let the batter settle evenly. It should look beautifully level. The pale color of the batter is like a blank canvas, ready to turn golden in the oven. Admire your work for a second—you’re almost there!
Step 6: The Baking Transformation
Place the pan in the center of your preheated oven. Now, the hardest part: wait! Set your timer for 30 minutes. Around that time, you’ll start smelling the most divine aroma. Peek through the oven window. The cake should be puffed and turning a perfect golden brown. To test, insert a thin knife or skewer into the center. If it comes out clean, your yogurt cake is done! This usually takes 30-35 minutes.
Step 7: The Crucial Cool Down
Resist the urge to dive in immediately! Let the cake cool in its pan on a wire rack for about 15 minutes. This allows the structure to set. Then, run a knife around the edges. Place a plate on top and flip it over. The cake should release with a soft *plop*. Let it cool completely before slicing. This patience rewards you with perfect, neat slices of creamy bliss.
Timing Your Perfect Cake
This recipe is a time-saver! Active prep time is a quick 15 minutes. Your oven will work its magic for about 35 minutes. Add in cooling time of 30 minutes, and you have a total of about 80 minutes from start to first bite. It’s faster than running to the bakery!
My Chef’s Secret for the Ultimate Moisture
My little secret is to add a simple syrup soak. While the cake is cooling, warm two tablespoons of apricot jam with a splash of water. Brush this gently over the warm cake. It adds a beautiful gloss and locks in incredible moisture. It’s a trick from professional bakers that makes this homely cake taste truly luxurious.
A Fun Yogurt Fact!
Did you know yogurt has been made for over 5,000 years? It’s believed that Central Asian herdsmen carried milk in pouches made from animal stomachs. The natural enzymes would ferment the milk, creating yogurt! Using it in cake is a much more delicious modern application, don’t you think?
Equipment You’ll Need
- One large mixing bowl
- A whisk and a spatula
- An 8-inch round cake pan or 9×5 loaf pan
- A sieve or sifter
- A wire cooling rack
Storing Your Creamy Yogurt Cake
Once completely cool, you can store this cake at room temperature. Just cover it with a cake dome or wrap it in foil. It will stay wonderfully moist for 2-3 days. The yogurt really helps it keep its texture.
For longer storage, you can refrigerate it. Place it in an airtight container. It will last for up to 5 days in the fridge. Let slices come to room temperature for the best flavor and texture before serving.
This cake also freezes beautifully! Wrap the whole cake or individual slices tightly in plastic wrap, then in foil. Freeze for up to 2 months. Thaw overnight in the refrigerator for a ready-made treat.
My Best Tips and Advice
- Use room temperature ingredients for a smoother batter.
- Don’t over-mix after adding the flour. Just fold until no streaks remain.
- For a tall, even rise, make sure your baking powder is fresh.
- Let the cake cool completely before slicing for clean cuts.
Presentation Ideas to Wow Your Guests
- Dust the top with a snowy layer of powdered sugar.
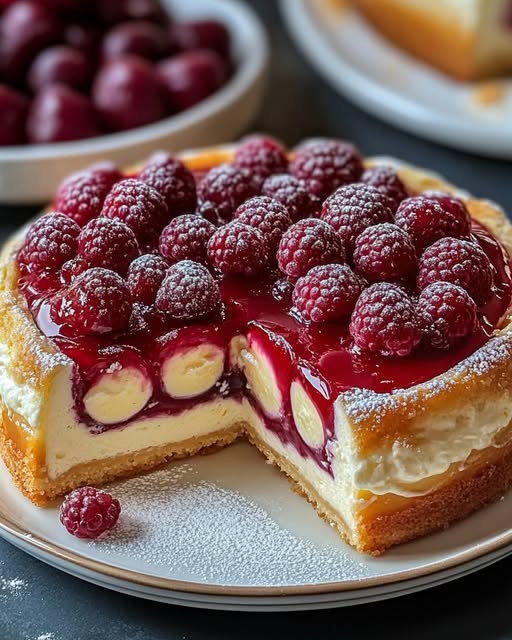
- Top with a pile of fresh, glossy berries and a mint leaf.
- Drizzle with a simple vanilla or lemon glaze.
- Serve with a dollop of whipped cream or a scoop of vanilla ice cream.
- For a rustic look, serve it right on the plate with a spoonful of fruit compote.
Healthier & Fun Variations to Try
Want to mix it up? Here are six delicious twists on the classic creamy yogurt cake:
- Lemon Zest Delight: Add the zest of two lemons to the batter. The citrus brightens the whole cake beautifully.
- Whole Wheat & Honey: Swap half the flour for whole wheat and use honey instead of sugar. It’s nutty and wholesome.
- Berry Burst Cake: Toss a cup of frozen berries in a little flour and gently fold them into the batter before baking.
- Chocolate Chip Version: Who can resist? Fold in ¾ cup of dark or semi-sweet chocolate chips for a sweet surprise.
- Coconut Dream: Replace half the flour with unsweetened shredded coconut and use coconut oil for the butter.
- Apple Cinnamon Swirl: Layer thin apple slices on the bottom of the pan and sprinkle with cinnamon sugar before adding batter.
Common Mistakes to Avoid With Creamy Yogurt Cake
Mistake 1: Not Measuring the Flour Correctly
Scooping flour directly from the bag with your measuring cup packs it down. This adds too much flour to your batter. A dry, dense cake is often the sad result. To avoid this, fluff your flour in the bag first. Then spoon it lightly into your measuring cup. Finally, level it off with the flat edge of a knife. This “spoon and level” method guarantees perfect amounts every time.
Mistake 2: Overmixing the Batter
Once you add the flour, a heavy hand can be the enemy. Vigorous mixing develops the gluten in the flour. This makes your cake tough and chewy, not tender and creamy. The goal is to mix just until you no longer see streaks of white flour. Use a folding motion with a spatula. A few small lumps are perfectly fine! They will bake out beautifully.
Mistake 3: Skipping the Pan Preparation
Buttering and flouring the pan is a non-negotiable step. If you skip it, you risk your beautiful cake sticking and tearing when you try to remove it. It’s heartbreaking after all your work! Take that extra minute. Use soft butter and a pastry brush, or even your fingers, to coat every corner. A light dusting of flour seals the deal for a perfect release.
Mistake 4: Opening the Oven Door Too Early
We get it—it’s exciting to watch! But opening the oven door in the first 20-25 minutes of baking is risky. The sudden drop in temperature can cause your rising cake to collapse. Trust the process and the timer. Use the oven light to peek if you must. Only open the door for the doneness test in the final 5-10 minutes of baking time.
Your Creamy Yogurt Cake Questions Answered
Can I use flavored yogurt instead of plain?
You can, but be careful. Flavored yogurts like vanilla or lemon already contain added sugar. If you use them, you should reduce the amount of granulated sugar in the recipe. Start by reducing it by about 2 tablespoons. The cake might also have a stronger artificial flavor. For the best, pure taste, I always recommend plain yogurt. You control the sweetness and flavor completely.
Why did my cake sink in the middle?
A sunken cake usually means it needed more baking time, or the oven door was opened too soon. The structure wasn’t fully set. It could also mean your baking powder was old and lost its rising power. Always test for doneness with a skewer. If it comes out with wet batter, it needs more time. If it comes out clean, your cake is done. Proper cooling also helps the structure stay firm.
Can I make this recipe gluten-free?
Absolutely! This recipe adapts wonderfully to gluten-free needs. Simply replace the all-purpose flour with a good quality, cup-for-cup gluten-free flour blend. Make sure the blend contains xanthan gum, which helps bind the batter. The rest of the steps remain exactly the same. I’ve done this many times for friends, and the cake is just as moist and delicious.
How can I tell if my cake is done without a skewer?
If you don’t have a skewer, use a thin knife or even a toothpick. The classic test is to gently press the top of the cake with your fingertip. If it springs back and feels firm, it’s likely done. You can also look at the edges. They should be pulling slightly away from the sides of the pan and be a deep golden brown. Trust your senses—the wonderful smell is also a great clue!
Is it possible to make this cake dairy-free?
Yes, you can create a dairy-free version. Use a plain, unsweetened plant-based yogurt like almond, soy, or coconut yogurt. Replace the melted butter with an equal amount of a neutral oil like canola or melted coconut oil. The texture might be slightly different depending on the yogurt, but you will still get a lovely, moist cake that everyone can enjoy.
My cake is very dense. What went wrong?
A dense cake often points to too much flour or overmixing. Revisit how you measured your flour. Did you scoop and pack it? That could be the culprit. Also, remember to fold, not beat, the batter after adding flour. Using cold ingredients can also prevent proper emulsification. Ensure your eggs and yogurt are at room temperature for a lighter, airier batter.
Can I add fresh fruit to the batter?
You can, but there’s a trick. Fresh fruit like berries or peaches contain a lot of water. If you just stir them in, they might sink and make the batter soggy. Toss your chopped fruit in a tablespoon of flour first. This light coating helps suspend them in the batter. Then, fold them in gently just before pouring into the pan for a beautiful, fruity distribution.
What’s the best way to serve this cake?
This cake is wonderfully versatile! Serve it plain for a humble, everyday treat. For a special touch, add a dusting of powdered sugar. It’s fantastic with a cup of coffee or tea. For dessert, warm a slice slightly and serve with a scoop of ice cream or a dollop of freshly whipped cream. Fresh berries on the side make it feel elegant. It’s delicious any way you choose.
Can I double this recipe?
You can double it, but don’t just put it all in one pan! A double batch needs to be divided between two 8-inch or 9-inch round pans. This ensures the heat penetrates evenly and the cakes bake through properly. You can also use a large Bundt pan. Just be sure to grease it very well. The baking time may be 10-15 minutes longer for a Bundt, so keep an eye on it.
How long will this cake stay fresh?
Stored properly at room temperature, covered, this cake stays wonderfully moist for 2 to 3 days. The yogurt helps it retain moisture beautifully. If you refrigerate it in an airtight container, it can last up to 5 days. The flavor actually improves a bit on the second day! If it seems a little dry after a couple days, a quick 10-second zap in the microwave can bring back its soft texture.
Go Bake Your Own Creamy Masterpiece
And there you have it! My go-to recipe for a Creamy Yogurt Cake that never fails to impress. It’s the kind of recipe that becomes a friend—reliable, comforting, and always there to make things better. I hope this cake finds its way into your kitchen and becomes a cherished tradition for your family, just like it is for mine. Now, go grab those yogurts and let’s get baking! Your home is about to smell amazing.
Creamy Yogurt Cake
Ingredients
Equipment
Method
- Preheat the oven to 180°C (350°F) and prepare your cake pan by buttering and dusting it with flour.
- In a large mixing bowl, combine the three yogurts, eggs, granulated sugar, and vanilla sugar, whisking until smooth.
- Sift the all-purpose flour and baking powder into the bowl, then fold in gently until a smooth batter forms.
- Add the slightly cooled melted butter and fold it in until shiny and well combined.
- Pour the batter into the prepared cake pan and level it out.
- Bake in the preheated oven for 30-35 minutes, or until a skewer inserted in the center comes out clean.
- Allow the cake to cool in the pan on a wire rack for about 15 minutes, then invert onto a plate to cool completely.