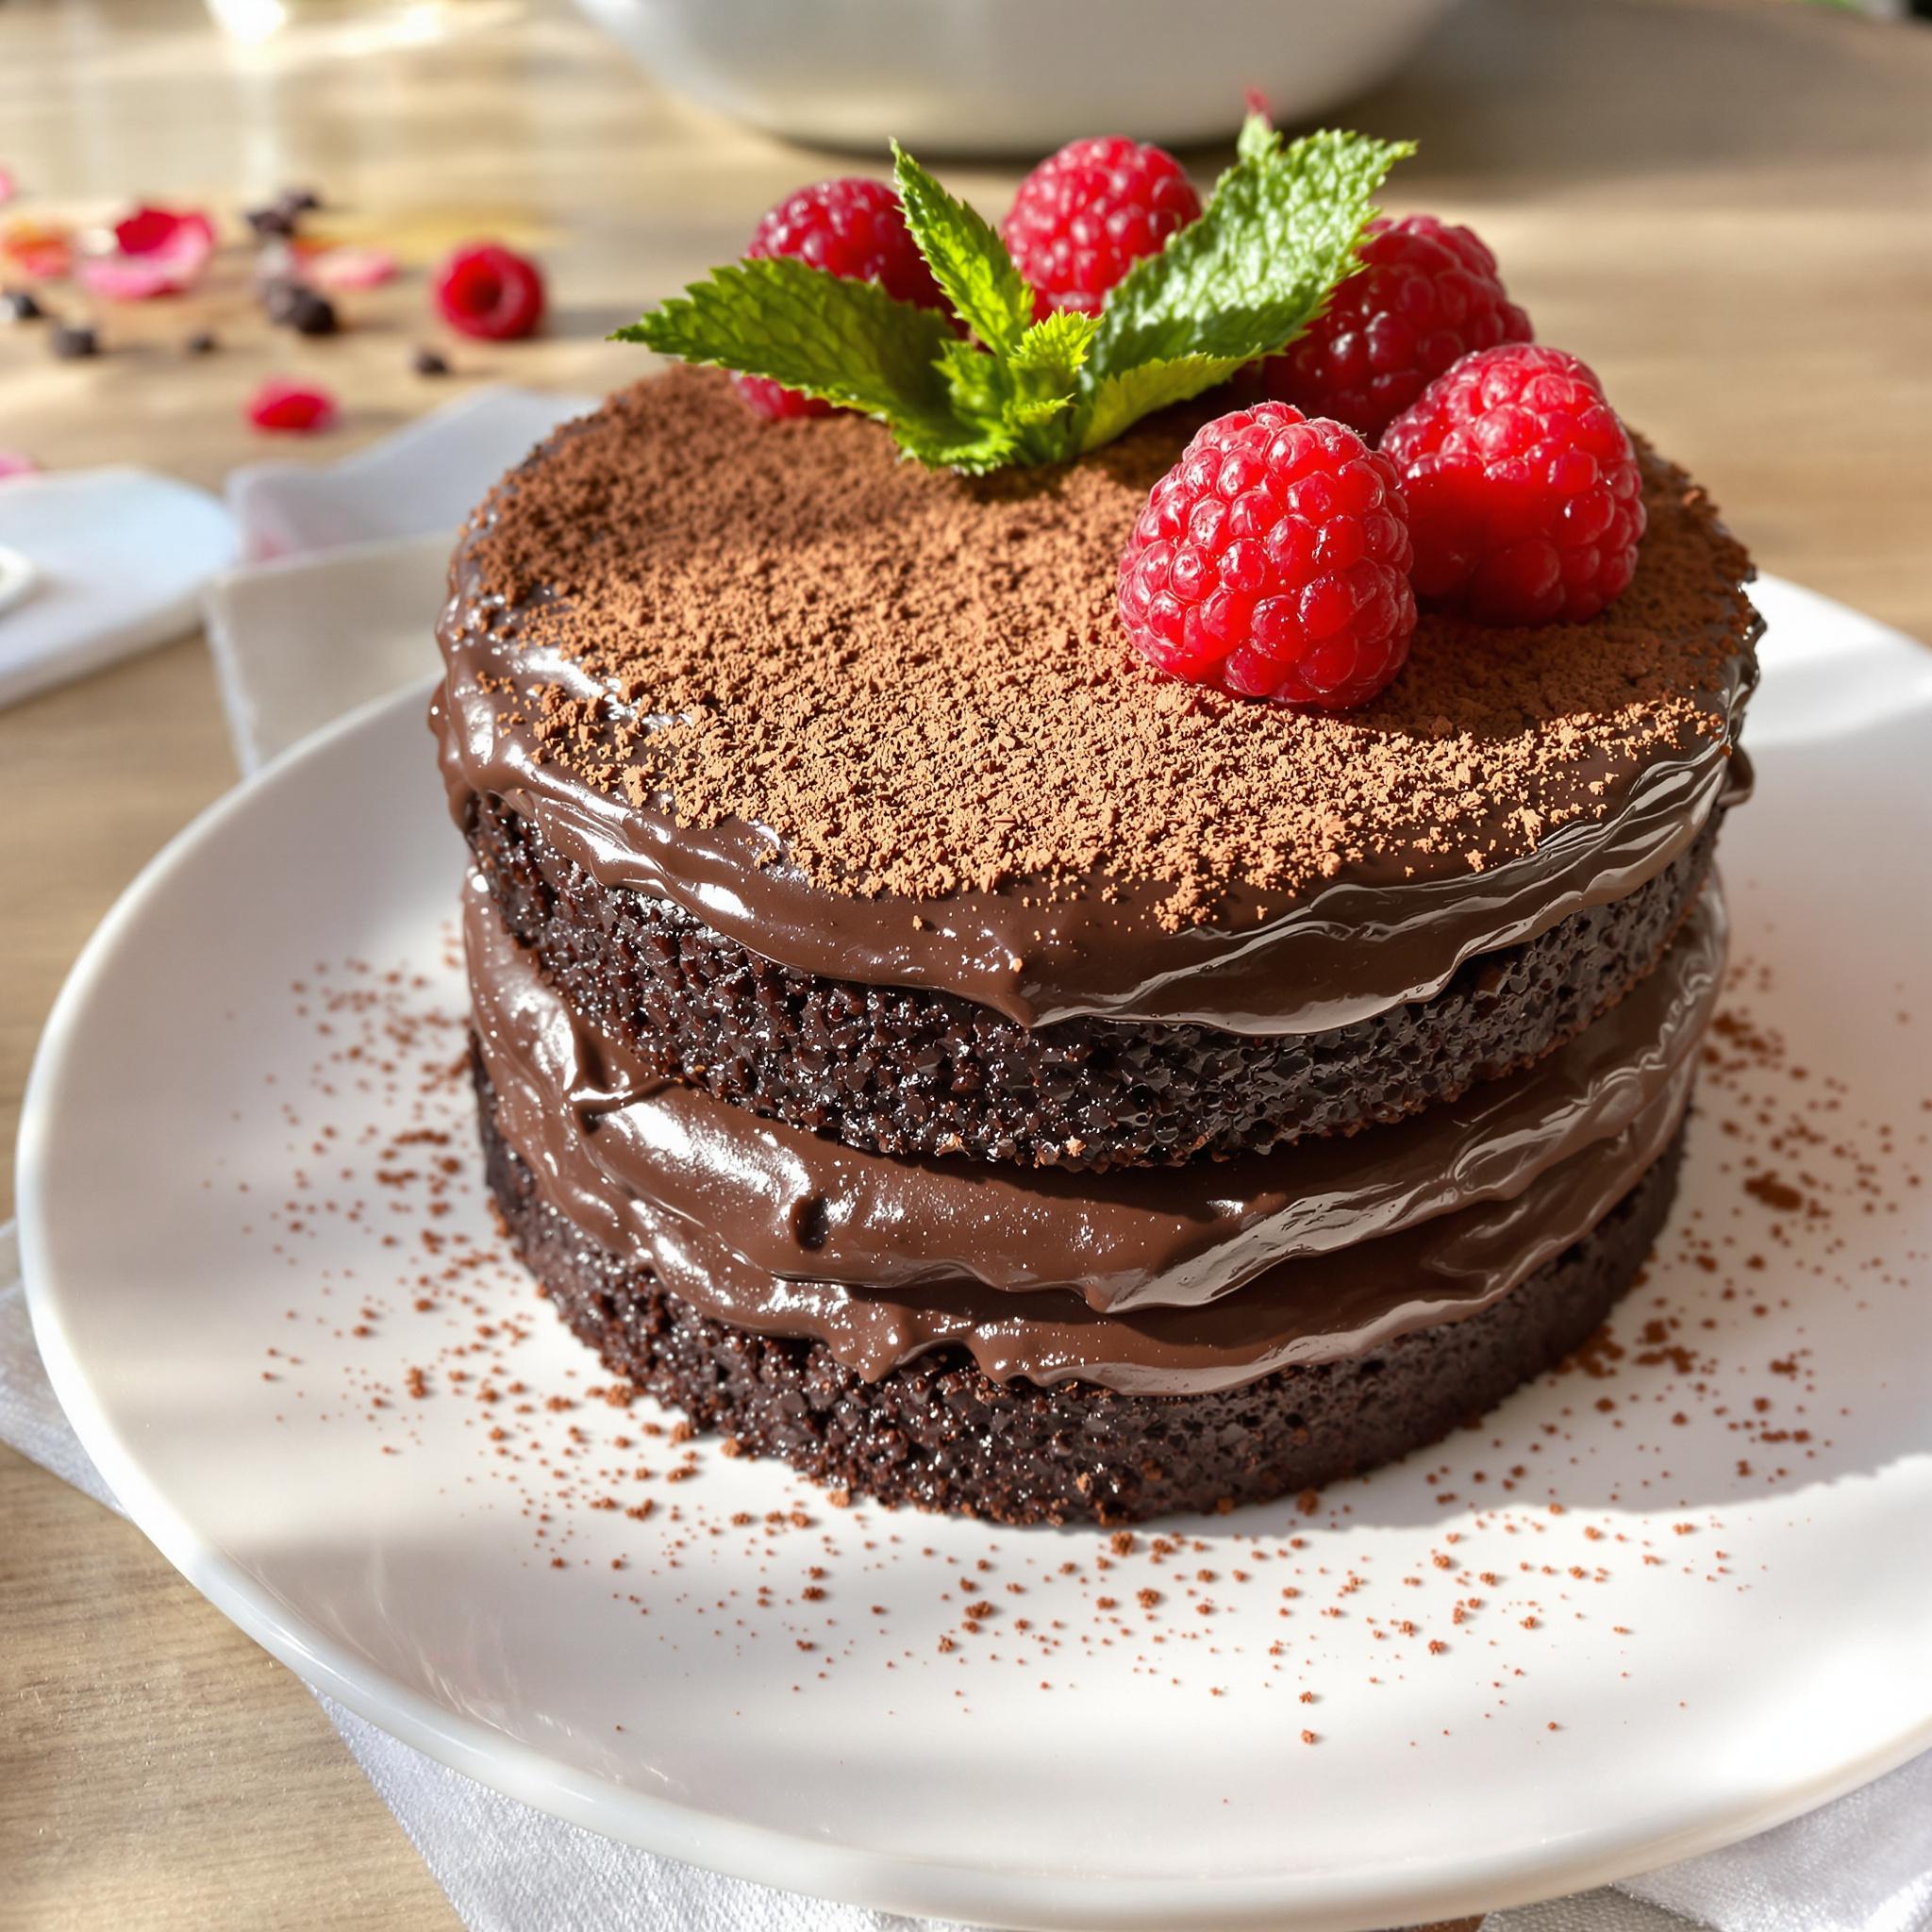
Introduction: Dark Chocolate Cake I – A Slice of Heaven
There’s something special about a rich, moist dark chocolate cake. Dark Chocolate Cake I is my favorite recipe for indulgence. It’s decadent, easy to make, and perfect for any occasion. Whether it’s a family dinner or a cozy night in, this cake always hits the spot.
A Little History of Dark Chocolate Cake
Chocolate cakes have been around since the 1800s when cocoa powder became popular. Over time, they turned into the fudgy treats we love today. This version blends classic methods with modern simplicity. I first made it for a friend’s birthday, and it quickly became a family favorite.
Why You’ll Love This Recipe
This cake delivers deep chocolate flavor and a soft, velvety texture. It’s simple enough for beginners but impressive enough for seasoned bakers. Plus, it uses ingredients you probably already have at home.
Perfect Occasions for Dark Chocolate Cake I
Serve this cake at birthdays, holidays, or even on a rainy day. Pair it with coffee for brunch or ice cream for dessert. Either way, it’s sure to please.
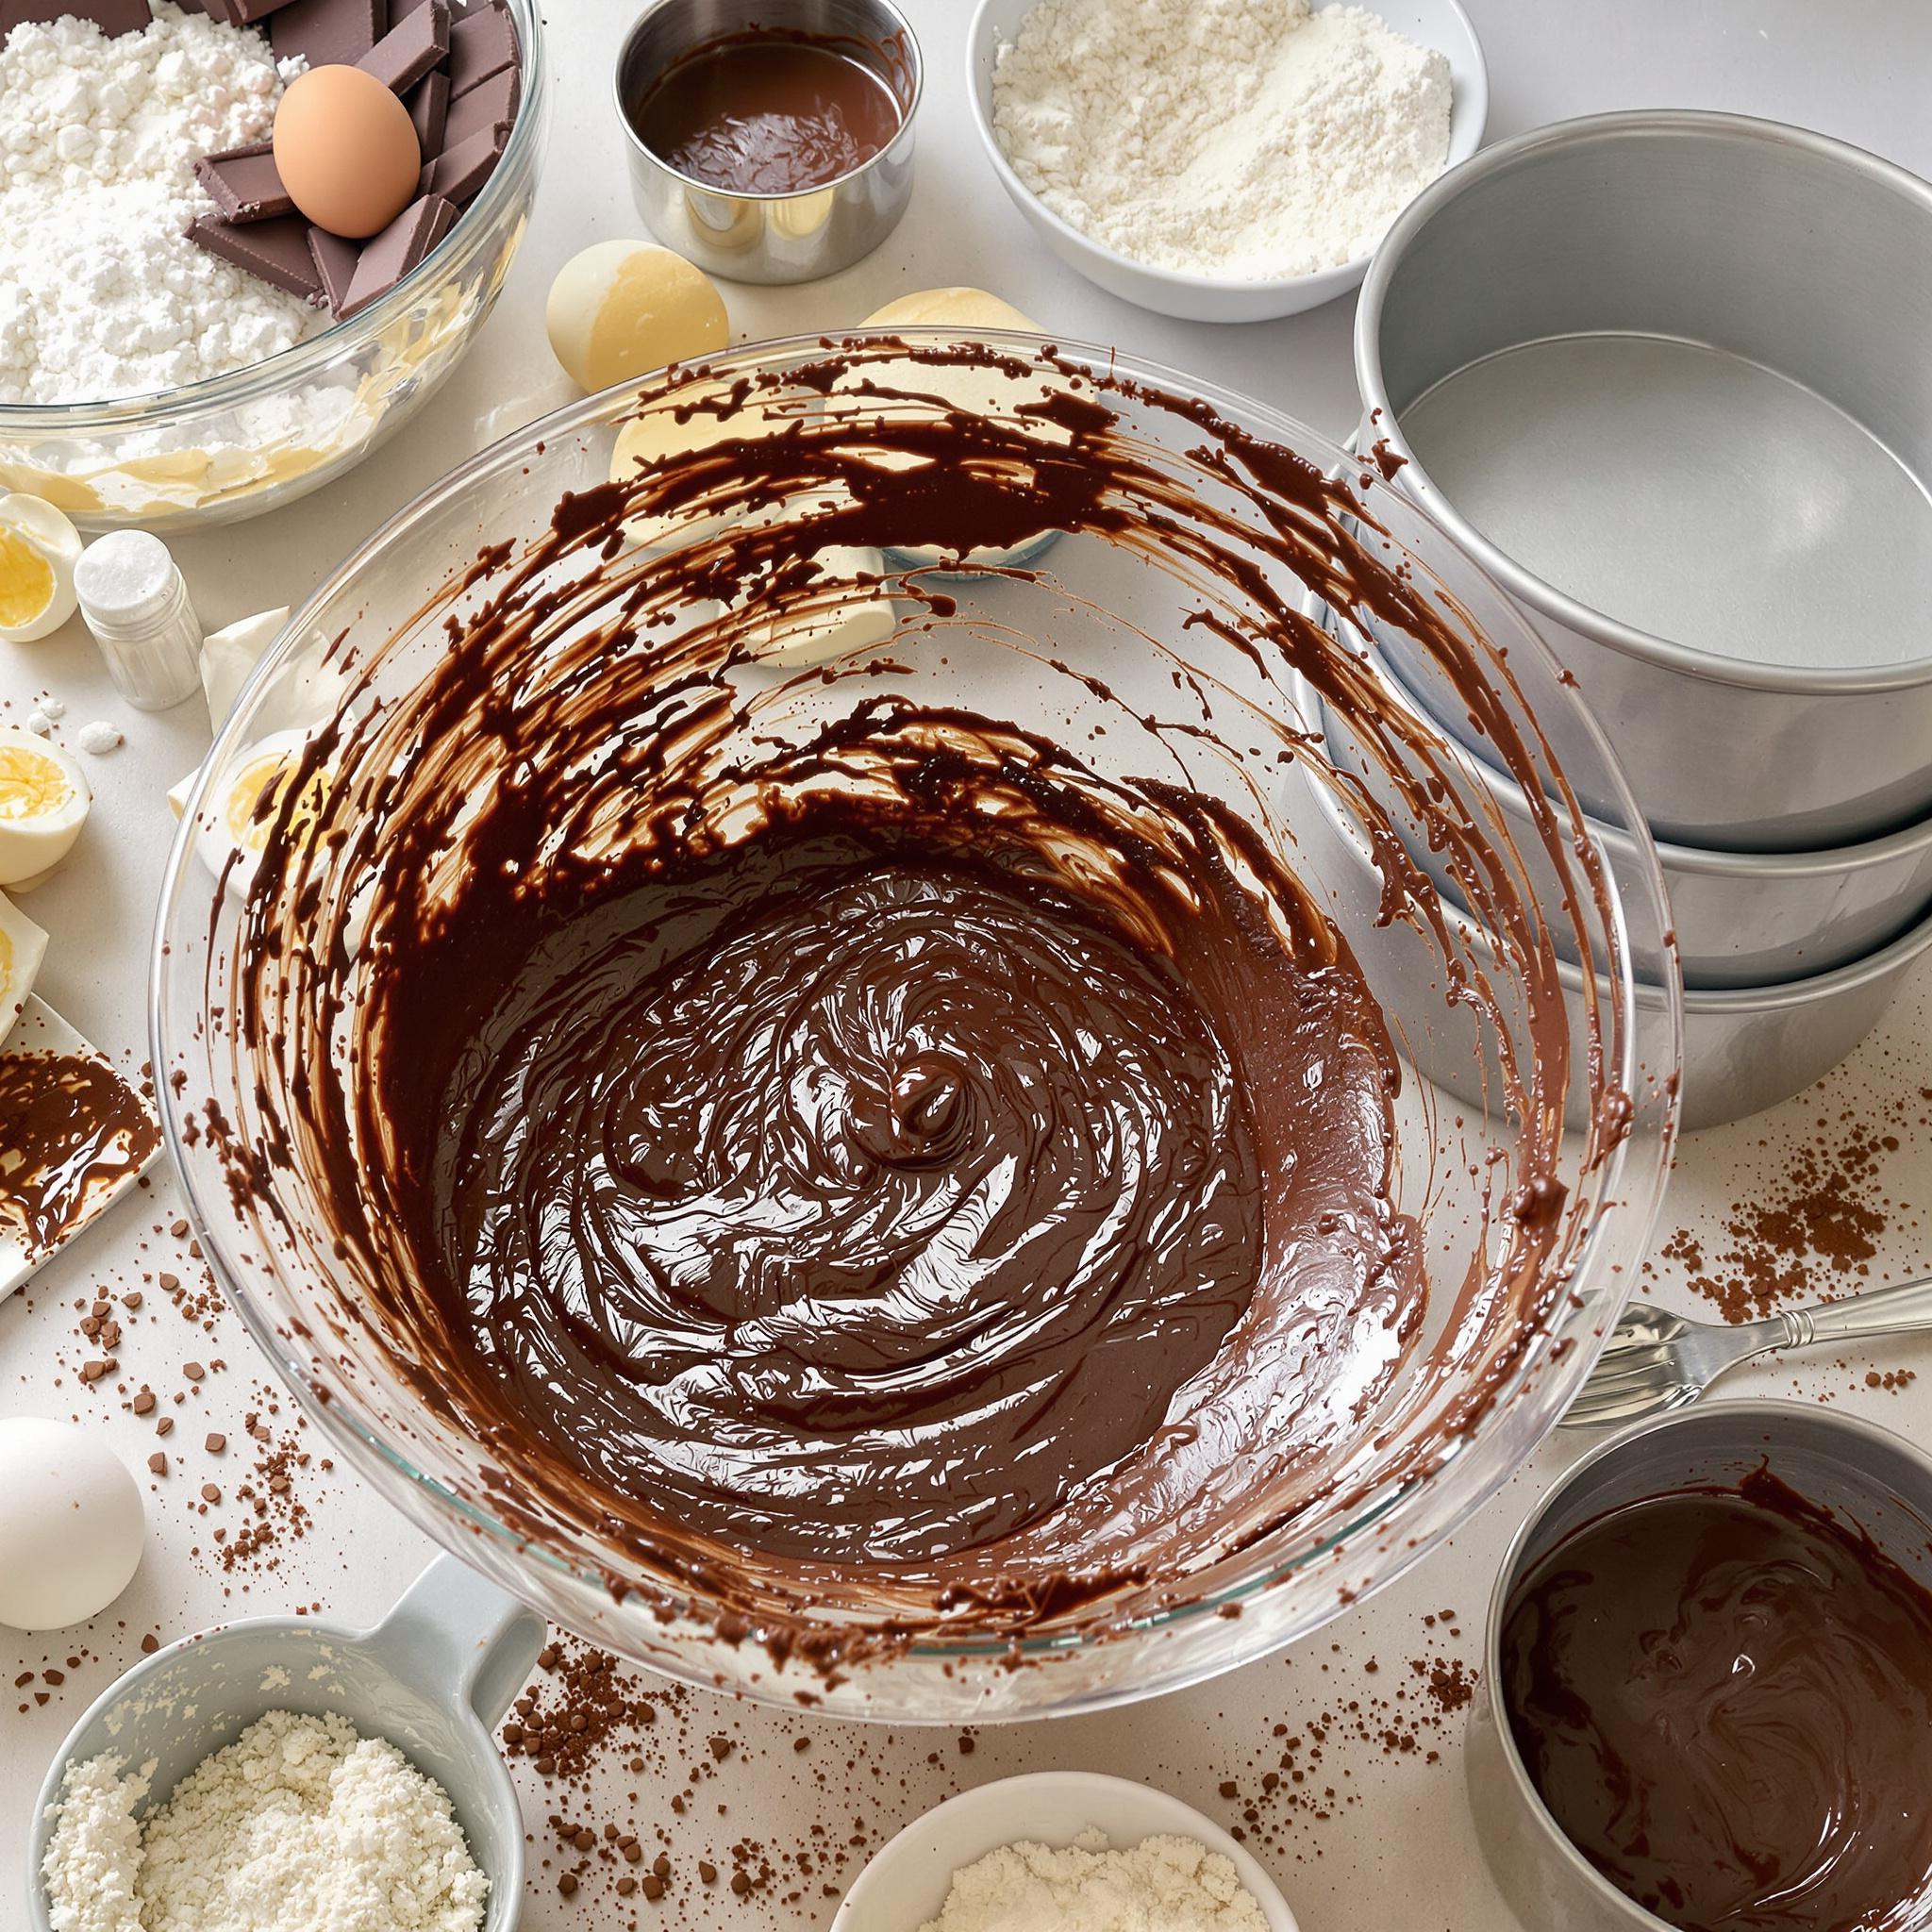
Ingredients for Dark Chocolate Cake I
- Dark chocolate
- All-purpose flour
- Sugar
- Unsweetened cocoa powder
- Baking powder
- Baking soda
- Salt
- Eggs
- Milk
- Vegetable oil
- Vanilla extract
- Boiling water
Substitution Options
- Use almond milk instead of regular milk for a dairy-free option.
- Swap vegetable oil with melted butter for a richer taste.
- Replace sugar with coconut sugar for a hint of caramel flavor.
Step 1: Preheat and Prepare
Preheat your oven to 350°F (175°C). Grease two 9-inch round pans lightly with butter or cooking spray. Dust them with cocoa powder to prevent sticking. Pro tip: Line the bottoms with parchment paper for extra insurance. The smell of warm chocolate will soon fill your kitchen!
Step 2: Mix Dry Ingredients
In a large bowl, whisk together flour, sugar, cocoa powder, baking powder, baking soda, and salt. These dry ingredients form the base of the cake. Cocoa powder adds that rich dark chocolate flavor. Make sure everything is evenly mixed before moving on.
Step 3: Combine Wet Ingredients
Add eggs, milk, vegetable oil, and vanilla extract to the dry mix. Stir until smooth. You’ll notice the batter turning glossy and thick. This step ensures every bite has balanced sweetness and richness. Be patient—it’s worth it!
Step 4: Add Boiling Water
Gradually pour in boiling water while stirring. The batter will become thin, which might surprise you, but don’t worry! This step makes the cake super moist and tender once baked. The aroma of hot cocoa will tempt you to sneak a taste.
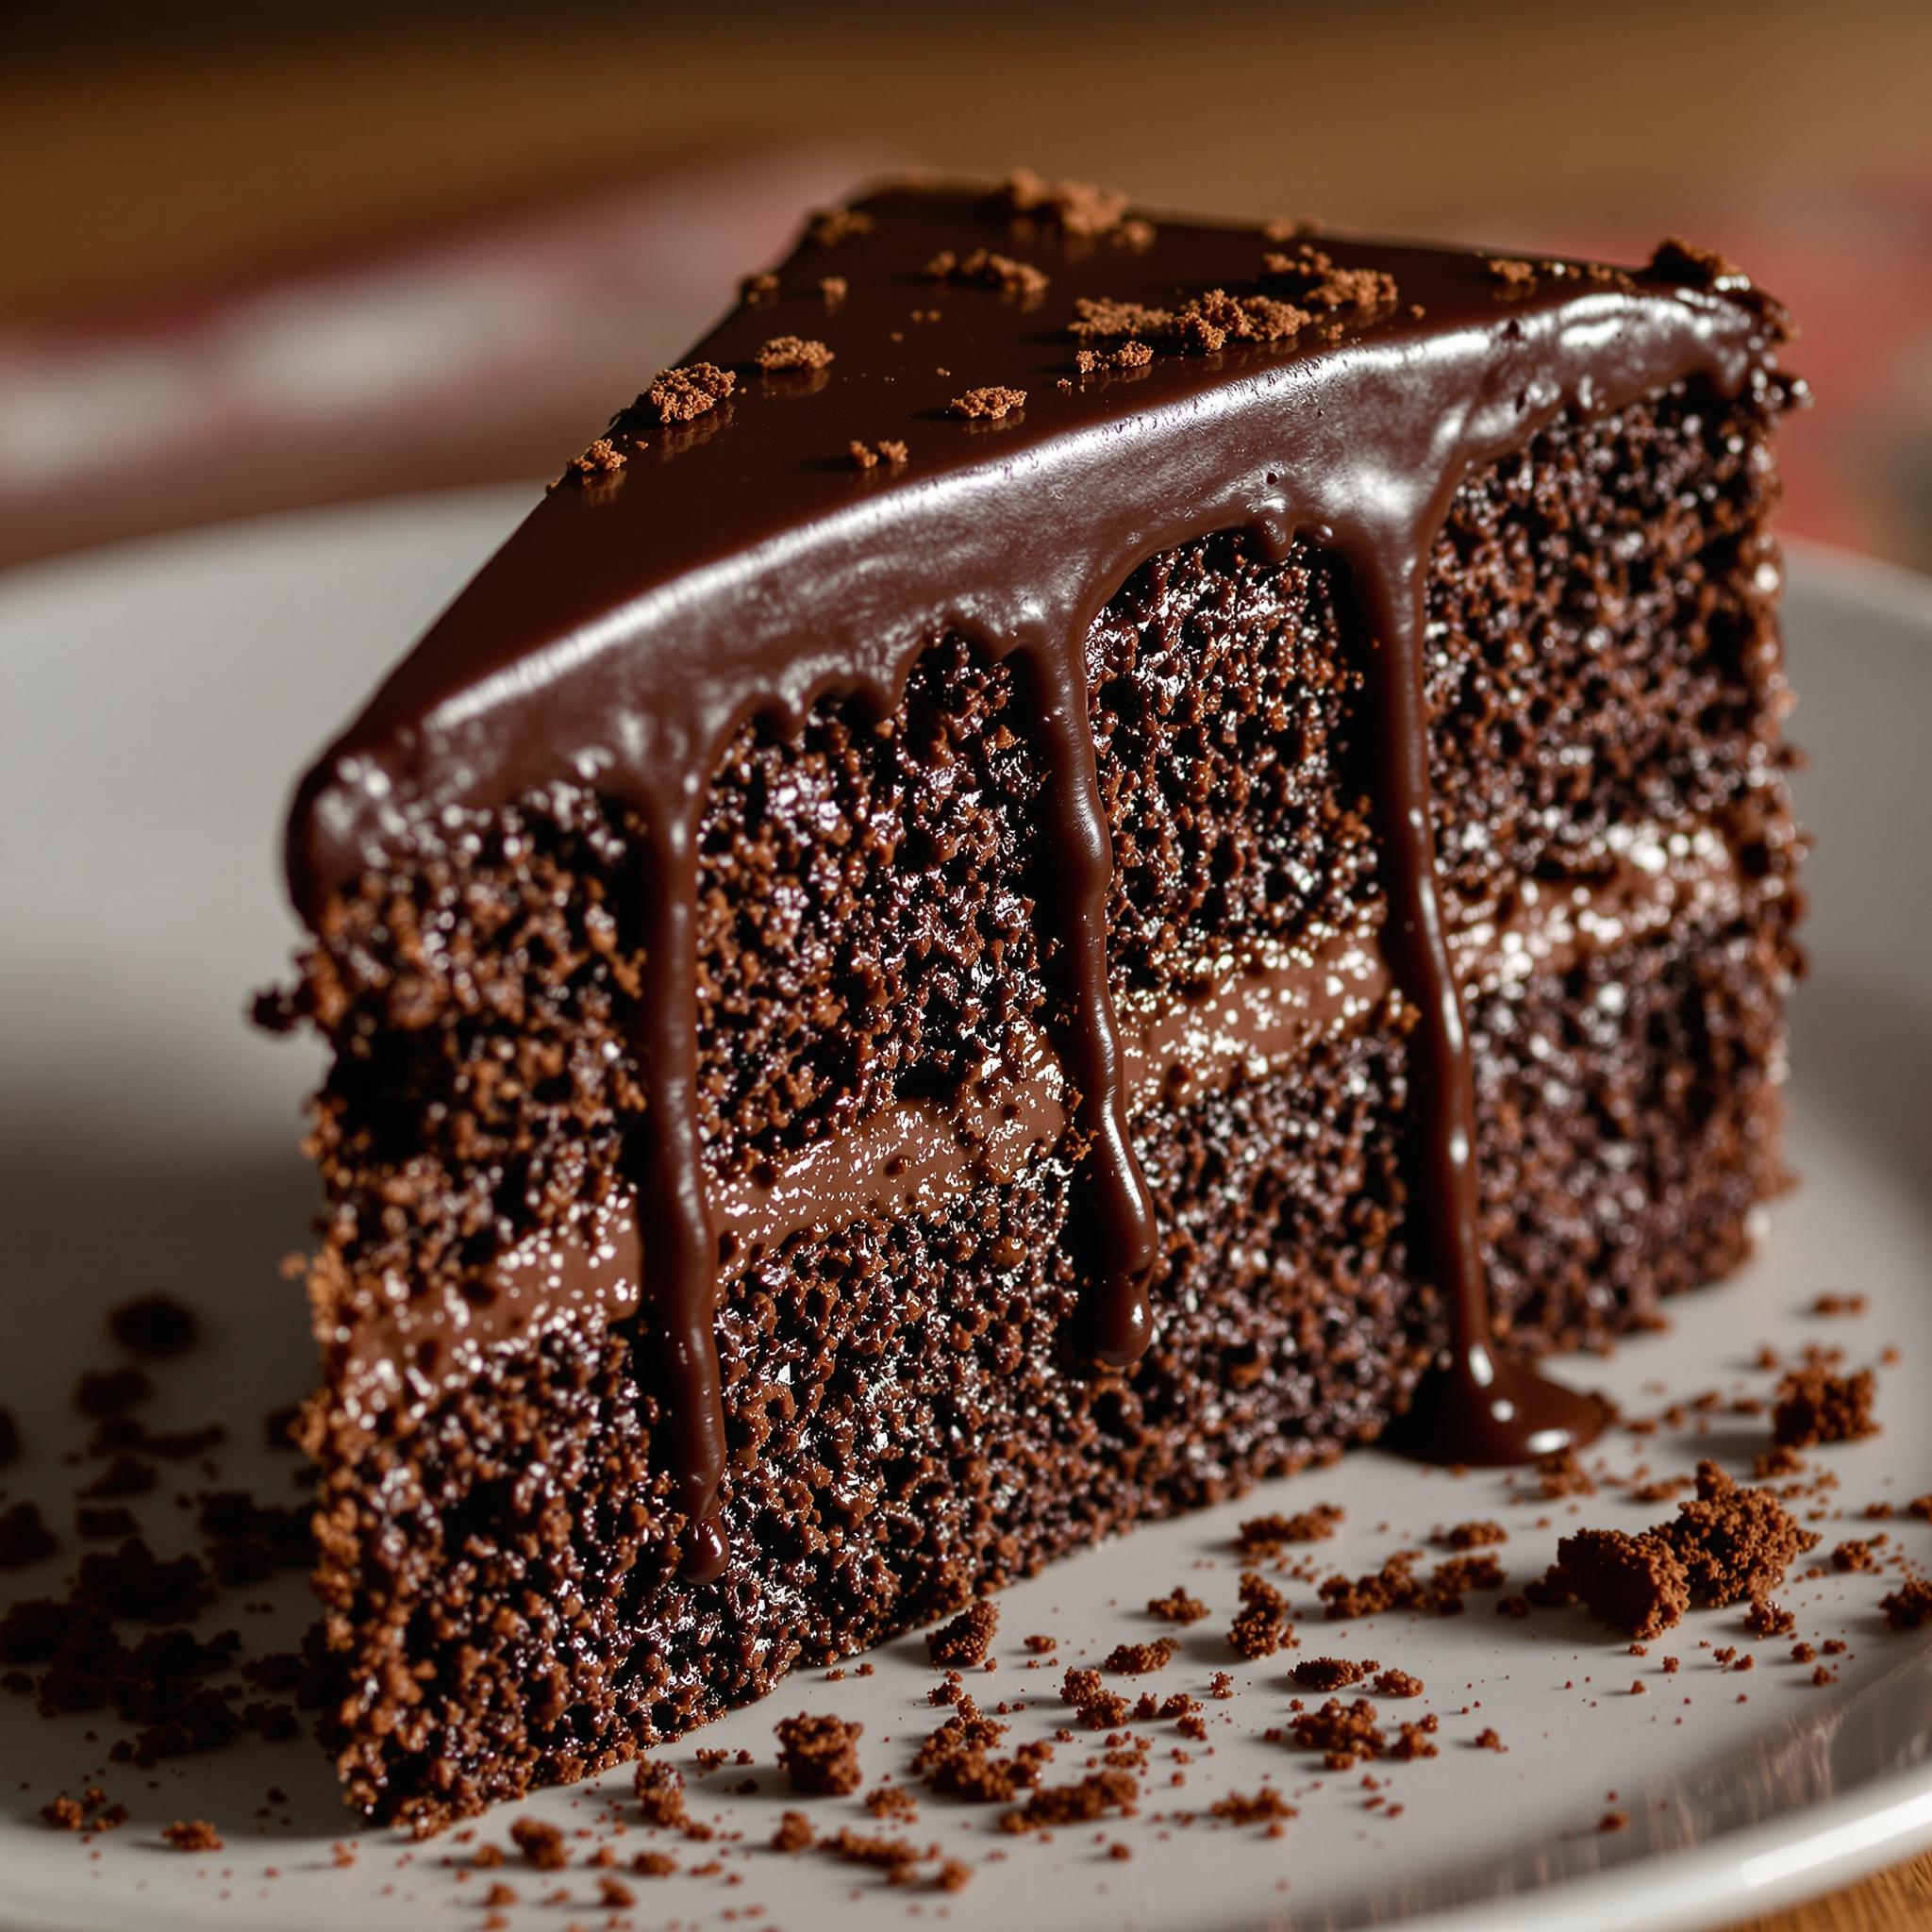
Step 5: Bake to Perfection
Divide the batter between the prepared pans. Slide them into the oven and bake for 30-35 minutes. A toothpick inserted should come out clean. Watch closely toward the end to avoid overbaking. Your kitchen will smell amazing by now.
Chef’s Tip
For an extra touch, brush each layer with simple syrup after cooling. It keeps the cake moist and adds a subtle sweetness.
Time Breakdown
- Prep Time: 15 minutes
- Cooking Time: 35 minutes
- Total Time: 50 minutes
Nutritional Information
Each slice contains approximately:
- Calories: 320
- Protein: 5g
- Fat: 14g
- Carbohydrates: 45g
Extra Information
Did you know dark chocolate contains antioxidants? That means indulging in this cake isn’t just delicious—it’s good for you too!
Necessary Tools
- Mixing bowls
- Whisk
- Measuring cups and spoons
- Cake pans
- Oven
Storage Instructions
Store leftover cake in an airtight container at room temperature for up to three days. For longer storage, refrigerate it. Always cover the cake well to keep it fresh.
If freezing, wrap individual slices tightly in plastic wrap. Place them in a freezer-safe bag. Thaw overnight in the fridge before serving.
Avoid leaving the cake uncovered, as it can dry out quickly.
Tips and Tricks
- Sift cocoa powder to remove lumps.
- Let the cake cool completely before frosting.
- Use high-quality dark chocolate for deeper flavor.
Serving Suggestions
- Serve with whipped cream and fresh berries.
- Top with ganache for extra decadence.
Healthier Alternatives
Here are six ways to make this recipe healthier:
- Gluten-Free Option: Substitute all-purpose flour with gluten-free flour blend.
- Low-Sugar Version: Use stevia or monk fruit sweetener instead of sugar.
- Vegan Twist: Replace eggs with flax eggs and use plant-based milk.
- Oil-Free: Swap vegetable oil with unsweetened applesauce.
- Whole Grain Goodness: Try whole wheat flour for added fiber.
- Less Sugar: Cut the sugar by one-third without losing much flavor.
Mistake 1: Overmixing the Batter
Overmixing leads to dense cakes. Mix just until ingredients combine. Stop as soon as the batter looks smooth. Overworking activates gluten, making the texture tough.
Mistake 2: Skipping the Boiling Water
Some skip boiling water thinking it’s optional. Don’t! It enhances moisture and flavor. Without it, the cake may turn dry and lack depth.
Mistake 3: Opening the Oven Door Too Soon
Opening the door early lets heat escape, causing uneven baking. Resist peeking until the timer hits 30 minutes. Patience pays off here.
Frequently Asked Questions
Can I use milk chocolate instead of dark?
Yes, but the flavor won’t be as intense. Stick to dark chocolate for best results.
How do I know when the cake is done?
Insert a toothpick; if it comes out clean, it’s ready. The top should spring back lightly when touched.
Can I freeze this cake?
Absolutely! Wrap slices tightly and freeze for up to three months. Thaw in the fridge overnight.
What frosting pairs well with this cake?
Cream cheese frosting or chocolate ganache works beautifully. Both balance the cake’s richness.
Is this recipe beginner-friendly?
Yes! With clear steps and common ingredients, anyone can master it.
Why does the batter seem so thin?
The boiling water thins it out. Trust the process—it bakes beautifully.
Can I add nuts or chips to the batter?
Definitely! Fold in chopped walnuts or chocolate chips before baking.
What size pans work best?
Two 9-inch round pans are ideal. Adjust timing if using different sizes.
Can I halve the recipe?
Yes, divide measurements by half and use one pan. Bake slightly less time.
Does altitude affect baking?
It can. Increase flour slightly and reduce baking powder for high altitudes.
Conclusion
Dark Chocolate Cake I is a timeless treat everyone deserves to try. Its rich flavor and ease of preparation make it unforgettable. So grab your mixing bowl and start baking—you won’t regret it!
Dark Chocolate Cake I
Ingredients
Equipment
Method
- Preheat your oven to 350°F (175°C). Grease two 9-inch round pans lightly with butter or cooking spray. Dust them with cocoa powder to prevent sticking. Pro tip: Line the bottoms with parchment paper for extra insurance. The smell of warm chocolate will soon fill your kitchen!
- In a large bowl, whisk together flour, sugar, cocoa powder, baking powder, baking soda, and salt. Make sure everything is evenly mixed before moving on.
- Add eggs, milk, vegetable oil, and vanilla extract to the dry mix. Stir until smooth. You’ll notice the batter turning glossy and thick. Be patient—it’s worth it!
- Gradually pour in boiling water while stirring. The batter will become thin, which might surprise you, but don’t worry! This step makes the cake super moist and tender once baked.
- Divide the batter between the prepared pans. Bake for 30-35 minutes. A toothpick inserted should come out clean. Watch closely toward the end to avoid overbaking. Your kitchen will smell heavenly by now.