The Ultimate Treat: Oreo Chocolate Chip Cookies That Steal the Show
Have you ever had one of those days where you just need a cookie that feels like a hug? You know, something that combines your childhood love for Oreos with your grown-up obsession with gooey chocolate chip cookies? Well, my friends, I have been on a serious kitchen mission to create that exact cookie. I think I’ve baked more batches than I can count trying to perfect it. The result? This glorious mash-up. These Oreo Chocolate Chip Cookies are seriously the best things to ever come out of my oven. They’re chewy, packed with chocolate, and have that iconic Oreo crunch in every single bite. Trust me, your cookie jar won’t stand a chance.
From Classic to Extra: The Story of a Cookie Mash-Up
The classic chocolate chip cookie is a timeless treasure. Then came along the Oreo, America’s favorite cookie, with its perfect crunch and creamy filling. It was only a matter of time before someone had the brilliant idea to put them together. This recipe is a modern twist on tradition. It takes the soft, chewy base we all love and adds layers of texture and flavor that make it spectacular. It’s like a party in your mouth where both classics are the guests of honor. I first made these for my niece’s birthday party, and let’s just say the kids went wild. They were gone before the cake was even cut!
Why These Oreo Chocolate Chip Cookies Will Be Your New Favorite
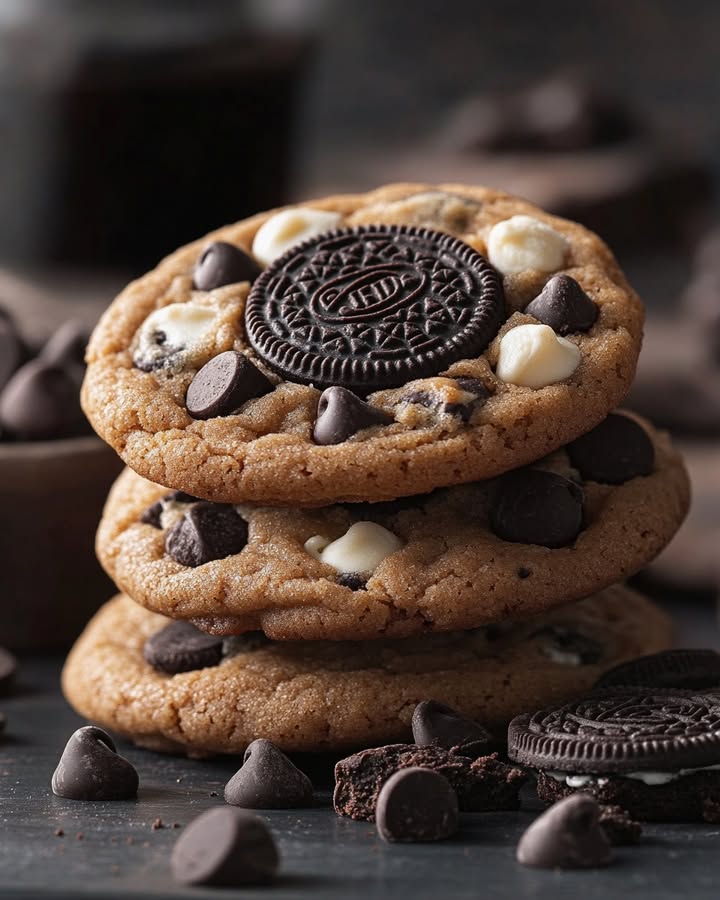
What’s not to love? First, they are incredibly easy. No fancy techniques here, just good old-fashioned cookie making. Second, the texture is absolutely dreamy. You get the soft chew from the cookie dough, the melty pools of chocolate chips, and the delightful crunch from the Oreo pieces. It’s a symphony of textures. Finally, they look impressive! Sprinkling a few extra Oreo pieces on top gives them a bakery-style finish that makes everyone think you’re a pastry pro.
The Perfect Moments for These Spectacular Cookies
- Movie Night: Swap the popcorn for a plate of these and watch the family smile.
- School Bake Sales: These will be the first to sell out. Guaranteed.
- Potluck Dessert: Bring a platter and become the most popular person at the gathering.
- Just Because: Sometimes, a Tuesday afternoon deserves a special cookie.
- Gift for a Friend: Package them up in a cute box. It’s a gift straight from the heart (and oven).
What You’ll Need: Oreo Chocolate Chip Cookie Ingredients
- 2 cups all-purpose flour – Spoon and level this for accuracy!
- 1 teaspoon baking soda
- 1 teaspoon salt – Balances all the sweetness perfectly.
- 1 cup unsalted butter, room temperature
- 1 cup brown sugar, packed – Light or dark, both work great.
- ½ cup white granulated sugar
- 1 teaspoon pure vanilla extract
- 1 large egg, room temperature
- 1 egg yolk, room temperature – This is the secret to extra chewiness.
- 1 ½ cups semi-sweet chocolate chips
- ½ cup Oreo crumbs – From about 5 Oreos, blended super fine.
- ¾ cup Oreo pieces – From about 6 Oreos, broken into small chunks.
No Worries! Handy Ingredient Substitutions
Out of something? Don’t panic! Here are some easy swaps:
- Butter: You can use salted butter, just reduce the added salt to ½ teaspoon.
- Brown Sugar: All light brown sugar is fine if you don’t have dark.
- Chocolate Chips: Milk chocolate or dark chocolate chips are wonderful alternatives.
- Eggs: Room temperature is key for blending smoothly.
- Oreos: Use any Oreo flavor you like! Mint or peanut butter could be fun twists.
Let’s Bake! Your Step-by-Step Guide to Perfect Cookies
Step 1: Get Your Dry Team Ready
Grab a medium mixing bowl. Whisk together your flour, baking soda, and salt. I like to give it a good 10-15 whisks. This ensures the leavening and salt are evenly spread throughout the flour. You’ll see the little specks of baking soda disappear. Set this bowl aside. This is your “dry team” waiting for its moment.
Step 2: Create Your Oreo Mix-Ins
This is the fun part! Take 5 whole Oreo cookies and toss them in a blender or food processor. Pulse until they become fine, dark, delicious crumbs. Measure out your ½ cup from this. The rest can be saved for topping. Now, take 6 more Oreos. Just break them by hand into small and medium pieces. You want some big chunks for those satisfying bites!
Pro tip: A quick pulse in a bag with a rolling pin works too if you don’t have a blender. Just be careful not to turn them to dust.
Step 3: Cream That Butter and Sugar
In a large bowl, use your mixer to beat the room-temperature butter with both sugars. Start on low, then crank it up to medium-high. Beat for a full 2-3 minutes until it’s light, fluffy, and pale in color. It should look like a cozy, creamy cloud. Scrape down the bowl with a spatula. Now add the vanilla, the whole egg, and the extra egg yolk. Mix again until everything is silky smooth and combined.
Chef’s tip: That extra egg yolk is my not-so-secret weapon. It adds richness and helps create that perfect chewy texture we all crave.
Step 4: Bring It All Together & Chill
With your mixer on low, gradually add the dry flour mixture to the butter mixture. Mix only until you no longer see streaks of flour. Overmixing makes tough cookies! Now, by hand with a sturdy spoon or spatula, fold in the chocolate chips, Oreo crumbs, and Oreo pieces. The dough will be thick and studded with goodies. Cover the bowl and pop it in the fridge for 40 minutes. This chills the butter back down, preventing cookies from spreading too thin.
Step 5: Preheat and Prep Your Pans
While the dough chills, preheat your oven to 350°F (175°C). Line two baking sheets with parchment paper. This is a lifesaver for easy cleanup and prevents sticking.
Step 6: Scoop and Shape Like a Pro
Use a large cookie scoop (about 3 tablespoons) to form your dough balls. Place 6 dough balls on one prepared sheet. Put this sheet in the freezer until the oven is fully preheated. Scoop the rest onto the second sheet and keep it in the fridge. The freezer shock helps the first batch hold their shape beautifully.
Step 7: Bake to Golden Perfection
Bake your cookies for 13-15 minutes. You want the edges to be a lovely golden brown, but the centers should still look a little soft and underdone. They will continue to cook on the hot pan. Let them sit on the baking sheet for 4 full minutes. This is crucial for setting their structure.
Presentation Pro Move: While they’re still warm, you can nudge the edges with a round biscuit cutter to make them perfectly circular. Then, press a few extra chocolate chips and Oreo pieces on top and dust with your saved Oreo crumbs.
Step 8: The Hardest Part: Let Them Cool!
Carefully transfer the cookies to a wire rack. Let them cool slightly for a warm, melty treat, or let them cool completely for the full chewy experience. I know it’s torture, but it’s worth the wait!
Your Baking Timeline
- Prep Time: 20 minutes
- Chill Time: 40 minutes
- Cook Time: 15 minutes per batch
- Total Time: About 1 hour 15 minutes
- Yield: About 18 large, amazing cookies
Chef’s Secret for the Ultimate Cookie
Here’s my golden rule: underbake them slightly. When you pull them out, the centers should look a little puffy and not fully set. They will deflate and finish cooking as they cool on the pan, giving you that perfect soft and chewy middle with a crispy edge.
A Little Cookie Trivia for You
Did you know the Oreo cookie was first introduced in 1912? It was actually a knock-off of another popular cookie called the Hydrox. The name “Oreo” might come from the French word ‘Or’, meaning gold, which was a color on the early packaging. Now, over 100 years later, we’re baking them right into another cookie classic!
Tools of the Trade
- Stand mixer or hand mixer
- Large and medium mixing bowls
- Whisk and spatula
- Measuring cups and spoons
- Blender or food processor (for Oreo crumbs)
- Large cookie scoop (3 Tbsp size)
- 2 Baking sheets
- Parchment paper
- Wire cooling rack
Keeping Your Cookies Fresh & Delicious
Once your cookies are completely cool, store them in an airtight container at room temperature. Place a piece of bread in the container with them. The cookies will absorb moisture from the bread, staying soft and chewy for up to 4 days.
You can also freeze the baked cookies! Layer them between sheets of parchment paper in a freezer-safe container or bag. They will keep for up to 2 months. Thaw at room temperature or warm them up for a few seconds in the microwave.
For make-ahead ease, you can freeze the unbaked dough balls. Place them on a sheet pan, freeze solid, then transfer to a freezer bag. Bake straight from frozen, just add 1-2 extra minutes to the baking time.
My Best Tips for Guaranteed Success
- Spoon & Level Flour: Do not scoop flour directly from the bag with your measuring cup. This packs it down and leads to dry cookies. Spoon it lightly into the cup and level it off.
- Room Temp is Key: Your butter and eggs must be at room temperature. Cold butter won’t cream properly, and cold eggs can cause the batter to curdle.
- Chill the Dough: Don’t skip the chilling step. It gives the flavors time to meld and prevents flat, greasy cookies.
- Give Them Space: Baking only 6 cookies per sheet allows for proper air circulation and even baking.
How to Serve Your Cookies for Maximum Wow
- Stack them high on a vintage cake stand for a party.
- Serve them warm with a cold glass of milk or a scoop of vanilla ice cream for an incredible ice cream sandwich.
- Package them in clear cellophane bags tied with a ribbon for a lovely homemade gift.
- For a fun dessert board, arrange cookies with fresh berries, whipped cream, and extra chocolate sauce for dipping.
Want to Mix It Up? Try These Fun Variations!
- Peanut Butter Lover’s: Use peanut butter Oreos and swap half the chocolate chips for peanut butter chips.
- Mint Chocolate: Use mint Oreos and dark chocolate chips for a cool, refreshing twist.
- Birthday Cake: Use Birthday Cake Oreos and add a handful of rainbow sprinkles to the dough.
- Salted Caramel: Drizzle finished cookies with caramel sauce and sprinkle with sea salt.
- Double Stuffed: Use Double Stuf Oreos for an extra creamy, decadent bite.
- Gluten-Free: Substitute your favorite 1:1 gluten-free flour blend and use gluten-free Oreos.
Common Mistakes to Avoid
Mistake 1: Not Measuring Flour Correctly
This is the biggest culprit for dry, cakey cookies. Scooping flour straight from the bag packs it down, so you end up using way too much. This extra flour absorbs all the moisture. The fix is simple: always spoon the flour lightly into your measuring cup and level it off with a knife. For total precision, a kitchen scale is your best friend.
Mistake 2: Skipping the Chilling Step
I know you’re excited to bake, but warm dough spreads like crazy in the oven. Your beautiful cookies will turn into one giant, thin, greasy puddle. Chilling the dough solidifies the butter, so the cookies bake up thick and chewy. It also gives the flavors time to develop. Think of it as a flavor-enhancing nap for your dough.
Mistake 3: Overbaking the Cookies
We want soft, chewy cookies, not crisp cracker-like ones. They continue to cook on the hot baking sheet after you take them out. Pull them from the oven when the edges are set and golden, but the centers still look slightly underdone and puffy. They will finish setting as they cool, leaving you with that perfect texture.
Mistake 4: Using Cold Butter and Eggs
Room temperature ingredients blend together smoothly and trap lots of air. This makes your cookies light and tender. Cold butter won’t cream properly with the sugar, and cold eggs can cause the mixture to separate or curdle. Take your ingredients out of the fridge about an hour before you start baking.
Your Oreo Cookie Questions, Answered!
Can I make the dough ahead of time?
Absolutely! You can cover and refrigerate the dough for up to 72 hours before baking. The flavor actually gets better! You can also freeze the scooped dough balls for up to 3 months. Just bake from frozen, adding a minute or two to the bake time.
My cookies spread too much. What went wrong?
This usually points to butter that was too warm. Make sure your butter is just soft to the touch, not melted or greasy. Also, never skip the chilling step. Chilling solidifies the fat, which is key for preventing spread. Lastly, check your oven temperature with a separate thermometer; an oven that runs too cool can cause spreading.
Can I use a different type of Oreo?
Yes, please do! This recipe is a fantastic canvas for any Oreo flavor. Mint, peanut butter, birthday cake, or even the seasonal flavors would all be delicious. Just keep the total amount of Oreo crumbs and pieces the same as the recipe calls for.
Why do I need an extra egg yolk?
The egg yolk adds extra fat and emulsifiers (lecithin) to the dough. This gives the cookies a richer flavor and a more tender, chewy texture that lasts for days. It’s a small step that makes a big difference in the final product.
How do I get my cookies to look round and pretty?
If your cookies bake with slightly uneven edges, here’s a neat trick. Right when they come out of the oven, take a round biscuit cutter or large mug that’s slightly bigger than the cookie. Gently swirl it around the edge of the warm cookie to nudge it into a perfect circle. Do this within the first minute of them being out of the oven.
Can I make these without a mixer?
You can, but it will be an arm workout! Use a sturdy wooden spoon or silicone spatula to vigorously cream the butter and sugars until light and fluffy. It might take a few minutes of good old-fashioned elbow grease, but it’s totally doable.
What’s the best way to store these cookies?
In an airtight container at room temperature, they’ll stay soft and delicious for 4-5 days. Adding a slice of bread to the container works magic to keep them moist. For longer storage, freeze the baked cookies or the unbaked dough balls. They taste almost fresh-baked when thawed.
Can I turn these into cookie bars?
Sure! Press the chilled dough evenly into a greased 9×13 inch baking pan. Bake at 350°F for 20-25 minutes, or until the edges are golden brown and the center is set. Let cool completely in the pan before cutting into squares.
Are the Oreo crumbs necessary if I’m using pieces?
Yes, I highly recommend using both. The fine crumbs disperse throughout the dough, giving every bite a subtle Oreo flavor and a cool dark color. The pieces give you those big, satisfying chunks of cookie crunch. They serve two different, delicious purposes.
My dough seems dry and crumbly. What should I do?
This is almost always a flour measurement issue. If you packed your flour, you likely have too much. Try adding an extra tablespoon of room-temperature butter or a splash of milk, and mix gently just until the dough comes together. Next time, remember to spoon and level your flour!
Happy Baking!
There you have it – my foolproof recipe for the most incredible Oreo Chocolate Chip Cookies. They really are a labor of love and a total crowd-pleaser. I hope you have as much fun making them as I do. The moment you pull that first warm, fragrant cookie off the tray and take a bite, you’ll know it was all worth it. Now, go preheat that oven and get baking! Don’t forget to let me know how your batch turns out.
Easy Chocolate Fudge
Ingredients
Equipment
Method
- Whisk together flour, baking soda, and salt in a medium bowl.
- Crush 5 Oreos into fine crumbs and measure out ½ cup.
- Break 6 Oreos into small chunks.
- In a large bowl, cream the butter and sugars until fluffy for 2-3 minutes.
- Add the vanilla, egg, and egg yolk, mixing until smooth.
- Gradually mix in the dry flour mixture until just combined.
- Fold in chocolate chips, Oreo crumbs, and Oreo pieces.
- Chill the dough in the fridge for 40 minutes.
- Preheat the oven to 350°F (175°C) and line baking sheets with parchment paper.
- Scoop dough into balls and place them on the baking sheets.
- Freeze the first batch while the oven preheats and keep the second batch in the fridge.
- Bake for 13-15 minutes until edges are golden and centers are soft.
- Let cookies sit on the baking sheet for 4 minutes before transferring to a wire rack.