A Garlic Ginger Chicken Recipe That’ll Make Your Kitchen Smell Heavenly
Picture this: it’s a busy Tuesday evening, and you want something quick, flavorful, and satisfying for dinner. Enter Garlic Ginger Chicken, a dish that smells so good while cooking, your family will start hovering around the kitchen before you even call them to the table. I first tried this recipe during a potluck with friends. It was love at first bite. The tender chicken, coated in a glossy, spicy sauce bursting with garlic and ginger, paired perfectly with fluffy basmati rice. Since then, I’ve made it countless times, tweaking it just a bit to suit my taste. Trust me, once you try it, it’ll become a staple in your home too.
The Origins of Garlic Ginger Chicken
This dish draws inspiration from Chinese cuisine, where garlic and ginger are staples in stir-fries. Traditionally, these flavors are used to balance savory, sweet, and spicy elements in a single dish. Over time, home cooks worldwide have embraced this style, adding their own twists. My version uses sriracha for an extra kick and brown sugar for a touch of sweetness. It’s a perfect blend of tradition and modern flair. Plus, it’s so easy to make, even if you’re new to cooking Asian-inspired dishes.
Why You’ll Love This Recipe
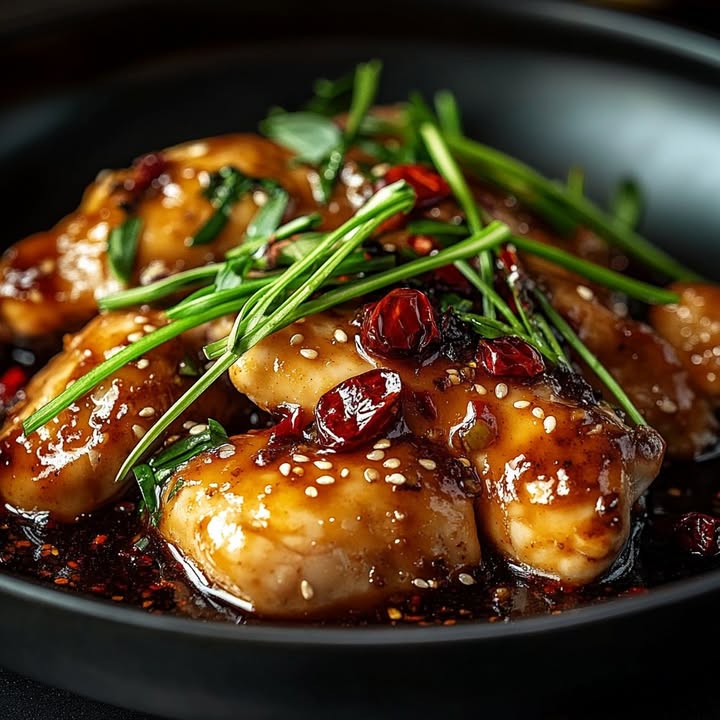
What makes Garlic Ginger Chicken a winner? First, it’s packed with bold flavors. The garlic and ginger give it a fragrant punch, while the sauce is sticky, shiny, and utterly irresistible. Second, it’s super simple. No fancy techniques or hours of prep—just straightforward steps anyone can follow. Finally, it’s versatile. Serve it over rice, noodles, or even cauliflower rice for a low-carb option. Whether you’re feeding picky kids or impressing guests, this dish has got you covered.
Perfect Occasions to Whip Up This Dish
Garlic Ginger Chicken is perfect for weeknight dinners when you need something quick but delicious. It’s also a crowd-pleaser at casual get-togethers or potlucks. I’ve served it at birthday dinners, holiday gatherings, and even game nights—it never fails to earn rave reviews. Plus, it reheats beautifully, making it ideal for meal prep or leftovers.
Ingredients You’ll Need
- For the chicken:
- 500 g boneless chicken thighs
- 1 tbsp cornstarch (maïzena)
- 1 tbsp dark soy sauce
- 1.5 tbsp minced garlic
- 1 tsp minced ginger
- 1 red bell pepper, sliced
- ½ cup chopped green onions
- ½ cup cooking oil (for frying)
- For the sauce:
- 2 tbsp soy sauce
- ½ cup chicken broth
- 2 tsp rice vinegar
- 1 tbsp light brown sugar
- 1 tsp sesame oil
- 1 tsp sriracha
- ½ cup water
- ¼ tsp black pepper
- 1 tbsp cornstarch mixed with 2 tbsp water (slurry)
Substitution Options
Not everyone has every ingredient on hand, and that’s okay! Here are some swaps:
- Use chicken breast instead of thighs if you prefer leaner meat.
- Swap sriracha for chili garlic sauce or red pepper flakes.
- If you don’t have dark soy sauce, regular soy sauce works fine.
- Replace brown sugar with honey or maple syrup for a different sweetness.
- Feel free to use any color bell pepper or skip it altogether.
Step 1: Prepare the Sauce & Marinate the Chicken
Start by mixing all the sauce ingredients in a bowl. The soy sauce adds saltiness, while the brown sugar brings sweetness, and the sriracha gives it a fiery kick. Next, cut the chicken into bite-sized pieces. Toss them with dark soy sauce and cornstarch until they’re evenly coated. Let them sit for 15–20 minutes. Pro tip: Marinating the chicken ensures it stays juicy and absorbs all those yummy flavors.
Step 2: Cook the Chicken
Heat the oil in a large skillet over medium heat. Fry the chicken in batches for 2–3 minutes per side until golden and crispy. Don’t overcrowd the pan—this helps the chicken cook evenly. Once done, remove it and drain excess oil, leaving just 1 tablespoon in the skillet. Pro tip: Use tongs to flip the chicken gently without breaking the coating.
Step 3: Add Aromatics & Sauce
In the same skillet, sauté the garlic and ginger for about 30 seconds until fragrant. Add the cooked chicken back in along with the bell pepper and green onions. Pour in the sauce mixture and let it simmer for 2–3 minutes until thickened. Watch as the sauce clings to the chicken, creating that irresistible shine. Chef’s tip: Stir constantly to prevent burning, especially if your stove runs hot.
Step 4: Serve with Style
Spoon the Garlic Ginger Chicken onto plates of steamed rice or noodles. Garnish with fresh cilantro or sesame seeds for a pop of color. Serve it piping hot and watch your family dig in with delight. Pair it with a side of cucumber salad or steamed broccoli for a complete meal.
Timing Breakdown
- Prep time: 10 minutes
- Cooking time: 15 minutes
- Total time: 25 minutes
Chef’s Secret
To elevate the dish, toast the sesame seeds before sprinkling them on top. Simply toss them in a dry pan over low heat for 1–2 minutes until fragrant. This small step adds a nutty aroma that complements the dish beautifully.
An Interesting Fact About Garlic and Ginger
Did you know garlic and ginger have been used in traditional medicine for centuries? Garlic is known for its immune-boosting properties, while ginger is often praised for aiding digestion. So not only does this dish taste amazing, but it might also give your health a little boost!
Necessary Equipment
- A sharp knife and cutting board
- A large non-stick skillet or wok
- Mixing bowls
- Tongs or a spatula
- Measuring spoons and cups
Storage Tips
Leftovers? Lucky you! Store the cooled Garlic Ginger Chicken in an airtight container in the fridge for up to 3 days. Reheat it in the microwave or on the stovetop with a splash of water to revive the sauce. For longer storage, freeze portions in freezer-safe bags for up to 2 months. Thaw overnight in the fridge before reheating.
If freezing, omit the green onions and add them fresh after reheating for better texture and flavor.
Avoid storing the dish at room temperature for more than 2 hours to prevent spoilage.
Tips and Advice
- Pat the chicken dry before marinating to help the cornstarch stick better.
- Adjust the spiciness by adding more or less sriracha based on your preference.
- Use freshly grated ginger for the best flavor—it’s worth the extra effort!
- Double the recipe if you’re cooking for a larger group or want leftovers.
Presentation Ideas
- Serve in individual bowls with a sprinkle of toasted sesame seeds.
- Garnish with thinly sliced green onions for a vibrant touch.
- Add edible flowers for a fancy presentation at dinner parties.
Healthier Alternatives
Here are six variations to make this dish healthier:
- Baked Version: Skip frying and bake the chicken at 400°F (200°C) for 20 minutes.
- Low-Sodium Option: Use low-sodium soy sauce and reduce added salt.
- Vegan Twist: Substitute chicken with tofu or tempeh.
- Gluten-Free: Swap soy sauce with tamari and ensure the cornstarch is gluten-free.
- Keto-Friendly: Serve over cauliflower rice instead of regular rice.
- Oil-Free: Use an air fryer to cook the chicken instead of frying.
Mistake 1: Overcrowding the Pan
When frying the chicken, resist the urge to cram everything into the pan at once. Overcrowding lowers the temperature and causes the chicken to steam rather than crisp up. Cook in smaller batches for perfectly golden results. Practical tip: Use two pans if you’re short on time.
Mistake 2: Skipping the Cornstarch Slurry
Some people forget to mix cornstarch with water before adding it to the sauce. Without this step, the sauce won’t thicken properly. Always prepare the slurry separately for smooth results.
Mistake 3: Overcooking the Garlic
Garlic burns easily, turning bitter and ruining the dish. Sauté it briefly, just until fragrant. Keep the heat medium-low and stir continuously to avoid mistakes.
Frequently Asked Questions
Can I use chicken breast instead of thighs?
Absolutely! Chicken breast works well, though it may be slightly drier. To keep it moist, don’t overcook it and consider slicing it thinly before marinating.
What can I substitute for sriracha?
If you don’t have sriracha, try chili garlic sauce, red pepper flakes, or even a dash of cayenne pepper. Adjust quantities to match your spice tolerance.
How do I store leftovers?
Store cooled leftovers in an airtight container in the fridge for up to 3 days. Reheat gently with a splash of water to loosen the sauce.
Can I freeze this dish?
Yes! Freeze portions in freezer-safe bags for up to 2 months. Thaw overnight in the fridge before reheating.
Is this dish kid-friendly?
Definitely! Kids love the sweet and savory flavors. Reduce the sriracha for a milder version they’ll enjoy.
What sides pair well with Garlic Ginger Chicken?
Steamed rice, noodles, or roasted vegetables are excellent choices. A cucumber salad or steamed broccoli adds freshness to balance the richness.
Can I make this dish in advance?
Yes! Prepare everything except the green onions ahead of time. Reheat before serving and garnish with fresh toppings.
What type of oil should I use?
Use neutral oils like vegetable, canola, or peanut oil for frying. Avoid olive oil, as it has a lower smoke point.
How can I make this dish gluten-free?
Swap soy sauce with tamari and ensure the cornstarch is gluten-free. Double-check labels for other ingredients.
Can I add other vegetables?
Of course! Broccoli, snap peas, carrots, or zucchini would all work wonderfully. Just adjust cooking times accordingly.
Final Thoughts
Garlic Ginger Chicken is one of those recipes that checks all the boxes: quick, easy, and bursting with flavor. Whether you’re a seasoned cook or a beginner, this dish will quickly become a favorite in your repertoire. So grab your ingredients, fire up the stove, and treat yourself to a meal that’s as comforting as it is delicious. Enjoy!
Garlic Ginger Chicken
Ingredients
Equipment
Method
- Mix all sauce ingredients in a bowl.
- Cut chicken into bite-sized pieces and toss with dark soy sauce and cornstarch, then let sit for 15-20 minutes.
- Heat oil in a large skillet over medium heat and fry chicken in batches for 2-3 minutes per side until golden and crispy.
- Remove chicken and drain excess oil, leaving 1 tablespoon in the skillet.
- Sauté garlic and ginger in the same skillet for about 30 seconds until fragrant.
- Add the cooked chicken, bell pepper, and green onions back to the skillet.
- Pour the sauce mixture over the chicken and let it simmer for 2-3 minutes until thickened.