Why Grilled Corn on the Cob is a Summer Must-Try
There’s something magical about biting into a perfectly grilled corn on the cob. I still remember the first time I made it for my family. We were gathered in the backyard, and as soon as the smoky aroma hit the air, everyone stopped what they were doing. The kids ran over, napkins in hand, ready to dig in. It’s not just food—it’s an experience. Whether you’re grilling grilled corn on the cob without husks or wrapping it in foil for that extra juiciness, this dish is always a crowd-pleaser.
A Little History Behind the Dish
Grilled corn on the cob has been around for centuries, with roots in cultures all over the world. In Mexico, street vendors sell mexican grilled corn on the cob, slathered in mayo, cotija cheese, and chili powder. Down South, folks swear by their southern grilled corn on the cob, often brushed with butter and sprinkled with spices. I love how versatile it is—whether you’re going for a quick weekday meal or a fancy backyard barbecue, there’s a version for every occasion. And trust me, once you try it, you’ll see why it’s such a timeless favorite.
Why You’ll Love This Recipe
This recipe is simple, flavorful, and downright delicious. The charred kernels are sweet, smoky, and slightly crunchy, while the buttery coating adds richness. Plus, it’s so easy to customize. Want to keep things classic? Go for plain butter and salt. Feeling adventurous? Try seasoned grilled corn on the cob in foil with garlic, paprika, and lime zest. It’s a dish that works for everyone, from picky eaters to foodies looking for something new.
Perfect Occasions to Make This Dish
Grilled corn on the cob shines at summer barbecues, picnics, and potlucks. It’s also great for game nights or casual dinners. I’ve even served it at holiday gatherings when I wanted something festive yet easy. If you’re hosting a themed party, like a Mexican fiesta or Southern cookout, this dish fits right in. And let’s not forget stovetop options for those rainy days when firing up the grill isn’t an option!
Ingredients
- 4 ears of fresh corn
- 4 tablespoons unsalted butter, melted
- 1 teaspoon salt
- 1 teaspoon black pepper
- 1 teaspoon smoked paprika (optional)
- Juice of 1 lime
- Optional toppings: grated Parmesan, chopped cilantro, chili powder
Substitution Options
- Use olive oil instead of butter for a lighter option.
- Swap smoked paprika for cayenne if you want some heat.
- For dairy-free diets, skip the butter and use vegan alternatives.
- Try lemon juice instead of lime for a different citrus twist.
Step 1: Preparing the Corn
Start by cleaning your corn. If you’re making grilled corn on the cob without removing silk, leave the husks on but soak them in water for 10 minutes. This keeps the kernels moist and prevents burning. For naked cobs, pat them dry after shucking. Pro tip: Use a clean toothbrush to remove stubborn silk strands—works like a charm!
Step 2: Seasoning the Corn
Melt your butter in a small bowl and mix in the salt, pepper, and paprika. Brush this mixture generously onto each ear of corn. Don’t skimp here—the seasoning makes all the difference. If you’re doing seasoned grilled corn on the cob in foil, wrap each ear tightly before moving to the grill. This traps moisture and infuses flavor deep into the kernels.
Step 3: Grilling the Corn
Preheat your grill to medium-high heat. Place the corn directly on the grates if you’re skipping foil, turning occasionally until golden brown spots appear. This usually takes about 10 minutes. For foil-wrapped corn, place them seam-side down and rotate every few minutes. Chef’s tip: Resist the urge to constantly flip—it needs time to develop those beautiful char marks!
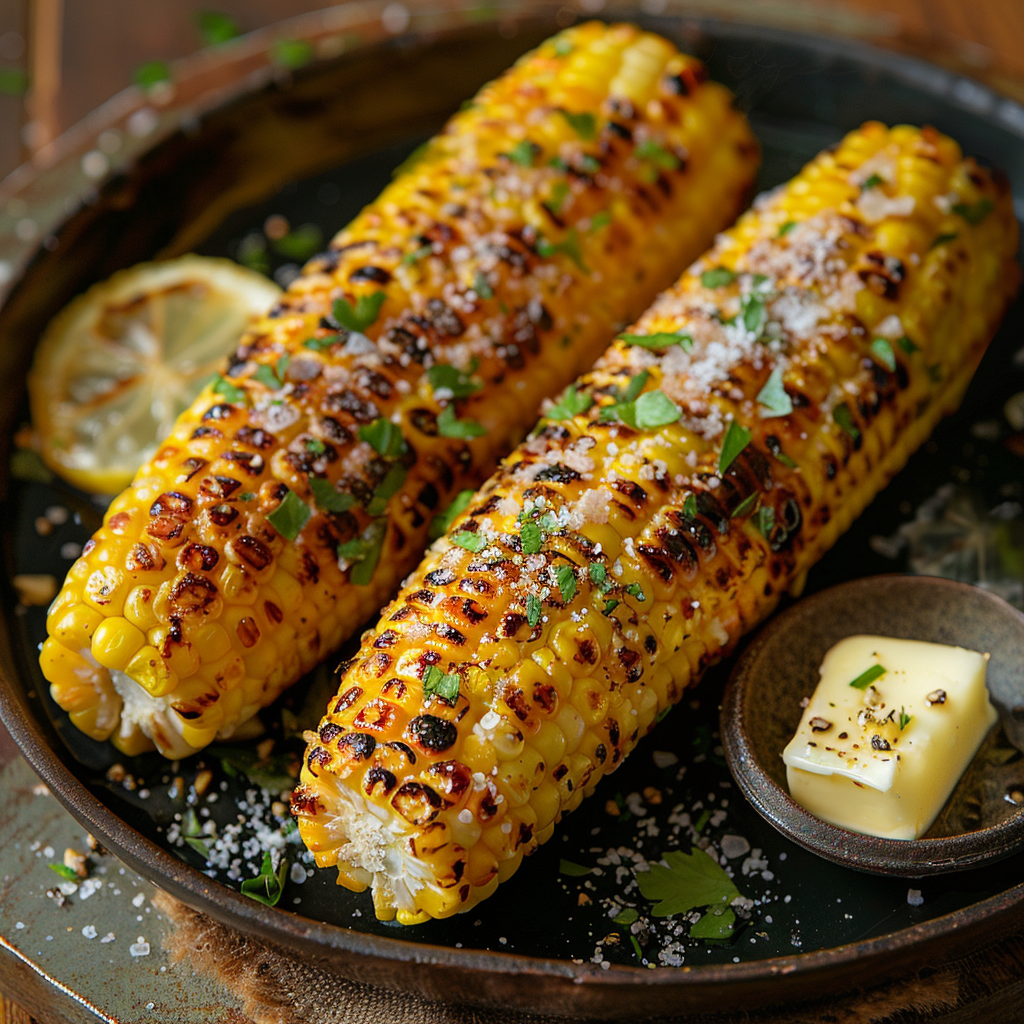
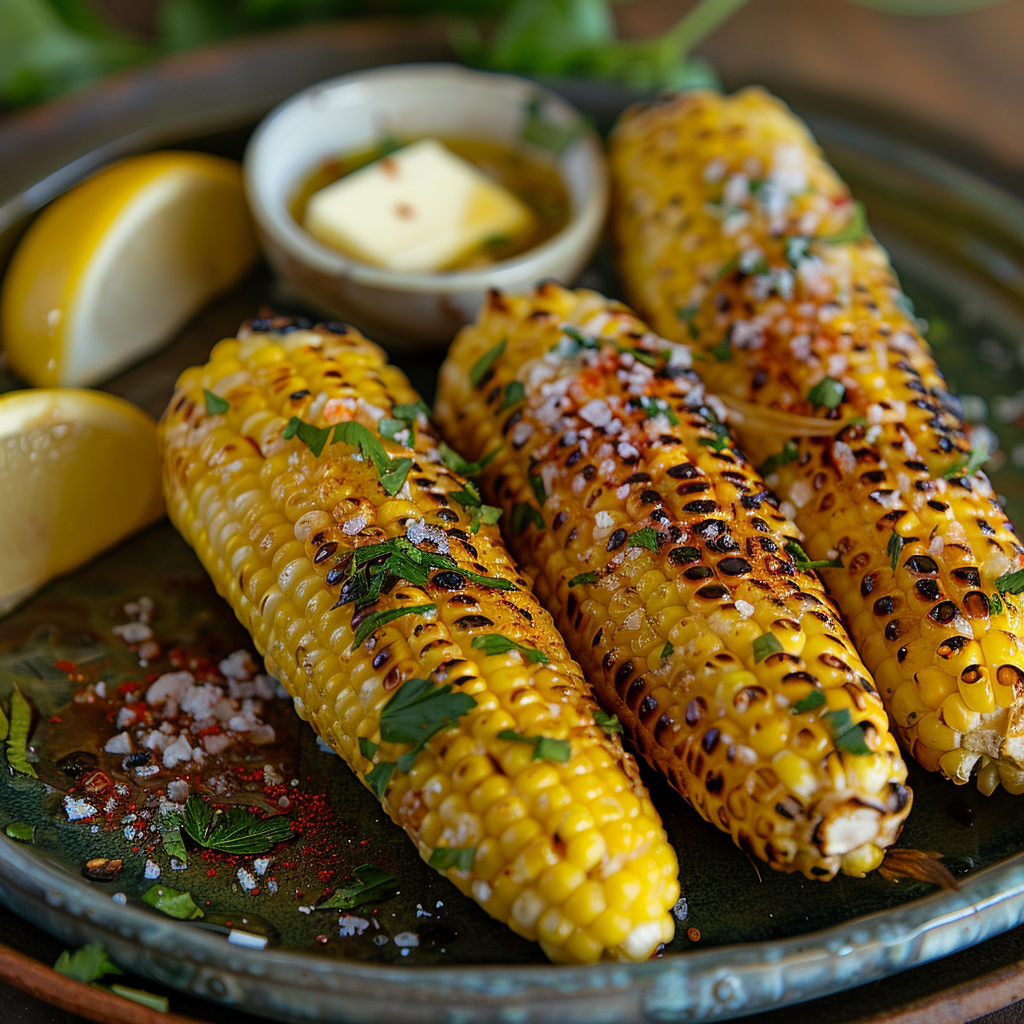
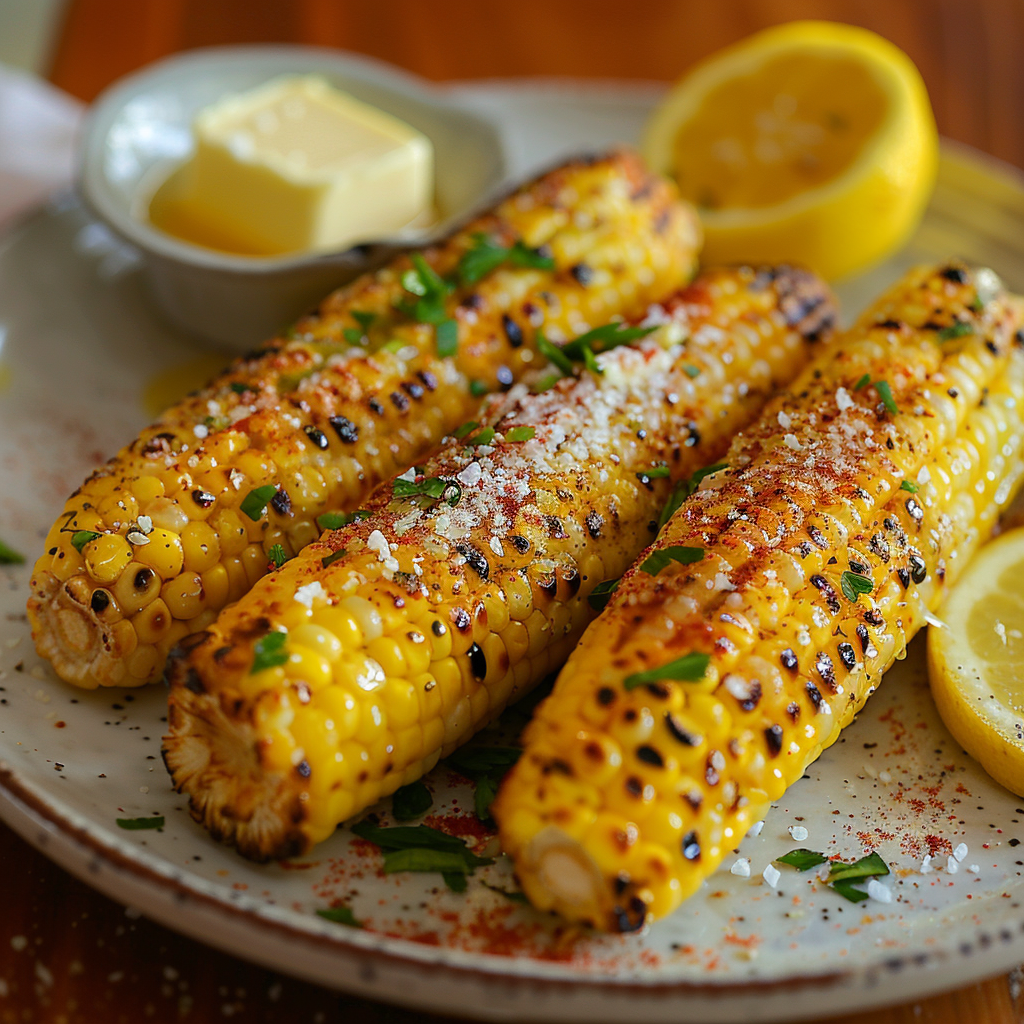
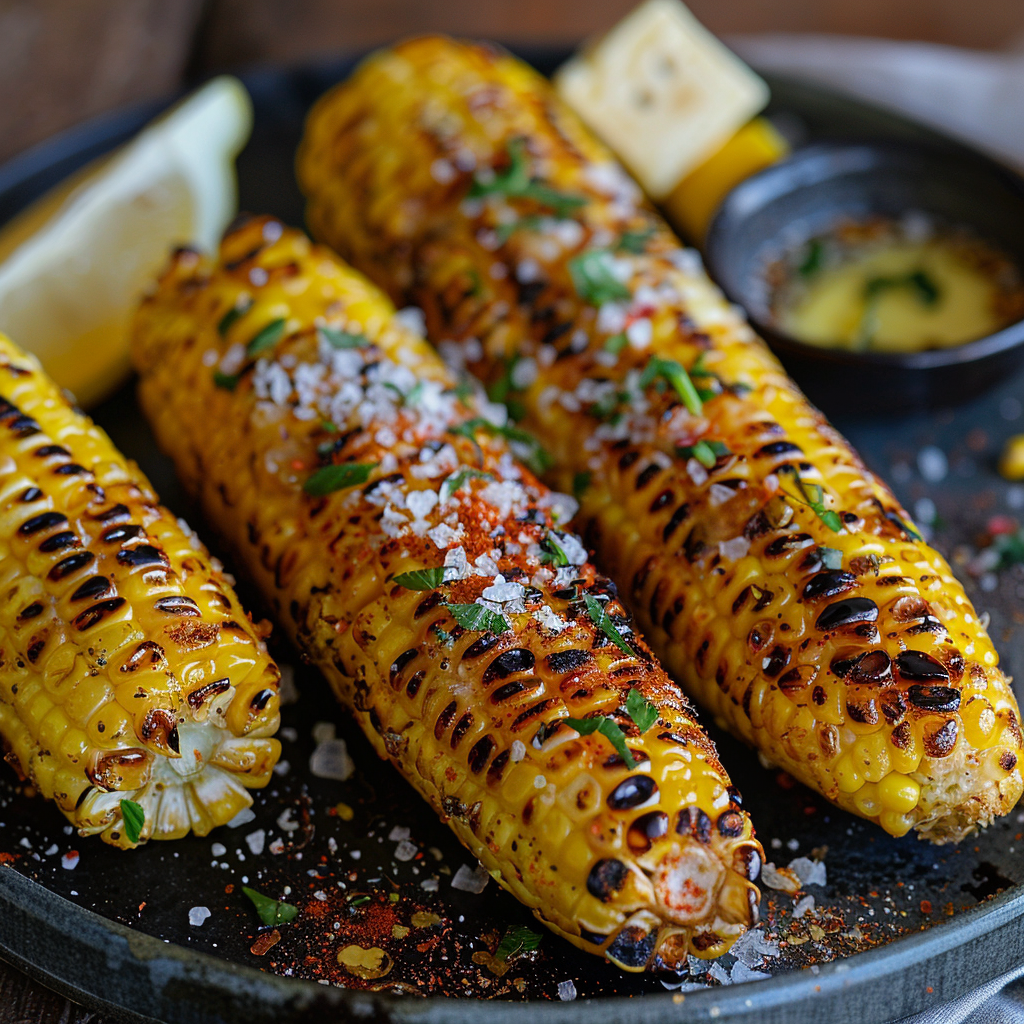
Step 4: Adding Final Touches
Once done, squeeze fresh lime juice over the hot corn. Sprinkle with Parmesan or cilantro if you’re feeling fancy. Serve immediately while it’s still warm. There’s nothing quite like sinking your teeth into a juicy, smoky kernel topped with zesty lime and salty cheese. Trust me, your guests will rave about it!
Timing
Prep time: 10 minutes
Cooking time: 10–15 minutes
Total time: 20–25 minutes
Chef’s Secret
Here’s a little trick I learned from the pioneer woman grilled corn on the cob in foil: Add minced garlic to the butter mixture before grilling. It gives the corn a rich, savory depth that pairs beautifully with the sweetness of the kernels.
Extra Info
Did you know corn is actually a type of grass? Each kernel is technically a seed, which means you’re eating nature’s popcorn when you bite into it. Isn’t that fun?
Necessary Equipment
- Grill or stovetop grill pan
- Tongs
- Basting brush
- Foil (optional)
Storage
If you have leftovers (unlikely, but possible), store them in an airtight container in the fridge for up to two days. Reheat by wrapping the corn in foil and placing it in a 350°F oven for 10 minutes. Avoid microwaving, as it can make the kernels rubbery.
For longer storage, freeze the cooked corn by cutting the kernels off the cob and storing them in freezer-safe bags. They’ll last up to three months. Just thaw and reheat when ready to enjoy again.
Pro tip: Keep a batch of seasoned butter in the fridge for future grilling sessions. It saves time and ensures consistent flavor every time.
Tips and Advice
- Always start with fresh corn for the best texture and taste.
- Soak the husks in water to prevent flare-ups during grilling.
- Experiment with different seasonings to find your perfect combo.
- Don’t overcrowd the grill—give each ear enough space to cook evenly.
Presentation Tips
- Serve on a wooden platter for a rustic look.
- Garnish with fresh herbs like cilantro or parsley for a pop of color.
- Offer a variety of toppings so guests can customize their corn.
- Arrange lime wedges around the plate for a vibrant touch.
Healthier Alternative Recipes
Want to lighten things up? Here are six variations:
- Olive Oil Drizzle: Replace butter with olive oil and sprinkle with sea salt.
- Vegan Delight: Use plant-based butter and top with nutritional yeast.
- Spicy Kick: Add cayenne pepper and chili flakes for heat.
- Herbaceous Twist: Mix chopped basil and thyme into the butter.
- Low-Sodium Option: Skip the salt and rely on spices like smoked paprika and garlic powder.
- Gluten-Free Fiesta: Top with gluten-free cotija-style cheese and lime zest.
Mistake 1: Overcooking the Corn
Overcooked corn becomes mushy and loses its natural sweetness. To avoid this, keep an eye on the grill and turn the ears frequently. Aim for golden-brown spots rather than blackened kernels.
Mistake 2: Skipping the Soak
If you’re grilling with husks on, soaking them is crucial. Without it, the husks can catch fire, leaving you with burnt corn instead of perfectly charred kernels. Always soak for at least 10 minutes.
Mistake 3: Using Old Corn
Freshness matters. Older corn tends to be drier and less flavorful. Look for bright green husks and plump kernels when shopping. Pro tip: Buy local if possible—it’s fresher and tastier.
FAQ
How do I grill corn on the cob without husks?
Simply shuck the corn, brush it with butter or oil, and place it directly on the grill. Turn every few minutes to ensure even cooking and avoid burning.
Can I make grilled corn on the cob in foil?
Absolutely! Wrapping the corn in foil traps moisture and creates tender, juicy kernels. It’s perfect for beginners or anyone who prefers softer corn.
What’s the best way to season grilled corn?
Butter, salt, and pepper are classics, but don’t be afraid to get creative. Try garlic powder, smoked paprika, or even a squeeze of lime for added flair.
How long does it take to grill corn?
About 10–15 minutes, depending on the heat of your grill. Rotate the ears every few minutes to achieve even charring.
Can I grill corn indoors?
Yes! Use a stovetop grill pan or roast it in the oven at 400°F for 20–25 minutes.
What toppings go well with grilled corn?
Popular choices include Parmesan cheese, cilantro, lime juice, chili powder, and mayonnaise. Experiment to find your favorite combo.
Is grilled corn healthy?
It can be! Corn is high in fiber and antioxidants. Opt for minimal butter and load up on herbs and spices for a nutritious treat.
Can I freeze leftover grilled corn?
Yes, cut the kernels off the cob and freeze them in airtight bags for up to three months.
How do I remove silk easily?
Soak the husked corn in water for a few minutes, then use a clean toothbrush to gently scrub away any remaining silk.
What’s the difference between southern and Mexican grilled corn?
Southern-style corn is typically simpler, with butter and spices. Mexican-style often includes mayo, cotija cheese, and chili powder for bold flavors.
Final Thoughts
Grilled corn on the cob is more than just a side dish—it’s a celebration of summer flavors and good company. Whether you’re making it for a crowd or enjoying it solo, this recipe never disappoints. So grab some fresh ears, fire up the grill, and let the magic happen. Your taste buds will thank you!
Grilled Corn on the Cob
Ingredients
Equipment
Method
- Clean the corn. Soak husked corn in water for 10 minutes if leaving the husks on.
- Melt butter and mix in salt, pepper, and paprika; brush onto each ear of corn.
- Preheat grill to medium-high heat, then place corn on grates and turn occasionally for 10 minutes (or wrap in foil and rotate).
- Once done, squeeze fresh lime juice over hot corn and add desired toppings. Serve immediately.