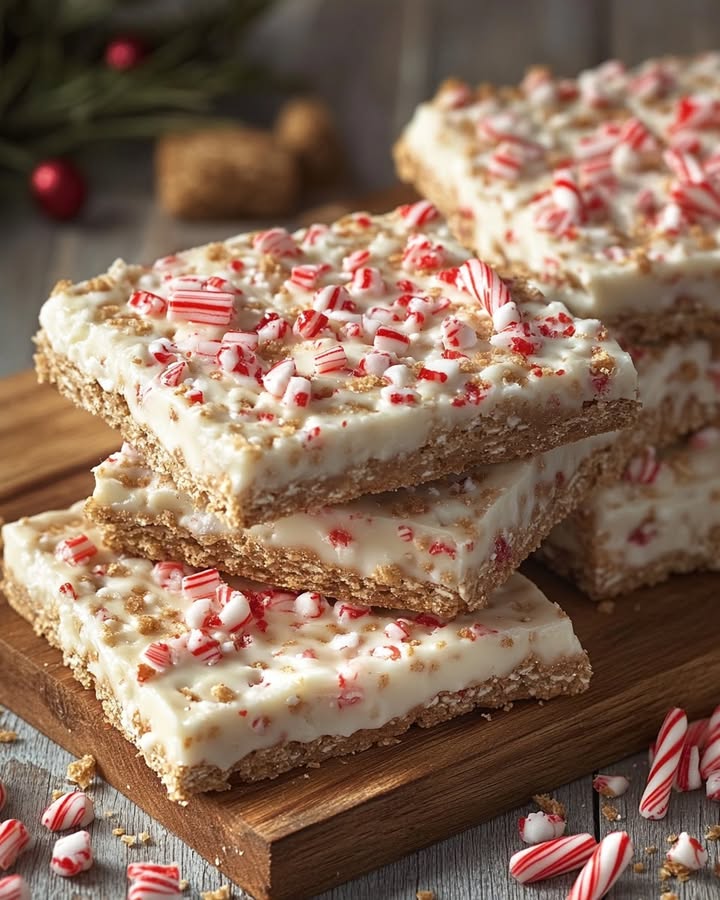
Peppermint Bark Graham Crackers: My Favorite Festive Shortcut
Every year, I find myself in a holiday baking marathon, surrounded by flour and butter. Last Christmas, I needed a quick treat for unexpected guests that felt special but didn’t require hours. I looked at a box of graham crackers and a bag of peppermint bark pieces… and a deliciously simple idea sparked! These Peppermint Bark Graham Crackers were born out of pure pantry panic, and let me tell you, they were the star of the party. They’re the perfect blend of crunchy, creamy, and minty, and they look like you spent all day on them.
From Campfire Treats to Holiday Elegance
Graham crackers have a humble history, originally created as a wholesome snack. Peppermint bark is a classic holiday confection, often broken into rustic pieces. This recipe marries these two traditions in the most delightful way. It’s a modern, no-fuss take on peppermint bark that gives you built-in portions. Instead of breaking bark into shards, you start with the perfect, neat canvas of a graham cracker. It’s a fun twist that both kids and adults adore.
Why You’ll Adore This Easy Recipe
You will love this recipe because it’s nearly impossible to mess up. It requires zero baking skills—just melting and dipping! The payoff is huge: you get a stunning, professional-looking treat with minimal effort. The combination of sweet white chocolate, rich milk chocolate, and the cool crunch of peppermint is absolutely magical. It’s also a fantastic recipe to do with little helpers in the kitchen. They love the dipping and sprinkling part!
When to Whip Up These Festive Crackers
This recipe is your secret weapon for any festive occasion. I make them for cookie exchanges because they travel so well. They’re perfect for leaving out for Santa (he always appreciates them!). I also package them in cute cellophane bags as edible gifts for teachers, neighbors, and friends. They shine at holiday potlucks, office parties, or as a sweet ending to a cozy family movie night.
What You’ll Need for Your Peppermint Bark Graham Crackers
- 5 whole graham cracker sheets, broken in half
- 10-12 oz high-quality white chocolate melting wafers (like Ghirardelli)
- 1 cup milk chocolate melting wafers
- 1/4 cup crushed peppermint candy canes (or starlight mints)
Handy Substitution Options
Don’t stress if you’re missing something! Here are easy swaps: Use dark chocolate wafers instead of milk chocolate for a richer flavor. If you can’t find melting wafers, high-quality chocolate chips mixed with a teaspoon of coconut oil will work. For the peppermint, pre-crushed peppermint bits save time, or use a few peppermint puff cookies crushed up. You can even use flat pretzels instead of graham crackers for a salty-sweet version!
Making Your Magical Peppermint Bark Graham Crackers
Let’s get our hands a little chocolatey and make some magic! This process is simple, fun, and fills your kitchen with the most wonderful holiday scent.
Step 1: Lining Your Baking Sheet
First, grab a large baking sheet and line it with parchment paper. This non-stick surface is your best friend. It will make clean-up a breeze and prevent any chocolate from sticking. I like to have my graham cracker halves ready and lined up nearby. I also put my crushed candy canes in a shallow bowl for easy sprinkling. This “mise en place” makes the dipping process smooth. Pro tip: If your kitchen is warm, you can even pop this baking sheet in the fridge for a few minutes to chill it.
Step 2: Melting the White Chocolate
Place your white chocolate wafers in a microwave-safe bowl that’s deep enough for dipping. Microwave them in 30-second bursts, stirring well after each one. The chocolate will hold its shape at first, then suddenly become smooth and glossy. Be patient! Overheating is the enemy of chocolate. You want it silky and free of lumps. The sweet, vanilla-like aroma is just heavenly. Pro tip: A dry bowl and spoon are crucial. Even a tiny drop of water can cause the chocolate to “seize” and become grainy.
Step 3: Dipping the Graham Crackers
Now for the satisfying part! Take one graham cracker half and fully submerge it into the bowl of melted white chocolate. Use a fork to lift it out, letting the excess drip back into the bowl. Gently place the coated cracker onto your prepared parchment paper. Immediately, while the chocolate is still wet, sprinkle a generous pinch of the crushed candy canes over the top. Watch the red and white flecks settle into the creamy white backdrop—it’s instantly festive!
Step 4: Letting the White Chocolate Set
Once all your crackers are coated and sprinkled, carefully transfer the entire baking sheet to your refrigerator. Let them chill for about 10 minutes. This firms up the white chocolate so it creates a solid base for the next layer. You’ll know they’re ready when you touch the chocolate and it feels hard and doesn’t leave a fingerprint. This chilling step is important. It prevents the two chocolate layers from mixing together.
Step 5: Melting the Milk Chocolate
While the white layer sets, melt your milk chocolate wafers using the same careful microwave method. Stir until it’s perfectly smooth and has that deep, rich brown color. The scent shifts from sweet creaminess to a more decadent, cocoa-rich fragrance. Let it cool for just a minute after melting. You don’t want it so hot that it melts the set white chocolate underneath.
Step 6: Adding the Final Chocolate Layer
Take your chilled crackers from the fridge. This time, you’re only dipping the bottom! Gently hold a cracker and dip just the backside (the side without candy canes) into the melted milk chocolate. Just a quick in-and-out motion to coat it thinly. Place it back on the parchment paper, milk chocolate side down. This creates that classic peppermint bark look with two distinct layers. Let the crackers sit at room temperature until the milk chocolate hardens, or pop them back in the fridge to speed things up.
Time You’ll Need From Start to Finish
Prep Time: 15 minutes
Setting Time: 20-30 minutes
Total Time: About 45 minutes
The active time is very short. Most of the “work” is just waiting for the chocolate to set, which is the perfect time to clean up or make a cup of coffee!
The Chef’s Secret for Perfect Chocolate Every Time
My absolute secret is using a high-quality chocolate melting wafer, specifically Ghirardelli brand. These wafers are made to melt smoothly and set with a perfect snap. They contain cocoa butter and stabilizers that regular chocolate bars don’t have. This means no tempering required and a beautiful, glossy finish that looks professional. It’s the one ingredient I never compromise on for this recipe.
A Sweet Piece of Candy History
The candy cane, originally a plain white sugar stick, is said to have gotten its red stripes and peppermint flavor in the early 1900s. Peppermint bark itself is believed to have been popularized by Williams Sonoma in the 1990s. Our graham cracker version is a new-school take on a modern classic, making that iconic flavor combination even easier to share and enjoy.
Equipment You’ll Want to Have Handy
- Large baking sheet
- Parchment paper
- Two microwave-safe bowls (deep ones are best)
- Microwave
- Spatula or spoon for stirring
- Fork for dipping
- Resealable plastic bag and rolling pin for crushing candy canes
Storing Your Delicious Creation
Once your peppermint bark graham crackers are fully set, you can store them in an airtight container. Place them in a single layer, separated by sheets of parchment or wax paper if you need to stack them. This prevents them from sticking together.
At cool room temperature, they will stay fresh and delicious for 1 to 2 weeks. The chocolate acts as a protective coating for the cracker, keeping it crisp.
If you live in a warm climate or prefer firmer chocolate, you can store the container in the refrigerator. This is also a great way to make them ahead of time for a party. Just let them sit at room temperature for a few minutes before serving for the best texture.
My Best Tips and Advice
- Crush your candy canes finely for easier sprinkling, but leave a few bigger pieces for visual texture.
- Work in batches if your kitchen is warm. Melt half the chocolate at a time to prevent it from hardening before you finish dipping.
- For a super-clean look, you can use a small spoon to drizzle the milk chocolate over the back instead of dipping.
- Add a tiny drop of peppermint extract to the white chocolate for an extra minty kick!
Pretty Presentation Ideas
- Stack them in a clear glass jar or cookie tin for a lovely countertop display.
- Tie 2-3 together with a pretty ribbon and gift tag for a homemade gift.
- Arrange them on a festive platter with other holiday cookies.
- Serve them standing up in a narrow cup or glass for a fun, modern look.
6 Fun Variations to Try
Once you master the basic recipe, get creative! Here are six tasty twists:
- Dark Chocolate Sea Salt: Use dark chocolate wafers for both layers and sprinkle the top with flaky sea salt instead of peppermint.
- Christmas Sprinkle Delight: Skip the peppermint and use red, green, and white holiday sprinkles on the white chocolate.
- Nutty Crunch: Sprinkle the white chocolate with very finely chopped toasted pecans or almonds.
- Cookie Butter Version: Spread a thin layer of biscoff cookie butter on the graham cracker before dipping in white chocolate. It’s incredible!
- Mocha Madness: Add a teaspoon of instant espresso powder to the melted milk chocolate for a coffee twist.
- Fruity Fun: Use freeze-dried raspberries or strawberries, crushed, instead of peppermint for a fruity flavor.
Common Mistakes to Avoid
Mistake 1: Using Chocolate Chips Without Modification
Many people grab regular chocolate chips from the pantry. These are designed to hold their shape in cookies, so they don’t melt as smoothly. You can end up with a thick, lumpy coating that’s hard to dip. If you must use chips, add a teaspoon of coconut oil or shortening to help them thin out. For the best, easiest results, melting wafers are definitely the way to go.
Mistake 2: Rushing the Microwave Process
It’s tempting to set the microwave for two minutes and walk away. This will burn your chocolate! Burnt chocolate is grainy and bitter, and it’s ruined. Always melt in short bursts of 30 seconds or less, stirring thoroughly in between. The residual heat will continue to melt the chunks as you stir. Patience gives you that perfect, glossy, dippable consistency.
Mistake 3: Skipping the Chill Between Layers
If you dip the bottom in milk chocolate right after sprinkling the top, the two chocolates will run together. You’ll lose that beautiful, distinct two-tone bark effect. The quick 10-minute chill in the fridge is crucial. It solidifies the first layer so the second layer sits neatly on top of it. This step makes them look professionally made.
Mistake 4: Not Tapping Off Excess Chocolate
When you lift your cracker out of the melted chocolate, don’t just plop it down. Gently tap the fork on the edge of the bowl a few times. This lets the extra chocolate drip off. Otherwise, you get thick, messy pools around the base of your cracker. A thinner, even coat looks neater and sets with a better texture.
Your Peppermint Bark Graham Cracker Questions, Answered
Can I use a regular chocolate bar instead of melting wafers?
You can, but it requires more care. Chop the chocolate bar very finely and melt it gently with a tablespoon of coconut oil or vegetable shortening. Chocolate bars are not formulated for dipping like wafers are, so they can be temperamental. They might not set as firmly or have the same glossy shine. For guaranteed success, especially if you’re new to working with chocolate, I strongly recommend using melting wafers.
How fine should I crush the candy canes?
Aim for a mix of textures! Most of it should be fairly fine, almost like peppermint dust. This sticks to the chocolate easily. But keep a few slightly larger pieces, about the size of a grain of rice. These bigger pieces add a wonderful crunch and look pretty scattered on top. Crush them in a sealed plastic bag with a rolling pin—it’s therapeutic and kids love to help!
Why did my white chocolate turn chunky or grainy?
This is called “seizing.” It happens when even a tiny bit of water or steam gets into the melting chocolate. Always ensure your bowl, spoon, and crackers are completely dry. Don’t cover the bowl while microwaving, as condensation can drip in. If it does seize, you can sometimes save it by stirring in a splash of warmed coconut oil or shortening until it smooths out again.
Can I make these completely dairy-free or vegan?
Absolutely! Look for high-quality dairy-free white and dark chocolate melting wafers. Many brands make them with cocoa butter instead of milk fat. Check that your graham crackers are also vegan, as some contain honey. Just be sure to read labels carefully. The process and result will be just as delicious.
My chocolate isn’t hardening at room temperature. What’s wrong?
If your kitchen is very warm or humid, chocolate can struggle to set properly. This is normal! Simply place the tray in the refrigerator for 15-20 minutes. The chocolate will firm up beautifully. Also, double-check that you’re using true “melting wafers” or “candy coating,” as these are designed to set firmly at cooler room temps.
How far in advance can I make these?
They are a fantastic make-ahead treat. You can prepare them up to two weeks in advance if stored properly in an airtight container at a cool room temperature. They also freeze wonderfully for up to a month. Just thaw them in the container at room temperature to prevent condensation from making them sticky.
Can I use other types of crackers?
Of course! This method is very versatile. Try it with Ritz crackers for a sweet-and-salty combo. Sturdy pretzel rods or square pretzels also work great. For a gluten-free option, use your favorite gluten-free graham-style crackers. Just make sure whatever you use is sturdy enough to hold up to dipping.
What’s the best way to package them as gifts?
I love using clear cellophane treat bags. Place a few crackers in a bag, tie it with a festive ribbon or twist tie, and attach a gift tag. You can also layer them in a decorated cookie tin with parchment paper between layers. For a rustic look, stack them on a pretty paper plate and wrap the whole thing in clear cellophane.
The bottom chocolate layer is cracking when I bite. How can I prevent this?
A very thick layer of chocolate can crack more easily. Try dipping with a lighter hand and tapping off more excess. Also, ensure you aren’t storing them in a place that’s too cold, as extreme cold makes chocolate more brittle. Letting them sit out for 5 minutes before serving can help.
Can I add food coloring to the white chocolate?
Yes, but only use oil-based food coloring, like candy-making colors or powdered color. Water-based food coloring (the kind for frosting) will cause the chocolate to seize. Gel colors can sometimes work, but oil-based is safest. Add just a tiny drop to create pastel holiday hues.
The Perfect Last-Minute Holiday Magic
So there you have it! These Peppermint Bark Graham Crackers are my go-to when I need a showstopping treat without the showstopping effort. They prove that the most beloved holiday treats don’t have to be complicated. With a handful of simple ingredients and a little bit of fun, you can create something truly special. I hope this recipe brings as much joy and ease to your kitchen as it has to mine. Happy dipping, and happy holidays!
Hearty Beef Skillet
Ingredients
Equipment
Method
- Line a large baking sheet with parchment paper.
- Melt the white chocolate wafers in a microwave-safe bowl in 30-second bursts, stirring after each burst until smooth.
- Dip each graham cracker half into the melted white chocolate, then place it on the lined baking sheet and sprinkle with crushed candy canes.
- Chill the coated crackers in the refrigerator for about 10 minutes until the white chocolate sets.
- Melt the milk chocolate wafers using the same method, stirring until perfectly smooth.
- Dip the bottom of each chilled cracker into the melted milk chocolate, placing it back on the parchment paper milk chocolate side down.
- Allow the milk chocolate to set at room temperature, or refrigerate to speed up the process.