Why This Homemade Marble Cake Will Steal Your Heart
There’s something magical about the swirls of chocolate and vanilla in a Homemade Marble Cake. It’s like art you can eat! I remember the first time I baked this cake—it was for my son’s birthday. He wanted something “cool and swirly,” so I decided to give this recipe a try. The result? A moist, flavorful cake that had everyone asking for seconds. What makes this cake special is how simple it is to make, yet it feels like you’ve spent hours perfecting it. Whether you’re a beginner or a seasoned baker, this recipe will quickly become your go-to dessert.
A Little History of the Marble Cake
The Homemade Marble Cake has been around for generations, with its roots tracing back to 19th-century Germany. Back then, bakers would use leftover batter from vanilla and chocolate cakes to create this marbled masterpiece. Over time, it gained popularity worldwide, especially in American households during the mid-20th century. My grandma used to make it for family gatherings, and her secret was always using real butter and high-quality cocoa powder. Today, we’ve modernized the recipe slightly, but the charm of those beautiful swirls remains timeless.
Why You’ll Love This Recipe
This Homemade Marble Cake is all about balance. The rich chocolate layer complements the light vanilla base perfectly, creating a flavor harmony that’s hard to resist. Plus, it’s incredibly easy to make! No fancy equipment or techniques are required—just a mixing bowl, a whisk, and your love for baking. The aroma of butter, vanilla, and cocoa filling your kitchen is enough to make anyone smile. Trust me, once you try this recipe, you’ll want to bake it over and over again.
Perfect Occasions for This Cake
Whether it’s a cozy Sunday afternoon, a birthday party, or even just a random Tuesday, this Homemade Marble Cake fits every occasion. It’s perfect for tea parties, potlucks, or as a sweet treat to share with coworkers. I once brought this cake to a book club meeting, and it was gone within minutes. People couldn’t stop raving about how moist and flavorful it was. So, next time you need a dessert that’s both impressive and comforting, this is your answer.
Ingredients You’ll Need
- 200 g of flour
- 150 g of sugar
- 3 eggs
- 100 g of melted butter
- 1 sachet of baking powder
- 20 g of cocoa powder
- 2 tablespoons of milk
Substitution Options
Not everyone has the same ingredients on hand, and that’s okay! You can swap regular flour with almond flour for a gluten-free version. If you’re out of butter, coconut oil works just as well. For a dairy-free option, replace regular milk with almond or oat milk. And if you’re cutting back on sugar, try using honey or maple syrup instead. Just keep in mind that substitutions may slightly alter the texture or taste, but the magic of the marble effect will still shine through.
Step 1: Preheat and Prep
Before diving into the fun part, preheat your oven to 180°C (350°F). Grab your mixing bowls and get ready to create some magic. I always like to grease and flour my cake pan at this stage—it saves time later and ensures the cake comes out easily. Pro tip: Use parchment paper at the bottom of the pan for extra insurance against sticking.
Step 2: Mix the Dry Ingredients
In a large mixing bowl, combine the flour, sugar, and baking powder. Whisk them together until they’re evenly distributed. This step is crucial because it ensures your cake rises beautifully. As you mix, take a moment to appreciate the soft, powdery texture of the dry ingredients—it’s like a blank canvas waiting to transform into something delicious.
Step 3: Add the Wet Ingredients
Now for the fun part! Crack the eggs one by one into the dry mixture, whisking continuously to avoid lumps. Once the eggs are fully incorporated, pour in the melted butter. The mixture will start to come together, turning into a smooth, golden batter. At this point, your kitchen will smell amazing—rich and buttery, with hints of sweetness wafting through the air.
Step 4: Divide and Conquer
Split the batter into two equal portions. In one half, stir in the cocoa powder and milk until you achieve a deep, chocolatey color. This is where the magic begins! Watching the chocolate batter come to life is one of my favorite parts of making a Homemade Marble Cake. Pro tip: Use a scale to divide the batter evenly for perfectly balanced layers.
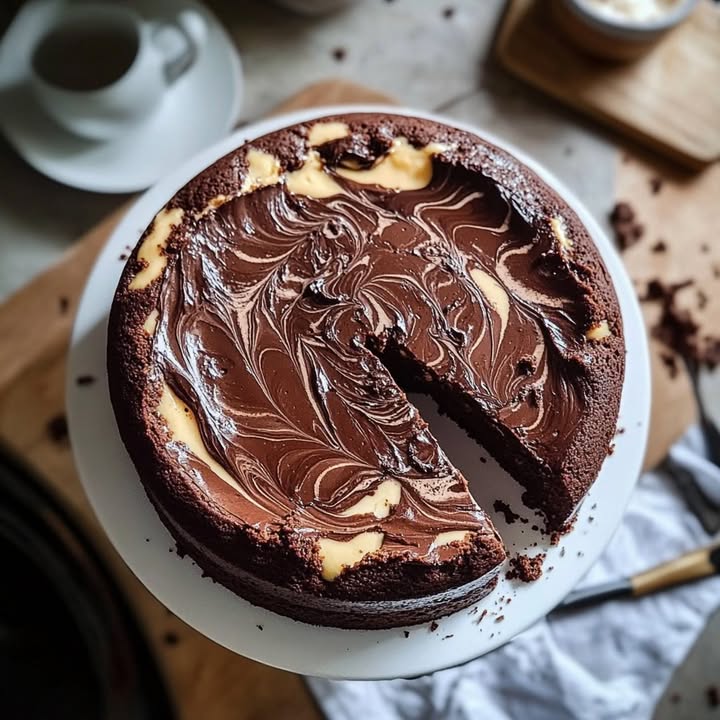
Step 5: Create the Marbled Effect
Spoon alternating layers of vanilla and chocolate batter into your prepared cake pan. Use a knife or skewer to gently swirl the batters together, creating that iconic marbled pattern. Be careful not to overmix—you want distinct swirls, not a uniform color. Chef’s tip: Less is more when swirling; subtle patterns look elegant and professional.
Step 6: Bake to Perfection
Pop the cake into the preheated oven and bake for about 40 minutes. Keep an eye on it—if the top starts browning too quickly, cover it loosely with foil. To check if it’s done, insert a toothpick into the center. If it comes out clean, your cake is ready! The smell of freshly baked Homemade Marble Cake is absolutely irresistible.
Timing Breakdown
- Preparation Time: 15 minutes
- Cooking Time: 40 minutes
- Total Time: 55 minutes
With just under an hour of your time, you’ll have a stunning dessert ready to impress. Not bad for a cake that tastes like it came from a fancy bakery!
Chef’s Secret
Here’s a little trick I learned from my grandma: add a pinch of salt to the chocolate batter. It enhances the cocoa’s flavor and balances the sweetness. Trust me, it makes a world of difference!
An Interesting Fact About the Recipe
Did you know that the marbling technique isn’t just limited to cakes? It’s also used in bread, cookies, and even savory dishes. The concept of combining contrasting flavors and colors has been a staple in culinary arts for centuries. Isn’t it fascinating how food connects us across cultures?
Necessary Equipment
- Mixing bowls
- Whisk
- Cake pan
- Measuring cups and spoons
- Toothpick or skewer
You don’t need anything fancy—just basic kitchen tools you probably already own.
Storage Tips
Once your Homemade Marble Cake has cooled completely, store it in an airtight container. This keeps it fresh and prevents it from drying out. If you live in a warm climate, refrigerating the cake can help extend its shelf life. However, bring it back to room temperature before serving for the best texture and flavor.
For longer storage, wrap individual slices in plastic wrap and freeze them. They’ll stay good for up to three months. Simply thaw overnight in the fridge when you’re ready to enjoy.
If you plan to serve the cake within a day or two, keeping it at room temperature is fine. Just make sure it’s covered to protect it from dust and odors.
Tips and Advice
- Don’t overmix the batter—it can make the cake dense.
- Use room-temperature eggs for easier blending.
- Sift the cocoa powder to avoid lumps in the chocolate batter.
- Let the cake cool completely before slicing for clean cuts.
Presentation Ideas
Dust the top with powdered sugar for a touch of elegance. Serve slices with a dollop of whipped cream or a scoop of vanilla ice cream for extra indulgence. Garnish with fresh berries or mint leaves for a pop of color. For special occasions, drizzle melted chocolate or caramel sauce over the slices.
Healthier Alternatives
Looking to lighten up this recipe? Here are six variations:
- Gluten-Free: Replace regular flour with almond or oat flour.
- Vegan: Use flax eggs and plant-based milk.
- Low-Sugar: Swap sugar with stevia or monk fruit sweetener.
- Protein-Packed: Add a scoop of protein powder to the batter.
- Fruit-Infused: Fold in mashed bananas or applesauce.
- Nutty Delight: Stir chopped nuts into the batter for added crunch.
Mistake 1: Skipping the Sifting Step
Many people skip sifting the dry ingredients, thinking it’s unnecessary. But trust me, it makes a huge difference. Sifting removes lumps and aerates the flour, resulting in a lighter cake. Pro tip: Take the extra minute to sift—it’s worth it!
Mistake 2: Overmixing the Batter
Overmixing can lead to a tough, dense cake instead of the light, fluffy texture we’re aiming for. Mix just until the ingredients are combined. If you see a few small lumps, that’s okay—they’ll disappear during baking.
Mistake 3: Opening the Oven Door Too Soon
It’s tempting to peek, but opening the oven door too early can cause the cake to sink. Resist the urge until at least 30 minutes into baking. Patience pays off here!
FAQs
Can I use self-rising flour instead of all-purpose flour?
Yes, you can substitute self-rising flour, but omit the baking powder since it’s already included in the flour. Just make sure to measure accurately to maintain the right consistency.
How do I prevent the cake from sticking to the pan?
Grease the pan thoroughly with butter or oil, then dust it with flour. Alternatively, line the bottom with parchment paper for extra protection.
Can I make this recipe in a bundt pan?
Absolutely! Just adjust the baking time slightly, as bundt pans often require a bit longer in the oven. Check for doneness with a toothpick.
What can I do if my cake is browning too fast?
Cover the top loosely with aluminum foil. This will prevent further browning while allowing the inside to finish cooking.
Is it possible to double the recipe?
Yes, simply double all the ingredients and divide the batter between two pans. Bake them side by side in the oven.
How many calories are in a slice?
Each slice contains approximately 350 calories, depending on portion size. Enjoy it guilt-free—it’s worth every bite!
Can I freeze the cake?
Definitely! Wrap individual slices in plastic wrap and store them in a freezer-safe bag. Thaw overnight in the fridge before serving.
Why is my cake dry?
Dryness usually happens if the cake is overbaked or if too much flour is used. Measure your ingredients carefully and avoid leaving the cake in the oven for too long.
Can I add frosting?
Of course! A simple vanilla or chocolate glaze pairs beautifully with this cake. Spread it evenly once the cake has cooled.
What’s the best way to serve this cake?
Serve it with a hot cup of coffee or tea for a cozy treat. For a fancier presentation, pair it with whipped cream or ice cream.
Final Thoughts
Baking a Homemade Marble Cake is more than just following a recipe—it’s about creating memories. Whether you’re whipping it up for a celebration or simply to brighten someone’s day, this cake never fails to impress. Its simplicity, versatility, and undeniable charm make it a timeless classic. So grab your apron, gather your ingredients, and let’s get baking. Your family and friends will thank you!
Homemade Marble Cake
Ingredients
Equipment
Method
- Preheat your oven to 180°C (350°F) and grease and flour your cake pan.
- In a large mixing bowl, combine the flour, sugar, and baking powder, whisking until evenly distributed.
- Crack the eggs into the dry mixture, whisking continuously. Add the melted butter and mix until smooth.
- Divide the batter into two equal portions. In one half, stir in the cocoa powder and milk.
- Spoon alternating layers of vanilla and chocolate batter into the prepared cake pan, then swirl gently with a knife or skewer to create a marbled effect.
- Bake in the preheated oven for about 40 minutes, checking for doneness with a toothpick.