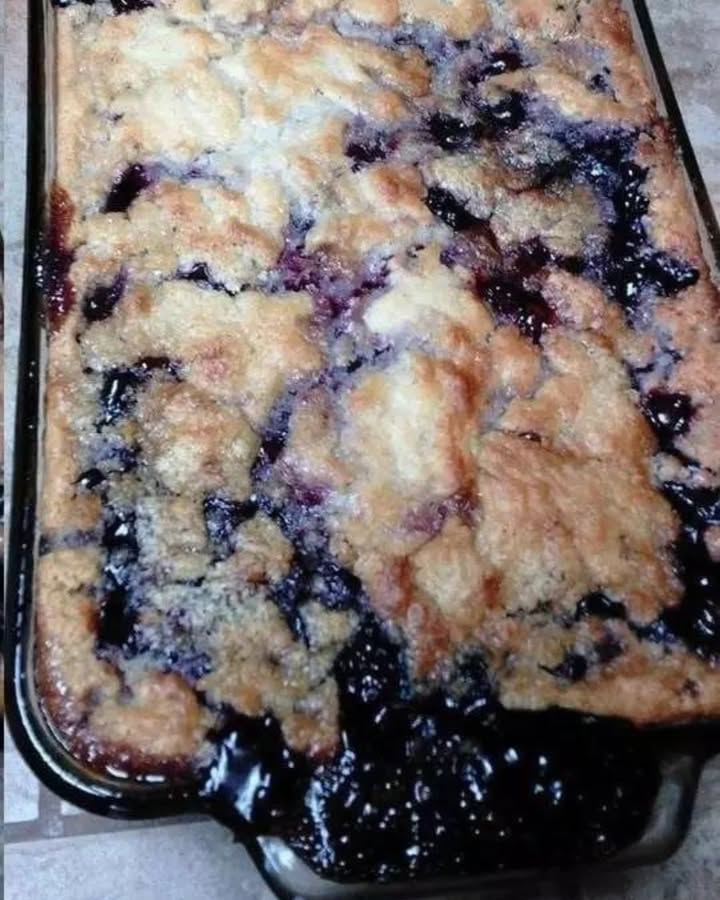
Homemade Blackberry Cobbler: A Slice of Summer Joy
You know that feeling when you visit a farmer’s market, see those plump, inky-black berries, and just have to bring them home? That’s how this cobbler was born for me. I wanted a dessert that shouted “summer!” without shouting “complicated!” from the kitchen. This recipe is my tested, family-approved, bring-to-every-potluck champion. It’s the kind of simple, heartwarming treat that makes everyone ask for the recipe before they’ve even finished their bowl.
A Pinch of Cobbler History
Cobblers are the laid-back cousins of pies, born out of American pioneer ingenuity. When fruit was plentiful but pie crusts were finicky, cooks would simply “cobble” together a batter or biscuit topping and bake it over sweetened fruit. My version leans into the Southern “pooled crust” style, where the batter bakes up around the fruit, creating a magical, golden cake with pockets of juicy berry perfection. It’s tradition, simplified for our modern, berry-loving lives.
Why You’ll Adore This Blackberry Cobbler
First, it’s unbelievably easy. No peeling, no pie dough chilling, no fancy techniques. Second, that contrast! The slightly tart burst of warm blackberries against the sweet, buttery, almost sugar-cookie-like crust is pure magic. It’s a forgiving recipe that welcomes beginners and comforts seasoned bakers with its reliable deliciousness. Plus, your kitchen will smell absolutely heavenly.
Perfect Occasions for This Berry Bliss
This cobbler is your secret weapon for countless sweet moments. It’s perfect for a casual weekend family dinner, stealing the show at a Fourth of July barbecue, or bringing comfort to a friend. I love serving it warm after a Sunday roast chicken or as the star of a backyard picnic. It’s a celebration of simple, shared joy.
Gathering Your Ingredients
Freshness is key! Here’s what you’ll need:
- 2 1/2 cups fresh blackberries: Look for plump, dark berries. Frozen work too (see below)!
- 1 cup granulated sugar: Divided use—some for the berries, some for the batter.
- 1 cup all-purpose flour: The foundation of our cobbler topping.
- 2 teaspoons baking powder: For that lovely, light rise.
- A pinch of salt: Balances all the sweetness beautifully.
- 1 cup whole milk: Brings the batter together with richness.
- 1/2 cup (1 stick) unsalted butter, melted: For irresistible flavor and a golden crust.
Smart Substitution Options
Don’t let a missing ingredient stop you! Here are easy swaps:
- Blackberries: Use an equal amount of frozen blackberries (no need to thaw). Mixed berries, raspberries, or peaches are also fantastic.
- Milk: Any milk you have works—2%, almond, or oat milk.
- Butter: Salted butter is fine; just omit the pinch of salt in the batter.
- For a touch of luxury: Add 1 teaspoon of vanilla extract or a sprinkle of lemon zest to the batter.
Creating Your Cobbler Masterpiece
Follow these simple steps for a perfect result every time.
Step 1: Wake Up the Berries
In a medium bowl, gently toss the blackberries with 1/2 cup of the sugar. Let them sit for 25-30 minutes. You’ll see a gorgeous, deep purple syrup start to form. This step, called maceration, pulls out the berries’ natural juices and intensifies their flavor. It’s the secret to a saucy, not dry, cobbler filling.
Step 2: Heat Things Up
While the berries rest, preheat your oven to 375°F (190°C). This ensures a consistent temperature for baking. Take your 1/2 stick of butter and place it in your 9×9 inch or similar baking dish. Pop the dish into the preheating oven to melt the butter. Pro tip: This butters the dish and starts our crust right in the butter—no greasing needed!
Step 3: Whisk the Batter
In a separate bowl, whisk together the flour, the remaining 1/2 cup of sugar, baking powder, and salt. Slowly pour in the milk. Whisk until you have a smooth, slightly thick batter with no lumps. It will be pourable, like pancake batter. The aroma of the dry ingredients mixing is a lovely preview of the treat to come.
Step 4: The Magical Assembly
Carefully take the hot baking dish from the oven. The butter should be fully melted and bubbly. Immediately pour your prepared batter directly over the melted butter. Do not stir! Now, spoon the blackberries and all that glorious sugary syrup evenly over the top of the batter. Chef’s tip: Resist the urge to mix! The batter will rise up and around the berries as it bakes, creating the classic cobbler look.
Step 5: Bake to Golden Perfection
Place the dish in the oven and bake for 45 to 55 minutes. You’re looking for a uniformly golden-brown top and berry juice bubbling vigorously around the edges. A toothpick inserted into the cobbler part should come out clean. The sight and smell are your best guides here!
Step 6: The (Brief) Wait
This is the hardest part! Let the cobbler cool on a wire rack for at least 15-20 minutes before serving. This allows the juicy filling to set slightly, so you get perfect slices rather than a soupy plate. Trust me, it’s worth the wait.
Your Cobbler Timeline
Here’s a quick breakdown of your time investment:
- Prep Time: 15 minutes
- Cook Time: 50 minutes
- Resting Time: 20 minutes
- Total Time: 1 hour 25 minutes
My Chef’s Secret
For an extra-crispy, sugary top crust, sprinkle a tablespoon of coarse sugar or regular sugar over the batter right after you add the berries, just before baking. It creates a delightful crunchy texture that contrasts wonderfully with the soft berries and cake.
A Berry Interesting Fact
Did you know blackberries aren’t actually berries in the botanical sense? They’re “aggregate fruits,” made up of dozens of tiny individual fruits called drupelets. Each little bump holds a seed! This unique structure is why they create such a wonderful, jammy texture when baked.
Necessary Kitchen Equipment
You likely have everything already!
- 9×9 inch or 2-quart baking dish
- Two mixing bowls (one medium, one large)
- Whisk and spatula
- Measuring cups and spoons
- Wire cooling rack
Storing Your Homemade Cobbler
Room Temperature: Once completely cooled, cover the baking dish tightly with foil or plastic wrap. Your cobbler will stay fresh at room temperature for up to 1 day. This is best if you plan to finish it quickly.
In the Refrigerator: For longer storage, keep the covered cobbler in the fridge. It will last for up to 3-4 days. The chilled cobbler is delicious, but I highly recommend reheating single portions in the microwave for that “fresh-from-the-oven” warmth.
Freezing for Later: Cobbler freezes quite well! Cut it into portions, wrap each piece tightly in plastic wrap and then foil, and freeze for up to 2 months. Thaw overnight in the fridge and reheat in a warm oven.
Tips for Cobbler Success
- Don’t skip macerating the berries. That juice is liquid gold for your filling.
- Pour the batter into the hot melted butter. This gives the bottom layer a head start on cooking.
- Use fresh baking powder for the best rise.
- If using frozen berries, add 5-10 extra minutes to the baking time.
Presentation Pointers
Make it beautiful!
- Scoop warm cobbler into bowls and top with a melting scoop of vanilla ice cream.
- Add a dollop of freshly whipped cream and a single perfect blackberry on top.
- Drizzle with a little cold heavy cream or a dusting of powdered sugar for a simple touch.
- Serve directly from the pretty baking dish at the table for a cozy, family-style feel.
Healthier & Fun Variations
Love this recipe? Try these twists!
- Gluten-Free Cobbler: Swap the all-purpose flour for a 1:1 gluten-free baking blend. The result is just as tender and delicious.
- Whole Wheat Honey Cobbler: Use 1/2 cup whole wheat flour and 1/2 cup all-purpose flour. Replace the sugar in the batter with 1/3 cup honey (reduce milk by 2 tbsp).
- Vegan Berry Cobbler: Use plant-based milk, vegan butter, and a flax egg (1 tbsp ground flax + 3 tbsp water) to bind the batter.
- Peach & Blackberry Mix: Use 1 1/2 cups blackberries and 1 cup sliced peaches for a classic summer combo.
- Lemon-Blackberry Cobbler: Add the zest of one lemon to the batter and a tablespoon of lemon juice to the berries for a bright, zingy flavor.
- Individual Cobblers: Divide the batter and berries among 4-6 ramekins for adorable personal desserts. Reduce baking time to 25-35 minutes.
Common Mistakes to Avoid
Mistake 1: Mixing the Butter and Batter
It’s so tempting to stir the melted butter into the batter in the baking dish. Don’t do it! Pouring the batter over the hot, separate butter is what creates the cobbler’s unique texture. The butter surrounds the batter as it bakes, giving parts of it a crisp, fried-like quality and other parts a soft, cakey rise. Stirring it all together gives you a denser, greasier result.
Mistake 2: Skipping the Berry Maceration
If you mix sugar with berries and bake immediately, you miss out on deep flavor and sauce. The resting time allows the sugar to dissolve into the berry juices, creating a natural syrup. Without it, your cobbler filling can be dry and the sugar can stay grainy. Set a timer for 30 minutes and let the magic happen.
Mistake 3: Using a Baking Dish That’s Too Small
A 9×9 inch dish is ideal. If your dish is too small or deep, the cobbler can’t spread out properly. The center might stay doughy while the edges burn. The berry juices could also bubble over and make a mess in your oven. If you only have an 8×8, watch the bake time closely as it may need a few extra minutes.
Mistake 4: Cutting Into It Too Soon
I know, the aroma is irresistible! But cutting into a piping hot cobbler leads to a flood of juice and a collapsed topping. The resting time lets the filling thicken slightly as it cools. This gives you neat, beautiful servings. Use the 15-minute wait to whip some cream or scoop the ice cream.
Your Blackberry Cobbler Questions, Answered
Can I use frozen blackberries?
Absolutely! Frozen blackberries are a great year-round option. There’s no need to thaw them first. Just mix them with the sugar while still frozen and let them sit. You may need to add 5 to 10 extra minutes to the baking time because you’re starting with a colder fruit mixture. The result will be just as juicy and delicious.
My cobbler is too runny. What happened?
A runny cobbler usually means it needed more baking time or resting time. The filling thickens as it cools. Next time, ensure the top is a deep golden brown and the juices are bubbling thickly at the edges. Also, letting it rest for a full 20 minutes is crucial for the filling to set properly before you dig in.
Can I make this cobbler ahead of time?
You can prepare it up to a day ahead. Assemble the cobbler completely in the baking dish, cover tightly, and refrigerate. Bake it straight from the fridge, but add 10-15 minutes to the baking time since it will be cold. For the best texture and crispy top, baking it fresh the day you’ll serve it is ideal.
What’s the difference between a cobbler, a crisp, and a crumble?
Great question! A cobbler has a biscuit or cake-like topping (like this recipe). A crisp has a crunchy topping made with oats, flour, butter, and sugar. A crumble is similar to a crisp but often without oats, using just a streusel-like mix of flour, butter, and sugar. Cobblers are my favorite for their soft, comforting texture.
How do I prevent a soggy bottom crust?
Using a properly preheated oven and putting the batter into the hot, melted butter are your best defenses. This starts cooking the bottom layer immediately. Also, avoid over-mixing the batter, which can make it dense and more likely to become soggy. A hot oven is key for that perfect texture.
Can I reduce the sugar in this recipe?
You can, but be careful. The sugar sweetens both the berries and the batter. Reducing it by 1/4 cup total is safe, especially if your berries are very sweet. Reducing it more might affect the texture of the batter and the sauciness of the berries. Taste your berries first to decide.
What should I serve with blackberry cobbler?
Vanilla ice cream is the classic and perfect pairing. The cold, creamy ice cream with the warm cobbler is heaven. Fresh whipped cream, a drizzle of heavy cream, or even a spoonful of Greek yogurt are also wonderful. For a special touch, a sprig of mint looks pretty on top.
Why did my cobbler topping not rise much?
This is usually due to old baking powder. Baking powder loses its potency over time. Make sure yours is fresh (less than 6 months old). Also, don’t over-mix the batter. Mix just until the flour is incorporated. Over-mixing can develop the gluten and lead to a tougher, flatter topping.
Can I use other types of fruit?
Yes, this is a very flexible recipe! Peaches, blueberries, raspberries, cherries, or a mix all work beautifully. Just keep the total fruit amount to about 2 1/2 to 3 cups. For harder fruits like apples or pears, consider slicing them thinly and pre-cooking them slightly with some sugar to soften.
How do I reheat leftover cobbler?
The best way is in the oven. Preheat to 350°F, cover the cobbler with foil to prevent over-browning, and warm for 10-15 minutes. For a single serving, the microwave works in a pinch—heat for 30-60 seconds until warm. The oven method will help restore some crispness to the top.
Final Thoughts from My Kitchen to Yours
This Homemade Blackberry Cobbler is more than just a dessert. It’s a reminder of simple joys, of summer captured in a dish, and of how a few basic ingredients can create something truly special. It has never failed me, and I know it won’t fail you. So grab those berries, preheat that oven, and get ready for the compliments to roll in. Happy baking, and don’t forget to share a piece with someone you love!
Luscious Orange Pineapple Cake
Ingredients
Equipment
Method
- In a medium bowl, gently toss the blackberries with 1/2 cup of the sugar and let them sit for 25-30 minutes.
- Preheat your oven to 375°F (190°C) and place 1/2 stick of butter in your baking dish to melt.
- In a separate bowl, whisk together the flour, remaining 1/2 cup sugar, baking powder, and salt. Slowly pour in the milk and whisk until smooth.
- Carefully take the hot baking dish from the oven, pour the batter directly over the melted butter, and spoon the blackberries and syrup evenly over the top. Do not stir.
- Bake for 45 to 55 minutes until golden brown and bubbly.
- Let the cobbler cool on a wire rack for at least 15-20 minutes before serving.