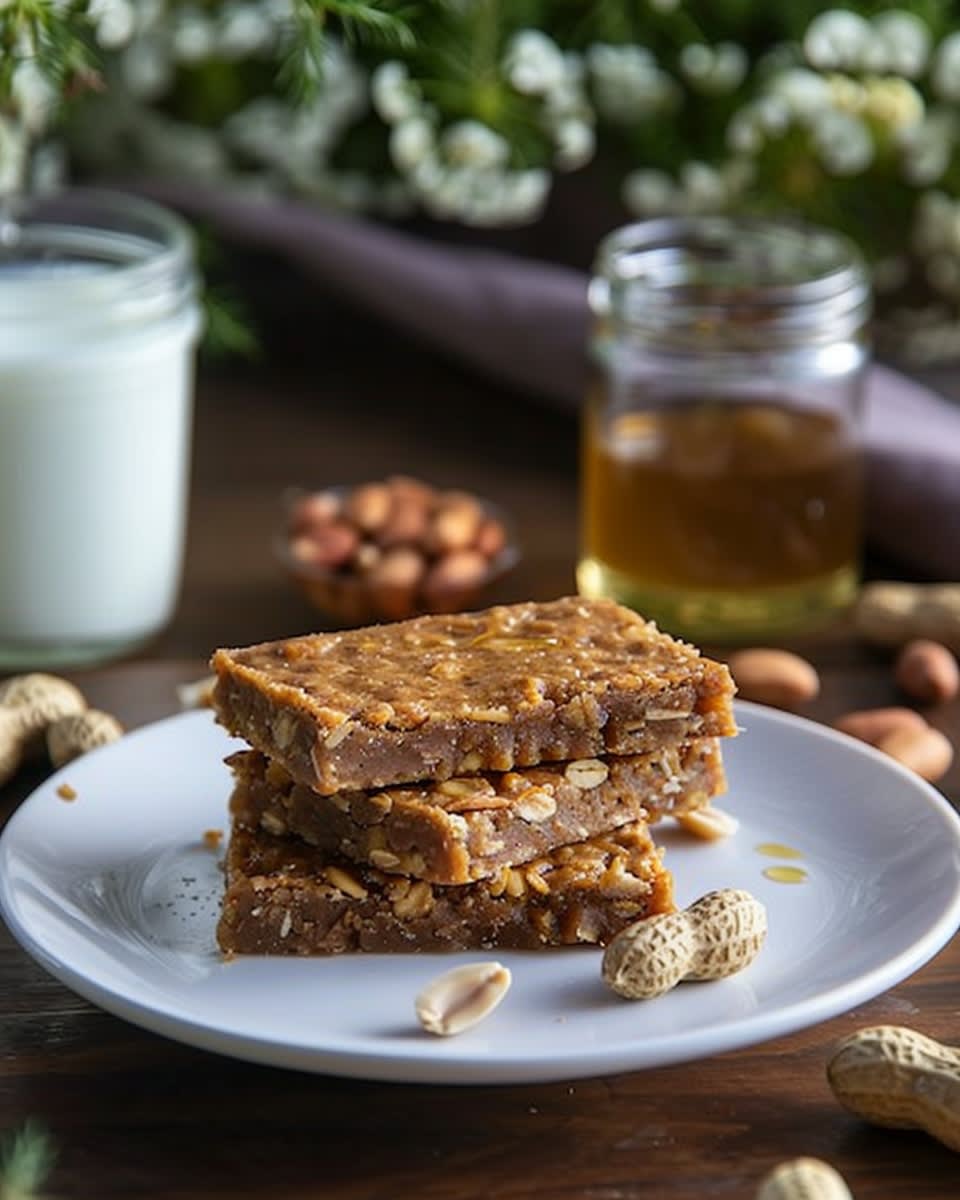
I still remember the exact moment I fell in love with no-bake snacks. It was a scorching July afternoon, and my kitchen felt like a sauna. My kids were begging for homemade treats, but the thought of turning on the oven made me want to cry. That’s when I stumbled upon my first batch of No Bake Peanut Butter Oat Bars. No heat required, no complicated steps, just mix and chill. My life changed that day.
These bars became my secret weapon for busy weeks, after-school snacks, and those moments when I needed something sweet but didn’t have hours to spend in the kitchen. The best part? They actually taste amazing and keep my family satisfied for hours.
If you’re anything like me, you want snacks that don’t require a culinary degree or half your day to prepare. No-bake recipes save time, keep your kitchen cool, and still deliver on flavor. You can whip up a batch during your lunch break and have them ready by dinner. No waiting for the oven to preheat, no worrying about burning the edges, and no extra dishes to clean.
Today, I’m sharing my go-to recipe for peanut butter oatmeal bars that requires zero baking. I’ll also give you some fun variations and practical tips that I’ve learned through lots of trial and error. Trust me, once you make these, they’ll become a staple in your home too.
Why No Bake Peanut Butter Oat Bars Are Perfect for You
Let me tell you why these bars work so well for real life. First, they take about 10 minutes of actual work. You mix everything in one bowl, press it into a pan, and let the fridge do the rest. No special equipment needed. No stand mixer, no food processor, just a bowl and a spoon.
I make these easy oatmeal bars at least twice a month, sometimes more during summer. When temperatures climb above 85 degrees, my oven stays off. But my family still wants homemade snacks. These bars solve that problem perfectly. You get the satisfaction of making something from scratch without heating up your entire house.
The convenience factor goes beyond just skipping the oven. These bars store well in the fridge for up to two weeks. I often make a double batch on Sunday and have grab-and-go snacks for the entire week. My teenagers love taking them to school, my husband packs them for work, and I eat them after my morning workouts.
What really makes no bake peanut butter bars special is how flexible they are. The basic recipe works great on its own, but you can customize it endlessly. Want more protein? Add a scoop of your favorite protein powder and you’ve got peanut butter oatmeal protein bars. Craving chocolate? Mix in some cocoa powder or chocolate chips for healthy no bake chocolate peanut butter oat bars.
Some of my friends can’t eat peanut butter due to allergies. I’ve made no bake oatmeal bars without peanut butter using almond butter or sunflower seed butter instead. They turn out just as delicious. The recipe adapts to whatever you have in your pantry or whatever dietary needs you’re working with.
Here are some ingredient swaps that work really well:
- Use almond butter, cashew butter, or sunflower seed butter instead of peanut butter
- Add mini chocolate chips, dried fruit, or coconut flakes for extra flavor
- Mix in chia seeds or flax seeds for added nutrition
- Drizzle melted dark chocolate on top for a fancy touch
- Stir in vanilla protein powder for a post-workout snack
My journey with this peanut butter oatmeal squares recipe started three years ago. I was trying to find healthier snacks for my kids that didn’t come from a package. Store-bought granola bars seemed convenient, but I hated how much sugar they contained. Plus, half the ingredients looked like chemistry experiments.
I tried several recipes that claimed to be easy, but they either tasted like cardboard or required ingredients I’d never heard of. Then a friend shared her version of healthy no bake peanut butter oatmeal bars at a potluck. I took one bite and immediately asked for the recipe. She laughed and told me it was actually the simplest thing she made.
That week, I went home and tested it myself. The first batch disappeared in two days. My picky eight-year-old asked when I would make them again. My teenager actually complimented my cooking, which almost never happens. I knew I had found something special.
Since then, I’ve made these bars probably a hundred times. I’ve experimented with different add-ins and techniques. I’ve brought them to bake sales, packed them for road trips, and given them as gifts to neighbors. Every single time, people ask for the recipe.
The texture hits that perfect spot between chewy and firm. They’re not crumbly like some granola bars, but they’re not sticky either. You can eat them with your hands without making a mess. They hold together well even when it’s warm outside. I’ve packed them in lunch boxes on hot days and they still look great hours later.
Another reason I love this peanut butter oatmeal bars recipe is how budget-friendly it is. The main ingredients are oats, peanut butter, and honey or maple syrup. These are staples I always keep in my pantry anyway. One batch costs maybe three or four dollars to make, and you get at least 12 good-sized bars. Compare that to buying fancy energy bars at the store.
The health benefits make me feel good about serving these to my family. Oats provide fiber and keep you full longer. Peanut butter adds protein and healthy fats. You control exactly how much sweetener goes in, so you can adjust based on your preferences. There are no artificial flavors, no preservatives, and no ingredients you can’t pronounce.
I’ve also discovered that these work great as a base for no bake peanut butter oatmeal cookies. Instead of pressing the mixture into a pan, I shape them into individual rounds and chill them on a baking sheet. Same great taste, different presentation. My kids think they’re getting cookies, which makes snack time feel more special.
The cleanup is minimal too. Since everything mixes in one bowl and you’re not dealing with a hot oven, you’re basically just washing a bowl, a spoon, and a pan. It takes less time to clean up than it does to eat the bars. For someone who hates doing dishes, this matters a lot.
These healthy no bake oatmeal bars have honestly simplified my life. I no longer panic when my kids want a snack and the pantry looks bare. I don’t stress about providing something nutritious that they’ll actually eat. I have a reliable recipe that works every single time and makes everyone happy.


Ingredients and Equipment Needed
Now that you know why these bars work so well, let’s talk about what you actually need to make them. I promise the shopping list is short, and you probably already have most of these items sitting in your pantry right now.
For the basic peanut butter oatmeal squares recipe, you need just five main ingredients. That’s it. Old-fashioned rolled oats form the base. You’ll need about two cups. Don’t use instant oats or steel-cut oats, they don’t work the same way. The rolled oats give you that perfect chewy texture that holds everything together.
Peanut butter is your binding agent and flavor star. I use one cup of creamy peanut butter, though crunchy works if you want extra texture. Here’s something I learned the hard way: natural peanut butter can make the bars a bit oily if you don’t stir it really well first. The kind with added sugar and oil actually works better for this recipe, even though that feels counterintuitive when you’re trying to make healthy no bake oatmeal bars.
Honey or maple syrup provides sweetness and helps everything stick together. I use about half a cup, sometimes a bit less if I’m feeling virtuous. Maple syrup gives a more subtle sweetness, while honey adds a richer flavor. Both work great, so use whatever you prefer or have available.
Vanilla extract might seem optional, but trust me on this one. Just one teaspoon makes a huge difference in flavor. It rounds out the taste and makes the bars smell amazing while they’re setting in the fridge.
A pinch of salt balances all the sweetness. I use about half a teaspoon, but you can adjust based on whether your peanut butter is already salted.
Beyond these basics, I almost always throw in some optional add-ins. Mini chocolate chips are my kids’ favorite, about half a cup mixed throughout. If you want to make healthy no bake chocolate peanut butter oat bars, you can also melt some dark chocolate and spread it on top after the bars set. It reminds me of those fancy chocolate-covered protein bars from the store, except these taste way better and cost a fraction of the price.
Chopped nuts add crunch and extra protein. Almonds, walnuts, or pecans all work beautifully. I usually add a quarter cup, roughly chopped. My husband loves when I throw in some dried cranberries too, maybe a third of a cup. The tartness cuts through the sweetness nicely.
For peanut butter oatmeal protein bars, I mix in two scoops of vanilla protein powder. This makes them much more filling and perfect after a workout. Just add a tablespoon or two of extra honey when you use protein powder, since it can make things a bit dry otherwise.
Finding quality ingredients doesn’t have to break the bank. I buy my oats in bulk from the grocery store’s bulk section. They’re cheaper that way and just as good as the fancy organic ones. For peanut butter, I stick with brands that have minimal ingredients. Some of the natural ones separate a lot, which can affect texture, so I usually go with something like Jif or Skippy for these bars specifically. Funny enough, the super expensive artisanal peanut butter I got as a gift didn’t work as well in this recipe.
The equipment list is even simpler than the ingredients. You need one medium mixing bowl, a wooden spoon or spatula, and an 8×8 or 9×9 inch pan. That’s literally it. I line my pan with parchment paper because it makes getting the bars out so much easier, but you could also just grease it lightly with coconut oil or butter.
Some people use a food processor to make these, but honestly, it’s not necessary and creates more dishes to wash. The whole point is keeping things simple. Just like when I make brown butter chocolate chip cookies, sometimes the traditional mixing method works better than any fancy equipment.
If you want to get really specific, a kitchen scale helps ensure consistency between batches, but I usually just eyeball measurements and everything turns out fine. After making this peanut butter oatmeal bars recipe so many times, I can pretty much tell by texture when I’ve got the ratios right.
Step-by-Step Recipe
Alright, let’s actually make these bars. I’m going to walk you through exactly how I do it, including the little tricks that make them turn out perfect every time.
Start by lining your 8×8 inch pan with parchment paper. Let it hang over the edges a bit so you can lift the whole thing out later. This step saves you so much frustration when you’re trying to cut clean bars. I forgot to do this once and ended up with a crumbly mess that I had to scoop out with a spoon.
In your mixing bowl, combine two cups of old-fashioned rolled oats with half a teaspoon of salt. If you’re adding any dry ingredients like protein powder, mix them in now. I usually add a quarter cup of ground flax seed at this stage because it boosts the nutrition without changing the taste much.
Here’s where it gets easy. In a small saucepan or in the microwave, warm up your honey and peanut butter together until they’re easy to stir. You don’t want them hot, just warm enough to mix smoothly. This takes about 30 seconds in the microwave or a couple minutes on low heat on the stove. Stir in your vanilla extract once you take it off the heat.
Pour this mixture over your oats and stir everything together. This is the arm workout part of the recipe. You need to mix thoroughly until every single oat is coated. It’ll seem like there’s not enough liquid at first, but keep stirring. It comes together, I promise. The mixture should be sticky and hold together when you press it.
Now comes the fun part if you’re adding extras. Fold in your chocolate chips, nuts, dried fruit, or whatever else you’re using. My daughter loves when I press some extra chocolate chips on top before chilling. It makes them look more like the chocolate strawberry cups I sometimes make for special occasions, all pretty and decorated.
Dump everything into your prepared pan and press it down firmly. Really firmly. This is important for getting bars that hold together well instead of crumbling apart. I use the bottom of a measuring cup to press everything down evenly. You want a compact, uniform layer with no gaps.
Pop the pan in the refrigerator for at least two hours. I know waiting is hard, but they need this time to firm up properly. Overnight is even better if you can manage it. Sometimes I make them right before bed so they’re ready for breakfast.
Once they’re set, lift the whole block out using the parchment paper edges. Place it on a cutting board and use a sharp knife to cut into squares. I get about 12 bars from an 8×8 pan, but you can cut them smaller or larger depending on your needs.
For my favorite variation of healthy no bake chocolate peanut butter oat bars, I melt about half a cup of dark chocolate chips with a teaspoon of coconut oil. Once the bars are completely set and cut, I drizzle this chocolate over the top or spread it in a thin layer. Then back in the fridge for another 15 minutes to let the chocolate harden. They look so fancy this way, like something you’d pay eight dollars for at a coffee shop.
Another combination I absolutely love involves swapping half the peanut butter for almond butter and adding a handful of sliced almonds and dried cherries. It tastes like dessert but keeps me full for hours, kind of like how a good honey garlic rice bowl satisfies both taste and hunger.
I’ve also made a version with sunflower seed butter, pumpkin seeds, and a handful of mini chocolate chips for friends with nut allergies. These no bake oatmeal bars without peanut butter taste completely different but equally delicious. The sunflower butter gives them an almost savory quality that balances really nicely with the sweet honey.
One trick I picked up is adding a tablespoon of coconut oil to the honey and peanut butter mixture if your bars tend to be too crumbly. The extra fat helps everything bind better. Conversely, if your bars are too soft and won’t hold shape, add another quarter cup of oats.
Temperature matters more than you’d think. If your kitchen is really warm, the bars might stay too soft. I learned this during a particularly hot August when nothing would set properly. Now I make sure they’re fully chilled before cutting, and I store them in an airtight container in the fridge rather than on the counter.
You can also shape these into no bake peanut butter oatmeal cookies if you prefer individual servings. After mixing everything, use a cookie scoop to form balls and flatten them slightly on a parchment-lined baking sheet. Chill them the same way, and you’ve got portable snacks that are easy to grab. My kids think these are way more fun than cutting bars.
The beauty of this recipe is how forgiving it is once you understand the basic ratios. Too dry? Add more honey. Too wet? Add more oats. Want them sweeter? Extra chocolate chips. Need more protein? That’s when the protein powder comes in. It’s become second nature to me, similar to how I’ve learned to adjust seasonings when I’m making something like garlic butter steak with potatoes based on what tastes good that day.
Store your finished bars in an airtight container with parchment paper between layers if you’re stacking them. They’ll keep in the fridge for up to two weeks, though they’ve never lasted that long in my house. You can also freeze them for up to three months. Just wrap individual bars in plastic wrap and toss them in a freezer bag.


Storage and Serving Tips for Your No Bake Oatmeal Bars
Let’s talk about keeping these bars fresh and finding creative ways to enjoy them, because honestly, proper storage makes all the difference between bars that taste amazing for days and ones that get stale or fall apart.
I learned my storage lessons the hard way. The first time I made No Bake Peanut Butter Oat Bars, I left them on the counter in a regular container. By day three, they’d gotten soft and started losing their shape. The peanut butter made them slightly oily, and they just didn’t hold together well. Now I know better.
Always store your bars in an airtight container in the refrigerator. This keeps them firm and fresh. I use glass containers with snap-on lids, but any airtight container works perfectly fine. The cold temperature keeps everything solid and prevents the natural oils in the peanut butter from making things too soft. They’ll stay fresh for about two weeks this way, though like I mentioned before, they never last that long at my house.
Here’s a tip that saves me from sticky messes: place a sheet of parchment paper between layers if you’re stacking the bars. This prevents them from sticking together and makes it easy to grab just one without disturbing the whole stack. I cut the parchment into squares roughly the size of my container, and it takes maybe two extra minutes but saves so much hassle later.
For longer storage, freezing is your friend. These healthy no bake oatmeal bars freeze beautifully. I wrap each bar individually in plastic wrap, then put them all in a freezer-safe bag or container. They’ll keep for up to three months frozen. When you want one, just pull it out and let it thaw for about 20 minutes at room temperature. My teenager grabs them frozen sometimes and says they’re like eating a chewy, cold candy bar. Not my preference, but he loves it.
The shelf life question comes up a lot. You’ll know the bars have gone bad if they smell off, develop any mold, or taste rancid. The nuts and peanut butter contain oils that can eventually go rancid, though this takes quite a while in the fridge. I’ve never actually had a batch go bad because we eat them too quickly, but I’d say if they’ve been in the fridge for more than two weeks, give them a smell test before eating.
Room temperature storage works if you’re in a cool climate and plan to eat the bars within two or three days. I sometimes leave a few out in a container when I know we’ll eat them that day, especially for packing in lunch boxes. They’re easier to bite into when they’re not fridge-cold. Just don’t leave them out in a hot kitchen or they’ll get too soft.
Now for the fun part: serving ideas. Sure, you can just eat these bars straight from the container, and that’s how I usually have them. But there are so many creative ways to enjoy them that can make snack time or dessert feel special.
My favorite trick is crumbling a bar over Greek yogurt with some fresh berries. It’s like having granola, except way better. The combination of creamy yogurt, tart fruit, and chewy bar pieces creates this amazing texture contrast. I do this for breakfast probably twice a week, and it keeps me full until lunch. Add a drizzle of honey on top and it feels like a fancy parfait.
Crumbled over ice cream is another winner. Vanilla ice cream works best because it doesn’t compete with the peanut butter flavor. Break up a bar into chunks, scatter them over a scoop of ice cream, and you’ve got yourself a dessert that tastes indulgent but has some nutritional value. My kids request this on Friday nights as their special treat.
I’ve also started using these easy oatmeal bars as a base for other desserts. Press the mixture into muffin tins instead of a pan, chill them, and you’ve got individual cups. Fill the center with jam or Nutella before serving. It’s similar to the concept of quick cooking methods like sautéing where you’re taking a simple technique and making it work for multiple purposes, except with cold prep instead of heat.
For packed lunches, I wrap individual bars in wax paper or put them in small reusable containers. They travel really well and don’t need to be kept cold if they’ll be eaten within a few hours. I’ve packed these for road trips, hiking snacks, and even airplane food. They’re way better than whatever snack mix you’d buy at the airport, and they actually fill you up.
Sometimes I cut the bars into smaller bite-sized pieces and serve them as party snacks. People love having something homemade and healthier at gatherings. I arrange them on a platter with some fruit and cheese, and they disappear fast. Nobody believes me when I say they took less than 15 minutes to make.
If you’ve made no bake oatmeal bars without peanut butter using another nut butter, all these serving suggestions still apply. Almond butter versions taste amazing crumbled over oatmeal in the morning. The flavors complement each other nicely and add protein to your breakfast without requiring any extra cooking.
Here’s something I discovered by accident: these bars taste incredible when paired with coffee. The slight bitterness of the coffee balances the sweetness of the honey perfectly. I have one with my afternoon coffee almost daily. It’s become my favorite three o’clock pick-me-up that doesn’t involve raiding the candy drawer.
For kids’ lunchboxes, I sometimes cut the bars into fun shapes using cookie cutters. It takes a bit more time and you end up with scraps, but my younger kids get so excited when they open their lunch and find star-shaped or heart-shaped bars. The scraps never go to waste though, I eat them myself or crumble them over yogurt.
Another serving idea that works great for breakfast is warming a bar in the microwave for just 10 seconds. It gets slightly soft and warm, almost like freshly baked cookies. Top it with a sliced banana and you’ve got a breakfast that feels comforting and satisfying. My husband does this on cold mornings before heading to work.
I’ve brought these to potlucks dozens of times. I arrange them on a nice plate, maybe dust them with a little powdered sugar if I’m feeling fancy, and put out a card that says what they are. People always come back asking how to make them. Some folks are shocked when I tell them there’s no baking involved. They assume anything that tastes this good must require an oven.
For a fancier presentation when you’re entertaining, try cutting the bars into smaller rectangles and inserting a popsicle stick into each one. Drizzle with melted chocolate and sprinkle with sea salt. They look like something from a bakery but still only took you that same 10 minutes of work.
Funny enough, I’ve even used crumbled bars as a topping for smoothie bowls. It adds texture and makes the bowl more filling. Mix your favorite smoothie, pour it into a bowl, and top with crumbled bar pieces, fresh fruit, and maybe some coconut flakes. It’s Instagram-worthy and actually nutritious.
When I’m really hungry and need something substantial, I make a bar sandwich. Spread some cream cheese or additional peanut butter between two bars. It sounds excessive, but it’s incredibly satisfying and keeps me going for hours. Perfect for those days when lunch is going to be late.
The versatility of these bars extends beyond just how you eat them. They work for so many occasions: after-school snacks, pre-workout fuel, post-workout recovery, dessert, breakfast on the go, hiking food, or just because you want something sweet. Having a batch in your fridge means you’re always prepared with a homemade option that’s better than reaching for processed snacks. If you’re looking for more creative ways to satisfy your sweet tooth without turning on the oven, you might enjoy exploring other dessert recipes that offer similar convenience and flexibility.
I hope these storage and serving tips help you get the most out of your No Bake Peanut Butter Oat Bars. Once you start making them regularly, you’ll develop your own favorite ways to enjoy them. The beauty of this recipe is how it adapts to your life and preferences. Make them yours, experiment with different serving styles, and most importantly, enjoy every bite without any guilt.
Frequently Asked Questions
Can I use almond butter instead of peanut butter?
Absolutely! Almond butter works perfectly in this recipe. The texture and binding properties are very similar to peanut butter. You might notice a slightly different flavor, a bit more subtle and less sweet, but the bars hold together just as well. I’ve also used cashew butter and sunflower seed butter with great success. Just make sure whatever butter you choose is well-stirred if it’s the natural kind, because separation can affect how the bars set.
How long do the bars need to set in the refrigerator?
I recommend at least two hours for the bars to firm up properly. If you can wait longer, overnight is even better. The longer they chill, the firmer and easier to cut they become. I’ve tried cutting them after just one hour when I was impatient, and they were too soft and fell apart. The full two hours makes a huge difference. If you’re in a rush, you can put them in the freezer for about 45 minutes instead.
Can I make these bars vegan?
Yes, with a simple swap. Replace the honey with maple syrup or agave nectar, and you’ve got completely vegan bars. Everything else in the basic recipe is already plant-based. I make the vegan version for a friend who doesn’t eat animal products, and she can’t tell the difference. The maple syrup actually gives them a lovely flavor that’s a bit more complex than honey. Just use the same measurements.
What are some good substitutes for honey if I don’t have any?
Maple syrup is my first choice for a honey substitute because it has a similar consistency and sweetness level. Brown rice syrup also works, though it’s a bit less sweet so you might want to add a tablespoon or two extra. Agave nectar is another option that works well. Even corn syrup will work in a pinch, though I prefer the more natural options. Whatever you use, you want something thick and sticky that will help bind everything together.
How can I make the bars more nutritious?
There are tons of ways to boost the nutrition without sacrificing taste. Add ground flax seeds or chia seeds for omega-3 fatty acids and extra fiber. Mix in protein powder for more protein. Include hemp hearts for additional protein and healthy fats. Reduce the honey slightly and add mashed banana for natural sweetness and potassium. Throw in some wheat germ for B vitamins. I usually add at least two of these options to every batch I make.
Can I freeze the bars for later?
Definitely! These bars freeze incredibly well. I wrap each bar individually in plastic wrap or parchment paper, then store them all together in a freezer-safe bag or container. They’ll keep frozen for up to three months. To thaw, just leave one out at room temperature for about 20 minutes, or grab one straight from the freezer if you like them cold and extra chewy. Freezing actually makes meal prep so much easier because you can make a huge batch and have snacks ready for weeks.
What other types of nuts can I use in the recipe?
Any nut works great in these bars. Chopped almonds, walnuts, pecans, and cashews are all excellent choices. I’ve even used pistachios for a fun variation. You can use a single type of nut or create your own mix. Usually I add about a quarter to half cup of chopped nuts. Just make sure they’re unsalted unless you want the bars to be quite salty. Toasting the nuts first adds even more flavor, but that’s an optional extra step.
How can I make the bars less sweet?
Start by reducing the honey or maple syrup. Instead of half a cup, try using just a third of a cup. You can also add a bit more salt to balance the sweetness, maybe increase to three-quarters of a teaspoon. Using unsweetened chocolate chips instead of regular ones cuts sweetness too. Another trick is adding more oats, which dilutes the overall sweetness while giving you more bars. I’ve made batches with as little as one-third cup of sweetener and they still held together fine.
Can I add protein powder to the recipe?
Yes, and it works beautifully! I add one or two scoops of vanilla protein powder regularly. When you add protein powder, you’ll need to increase the liquid binders slightly because the powder absorbs moisture. Add an extra tablespoon or two of honey or peanut butter. The bars become much more filling this way and make an excellent post-workout snack. Just avoid using chocolate protein powder with chocolate chips, it becomes too much chocolate for most people.
How do I prevent the bars from being too crumbly?
Crumbly bars usually mean you need more binding ingredients. Try adding an extra tablespoon of peanut butter or honey. Make sure you’re pressing the mixture very firmly into the pan, really compact it down. Let them chill for the full two hours before cutting. Also check that you’re using old-fashioned rolled oats, not quick oats or steel-cut. If your bars still crumble, add a tablespoon of coconut oil to the mixture next time. That extra fat helps everything stick together much better.
Ingredients
Equipment
Method
- Tapissez un moule de 20x20 cm avec du papier sulfurisé, en laissant dépasser les bords.
- Dans un bol, combinez les flocons d'avoine et le sel.
- Dans une casserole ou au micro-ondes, chauffez le miel et le beurre de cacahuète jusqu'à ce qu'ils soient faciles à mélanger, puis incorporez l'extrait de vanille.
- Versez le mélange sur les flocons d'avoine et mélangez soigneusement jusqu'à ce que tous les flocons soient enrobés.
- Incorporez les ajouts optionnels comme les pépites de chocolat ou les noix.
- Appuyez fermement sur le mélange dans le moule préparé.
- Réfrigérez pendant au moins 2 heures ou toute la nuit jusqu'à ce que le mélange soit ferme.
- Soulevez les barres en utilisant le papier sulfurisé et découpez en carrés.