The Creamy Dream That Stole My Heart: Panna Cotta Caramel au Beurre Salé
Let me tell you about the dessert that made me look like a pastry pro at my last dinner party. It all started with a craving for something silky, sweet, and with just a hint of salty magic. Enter the Panna Cotta with Salted Butter Caramel. This isn’t just a pudding; it’s a cloud of creamy perfection with a caramel sauce so good you’ll want to eat it with a spoon. It’s my go-to when I need a showstopper that’s secretly simple. Trust me, your guests will ask for the recipe.
A Little Slice of Sweet History
Panna cotta means “cooked cream” in Italian, and its roots are in the beautiful Piedmont region. Traditionally, it was just cream, sugar, and vanilla, set with gelatin. Simple and elegant. The French, with their genius for sauces, saw this blank canvas and said, “Let’s add caramel!” And not just any caramel—rich, buttery caramel avec du beurre salé (with salted butter). This combo of Italian simplicity and French indulgence is what makes this dessert a modern classic. It’s a fancy bistro dessert you can now make right in your own kitchen.
Why You’ll Love This Silky Salted Caramel Dream
You will adore this recipe for so many reasons! First, the texture is pure bliss—it’s jiggly, smooth, and melts on your tongue. The flavor balance is perfect. The sweet, vanilla-infused cream partners with a deep, rich caramel that has that tiny kick of sea salt. It cuts the sweetness and makes every bite interesting. Best of all? It’s incredibly easy. No fancy techniques or baking required. Just a few simple steps, some patience while it chills, and voilà! You have a dessert that looks and tastes like it came from a high-end patisserie.
When to Whip Up This Gourmet Treat
This panna cotta is your secret weapon for so many occasions. It’s perfect for a romantic dinner date at home—light some candles and watch the magic happen. It’s a total hit at dinner parties because you make it ahead, leaving you stress-free to enjoy your company. I love serving it during the holidays for a festive yet light finish to a big meal. It’s also a wonderful way to treat your family on a Sunday, turning an ordinary day into a special moment gourmand. Any time you want to add a touch of luxury, this is your dessert.
Gathering Your Ingredients
Let’s gather our simple, high-quality components. This is all you need:
- 500 ml heavy cream: The star! Use full-fat for the richest texture.
- 100 g granulated sugar: Sweetens the creamy base.
- 2 sheets of gelatin: For that perfect, delicate set.
- 1 packet of vanilla sugar (or 1 tsp vanilla extract): Adds warm, floral notes.
- 50 g salted butter: The key to that salted caramel magic.
- 200 g liquid caramel: You can use a good store-bought one or make your own.
Smart Swaps and Substitutions
No worries if you’re missing something! Here are some easy swaps:
- Gelatin Sheets: You can use powdered gelatin. One sheet usually equals about 2 grams or 3/4 teaspoon of powder. Bloom it in a few tablespoons of cold water.
- Heavy Cream: For a slightly lighter version, you can use half heavy cream and half whole milk. The texture will be a bit less firm but still delicious.
- Salted Butter: If you only have unsalted butter, just add a generous pinch of flaky sea salt to the caramel sauce.
- Vanilla Sugar: A teaspoon of good vanilla bean paste or extract works perfectly.
- Liquid Caramel: Feel free to make your own by slowly melting sugar with a bit of water until golden, then whisking in warm cream and your salted butter.
Creating Your Panna Cotta Masterpiece
Put on some music, and let’s get cooking. This process is as soothing as the dessert itself.
Step 1: Warming the Creamy Base
Pour the heavy cream into a small saucepan. Place it over low heat—we don’t want a boil, just a gentle warmth. Add the granulated sugar and vanilla sugar. As you stir, watch the sugar crystals dissolve into the cream, turning it into a sweet, fragrant liquid. The kitchen will start to smell like vanilla. This gentle heat is crucial for a smooth final product. Pro tip: Run your finger along your spoon. If you can’t feel any sugar grains, it’s fully dissolved.
Step 2: Prepping the Gelatin
While the cream warms, take your gelatin sheets. Place them in a shallow bowl of cold water. They will look stiff and wrinkled at first. In about 5 minutes, they’ll become soft, slippery, and pliable, like flexible plastic. This process is called “blooming” and it helps the gelatin melt evenly later. Make sure they are fully submerged.
Step 3: Bringing It All Together
Once your cream is hot (steaming but not bubbling), take the saucepan off the heat. Lift the gelatin sheets from the water. Gently squeeze them with your hands to remove excess water—they should feel soft and heavy. Add them to the hot cream. Stir slowly and consistently. You’ll see the gelatin melt and vanish into the mixture, creating a silky, unified liquid.
Step 4: The Salty Butter Finish
Now for the secret ingredient! Cut your salted butter into a few chunks. Drop them into the warm cream mixture. The residual heat will start to melt the butter immediately. Keep stirring until the sauce becomes glossy, homogenous, and you can see no separate butter streaks. The melted salted butter adds an incredible depth of flavor to the base itself.
Step 5: Setting the Stage
Carefully pour the mixture into your serving glasses or ramekins. I love using clear glasses to show off the beautiful layers later. Let them cool on the counter until they are no longer warm to the touch. This prevents condensation in the fridge. Then, cover them lightly with plastic wrap and tuck them into the refrigerator. Patience is key here! They need at least 4 hours, but for the absolute best texture, I let them set overnight.
Step 6: The Grand Caramel Finale
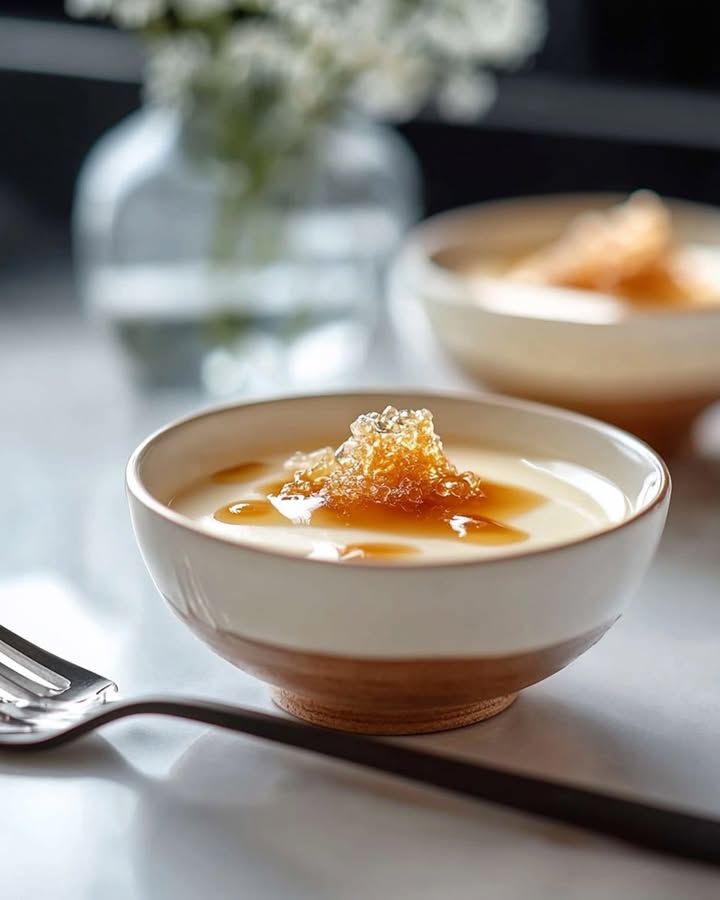
The moment of truth! Take your chilled panna cottas from the fridge. They should be firm and jiggle gently when shaken. Give your liquid caramel a quick stir. Then, slowly pour a generous spoonful over each one. Watch as the thick caramel sauce cascades down the sides—it’s so satisfying! For a final touch, sprinkle with crushed nuts, a few sea salt flakes, or some chocolate shavings.
Chef’s tip: To get a clean unmolding, briefly dip the bottom of the ramekin in hot water (about 10 seconds), then run a thin knife around the edge and invert onto a plate.
Planning Your Time
This is a fantastic make-ahead dessert. The active prep time is only about 15 minutes of hands-on work. The cooking time for warming the cream is just 5 minutes. The real wait is for setting. It needs a minimum of 4 hours in the fridge, but for absolute perfection, plan for an overnight chill (about 8 hours). So, your total time from start to serving is roughly 4 hours and 20 minutes, but most of that is hands-off.
A Chef’s Little Secret
My secret for an extra-smooth panna cotta? Strain the mixture before you pour it into the glasses. After you’ve added the butter and everything is melted, pour the liquid through a fine-mesh sieve into a jug. This catches any little undissolved bits of gelatin or skin that might have formed, guaranteeing a flawlessly silky texture in every single spoonful.
A Sweet Bit of Extra Info
Did you know the salt in salted butter caramel (or “caramel au beurre salé”) isn’t just for taste? It actually enhances our perception of sweetness. The contrast makes the caramel flavor seem deeper and more complex. This famous sauce originated in Brittany, France, a region known for its high-quality sea salt and butter. It’s a match made in culinary heaven!
Tools You’ll Need
You don’t need any special equipment, just basics from your kitchen:
- A small saucepan
- A whisk or silicone spatula
- A small bowl for the gelatin
- 4-6 serving glasses, ramekins, or dariole molds
- A fine-mesh sieve (optional but recommended for the chef’s secret!)
- A measuring jug for easy pouring
Storing Your Dessert Delight
Once set, your panna cottas are happy to live in the fridge. Cover them tightly with plastic wrap or place them in an airtight container. This prevents them from absorbing any other fridge odors and keeps the surface from drying out.
They will keep beautifully for up to 3 days. It’s actually a fantastic dessert to make two days before a party. The flavors have more time to meld and develop. I often make them on a Friday for a Saturday night dinner.
I do not recommend freezing panna cotta. The gelatin structure can break down when frozen and thawed, resulting in a grainy or separated texture. It’s best enjoyed fresh from the fridge.
My Best Tips and Advice
- Gentle Heat is Key: Never let the cream boil. A simmer is okay, but a rolling boil can cause the cream to separate or the gelatin to lose its setting power.
- Chill Your Serving Dishes: For even faster setting, pop your empty glasses in the fridge for 10 minutes before you pour the mixture in.
- Test the Set: Not sure if it’s ready? Give the glass a gentle sideways nudge. The entire panna cotta should move as one soft, quivering mass. If the center is still liquid, give it more time.
- Warm Your Caramel: If your store-bought caramel is too thick to pour, warm the jar in a bowl of hot water for a few minutes to loosen it up.
Presentation Ideas to Impress
Make your dessert look as good as it tastes!
- The Layer Look: For clear glasses, pour a layer of caramel in the bottom first, let it set a little, then add the panna cotta mixture on top. When you serve, you get a stunning two-toned effect.
- Crunchy Toppings: Add texture with toasted hazelnuts, chopped pecans, or crumbled nutty chocolate pieces right before serving.
- Fruit Companion: Serve with a side of fresh berries or a few thin slices of ripe pear. The fruit’s acidity balances the richness.
- Herb Garnish: A single tiny leaf of mint or a pinch of edible gold dust can make it look truly restaurant-worthy.
Lighter and Creative Variations
Love the idea but want to mix it up? Try these twists:
- Coconut Dream: Replace half the heavy cream with full-fat coconut milk. It adds a tropical flavor that pairs amazingly with the salted caramel.
- Chocolate-Hazelnut Swirl: Add two tablespoons of chocolate-hazelnut spread to the warm cream. Swirl extra into the caramel sauce for a Nutty Chocolate Delight version.
- Matcha Green Tea: Whisk 1-2 teaspoons of high-quality matcha powder into the sugar before adding it to the cream. Serve with a white chocolate sauce instead of caramel.
- Berry Panna Cotta:
Infuse the cream with a handful of mashed raspberries while heating, then strain them out. Top with a fresh berry compote instead of caramel.
- Espresso Affogato Style: Make a plain vanilla panna cotta. To serve, pour a shot of hot espresso over the top and add a drizzle of caramel. It’s an incredible dessert-coffee hybrid.
- Vegan Friendly: Use full-fat coconut cream and agar-agar powder instead of gelatin. Swap the butter for a vegan butter alternative for the sauce.
Common Mistakes to Avoid
Let’s sidestep a few pitfalls so your dessert is perfect every time.
Mistake 1: Using Boiling Hot Cream
Adding gelatin to boiling liquid can weaken its gelling power. You might end up with a panna cotta that never fully sets or is too soft. Always remove the cream from the heat just before it starts to boil. It should be steaming hot, not bubbling. This temperature is perfect for melting the gelatin gently without destroying it.
Mistake 2: Not Blooming the Gelatin Properly
If you toss stiff, dry gelatin sheets directly into the hot cream, they will clump together. You’ll get unpleasant, rubbery blobs in your final dessert. Always soak them in cold water first. Make sure they are fully softened and flexible. Squeeze out the excess water well so you don’t dilute your mixture.
Mistake 3: Rushing the Setting Time
Impatience is the enemy of panna cotta! If you try to unmold or serve it after only an hour or two, it will be a soupy mess. The gelatin needs several hours at a cold, consistent temperature to form a stable network. Respect the fridge time. Planning for an overnight set is the safest and best bet for a flawless texture.
Mistake 4: Skimping on the Salt in the Caramel
The magic of “au beurre salé” is the balance. If you use unsalted butter and forget to add salt, or if you use lightly salted butter, the sauce can be one-dimensionally sweet and cloying. Don’t be shy! Use a good, flavorful salted butter. If making your own sauce, finish it with a pinch of flaky sea salt. That salty contrast is what makes the dessert sophisticated.
Your Panna Cotta Questions, Answered
Can I make panna cotta without gelatin?
Yes, but it will be a different dessert. Gelatin is what gives panna cotta its characteristic wobble and clean slice. For a vegetarian option, you can use agar-agar, a seaweed derivative. Be aware that agar sets firmer and at a higher temperature than gelatin, so you need to follow specific substitution guidelines (usually about 1 teaspoon of agar powder to 500ml liquid). The texture will be more like a firm jelly than a silky cream.
Why did my panna cotta turn out rubbery?
A rubbery texture usually means too much gelatin was used. It’s crucial to measure correctly. If using sheets, standard size sheets (like platinum) are typically 2 grams each. Two sheets for 500ml of cream is the perfect ratio. If using powder, one envelope (about 2 1/4 teaspoons) usually sets 2 cups (500ml) of liquid. Using more than this will give you a bouncy, firm texture instead of a delicate, melt-in-your-mouth one.
Can I use flavored coffee creamer instead of heavy cream?
I wouldn’t recommend it for this classic recipe. Coffee creamers often contain additives, sweeteners, and oils that won’t set properly with gelatin. They can also give an artificial flavor. For the best, creamiest results and a guaranteed set, stick with real, full-fat heavy whipping cream (or a mix of cream and whole milk). Your taste buds will thank you for using the real deal.
How do I get my panna cotta out of the mold perfectly?
Unmolding can be tricky but is easy with the right method. First, run a thin, sharp knife (dipped in hot water) around the very edge of the ramekin to loosen it. Then, fill a bowl with hot tap water. Dip the bottom of the ramekin in the water for about 5-10 seconds—just to warm the outside. Place your serving plate on top, hold them together firmly, and flip in one confident motion. Give it a gentle shake, and it should slide right out. If it doesn’t, dip it for a couple more seconds.
My caramel sauce is too thick. How can I thin it?
This is a common issue with store-bought caramel. The easiest fix is to gently warm it. You can microwave it in a microwave-safe bowl for 10-15 seconds, stirring halfway. Or, place the jar (without the lid) in a small pot of simmering water, letting the heat from the water warm the glass and soften the caramel. Stir until it reaches a pourable consistency. You can also add a tiny splash of warm cream or milk to thin it out.
Is it possible to make this recipe vegan?
Absolutely! You can create a delicious vegan version. Substitute the heavy cream with full-fat canned coconut cream. Use agar-agar powder instead of gelatin (follow package instructions for setting 500ml liquid). For the sauce, use a high-quality vegan butter and your favorite plant-based caramel or make one by cooking coconut sugar with coconut cream. The flavor will be different but equally indulgent and creamy.
What’s the difference between panna cotta and créme caramel?
They are both creamy, set desserts but are quite different. Panna cotta is made with cream set with gelatin and is unmolded or served in a glass. Crème caramel (or flan) is a custard made with eggs and milk, baked in a water bath with a layer of liquid caramel on the bottom. When unmolded, the caramel becomes a sauce on top. Panna cotta is usually lighter and doesn’t require baking.
Can I add alcohol like rum or Grand Marnier?
You certainly can, but be careful! Alcohol can interfere with gelatin’s setting ability. If you want to add a liqueur like Grand Marnier, Kahlúa, or a dash of rum, limit it to 1 ½ to 2 tablespoons for the entire recipe. Add it after you’ve taken the cream off the heat and melted the gelatin. Too much alcohol might prevent your dessert from setting firmly.
How far in advance can I add the caramel topping?
You can add the caramel sauce up to a few hours before serving. If you add it the night before and let it sit in the fridge, the caramel will slowly start to seep into and soften the top layer of the panna cotta. For a clean, defined layer of sauce on top of a firm cream, I recommend adding the caramel just before you serve, or at most 1-2 hours ahead.
My panna cotta is too soft. Can I fix it?
If it’s been chilling for over 4 hours and is still too soft, it’s likely a gelatin issue. It’s tricky to fix once set, but you can try a rescue. Gently re-melt the entire mixture in a saucepan over very low heat, stirring constantly. Do not let it boil. Once liquid, you can dissolve an extra ½ sheet of bloomed gelatin (or ½ teaspoon powder) into it. Pour it back and chill again. For next time, ensure your gelatin was fresh and you measured correctly.
The Final Sweet Spoonful
There you have it—your guide to creating the most luxurious, silky-smooth Panna Cotta with Salted Butter Caramel. This recipe is more than just a list of steps. It’s an invitation to create a little restaurant magic at home. It’s about the joy of seeing that perfect wobble and the smiles it brings. So grab that cream, melt that butter, and treat yourself to this simple yet spectacular dessert delight. Happy cooking, and enjoy every delicious, creamy bite!