Last Tuesday night, I stood in my kitchen staring at a beautiful piece of pork tenderloin, wondering how I’d managed to mess up this simple cut so many times before. You know that moment when you slice into meat and find it’s either dry as cardboard or still pink in the middle? Yeah, I’ve been there more times than I care to admit. But here’s the good news: cooking pork tenderloin doesn’t have to be a guessing game anymore.
Welcome to my complete guide on cooking the perfect pork tenderloin! I’ve spent years perfecting these techniques, and I’m excited to share everything I’ve learned with you. This lean, tender cut of meat has become my go-to option for both busy weeknights and special occasions.
Pork tenderloin has earned its place as a favorite among home cooks for several solid reasons. First, it’s incredibly affordable compared to beef tenderloin. You get that same elegant presentation without emptying your wallet. Second, it cooks faster than most other roasts. We’re talking 20 to 30 minutes in many cases. Third, it’s versatile enough to pair with just about any flavor profile you can imagine.
In this article, I’ll walk you through everything you need to know about preparing pork tenderloin. We’ll explore easy recipes that work for beginners and experienced cooks alike. I’ll share my favorite cooking methods, from oven-baked to slow cooker options. You’ll learn the right internal temperature to aim for and how to keep this lean meat juicy and flavorful. By the end, you’ll have the confidence to cook pork tenderloin perfectly every single time.
Easy Pork Tenderloin Recipes
Let me share some of my top-rated pork tenderloin recipes that have never let me down. These recipes range from super simple to slightly more involved, but none of them are complicated. The beauty of pork tenderloin is that it welcomes bold flavors while still tasting amazing with just salt and pepper.
My honey dijon pork tenderloin is probably the recipe I make most often. The sweet and tangy glaze caramelizes beautifully in the oven and creates this gorgeous golden crust. I mix honey, dijon mustard, garlic, and a splash of apple cider vinegar. That’s it. Four ingredients that transform ordinary pork into something restaurant-worthy. My kids actually request this dish by name now.
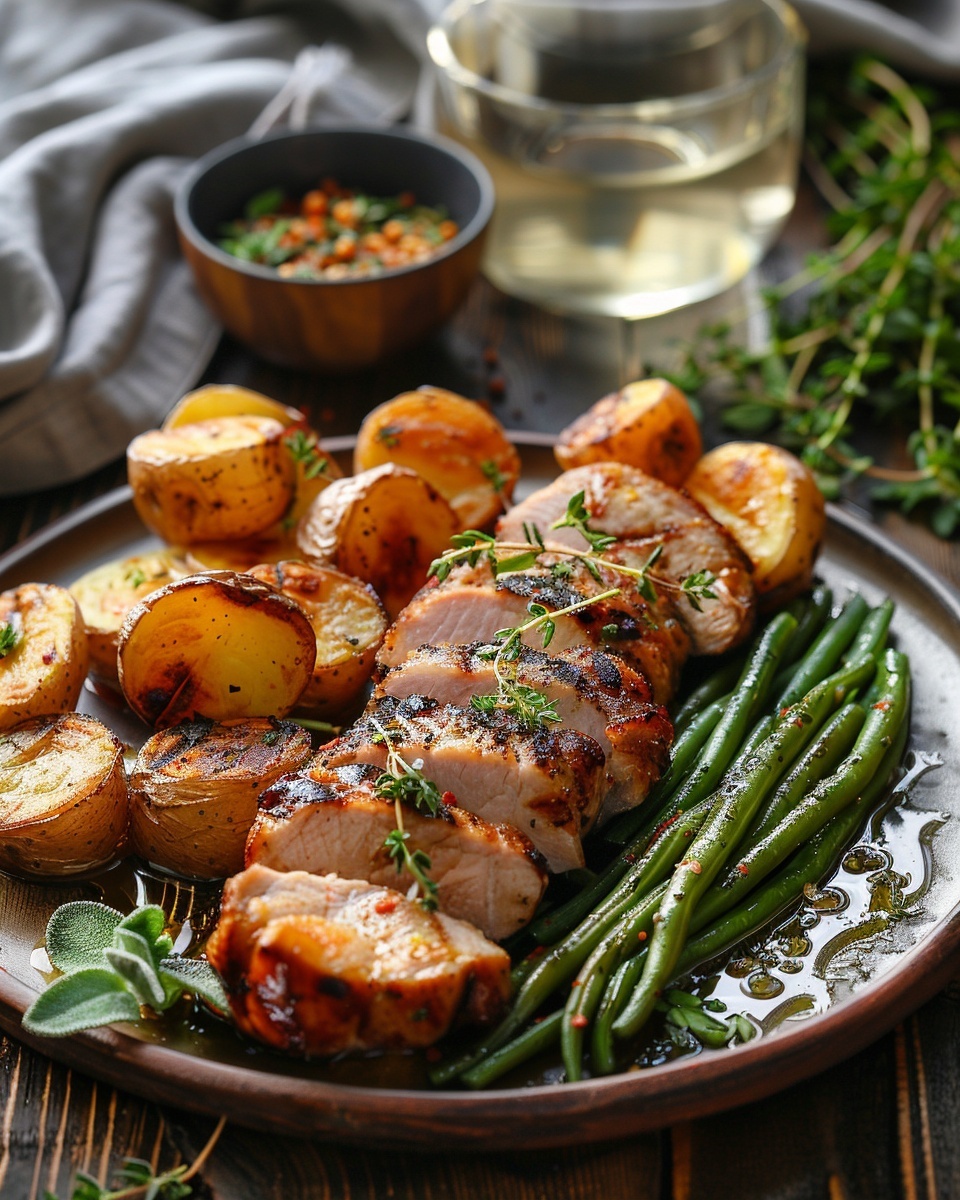
Another family favorite is pork tenderloin with apples. This one screams fall comfort food. I sear the tenderloin first, then surround it with sliced apples, onions, and fresh thyme. As everything roasts together, the apples soften and their juices mingle with the pork drippings. The result is a one-pan meal that tastes like you spent hours on it.
For those crazy busy days, I turn to my pork tenderloin recipe slow cooker version. I brown the meat quickly on the stove, toss it in the slow cooker with some broth and seasonings, and forget about it for a few hours. The meat comes out fork-tender and practically shreds itself. This method works great when you need dinner ready when you walk in the door.
Choosing the right recipe depends on what you’re working with. Consider your time constraints first. Got 30 minutes? Go with a quick roasted version. Have all day? The slow cooker is your friend. Think about your audience too. Picky eaters might prefer simpler seasonings, while adventurous eaters will appreciate bolder flavors.
The occasion matters as well. Grilled pork tenderloin recipes shine at summer cookouts. The char from the grill adds a smoky depth that people love. I marinate the meat for a few hours beforehand, and the grill does the rest of the work. Just remember to watch it closely since tenderloin cooks fast over high heat.
Here’s my simple framework for picking a recipe:
- Weeknight dinner: Choose recipes with 5 ingredients or less
- Weekend meal: Try something with a marinade or special sauce
- Feeding a crowd: Go with crowd-pleasers like honey dijon or apple versions
- Summer cooking: Fire up the grill for those beautiful char marks
- Winter comfort: Use the slow cooker or oven with root vegetables
I keep a rotation of about five go-to recipes. This gives me enough variety without feeling overwhelmed by choices. Once you master a couple of basic techniques, you can adapt and create your own variations easily.
Baked Pork Tenderloin Recipes
Baking pork tenderloin in the oven is hands-down the most reliable method I’ve found. The dry heat creates a beautiful crust while keeping the inside juicy. Let me walk you through my foolproof approach that works every single time.
Start by taking your pork tenderloin out of the fridge about 30 minutes before cooking. Room temperature meat cooks more evenly. While it’s sitting out, preheat your oven to 400 degrees. This higher temperature helps develop that golden exterior we’re after.
Pat the meat completely dry with paper towels. This step is critical. Moisture on the surface will steam rather than brown, and you’ll miss out on all that flavorful crust. Season generously with salt and pepper at minimum. I usually add garlic powder and smoked paprika too.
Heat an oven-safe skillet over medium-high heat with a tablespoon of oil. Sear the tenderloin on all sides until golden brown. This takes about 8 to 10 minutes total. Don’t rush this step. That caramelization adds so much flavor.
Now here’s where people often ask about timing. How long to cook 1 lb pork tenderloin at 350 degrees? If you’re using 350 instead of 400, plan on about 25 to 30 minutes. The most important factor isn’t time though. It’s temperature.
The magic number for pork tenderloin temp is 145 degrees Fahrenheit. Use a meat thermometer inserted into the thickest part. This gives you juicy, slightly pink meat that’s completely safe to eat. The pork will continue cooking as it rests, reaching about 150 degrees.
Let me share my method for how to cook pork tenderloin in oven with foil. After searing, I transfer the skillet to the oven uncovered for about 10 minutes. Then I tent the meat loosely with aluminum foil and continue cooking until it hits 140 degrees. I remove it from the oven at that point and let it rest covered for 10 minutes. The foil traps some moisture and prevents the top from getting too dark while the inside finishes cooking.
Keeping the meat moist requires attention to a few key details. First, don’t overcook it. Seriously, this is the number one mistake. Pork doesn’t need to be cooked to 160 or 170 degrees like it used to. Those days are gone. Modern pork is safe at 145 degrees and stays much juicier.
Second, always let it rest before slicing. I know it’s tempting to cut right into it, but wait at least 10 minutes. This allows the juices to redistribute throughout the meat instead of running all over your cutting board.
Here are my essential tips for perfect baked pork tenderloin:
- Remove the silverskin (that shiny membrane) before cooking
- Don’t skip the searing step for maximum flavor
- Use a meat thermometer instead of guessing on time
- Tent with foil if the outside is browning too quickly
- Add liquid to the pan (broth or wine) if it looks dry
- Slice against the grain for the most tender bites
One question I get often is about Gordon Ramsay’s method. How does Gordon Ramsay cook a pork tenderloin? He uses a hot pan sear followed by a butter baste in the oven. He adds herbs and garlic to the butter and spoons it over the meat as it roasts. This creates incredible flavor and helps keep the surface moist.
My own variation includes adding vegetables to the roasting pan. Carrots, potatoes, and Brussels sprouts all work beautifully. They soak up the pork drippings and cook in the same amount of time. One pan, complete meal, minimal cleanup. That’s my kind of cooking.
The key to never drying out pork tenderloin comes down to temperature control and proper resting. I can’t stress this enough. Buy a good meat thermometer if you don’t have one. It’s the single best investment you can make for cooking any protein perfectly.


Grilled and Slow Cooker Pork Tenderloin Recipes
While oven baking is fantastic, sometimes you want to switch things up and explore other cooking methods that bring their own unique qualities to the table.
Grilling pork tenderloin is honestly one of my favorite summer activities. There’s something about cooking outside with a cold drink in hand that just feels right. The grill adds this incredible smoky char that you simply can’t replicate in an oven. Last Fourth of July, I grilled three tenderloins for a backyard party, and they disappeared faster than the potato salad.
Here’s the thing about grilled pork tenderloin recipes: they require a bit more attention than oven methods, but the payoff is worth it. The biggest challenge is preventing the outside from burning while the inside cooks through. I’ve learned this the hard way, trust me. My solution involves a two-zone fire setup.
For gas grills, heat one side to high and leave the other side on low or off completely. For charcoal, pile all the coals on one side. You’ll start by searing the tenderloin over the hot zone, turning it every couple minutes to get char marks on all sides. This takes maybe 8 to 10 minutes total. Then move it to the cooler zone to finish cooking gently until it reaches that magic 145-degree mark.
The marinade makes a huge difference with grilled pork. I usually go with something that has acid, fat, and seasonings. My go-to combines olive oil, balsamic vinegar, minced garlic, fresh rosemary, and a touch of honey. The acid tenderizes the meat slightly, while the oil helps prevent sticking and promotes browning. Give it at least two hours to marinate, but overnight is even better if you’re planning ahead.
Funny enough, I discovered that the same principles I use for making crispy chicken tenders apply here too. Getting the surface dry before it hits the heat creates better browning. After removing the tenderloin from the marinade, I pat it thoroughly with paper towels before placing it on the grill grates.
One technique that changed my grilling game involves butterflying thicker portions of the tenderloin. Since one end is typically fatter than the other, I’ll sometimes make a lengthwise cut halfway through the thicker end and open it like a book. This creates more even thickness throughout and ensures everything cooks at the same rate. No more overdone ends and undercooked middles.
Now let’s talk about the complete opposite approach: the slow cooker method. When I’m having one of those chaotic days where I know I won’t have time to actually cook dinner, my pork tenderloin recipe slow cooker style is a lifesaver.
The beauty of slow cooking pork tenderloin is that it becomes incredibly tender and takes on whatever flavors you pair with it. I’ll be honest though, it’s different from oven-roasted pork. You won’t get that crispy exterior. What you get instead is fall-apart tender meat that’s absorbed hours of seasoning.
My standard slow cooker approach starts with browning. Yeah, I know it seems like an extra step when you’re trying to save time, but hear me out. Taking five minutes to brown the tenderloin in a hot skillet before it goes into the slow cooker adds flavor depth that you’ll taste in the final dish. Think of it like building layers of flavor. Similar to how I approach pork chops with gravy, that initial sear creates fond in the pan that translates to richer overall taste.
After browning, I place the tenderloin in the slow cooker and add liquid. This could be chicken broth, apple juice, or even just water with some bouillon. You don’t need much, maybe a cup. Then I add aromatics like sliced onions, garlic cloves, and whatever herbs I have on hand. Thyme and sage work beautifully with pork.
The cooking time for slow cooker pork tenderloin is pretty forgiving. On low, figure about 4 to 5 hours. On high, you’re looking at 2 to 3 hours. The meat is done when it reaches 145 degrees internally, but honestly, with the slow cooker I often let it go a bit longer until it’s super tender and almost shreds. At that point, the temperature might be closer to 160 or 165, but the slow, moist cooking environment prevents it from drying out like it would in the oven.
One of my favorite variations involves adding root vegetables during the last couple hours of cooking. Carrots, parsnips, and baby potatoes all work great. They cook in the pork drippings and create a complete meal. It reminds me of the convenience of throwing together ground beef quesadillas on busy nights, just with a different protein and cooking method.
By the way, the liquid left in the slow cooker makes an incredible gravy. After removing the pork, I strain the liquid into a saucepan and simmer it down by about half. Then I whisk in a cornstarch slurry (equal parts cornstarch and cold water) until it thickens. Pour that over sliced pork and mashed potatoes, and you’ve got serious comfort food.
The slow cooker method also works wonderfully for meal prep. I’ll cook two tenderloins at once on Sunday, slice them up, and use the meat throughout the week. It’s great in salads, sandwiches, or grain bowls. The leftover pork stays moist and flavorful for days.
How Long to Cook Pork Tenderloin in Oven at 350 Degrees
Let me address what might be the most common question I get about cooking pork tenderloin. Everyone wants to know the exact timing, and I get it. We’re all looking for that magic number that guarantees perfect results.
So, how long to cook pork tenderloin in oven at 350 degrees? For a standard tenderloin weighing between 1 and 1.5 pounds, you’re looking at roughly 25 to 30 minutes after an initial sear. But here’s where I need to be completely straight with you: timing alone won’t give you perfect pork every single time.
Let me explain why. Tenderloins vary in thickness and shape. A long, thin one cooks faster than a short, thick one, even if they weigh the same. Your oven might run hotter or cooler than mine. The pan you use affects heat transfer. Starting temperature matters too. Room temperature meat cooks faster than cold meat straight from the fridge.
That’s why I always, always use a meat thermometer. Insert it into the thickest part of the tenderloin, making sure it’s not touching the pan. When it reads 140 to 145 degrees, pull that meat out. It’ll continue cooking as it rests, eventually reaching around 150 degrees. This gives you perfectly cooked, slightly pink, juicy pork.
Specifically for how long to cook 1 lb pork tenderloin at 350 degrees, I’d plan on checking the temperature starting around the 20-minute mark. A one-pound tenderloin is on the smaller side and can cook quicker than you expect. I learned this lesson when I overcooked a beautiful piece of meat because I assumed it needed the full 30 minutes. Now I check early and often.
Here’s my actual cooking timeline when I use 350 degrees. First, I sear the tenderloin in an oven-safe skillet for about 2 minutes per side over medium-high heat on the stovetop. That’s roughly 8 minutes total for getting all sides nicely browned. Then into a 350-degree oven it goes. I check the temperature at 15 minutes. Usually it’s around 120 degrees at this point. Then I check again at 20 minutes. Often it’s close to done here, maybe 138 to 142 degrees. If not quite there, I give it another 5 minutes and check again.
The visual cues help too, though they’re not as reliable as a thermometer. The pork should be golden brown on the outside. When you press it with your finger, it should feel firm but still have some give, similar to the fleshy part of your palm when you touch your thumb to your middle finger. But honestly, just use the thermometer. It removes all the guesswork.
Checking doneness without a thermometer is possible but risky. You can make a small cut in the thickest part and peek inside. The meat should be mostly white with just a hint of pink in the very center. The juices should run clear, not pink or red. But making that cut releases juices you’d rather keep inside the meat, so I really don’t recommend this method unless you’re desperate.
A trick I picked up from a chef friend involves the touch test, but it takes practice. As meat cooks, it gets firmer. Raw meat feels soft and squishy. Well-done meat feels very firm. Medium, which is where we want pork, feels springy but not mushy. This takes time to develop a feel for, though. When I’m making something like turkey chili, I don’t worry about this stuff, but with a nice cut of meat, precision matters.
Temperature carryover is real and significant. That tenderloin will continue cooking for several minutes after you remove it from the oven. The exterior is hotter than the interior, and that heat continues moving inward. I’ve measured a 5 to 7-degree temperature increase during resting. So if you pull your pork at 145 and let it rest for 10 minutes, it might actually be 150 to 152 when you slice it. This is why I sometimes pull it at 140, especially if I know I’ll be letting it rest for a while.
The resting period serves another crucial purpose beyond temperature equalization. The muscle fibers relax and reabsorb some of the moisture that gets pushed toward the center during cooking. Slice too early, and all those delicious juices end up on your cutting board instead of in your mouth. Wait those 10 minutes, and each slice stays moist and tender.
One final note about oven temperature: I personally prefer 400 degrees over 350 for pork tenderloin. The higher heat creates better browning and a more flavorful crust. But if your recipe calls for vegetables that need gentler cooking, or if you’re cooking multiple dishes at once and need everything at 350, it absolutely works. You’ll just add a few extra minutes to the cooking time and maybe lose a bit of that beautiful caramelization on the exterior.


Keeping Your Pork Tenderloin Moist and Flavorful
Alright, let’s dig into what I consider the holy grail of pork cooking: keeping that lean tenderloin juicy and packed with flavor. This is where most people struggle, myself included for years. The problem is that pork tenderloin has almost no fat marbling. Unlike a ribeye that can practically forgive any cooking mistake because of all that beautiful fat, tenderloin is unforgiving. Overcook it by even five minutes, and you’re chewing on something that resembles a shoe sole.
The first technique that transformed my pork cooking was brining. Now, I know what you’re thinking because I thought the same thing: “That sounds complicated and time-consuming.” But honestly, it’s just soaking meat in salty water. I mix a quarter cup of salt with four cups of cold water, submerge the tenderloin, and let it sit in the fridge for at least two hours. The salt changes the protein structure in a way that helps it retain moisture during cooking. The difference is honestly shocking. Even if I accidentally overcook it slightly, the brined version stays noticeably more moist.
Another game-changer involves adding fat where nature didn’t. I sometimes wrap the entire tenderloin in bacon before cooking. Yeah, it sounds over the top, but bacon fat bastes the pork as it cooks, keeping the surface moist while adding incredible flavor. Plus, crispy bacon wrapped around tender pork? Come on, that’s just good eating. My brother-in-law, who claims he doesn’t like pork, asks for this version every time he visits.
Basting makes a huge difference too. Every ten minutes or so, I’ll spoon the pan juices or melted butter over the tenderloin. This keeps the surface from drying out and builds up layers of flavor. It’s similar to the cooking process used for roasting chickens, where continuous moisture on the surface prevents that dried-out exterior.
Here’s something I stumbled on by accident: finishing with butter. After the tenderloin comes out of the oven, I’ll slice a tablespoon of cold butter over the top while it rests. The butter melts into the meat and the resting juices, creating this glossy, rich coating that makes each slice taste restaurant-quality. Sometimes the best techniques come from happy mistakes.
Now let me tell you about the 7-6-5 method for pork tenderloin, which might sound like some secret code, but it’s actually a brilliant timing technique that takes the guesswork out of cooking. When someone asks what is the 7 6 5 method for pork tenderloin, they’re asking about a foolproof roasting approach that works almost every time.
Here’s how it works. You roast the tenderloin at a high temperature (around 425 to 450 degrees) for seven minutes per pound. Then you flip it over and roast for six minutes per pound. Finally, you turn off the oven, crack the door open slightly, and let it rest inside for five minutes. The residual heat finishes the cooking perfectly without any risk of overdoing it.
Let me break this down with a real example. Say you’ve got a 1.5-pound tenderloin. You’d roast it for about 10 to 11 minutes on one side (7 minutes times 1.5 pounds). Then flip it and go another 9 minutes (6 minutes times 1.5 pounds). Turn off the oven, crack the door, wait 5 minutes, and you’re done. The internal temperature should land right around 145 degrees.
I tried this method last month when I was cooking for my in-laws, and I was genuinely nervous because I’d never used it before. But it worked perfectly. The pork came out with a beautiful crust and a juicy, slightly pink interior. My father-in-law, who’s pretty tough to impress, asked me to write down the technique for him.
The genius of this method is the resting period inside the turned-off oven. You’re not blasting it with heat anymore, so there’s no risk of overcooking. But it’s staying warm while the temperature evens out throughout the meat. It’s gentler than resting on the counter and keeps everything at a better serving temperature.
One adjustment I’ve made is adding aromatics to the roasting pan. Smashed garlic cloves, fresh thyme sprigs, and a halved lemon all contribute flavor and make your kitchen smell absolutely incredible. The garlic gets soft and sweet, and you can actually smash it into a paste and spread it on the sliced pork before serving.
Another moisture-saving trick involves scoring the surface lightly before seasoning. I’ll make shallow diagonal cuts across the top, creating a crosshatch pattern. This does two things: it allows seasonings and marinades to penetrate deeper, and it gives rendered juices little channels to flow over the meat as it cooks. Just don’t cut too deep, maybe an eighth of an inch at most.
Expert Tips from Gordon Ramsay
Speaking of professional techniques, I’ve watched probably every Gordon Ramsay cooking video on the internet, and his approach to pork tenderloin is worth studying. When you ask how does Gordon Ramsay cook a pork tenderloin, you’re really asking about a method that prioritizes crust development and continuous basting.
Ramsay starts with a screaming hot pan. And I mean hot enough that you’re slightly nervous about it. He sears the tenderloin hard on all sides until it’s deeply golden brown. This creates what he calls “color,” which is really just shorthand for “intense, caramelized flavor.” Most home cooks, myself included for years, don’t get the pan hot enough. We’re scared of burning things. But that initial high heat is crucial for developing the kind of crust that makes restaurant pork taste different from home-cooked versions.
After the sear, Ramsay adds butter, garlic, and woody herbs like thyme or rosemary to the pan. Then he tilts the pan and continuously spoons that foaming, flavored butter over the meat. This technique, called arrosage in French cooking, keeps the surface moist while building up incredible layers of flavor. I’ve adopted this into my own cooking, and the difference is remarkable. That butter picks up all the browned bits from the pan and deposits them back onto the pork with every spoonful.
Here’s what really struck me about his method: he cooks the entire thing on the stovetop, never transferring to the oven. For a standard tenderloin, he’ll sear it hard for a couple minutes per side, then reduce the heat to medium and continue cooking while basting constantly. The whole process takes maybe 12 to 15 minutes. A meat thermometer is essential here because you’re not relying on oven timing.
One Ramsay tip that changed my game involves seasoning timing. He seasons the meat generously right before it hits the pan, not earlier. Salt draws out moisture, so if you salt too early, the surface gets wet and won’t brown as well. By seasoning immediately before cooking, you get proper crust development without any moisture issues.
He’s also big on resting meat properly, which I’ve mentioned before, but his method is specific. After cooking, he places the tenderloin on a wire rack set over a plate, not directly on a cutting board. This allows air to circulate all around the meat, preventing the bottom from getting soggy. It’s a small detail that makes a noticeable difference in the final texture.
Another professional trick involves building a pan sauce from the drippings. After removing the pork to rest, Ramsay adds a splash of wine or stock to the hot pan and scrapes up all the browned bits stuck to the bottom. This deglazing creates an instant sauce that’s already flavored with pork drippings, butter, and herbs. Reduce it down by half, season with salt and pepper, and you’ve got a restaurant-quality sauce in about three minutes.
By the way, if you’re looking for more ways to work with different cuts and cooking methods, there’s a whole world of options in meat and poultry recipes that can expand your weeknight dinner rotation beyond just tenderloin.
Here’s my version of Ramsay’s approach adapted for home cooks. Heat your heaviest skillet (cast iron works great) over medium-high heat until it’s very hot. Add a tablespoon of oil with a high smoke point like avocado or grapeseed. Season your room-temperature tenderloin generously with salt and pepper. Sear hard on all sides, about 10 minutes total. Reduce heat to medium, add butter and herbs, and start basting. Keep cooking and basting until the internal temperature hits 140 degrees. Remove to a wire rack, tent loosely with foil, rest for 10 minutes. Make a quick pan sauce while it rests. Slice and serve with that sauce drizzled over top.
The confidence Ramsay brings to cooking comes from understanding what’s happening at each stage. He knows when a proper sear has developed by the color and smell. He knows when meat is done by how it feels when pressed. These instincts develop over time, but using his techniques gets you 90% of the way there even without decades of experience.
One last thing I’ve learned from watching professional chefs work: they taste everything and adjust constantly. That pan sauce might need more salt, a squeeze of lemon, or a tiny pinch of sugar to balance the flavors. Don’t be afraid to taste and tweak. Cooking isn’t about following recipes like scientific formulas. It’s about developing your palate and making adjustments based on what you’re tasting.
The beautiful thing about pork tenderloin is that once you master these core techniques, you can adapt them endlessly. Different spice rubs, various pan sauces, seasonal vegetables roasted alongside—the possibilities really are endless. I probably cook pork tenderloin twice a month, and I rarely make it the same way twice. That versatility combined with the relatively quick cooking time makes it one of my absolute favorite proteins to work with.
So whether you’re trying the 7-6-5 method, experimenting with different marinades, or channeling your inner Gordon Ramsay with the butter-basting technique, remember that practice makes progress. Not every tenderloin will be perfect, especially at first. But each time you cook one, you’ll learn something new. You’ll start to recognize what properly seared meat looks like, what the right internal temperature feels like when you press it, and how to adjust your timing based on the specific piece of meat you’re working with. That knowledge is what transforms you from someone following recipes into someone who actually knows how to cook.
FAQs
How do you cook a pork tenderloin so it doesn’t dry out?
The key is never cooking past 145 degrees internal temperature and always letting it rest for at least 10 minutes after cooking. I also recommend brining for a couple hours before cooking, which helps the meat retain moisture. Adding fat through basting with butter or wrapping in bacon keeps the surface from drying out. Finally, resist the urge to slice into it immediately, as those resting minutes allow juices to redistribute throughout the meat instead of running out onto your cutting board.
What is the 7 6 5 method for pork tenderloin?
This method involves roasting at high heat (425-450 degrees) for 7 minutes per pound on one side, then flipping and cooking 6 minutes per pound on the other side. After that, turn off the oven, crack the door slightly, and let the tenderloin rest inside for 5 minutes. The residual heat finishes cooking it perfectly to about 145 degrees internal temperature. This technique takes the guesswork out of timing and consistently produces juicy results with a beautiful crust.
How does Gordon Ramsay cook a pork tenderloin?
Ramsay uses a hot pan sear followed by continuous butter basting on the stovetop, never transferring to the oven. He gets the pan screaming hot, sears all sides until deeply golden, then adds butter with garlic and herbs. He tilts the pan and constantly spoons that flavored butter over the meat while it finishes cooking. He cooks to 145 degrees internal temperature, then rests the meat on a wire rack to allow air circulation. The whole process takes about 15 minutes for a standard tenderloin.
How long does it take to cook a 2 lb pork tenderloin?
A 2-pound tenderloin typically takes 25 to 35 minutes at 400 degrees after an initial sear, or about 30 to 40 minutes at 350 degrees. However, time varies based on thickness and your oven’s accuracy, so always use a meat thermometer. Start checking the internal temperature around the 20-minute mark. Remove it from the oven when it reaches 140-145 degrees, then let it rest for 10 minutes. The resting period allows the temperature to rise another 5 degrees while keeping all the juices inside.
Should I cover pork tenderloin with foil when baking?
I don’t cover it at the beginning because you want the surface to brown and develop flavor. However, if the outside is getting too dark before the inside is cooked through, tenting it loosely with foil helps. Some cooks cover it for the last 10 minutes to retain moisture while finishing the cooking. I prefer to leave it uncovered for maximum crust development, then tent it with foil during the resting period to keep it warm.
What temperature should pork tenderloin be when it’s done?
The USDA recommends 145 degrees Fahrenheit followed by a three-minute rest. This gives you slightly pink, juicy pork that’s completely safe to eat. I usually pull mine at 140-145 degrees because it continues cooking during the resting period and will reach 150 degrees. Gone are the days of cooking pork to 160 or 170 degrees, which just results in dry, tough meat. Invest in a good meat thermometer and trust the 145-degree mark.
Can you cook pork tenderloin from frozen?
While it’s possible, I really don’t recommend it because the results are unpredictable. The outside can overcook while the inside is still frozen, and you won’t get proper browning. If you forgot to thaw it, place the sealed tenderloin in cold water and change the water every 30 minutes. A one-pound tenderloin thaws in about an hour this way. For best results, thaw it in the refrigerator overnight, then let it sit at room temperature for 30 minutes before cooking.
What’s the difference between pork tenderloin and pork loin?
Pork tenderloin is a small, narrow cut from inside the rib cage that weighs about 1 to 1.5 pounds. It’s extremely tender and cooks quickly, usually in 20 to 30 minutes. Pork loin is much larger, wider, and comes from the back of the pig. It can weigh 3 to 5 pounds and takes much longer to cook, often over an hour. They’re not interchangeable in recipes because of the size and timing differences, though both are lean cuts that benefit from careful temperature monitoring.
What sides go best with pork tenderloin?
I love pairing it with roasted vegetables like Brussels sprouts, carrots, or asparagus that can cook in the same oven. Mashed potatoes or sweet potatoes work beautifully with the pan juices or gravy. For lighter options, a crisp salad with vinaigrette balances the richness of the pork. Apples, whether sautéed, roasted, or in a sauce, have a natural affinity with pork. Rice pilaf, quinoa, or couscous also make great bases for serving sliced tenderloin on top.
How do you know when pork tenderloin is done without a thermometer?
While I always recommend using a thermometer, you can make a small cut in the thickest part to check. The meat should be mostly white with just a hint of pink in the center, and the juices should run clear. You can also use the touch test where done pork feels firm but springy, similar to the fleshy part of your palm when touching your thumb to your middle finger. However, these methods are much less reliable than a simple instant-read thermometer, which costs about ten dollars and eliminates all guesswork.
Pork Tenderloin
Ingredients
Equipment
Method
- Remove pork tenderloin from the fridge and let it sit for 30 minutes.
- Preheat the oven to 400°F.
- Pat the pork tenderloin dry with paper towels.
- Season generously with salt and pepper (and optional spices).
- Heat an oven-safe skillet over medium-high heat with oil.
- Sear the tenderloin on all sides until golden brown (about 8-10 minutes total).
- Transfer the skillet to the oven uncovered for about 10 minutes.
- Tent the meat loosely with aluminum foil and continue cooking until it reaches 140°F.
- Remove from the oven and let it rest covered for 10 minutes before slicing.
- Slice the pork and serve.
- Enjoy your perfectly cooked pork tenderloin!