My Guilt-Free Coconut Cream Pie: A Sweet Victory in My Kitchen
Let’s be honest, we all have that one dessert we dream about. For me, it was always the rich, creamy slice of coconut cream pie from my favorite diner. But between watching my sugar and wanting something lighter for family gatherings, I felt stuck. I started experimenting. After a few… let’s call them ‘learning experiences’… I finally cracked the code. This No Sugar, Guilt-Free Coconut Cream Pie is my proudest kitchen creation. It’s the answer to that creamy, dreamy craving, without any of the regret. It’s so good, my husband didn’t even know it was “light” until I told him!
The Story of Coconut Cream Pie: From Tropics to Table
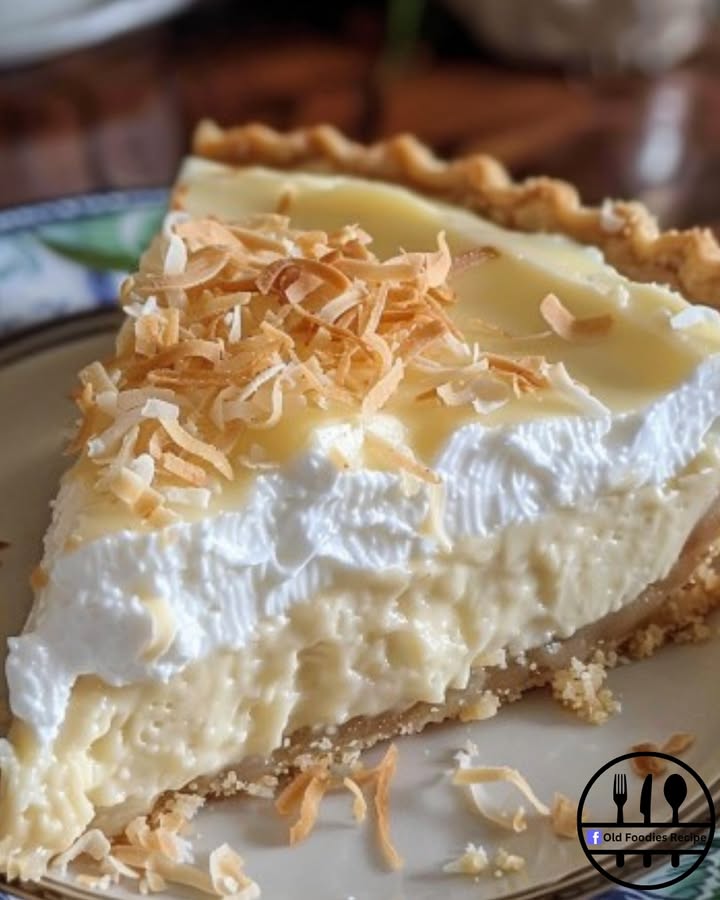
Coconut cream pie feels like a taste of summer all year round. Its roots are tied to the availability of coconut, which made it a popular treat in tropical regions and across the American South. The traditional version is a decadent custard made with egg yolks, cream, and sugar, topped with mountains of meringue or whipped cream. My modern, health-conscious twist swaps the heavy custard for a clever combination of sugar-free pudding and light whipped topping. It captures all the essential flavors—the vanilla, the creamy texture, and the star of the show, the toasted coconut—in a fraction of the time and with a much lighter footprint. It’s a perfect example of how we can keep our food traditions alive while making them work for our modern lives.
Why This Recipe Will Steal Your Heart
You are going to adore this recipe for three big reasons. First, it’s incredibly easy. If you can whisk and fold, you can make this pie. Second, it’s truly guilt-free. Using sugar-free pudding and light whipped topping lets you enjoy a generous slice. Finally, that toasted coconut topping is a game-changer. It adds a nutty, crunchy texture and an amazing aroma that makes the whole pie smell like a bakery. It’s a dessert that feels indulgent but lets you stay on track with your wellness goals.
When to Whip Up This Dreamy Pie
This pie is your new secret weapon for any gathering. It’s a star at potlucks because it travels well and pleases everyone. It’s a light and lovely finish to a heavy holiday meal like Easter or Thanksgiving. I love making it for summer barbecues—it’s a cool, refreshing contrast to smoky grilled foods. And honestly? Sometimes I make it on a Tuesday just because we deserve a little sweet joy in the middle of the week.
Gathering Your Ingredients
Here is your simple shopping list. The beauty is in the short ingredient list!
- 1 (9-inch) pie crust, regular or graham cracker
- 1 large package (about 3.4 oz) sugar-free instant vanilla pudding mix
- 1 3/4 cups cold skim milk (or your milk of choice)
- 1 carton (8 ounces) light whipped topping, thawed
- 1 cup flaked coconut, toasted and divided
Easy Swaps: Make It Your Own
No problem! This recipe is very flexible.
- Pudding: You can use regular instant vanilla pudding if sugar isn’t a concern.
- Milk: Any cold milk works—almond, oat, or full-fat dairy will make it even creamier.
- Whipped Topping: Swap with an equal amount of homemade whipped cream sweetened with a stevia blend.
- Crust: A store-bought crust is perfect, or get fancy with a homemade almond flour crust.
- Coconut: Unsweetened shredded coconut works beautifully for an even lower-sugar option.
Crafting Your Perfect No Sugar Coconut Cream Pie
Step 1: The Crispy Foundation
Start with your pie crust. If you’re using a frozen or homemade pastry crust, bake it according to the package directions until it’s a beautiful golden brown. Let it cool completely on a wire rack. This is crucial! A warm crust will melt your creamy filling and make it soggy. I like to do this step first thing so it has plenty of time to cool while I prep the other components. The smell of a baking crust always makes my kitchen feel so welcoming.
Step 2: Whipping Up the Creamy Core
Now, grab a medium mixing bowl. Pour in the cold milk. Sprinkle the entire package of sugar-free instant vanilla pudding mix over the milk. Using an electric mixer on low speed, beat this for a full two minutes. Watch it transform from a thin liquid into a gloriously thick, smooth, and pale yellow pudding. It should hold soft peaks when you lift the beaters. This thick base is what gives our pie its sturdy, sliceable structure.
Pro tip: Make sure your milk is really cold. This helps the pudding set faster and become extra thick.
Step 3: Folding in Fluff & Flavor
Time for the magic! Take your bowl of thickened pudding. Gently add about three-quarters of your toasted coconut and all of the thawed light whipped topping. Use a spatula to fold these together. “Folding” means you cut down through the center of the mixture, scoop along the bottom, and turn it over gently. Repeat until just combined. You want to keep as much air in the whipped topping as possible for a light, cloud-like texture. The mix will turn a gorgeous off-white color, flecked with golden bits of coconut.
Step 4: Building Your Masterpiece
Retrieve your completely cooled pie crust. Give your creamy coconut mixture one final stir, then pour it all into the crust. Use your spatula to spread it evenly, making nice swoops and swirls on the surface. This is your canvas! Now, take the remaining quarter cup of toasted coconut and sprinkle it evenly over the top. The contrast of the creamy white filling with the golden-brown toasted coconut is just beautiful.
Step 5: The Patient Chill
This is the hardest part—waiting! Carefully place your finished pie in the refrigerator. Let it chill for at least 3-4 hours, but overnight is even better. This rest allows the pudding to fully set and the flavors to meld beautifully. You’ll know it’s ready when you gently shake the pan and the filling doesn’t jiggle loosely. A well-chilled pie gives you that perfect, clean slice.
Chef’s tip: For the cleanest slices, dip your sharp knife in hot water and wipe it dry between each cut.
Your Pie Timeline
Prep Time: 20 minutes
Chill Time: 4 hours (or overnight)
Total Time: 4 hours 20 minutes
A Secret from My Kitchen
Don’t skip toasting the coconut! It’s not just for looks. Toasting unlocks a deep, nutty flavor and adds a crucial crunch. Simply spread the flaked coconut on a baking sheet and toast in a 350°F oven for 5-8 minutes, stirring once, until it’s golden all over. Watch it closely—it goes from perfect to burnt in seconds. This one simple step elevates the entire pie from “good” to “unforgettable.”
A Coconutty Fun Fact
Did you know coconut isn’t actually a nut? It’s classified as a drupe, a type of fruit with a hard stone, like a peach or plum. The part we eat is the white “meat” from inside the seed. This meat is dried to make the flaked coconut we use for topping our pie. So really, we’re just enjoying a delicious, creamy fruit pie!
What You’ll Need to Make It
- 9-inch pie plate
- Electric hand mixer or stand mixer
- Medium mixing bowl
- Spatula
- Baking sheet (for toasting coconut)
- Wire cooling rack
Keeping Your Pie Fresh
This pie is best enjoyed within the first two days. Keep it covered loosely with plastic wrap or stored in a pie carrier in the refrigerator. The crust may start to soften slightly after day two, but the flavor will still be delicious.
I do not recommend freezing this pie. The whipped topping and pudding filling can separate and become watery when thawed, losing that perfect creamy texture we work so hard to achieve.
If you have leftovers, just keep them refrigerated. Cover the cut edges with plastic wrap pressed directly onto the filling to prevent it from drying out.
Tips for Pie Perfection
- For extra coconut flavor, you can brush your pre-baked crust with a thin layer of melted coconut oil before adding the filling.
- If you’re in a hurry, you can use pre-toasted coconut from the store, but toasting it yourself is fresher and more aromatic.
- Let the pie sit at room temperature for about 10 minutes before serving. This softens the crust just enough for easier slicing.
Making It Look Fancy
Presentation is the final touch! Serve each slice on a chilled plate. You can add a tiny dollop of extra whipped topping on the side. For a Fourth of July or Christmas party, sprinkle a few fresh raspberries or pomegranate arils on top for a pop of color. Using a pie server with a sharp edge helps lift out those perfect slices.
Other Delicious Twists to Try
Love this concept? Here are six other ways to play with it.
- Chocolate Coconut Cream Pie: Use sugar-free chocolate pudding mix instead of vanilla. Top with chocolate shavings along with the coconut.
- Tropical Parfaits: Skip the crust. Layer the filling in glasses with diced mango, pineapple, and crushed ginger snap cookies.
- Banana Coconut Cream Pie: Add a layer of thinly sliced bananas on the bottom of the crust before adding the filling.
- Individual Mini Pies: Use pre-made mini graham cracker crusts for personal-sized treats, perfect for parties.
- Vegan Version: Use coconut milk, vegan pudding mix, and a coconut whipped topping. It’s just as creamy and delightful.
- Nutty Delight: Fold in a half cup of chopped toasted pecans or macadamia nuts along with the coconut for added crunch.
Common Mistakes to Avoid
Using a Warm Pie Crust
This is the number one mistake. Pouring a cold, creamy filling into a warm crust is a recipe for disaster. The heat will start to melt the whipped topping and prevent the pudding from setting properly. You’ll end up with a runny, soggy mess. Always, always let your baked crust cool completely on a wire rack before you even think about adding the filling. Patience here makes all the difference.
Not Letting the Pie Chill Long Enough
I know it’s tempting to cut into it right away. But this pie needs those few hours in the fridge to become firm and sliceable. The chilling time allows the pudding to fully hydrate and set. If you skip this, your slices will slump on the plate. Plan ahead and make it the day before your event. Overnight chilling is the best guarantee of perfect slices.
Over-Mixing the Filling
When you fold in the whipped topping, be gentle! Vigorous stirring or beating will deflate the whipped topping. You’ll squeeze out all the air that gives the filling its light, fluffy texture. Instead, you’d get a dense, heavy pie. Use a wide spatula and a patient hand, folding just until no white streaks remain.
Burning the Toasted Coconut
Toasted coconut adds flavor; burnt coconut adds bitterness. Coconut toasts very quickly because of its high fat and sugar content. Don’t walk away from the oven! Stir it frequently and check it every minute after the 5-minute mark. It should be a uniform golden brown, not dark brown. If a few pieces get a little darker, just pick them out.
Your Pie Questions, Answered
Can I use a homemade pudding instead of instant?
You can, but it changes the recipe quite a bit. A cooked homemade pudding needs to be completely chilled before you fold in the whipped topping. This adds significant time. Also, a homemade sugar-free pudding might not set as firmly as the instant kind, which is designed to be thick. For the easiest, most reliable result, I recommend sticking with the instant pudding mix as written in the recipe.
My filling seems too runny. What did I do wrong?
A runny filling usually points to one of three things. First, did you use the correct amount of milk? Even a little extra milk can thin it out. Second, did you beat the pudding and milk for the full two minutes? This activation time is key for thickness. Third, was your whipped topping fully thawed but still cold? If it was melted or too warm, it could thin the mixture. If your filling is runny, just pop the whole assembled pie back in the fridge for several more hours; it will likely firm up more.
How long will this pie last in the fridge?
For the best texture and flavor, enjoy your pie within 2 to 3 days. After that, the crust will continue to absorb moisture from the filling and can become very soft. The whipped topping may also start to break down a little. It will still be safe to eat for up to 4 days, but the quality will be at its peak within that first couple of days. Always keep it covered in the refrigerator.
Can I make this dairy-free?
Absolutely! This is a very easy recipe to adapt for dairy-free needs. Simply use a chilled, full-fat canned coconut milk or another unsweetened dairy-free milk (like almond or oat) for the pudding. Then, use a dairy-free whipped topping alternative, which you can find in most grocery stores. Just check that your pudding mix is also dairy-free if that’s a concern, as some brands contain milk solids.
What’s the best way to toast coconut?
You have two great options. The oven method is best for larger amounts: spread coconut on a baking sheet and toast at 350°F for 5-8 minutes, stirring once. For a small amount like one cup, the stovetop is faster: put the coconut in a dry skillet over medium-low heat. Stir it constantly for 3-5 minutes until it’s golden. No matter which method you use, watch it like a hawk—it burns in a flash! Transfer it to a plate immediately to stop the cooking.
Can I use sweetened coconut instead?
You can, but it will affect the “no sugar” and “guilt-free” label of the recipe. Sweetened flaked coconut has added sugar. Using it will increase the sugar content of the final pie. If that’s okay for your dietary plan, go for it! Just note that it may toast a little faster because of the extra sugar, so watch it even more closely.
Do I have to use a pre-made crust?
Not at all! A homemade crust is a wonderful choice. A graham cracker crust made from crushed crackers, a little melted butter, and a touch of cinnamon is delicious. For a regular pastry crust, blind-bake it until fully cooked and golden. Using your own crust lets you control the ingredients and can make the pie feel extra special.
My whipped topping was frozen solid. Can I still use it?
If your whipped topping is still frozen, do not try to mix it in. It won’t incorporate properly and will leave icy chunks in your filling. The key is to plan ahead. Thaw it overnight in the refrigerator, or if you’re short on time, let it sit at room temperature for about an hour. It should be soft and spreadable but still cold.
Can I add other flavors to the pie?
Please do! This is a fantastic base recipe. Try adding a half teaspoon of coconut or almond extract to the pudding mix for a stronger flavor. You could also fold in some citrus zest, like lime or orange, for a tropical twist. A sprinkle of cinnamon or nutmeg in the crust or on top adds a warm, cozy note. Make it your own!
Is this pie actually sugar-free?
This pie uses a sugar-free instant pudding mix and light whipped topping, which are sweetened with artificial sweeteners or sugar alcohols. Always check the labels of the specific brands you buy if you are monitoring certain sweeteners. The coconut may have minimal natural sugars. So while it’s vastly lower in sugar and calories than a traditional coconut cream pie, it’s important to check products based on your personal dietary needs.
The Final Slice
This No Sugar, Guilt-Free Coconut Cream Pie proves you don’t have to give up the foods you love to feel your best. It’s a creamy, dreamy, absolutely satisfying dessert that everyone at your table will enjoy. From that first crunchy bite of toasted coconut to the last smooth, vanilla-kissed forkful, it’s pure happiness on a plate. I hope this recipe becomes a trusted favorite in your home, just like it is in mine. Now go on, toast that coconut, and get ready for the compliments to roll in!
Pumpkin Cheesecake Trifle
Ingredients
Equipment
Method
- Bake the pie crust according to package directions until golden brown; let cool completely.
- In a medium mixing bowl, pour cold milk and sprinkle the sugar-free instant vanilla pudding mix over it.
- Using an electric mixer on low speed, beat for two minutes until thick and smooth.
- Gently fold in three-quarters of the toasted coconut and all of the thawed light whipped topping until just combined.
- Pour the creamy mixture into the cooled pie crust and spread evenly; top with remaining toasted coconut.
- Refrigerate for at least 3-4 hours, preferably overnight, until set.