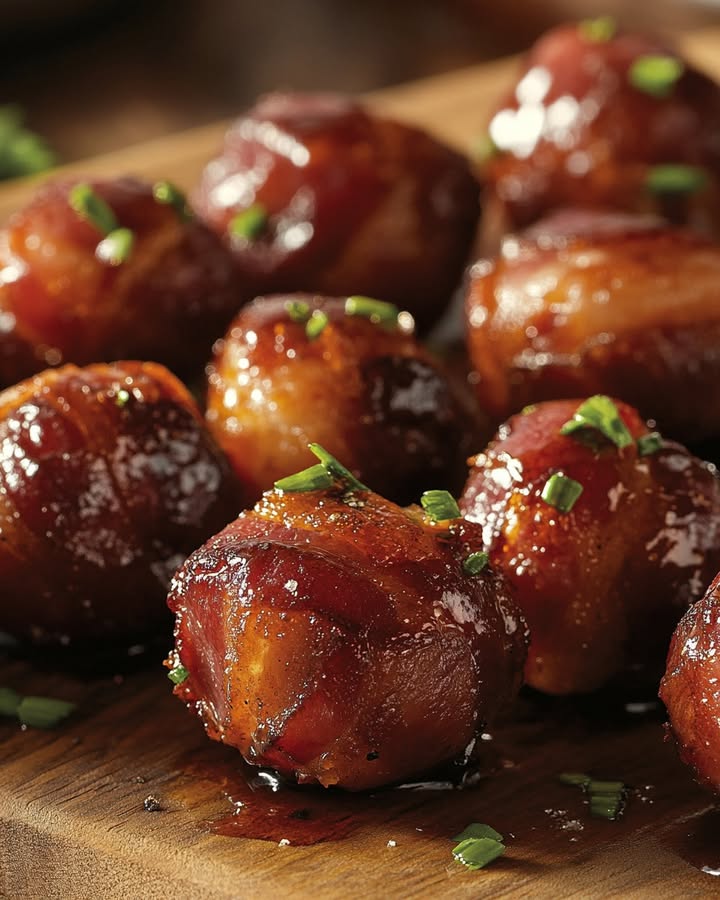
The Magic of Bacon Wrapped Kielbasa Bites
Let me tell you about these little bites of joy. I was hosting my husband’s office party last year and needed a crowd-pleaser. I wanted something simple but with a “wow” factor. I found this idea online and made it my own. The moment I pulled the first pan out of the oven, I knew I had a winner. The entire tray disappeared in about five minutes flat. There were actual negotiations over the last few pieces. Now, my friends request them for every single gathering. They are that good. They are the perfect mix of smoky, sweet, savory, and crispy.
A Bite-Sized History of a Party Favorite
Let’s be honest. Wrapping things in bacon is a proud tradition. Kielbasa, that wonderful Polish sausage, brings its own smoky, garlicky history to the table. Putting them together isn’t just smart; it feels right. Think of it as a fun, handheld take on pigs in a blanket, but for grown-ups who appreciate a good glaze. My version adds a Southern twist with a brown sugar and mustard glaze. It gives that sweet-and-tangy kick we all love on our holiday ham. It’s a simple recipe with roots in potluck wisdom: make it easy, make it tasty, and make plenty.
Why You’ll Love This Recipe
You will adore this recipe for three big reasons. First, it’s incredibly easy. You’re basically just wrapping and glazing. Second, it is a guaranteed hit. I have never met a person who didn’t go back for seconds. Finally, you can make it ahead of time. You can do all the wrapping the night before. Then, just pop them in the oven before your guests arrive. You get to be a relaxed host with a fantastic appetizer. What’s not to love?
Perfect Occasions for These Savory Bites
These bites shine at any event where people gather and snack. They are perfect for game day. Think Super Bowl Sunday or a casual football watch party. They are a star at holiday gatherings like Christmas Eve or New Year’s Eve. I love them for casual backyard barbecues. They pair perfectly with a cold beer. They even work as a fun, hearty appetizer before a big family dinner. Any time you need food that makes people happy, this is your recipe.
Ingredients You’ll Need
Gathering your ingredients is the first step to magic. Here is your shopping list:
- 1 lb kielbasa (use gluten-free if needed)
- 10 slices bacon
- 1 cup packed brown sugar
- 3 tbsp stone-ground mustard
- 3 tbsp white wine vinegar
- 1 tbsp black pepper (or to taste)
Easy Substitution Options
Don’t stress if you’re missing an item. Cooking should be flexible! Here are some easy swaps:
- Kielbasa: Feel free to use any smoked sausage. Andouille sausage adds a spicy kick.
- Bacon: Use thin-cut bacon for quicker crisping, or thick-cut for a meatier bite. Turkey bacon works too.
- Stone-ground Mustard: Dijon mustard is a great substitute. It will be a bit smoother but just as tasty.
- White Wine Vinegar: Apple cider vinegar works beautifully here. It adds a fruity touch.
- Brown Sugar: You can use dark brown sugar for a deeper molasses flavor.
How to Make Bacon Wrapped Kielbasa Bites
Now for the fun part! Let’s walk through the steps together. It’s a simple process that yields amazing results.
Step 1: Preheat and Prep
Start by heating your oven to 375°F (190°C). This is a crucial first step for even cooking. Grab a baking sheet and line it with aluminum foil. This makes cleanup a dream. Place a wire cooling rack on top of the foil. Then, give the rack a quick spray with non-stick cooking spray. This little trick prevents the bacon from sticking. It also lets the hot air circulate all around the bites. You get perfectly crispy bacon every time.
Step 2: Prepare the Kielbasa and Bacon
Take your kielbasa and cut it in half lengthwise. This gives you two long halves. Now, slice each half into 1-inch pieces. You should get about 30 cute little rounds. Next, tackle the bacon. Lay out a slice and cut it into three shorter strips. Wrap one of these shorter bacon strips around a kielbasa piece. Secure it with a toothpick through the center. Imagine you’re putting a tiny, delicious belt on it. The smell of smoked sausage and bacon is already amazing.
Pro tip: If your bacon strips are very long, cut them in half, not thirds. You want the bacon to wrap around once or twice, not overlap too much.
Step 3: Make the Glaze
This glaze is the sweet and tangy soul of the dish. In a small saucepan, combine the brown sugar, stone-ground mustard, white wine vinegar, and black pepper. Turn the heat to medium. Stir it gently as it heats up. You’ll watch the sugar slowly dissolve into the vinegar and mustard. It creates a glossy, fragrant syrup. Once it’s smooth and bubbling slightly, reduce the heat to low. Let it stay warm and ready for basting. The smell is a fantastic mix of sweet sugar and sharp mustard.
Step 4: Assemble, Glaze, and Bake
Arrange your bacon-wrapped soldiers on the prepared rack. Give each one a generous brush with the warm brown sugar glaze. Don’t be shy! This first coat starts the flavor layering. Slide the pan into the hot oven. Now, the magic happens. Set a timer for 15 minutes. When it goes off, pull the pan out and baste the bites again with more glaze. The bacon will be starting to render and sizzle. Repeat this basting once or twice more during the 40-minute total bake time. You’ll see them transform into sticky, caramelized, crispy wonders.
Chef’s tip: For extra caramelization and crispiness, you can broil them for the last 1-2 minutes. Watch them closely so they don’t burn!
Step 5: Serve and Enjoy!
Once they are beautifully browned and the bacon is crisp, take them out of the oven. Let them cool for just a minute on the pan. Then, transfer them to a serving platter. I like to add a small bowl of extra glaze on the side for dipping. Serve them warm. Watch them disappear! The combination of the salty, crispy bacon, the juicy kielbasa, and that sticky-sweet glaze is simply irresistible. Be prepared to share the recipe.
Your Cooking Timeline
Here’s a quick breakdown of the time you’ll need:
- Prep Time: 20 minutes
- Cooking Time: 40 minutes
- Total Time: 1 hour
My Chef’s Secret
My secret is all about the pepper. That tablespoon of black pepper might seem like a lot. It’s what makes the glaze special. It cuts through the sweetness perfectly. It adds a subtle warmth and complexity that keeps people guessing. Don’t skip it! If you’re worried, start with a teaspoon and taste the glaze. You can always add more.
A Little Extra Info
Did you know kielbasa simply means “sausage” in Polish? The version we often buy in the U.S. is typically a smoked sausage. This smoking process is what gives it that deep, robust flavor that pairs so well with bacon. It’s a match made in hearty appetizer heaven!
Equipment You’ll Need
You don’t need any fancy tools for this recipe. Here is a simple list:
- Baking sheet
- Aluminum foil
- Wire cooling rack
- Non-stick cooking spray
- Sharp knife and cutting board
- Small saucepan
- Pastry brush or spoon for basting
- Toothpicks
Storing Your Bacon Wrapped Kielbasa Bites
Short-Term Storage: If you have leftovers (a rare event!), let them cool completely. Place them in an airtight container in the refrigerator. They will keep for 3-4 days.
Reheating: To bring back the crispiness, reheat them in an air fryer or a conventional oven at 375°F for 5-8 minutes. The microwave will make them soft, so I don’t recommend it.
Make-Ahead Magic: This is my favorite trick. You can assemble the bacon-wrapped kielbasa bites a full day ahead. Cover the baking sheet tightly with plastic wrap and refrigerate. When you’re ready, just make your glaze, brush them, and bake. It makes party day so much easier.
Tips for Guaranteed Success
- Use the baking rack! It’s the key to crispy, not soggy, bacon.
- Cut your kielbasa pieces uniformly so they cook at the same rate.
- Don’t skip the basting. Each layer of glaze builds that amazing sticky-sweet crust.
- Let them rest for a minute after baking. The glaze will be extremely hot.
Presentation Perfect
How you serve them can make them even more fun!
- Stick them upright in a hollowed-out cabbage for a rustic, fall look.
- Arrange them on a platter around a small bowl of extra glaze or spicy mustard for dipping.
- For a fun party look, use colorful decorative toothpicks.
- Serve them on a wooden board with other charcuterie items like cheese and pickles.
Healthier Recipe Variations
If you’re looking for a lighter twist, try one of these ideas:
- Turkey Everything: Use turkey kielbasa and turkey bacon. The flavor will be milder but still delicious.
- Spice It Up: Add a teaspoon of smoked paprika or a pinch of cayenne pepper to the glaze for a kick.
- Low-Sugar Option: Substitute the brown sugar with a monk fruit or erythritol brown sugar substitute. The glaze won’t be as thick but will still taste good.
- Pineapple Twist: Add a small chunk of pineapple or water chestnut inside the bacon wrap before securing it. It adds a sweet crunch.
- Apple Glaze: Swap the white wine vinegar for apple cider vinegar and add a pinch of cinnamon to the glaze for an autumn flavor.
- Air Fryer Method: Cook these in an air fryer at 375°F for 12-15 minutes, turning and basting halfway through. It’s faster and can be less greasy.
Common Mistakes to Avoid
Mistake 1: Skipping the Baking Rack
This is the biggest mistake. Placing the bites directly on a foil-lined pan traps the bacon grease. They end up boiling in fat instead of roasting. The bacon becomes soggy and greasy. Using a rack allows the hot air to circulate all around each bite. It lets the fat drip away. You get that perfect, crispy bacon texture we all love. It’s a small step that makes a huge difference.
Mistake 2: Overcrowding the Pan
We want each bite to have its own personal space in the oven. If you cram them all together on the pan, they will steam instead of roast. The bacon won’t crisp up properly. They need room for the heat to reach all sides. Use a large enough baking sheet. If needed, use two pans and rotate them in the oven. Giving them space ensures even cooking and perfect browning.
Mistake 3: Forgetting to Baste
The glaze is what makes these bites truly special. Just brushing them once at the start isn’t enough. As they bake, the glaze gets absorbed and cooks off. Basting every 15 minutes builds up layers of flavor. It creates that irresistible sticky, caramelized coating. Set a timer so you don’t forget. Each baste adds more sweetness and tang right onto the bacon, making it shine.
Mistake 4: Using Bacon That’s Too Thick or Too Thin
The type of bacon matters. Very thick-cut bacon might not crisp fully before the kielbasa gets too hot. Very thin bacon can burn quickly or shred when you wrap it. A standard, medium-cut bacon is your best friend here. It renders nicely, gets crispy, and holds together. If you only have thick-cut, just par-cook it slightly in the microwave for 30 seconds before wrapping.
Frequently Asked Questions
Can I make these ahead of time?
Absolutely, and I highly recommend it! You can wrap the kielbasa in bacon and secure them with toothpicks a full day in advance. Just cover the baking sheet tightly with plastic wrap and keep it in the refrigerator. When you’re ready to cook, simply make your fresh glaze, brush it on, and bake as directed. This makes party preparation so much less stressful. You can focus on your guests instead of last-minute prep.
What can I use instead of brown sugar?
If you’re out of brown sugar, you have a couple of good options. You can use an equal amount of dark brown sugar for a deeper molasses flavor. You can also make a substitute by mixing one cup of white granulated sugar with one tablespoon of molasses. For a sugar-free version, a brown sugar substitute made from erythritol or monk fruit will work. Just know the glaze might be a bit less thick and syrupy. The flavor profile will still be sweet and pleasant.
My bacon isn’t getting crispy. What did I do wrong?
The most common culprit is not using a wire rack. Without a rack, the bites sit in rendered bacon fat. This steams them instead of roasting them. Also, ensure your oven is fully preheated. Baking at too low a temperature will yield rubbery bacon. Finally, make sure your bacon slices aren’t overlapping too much on the kielbasa. A single wrap is plenty. Too many layers will take longer to cook through and crisp up.
Can I cook these in an air fryer?
Yes, you can! The air fryer is a great tool for this recipe. It gives you extra-crispy bacon quickly. Preheat your air fryer to 375°F. Arrange the bites in a single layer in the basket. You’ll likely need to cook them in batches. Cook for about 10-12 minutes, turning and basting them halfway through the cooking time. Keep an eye on them, as air fryers can vary. They are done when the bacon is crisp and caramelized.
How do I store leftovers?
Let any leftovers cool completely on the counter. Then, transfer them to an airtight container. Store them in the refrigerator for up to 3-4 days. To reheat, avoid the microwave. It will make the bacon soft. Instead, use an air fryer or a conventional oven at 375°F for 5-8 minutes. This will help bring back some of the crispy texture. They taste best reheated this way.
Can I use a different type of sausage?
You sure can! Smoked sausage is best because it holds its shape and has great flavor. Andouille sausage would add a lovely spicy Cajun kick. A good quality smoked bratwurst would also work well. If you use a raw sausage, you would need to precook it before wrapping it in bacon. This ensures everything cooks safely and evenly in the oven. Stick with something that has a firm texture.
Is there a way to make these less sweet?
If you prefer a less sweet glaze, you have a few choices. You can simply reduce the brown sugar to 3/4 or even 1/2 cup. Taste the glaze as you go. You can also increase the amount of stone-ground mustard or add a splash more vinegar to balance the sweetness. Another idea is to add a teaspoon of Worcestershire sauce to the glaze. It adds a savory, umami depth that counters the sugar beautifully.
What do I serve with these bites?
These are fantastic on their own, but they pair wonderfully with other party foods. I like to serve them alongside other easy finger foods. Think of things like a simple cheese board, a veggie platter with ranch dip, or some seasoned crackers. For drinks, they go great with cold beer, a crisp white wine, or a simple cider. They are rich, so a fresh, crunchy side helps balance the plate.
Can I use toothpick alternatives?
If you don’t have toothpicks, you can try a couple of things. Small, soaked bamboo skewers work as a larger alternative. You can put several bites on one skewer. Some people also use rosemary sprigs as a fragrant, edible skewer. Just strip most of the leaves off a sturdy stem. However, a toothpick really is the easiest and most secure way. It holds the bacon tightly in place as it shrinks during cooking.
Are these spicy?
The recipe as written is not spicy. It’s sweet, tangy, and savory. The black pepper adds warmth, not heat. If you want to add spice, you easily can. Add 1/2 teaspoon of crushed red pepper flakes or a pinch of cayenne pepper to the glaze. Another idea is to use a spicy kielbasa or andouille sausage to begin with. You can also serve them with a spicy mustard or sriracha-mayo dipping sauce on the side.
Your New Go-To Party Appetizer
And there you have it. My tried-and-true recipe for the most addictive party appetizer I know. These Bacon Wrapped Kielbasa Bites are more than just food. They are a conversation starter. They are the thing people remember and ask for again. They are proof that the simplest recipes, made with care and a few good ingredients, are often the very best. So next time you need a guaranteed crowd-pleaser, give these a try. Wrap, glaze, bake, and get ready for the compliments. Happy cooking!
Retro Rectangle Pizza
Ingredients
Equipment
Method
- Preheat your oven to 375°F (190°C) and line a baking sheet with aluminum foil.
- Place a wire cooling rack on top of the foil and spray it with non-stick cooking spray.
- Cut the kielbasa in half lengthwise and then slice each half into 1-inch pieces (about 30 pieces total).
- Cut each strip of bacon into three shorter strips, then wrap one strip around a kielbasa piece and secure with a toothpick.
- In a small saucepan, combine brown sugar, mustard, white wine vinegar, and black pepper; heat until sugar dissolves and mixture is smooth.
- Arrange the bacon-wrapped kielbasa on the wire rack and brush with the glaze.
- Bake in the oven for 40 minutes, basting with glaze every 15 minutes.
- Optionally, broil for 1-2 minutes for extra crispiness.
- Let cool slightly, then serve warm on a platter with extra glaze for dipping.