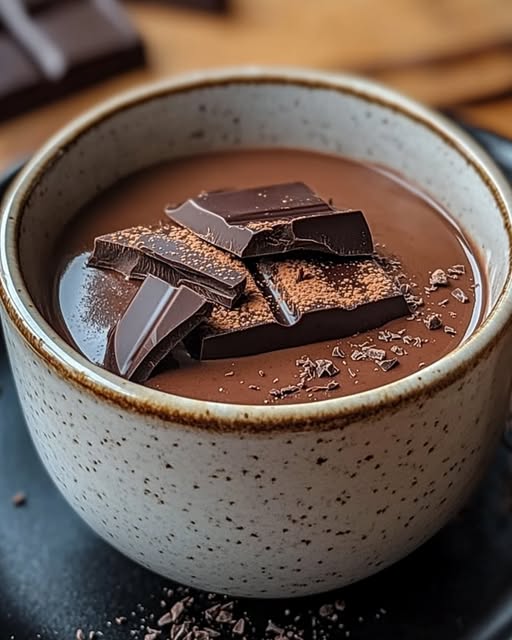
Le Vrai Chocolat Chaud Maison: A Hug in a Mug
There’s hot chocolate, and then there’s *real* hot chocolate. You know the difference. The kind from a powder packet is fine in a pinch. But the rich, velvety magic you get from melting real chocolate into warm milk? That’s a completely different experience. It’s a slow-down, wrap-your-hands-around-the-mug, close-your-eyes-and-sigh kind of moment. Today, I’m sharing my family’s favorite recipe for **rich homemade hot chocolate**. It’s the one I make for movie nights, chilly mornings, and anytime someone needs a little sweet comfort. Let’s make a batch!
A Brief, Sweet History of Hot Chocolate
Our cozy drink has a fascinating past! It started thousands of years ago with the ancient Mayans and Aztecs. They drank a bitter, spiced beverage made from ground cacao beans. It was nothing like our sweet treat. When it came to Europe in the 1500s, sugar was added, and it became a trendy luxury for the rich. The French loved it and helped make it popular. Our modern **creamy hot chocolate recipe** is a direct descendant of that French tradition. It focuses on chocolate’s pure flavor, enhanced with just a hint of vanilla and spice. It’s a delicious little piece of history you can make in 15 minutes.
Why You’ll Fall in Love With This Rich Hot Chocolate
Why choose this over a quick mix? First, the texture is silkier than any powder could ever be. Second, YOU control the sweetness and richness. Want it darker? Use a higher percentage chocolate. Want it extra creamy? Add a dollop more cream. This **easy French hot chocolate** is also incredibly forgiving and fun to make. It fills your kitchen with the most incredible aroma. It’s a simple act of self-care or love for others. Once you taste this decadent homemade version, you might never go back to the packets again.
The Perfect Time for a Perfect Cup
This isn’t just a drink; it’s an event creator. Here are my favorite times to whip it up:
- Family Movie Night: Serve it with a big bowl of popcorn for the ultimate cozy combo.
- Frosty Weekend Mornings: Swap your usual coffee for this luxurious start to a slow day.
- Holiday Gatherings: It’s a wonderful welcome drink for guests coming in from the cold.
- After-School Treat: A special pick-me-up that feels like a celebration.
- A Quiet Evening for One: Sometimes, the best company is you, a good book, and this mug of warmth.
Gathering Your Ingredients
Quality ingredients make a world of difference. Here’s what you’ll need for 4 generous mugs:
- 1 liter (about 4 ¼ cups) of whole milk
- 200 g (about 7 oz) of good-quality dark chocolate
- 4 tablespoons of white sugar
- 2 tablespoons of heavy cream (crème fraîche épaisse)
- 1 teaspoon of pure vanilla extract
- ¼ teaspoon of ground cinnamon (optional, but lovely)
No Heavy Cream? No Problem! Substitution Ideas
Don’t let a missing ingredient stop you. Here are easy swaps:
- For the Chocolate: Use a high-quality dark chocolate bar (between 60-70% cocoa). You can use semi-sweet, but reduce the added sugar a bit.
- For the Heavy Cream: Full-fat coconut cream makes a delicious dairy-free alternative. Whole milk yogurt (at room temp) also works in a pinch.
- For the Milk: Any plain, unsweetened milk alternative like oat milk, almond milk, or cashew milk will work wonderfully.
- For the Sugar: Coconut sugar, maple syrup, or honey are great natural substitutes. Add them to taste.
Crafting Your Creamy Hot Chocolate Masterpiece
This is where the magic happens. Follow these simple steps for a flawless result.
Step 1: Gently Warm the Milk
Pour the milk into a large, heavy-bottomed saucepan. Place it over low to medium-low heat. We want to gently warm the milk until it’s just steaming and little bubbles form around the edge. Do not let it boil! A gentle heat prevents the milk from scalding and gives us more control. You’ll see a light steam rising, and the surface will shimmer. This is your cue that it’s ready for the chocolate.
Step 2: Meet the Chocolate Melts
While the milk warms, chop your dark chocolate bar into small, even pieces. Smaller pieces melt faster and more evenly. Once the milk is hot, take the pan off the heat and add all the chocolate pieces. Let it sit for a minute to start softening. Then, use a whisk to stir in a slow, steady motion. Watch as the dark chocolate ribbons swirl into the milk, creating a beautiful, dark, and inviting mixture. Pro tip: Taking the pot off the heat prevents the chocolate from “seizing” or getting grainy.
Step 3: Add the Luxurious Richness
Now, stir in the two tablespoons of cold heavy cream. This addition is what takes our drink from good to “OH MY.” It adds a lush, velvety body that feels incredibly indulgent on the tongue. Put the saucepan back on low heat. Continue to whisk gently. You’ll feel the mixture thicken slightly as everything combines perfectly.
Step 4: The Final Flavor Flourish
This is the fun part! Sprinkle in the sugar, vanilla extract, and that optional pinch of cinnamon. Keep whisking until the sugar is completely dissolved and the spices are fully blended. Taste it! Is it sweet enough? Remember, the cinnamon is a background note. It should whisper, not shout, so it doesn’t hide that beautiful chocolate flavor. Chef’s tip: A tiny pinch of salt can actually make the chocolate taste richer and more complex. Try it!
Let’s Talk Timing
This recipe is all about simplicity and speed.
- Prep Time: 5 minutes (chopping chocolate, measuring)
- Cook Time: 10 minutes
- Total Time: A mere 15 minutes from start to sipping!
There’s no resting time needed. It’s meant to be enjoyed immediately, while it’s perfectly hot and frothy.
The Secret to Silky Perfection
My absolute secret weapon? Whisk, whisk, whisk! Constant, gentle whisking while heating does two things. First, it ensures the chocolate melts smoothly without any lumps. Second, and most importantly, it incorporates air into the hot chocolate. This creates a light, frothy layer on top that feels like a professional cafe drink. Don’t just stir; get your wrist moving and create that beautiful foam.
A Fun Chocolate Fact
Did you know the vanilla in this recipe is more than just a flavor? Vanilla acts as a “flavor enhancer” for chocolate. It doesn’t just add its own lovely aroma; it actually helps to round out and deepen the taste of the cocoa, making the chocolate flavor seem richer and more well-balanced. So that teaspoon is doing some serious scientific (and delicious) work!
What You’ll Need in Your Kitchen
No fancy gadgets required!
- A large, heavy-bottomed saucepan
- A sturdy whisk (your best friend for froth)
- A sharp knife and cutting board for the chocolate
- Measuring cups and spoons
- Four heat-proof mugs for serving
Storing Your Delicious Creation
This hot chocolate is truly best enjoyed fresh. The texture and froth are at their peak right after making it.
If you have leftovers, let them cool completely. Then, pour the chocolate into an airtight container and store it in the refrigerator. It will keep well for 2-3 days.
To reheat, pour the cold chocolate into a saucepan and warm it over low heat, whisking frequently to bring back the smooth texture. You can also use a microwave, heating in 30-second intervals and stirring well in between.
My Best Tips for the Best Cup
- Chocolate Choice Matters: Use a chocolate bar you’d enjoy eating on its own. The flavor shines through.
- Low and Slow: Patience is key. High heat is the enemy of smooth chocolate and can burn the milk.
- Taste as You Go: Adjust the sugar and spice to suit your personal preference.
- Get Frothy: Don’t be shy with the whisk right before serving. That foam is a treat!
Making it Pretty: Presentation Ideas
Turn your mug into a masterpiece!
- Top with a mountain of whipped cream or marshmallows.
- Drizzle with extra melted chocolate or caramel sauce.
- Add a cinnamon stick stirrer for aroma and style.
- Grate a little orange zest on top for a bright, citrusy surprise.
- Serve with a couple of buttery shortbread cookies on the side.
Six Delicious Ways to Mix It Up
Once you master the base, try these fun twists for your next batch!
1. Mexican-Style Hot Chocolate: Add a pinch of cayenne pepper and a dash more cinnamon. It’s warmly spiced with a little kick at the end.
2. Orange Bliss Hot Chocolate: Add the zest of one orange to the milk as it warms. Strain it out before serving or leave it in for extra flavor.
3. Salted Caramel Hot Chocolate: Swirl in 2 tablespoons of salted caramel sauce along with the sugar. Top with a flaky sea salt.
4. Minty Fresh Hot Chocolate: Add ¼ teaspoon of peppermint extract (not mint extract) with the vanilla. It’s like a liquid peppermint patty.
5. Vegan Dark Hot Chocolate: Use full-fat coconut milk and a dairy-free dark chocolate bar. It’s incredibly rich and creamy.
6. Mocha Hot Chocolate: Dissolve 1-2 tablespoons of instant espresso powder into the warm milk before adding the chocolate for a coffee-chocolate dream.
Common Mistakes to Avoid
Steer clear of these pitfalls for a perfect cup every time.
Mistake 1: Boiling the Milk
This is the biggest mistake! Boiling milk can make it taste “scorched” and can cause the proteins to separate. It also creates a skin on top. More importantly, if you add chocolate to boiling milk, it can become grainy. Always heat your milk gently over medium-low heat until it’s just steaming. Look for tiny bubbles around the pan’s edge, not a rolling boil.
Mistake 2: Using Chocolate Chips
Chocolate chips are designed to hold their shape in cookies. They contain stabilizers that prevent them from melting smoothly. This can leave your hot chocolate slightly grainy or waxy. For the silkiest texture, always use a pure chocolate baking bar from the baking aisle. Chop it up yourself for quick, even melting.
Mistake 3: Not Whisking Enough
Simply stirring with a spoon isn’t enough. A whisk is your best tool. Vigorous whisking while heating emulsifies the chocolate and milk. This blends them into one cohesive, creamy liquid. It also incorporates air, giving you that lovely, light froth on top. A spoon just can’t achieve the same result. Whisk from start to finish for maximum silkiness.
Mistake 4: Adding Cold Dairy to Hot Chocolate
If your heavy cream is straight from the fridge, let it sit out for 10-15 minutes before using. Adding very cold cream to the hot mixture can cause it to cool down too quickly. This might make the chocolate harden into little specks. Using room-temperature cream helps it blend in seamlessly, maintaining a smooth and velvety consistency.
Your Hot Chocolate Questions, Answered
Can I make this hot chocolate ahead of time?
Yes, you can! Prepare the recipe as directed and let it cool completely. Store it in a sealed container in the fridge for up to 3 days. When you’re ready to serve, reheat it gently in a saucepan over low heat. Whisk it really well as it warms to bring back its creamy texture and froth. This makes it perfect for planning a cozy gathering without last-minute fuss.
What’s the best type of chocolate to use?
For a balanced, rich flavor, choose a dark chocolate bar with a cocoa content between 60% and 70%. This gives you deep chocolate taste without being too bitter. A good-quality semi-sweet chocolate bar also works wonderfully. Avoid milk chocolate, as it can make the final drink too sweet and not chocolatey enough. Remember, the chocolate is the star!
My hot chocolate turned out too thin. How can I thicken it?
If your hot chocolate is thinner than you’d like, don’t worry. You have a couple of easy fixes. First, you can let it simmer on low heat for a few more minutes to reduce and concentrate. Second, you can make a quick slurry by mixing a teaspoon of cornstarch with a tablespoon of cold milk. Whisk this into your hot chocolate and cook for another minute until thickened.
Can I make this recipe dairy-free?
Absolutely! This recipe adapts beautifully. Use a plain, unsweetened, creamy non-dairy milk like oat milk or cashew milk. Choose a high-quality dairy-free dark chocolate bar. For the cream, use a can of full-fat coconut cream. The result will be just as rich, creamy, and decadent, making it a wonderful treat for everyone to enjoy.
Why did my chocolate get lumpy or grainy?
Grainy texture usually happens from two things. First, the milk was too hot when the chocolate was added, causing the cocoa solids to seize. Second, not enough whisking allowed the chocolate to melt unevenly. To fix it, strain the mixture through a fine-mesh sieve to remove lumps. Then, return it to low heat and whisk vigorously until smooth again.
What can I use instead of a vanilla extract?
If you don’t have vanilla extract, you have tasty options. You can use the seeds scraped from half a vanilla bean pod for an incredible flavor. A tablespoon of a complementary liqueur like Grand Marnier or Amaretto can work too. Or, simply omit it! The chocolate and cinnamon will still make a delicious drink. The vanilla just adds a lovely, rounded background note.
How can I make my hot chocolate extra frothy?
For serious foam, use your whisk with enthusiasm right before serving! An immersion blender or a simple milk frother is also a fantastic tool. Just pulse it in the saucepan or directly in your mug for a few seconds. For a fun gadget, a handheld electric frother works wonders. The key is to incorporate air while the chocolate is still hot.
Is this recipe suitable for children?
Yes, it’s a fantastic treat for kids! Just be mindful of the caffeine naturally present in dark chocolate. For a more child-friendly version, you can use a semi-sweet chocolate bar which is milder. You can also reduce or omit the optional cinnamon if their palates are sensitive. Always let it cool to a safe sipping temperature before serving.
Can I use cocoa powder instead of a chocolate bar?
You can, but it’s a different recipe. Cocoa powder requires a different technique to avoid clumps. You typically mix it with the sugar first, then make a paste with a little hot milk before adding the rest. This recipe is specifically designed for real chocolate, which gives a richer, smoother, and more luxurious result. I highly recommend trying it with the bar first!
What are the best toppings for homemade hot chocolate?
The topping options are endless! Classic whipped cream is always a winner. Marshmallows, big or small, are a must for many. For grown-ups, a splash of bourbon, peppermint schnapps, or Irish cream is delightful. Get creative with shavings of white chocolate, a dusting of cocoa powder, or even a sprinkle of crushed candy canes during the holidays.
Wrapping Up Your Cozy Cooking Session
And there you have it—the secret to making truly incredible **rich homemade hot chocolate** that feels like a special occasion, even on a random Tuesday. It’s more than a recipe; it’s a ritual of warmth and comfort. I hope this becomes a cherished tradition in your home, just like it is in mine. So grab your favorite mug, put on the kettle (or rather, the saucepan), and give yourself the gift of this simple, decadent pleasure. happy sipping!
Rich Homemade Hot Chocolate
Ingredients
Equipment
Method
- Pour the milk into a large, heavy-bottomed saucepan and warm it over low to medium-low heat until just steaming.
- Chop the dark chocolate into small, even pieces and add it to the hot milk.
- Let the chocolate sit in the warm milk for a minute, then whisk until smooth.
- Stir in the heavy cream and return to low heat, whisking gently until combined.
- Sprinkle in the sugar, vanilla extract, and optional cinnamon, whisking until dissolved and blended.