A Slice of Pure Joy: The Tuxedo Cake That Stole My Last Party
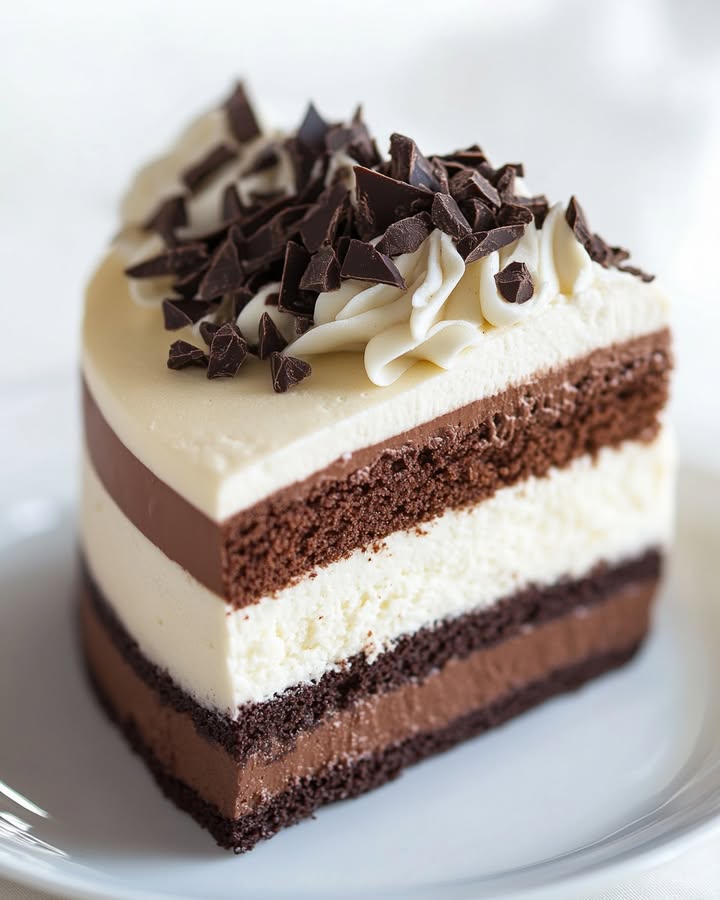
Have you ever watched a cake disappear? I mean, truly vanish, with guests sneaking back for “just one more sliver”? That was my kitchen last weekend. I made this stunning triple chocolate mousse cake, and let me tell you, it was pure magic. With its sleek layers of dark, white, and milk chocolate, it looked so elegant – like a dessert wearing its best tuxedo. But the best part? It’s not as tricky as it looks! If you love creating something that makes people’s eyes light up, this recipe is for you.
The Story Behind This Decadent Tuxedo Delight
This cake feels like a modern classic. It doesn’t have a centuries-old history, but it’s a star of today’s dessert tables. I think of it as the glamorous cousin of the humble chocolate layer cake. The name “Tuxedo” comes from its beautiful contrast of dark and white layers, mimicing the sharp look of formal wear. While its origins are a bit mysterious, it became famous in fancy restaurants and high-end bakeries. I first fell for it at a wedding. I spent years trying different recipes to get that perfect, velvety mousse and moist cake. My version combines a rich chocolate base with two dreamy mousses. It’s my go-to when I want to feel like a professional pastry chef in my own home.
Why You Will Absolutely Love This Recipe
You will love this because it’s a showstopper that’s secretly approachable. The flavors are a deep, satisfying chocolate journey in every bite. The cake is super moist. The mousse is light as a cloud. The ganache is gloriously shiny. It’s the perfect mix of textures. Best of all, you can make most parts ahead of time! No last-minute panic. Just assemble, chill, and get ready for the compliments to roll in. It’s a recipe that builds your confidence and delights everyone who tastes it.
Perfect Occasions for Your Triple Chocolate Masterpiece
This cake is your secret weapon for special moments. It’s perfect for birthdays, anniversaries, or holiday dinners like Christmas. I love making it for dinner parties because it makes the whole meal feel extra special. It’s also a fantastic “wow” factor dessert for potlucks – trust me, you’ll be the talk of the table. Honestly, any day you want to treat your family or friends to something unforgettable is the right day for this Decadent Tuxedo Delight.
Gathering Your Ingredients for Chocolate Heaven
Here’s what you’ll need to create this dreamy dessert. Using good quality chocolate makes a real difference in flavor!
For the Chocolate Cake:
- 2 cups (240g) All-purpose Flour
- 2 cups (400g) Sugar
- ¾ cup (50g) Cocoa Powder (Dutch-processed is best)
- 1 ½ teaspoons Baking Powder
- 1 ½ teaspoons Baking Soda
- 1 teaspoon Salt
- ½ cup (120ml) Milk
- 2 large Eggs
- ½ cup (128g) Sour Cream
- ½ cup (110g) Vegetable Oil
- 1 teaspoon Espresso Powder (secret flavor booster!)
- 1 teaspoon Vanilla Extract
- 1 cup (240ml) Hot Water
For the Chocolate Mousses:
- 4 large Egg Yolks
- 2 cups (480ml) Heavy Cream, divided
- 1 teaspoon Vanilla Extract
- 3.5 oz (100g) Dark Chocolate, finely chopped
- 3.5 oz (100g) White Chocolate, finely chopped
For the Chocolate Ganache:
- 4.3 oz (120g) Milk Chocolate, chopped
- ½ cup (120ml) Heavy Cream
No Problem! Handy Ingredient Substitutions
Don’t have everything on hand? No worries! Here are some easy swaps.
- Sour Cream: Plain, full-fat Greek yogurt works beautifully.
- Espresso Powder: Use 1 tablespoon of strong brewed coffee, cooled. Or just skip it.
- Milk: Any milk you have – whole, 2%, or even a non-dairy alternative like almond milk.
- Chocolate Types: Feel free to use semi-sweet instead of dark. Or use all one type of chocolate for the mousse if you prefer.
- Vegetable Oil: Canola oil or melted, cooled coconut oil are fine substitutes.
Creating Your Decadent Tuxedo Delight: Step-by-Step
Step 1: Make the Chocolate Cake
Start by heating your oven to 350°F (180°C). Grease two 8-inch round pans and line the bottoms with parchment paper. This is your insurance policy for perfect cake release! In a big bowl, sift together the flour, sugar, cocoa powder, baking powder, baking soda, and salt. Whisk it all until it looks like a uniform, dark powder. In another bowl, whisk the eggs, milk, sour cream, oil, and vanilla until smooth and creamy. Pour the wet mix into the dry ingredients. Stir gently until just combined. Now, mix the hot water with the espresso powder and slowly whisk it into the batter. The batter will be very thin – that’s perfect! It makes the cake incredibly moist. Divide the batter evenly between your pans. Bake for about 35 minutes. You’ll know it’s done when a toothpick poked in the center comes out clean. Let the cakes cool completely in the pans on a wire rack. Pro tip: For perfectly flat layers, once the cakes are cool, use a serrated knife to gently slice off any dome that formed on top.
Step 2: Make the Chocolate Mousses
Finely chop your dark and white chocolates and put them in separate, heatproof bowls. Now, let’s make the custard base. Whisk the 4 egg yolks in a medium bowl until they turn pale and slightly thick. In a small saucepan, heat 1 cup of the heavy cream with the vanilla until it’s just warm – you should see small bubbles around the edge. This is key: slowly pour the warm cream into the egg yolks while whisking constantly. We’re tempering the eggs so they don’t scramble. Pour the whole mixture back into the saucepan. Cook it over medium heat, stirring non-stop with a spatula, until it thickens enough to coat the back of a spoon. Don’t let it boil! Immediately pour the hot custard evenly over the two bowls of chopped chocolate. Let it sit for a minute, then stir each until the chocolate is fully melted and the mixtures are silky smooth. Let them cool to room temperature. While they cool, whip the remaining 1 cup of heavy cream to firm peaks. Gently fold half of the whipped cream into the dark chocolate and half into the white chocolate. Be gentle to keep that lovely airy texture.
Chef’s tip: If your mousse seems too soft, just pop the bowl in the fridge for 15-20 minutes before folding in the whipped cream. It will set up beautifully.
Step 3: Assemble the Tuxedo Cake
This is where the magic happens! You’ll need your dessert ring, a springform pan, or a cake pan with high sides. Place your first cooled and trimmed cake layer at the bottom. If using a cake ring, wrap the outside in plastic wrap or acetate to keep it neat. Carefully spread all of the dark chocolate mousse over the cake layer, making it nice and even. Tap the pan gently on the counter to settle it. Pop it in the fridge for 30 minutes to firm up. Next, pour all of the white chocolate mousse over the now-set dark layer. Smooth the top. Chill for another 30 minutes. Finally, place your second cake layer on top, pressing down gently. Now, the hardest part – patience! Let the whole cake chill in the fridge for at least 4 hours, or better yet, overnight. This gives the mousses time to set completely so you get those perfect, clean layers when you slice it.
Step 4: Decorate and Serve Your Masterpiece
Time for the final glamorous touch: the ganache. Place your chopped milk chocolate in a bowl. Heat the ½ cup of heavy cream in a saucepan until it just begins to simmer. Pour the hot cream over the chocolate and let it sit, untouched, for 1 full minute. Then, start stirring from the center outward until you have a gorgeous, glossy, smooth ganache. Let it cool at room temperature for about 10-15 minutes until it thickens to a pourable but not runny consistency. Carefully remove your chilled cake from its mold. Pour the ganache over the top, using an offset spatula to gently push it to the edges so it drips down the sides a little. For extra fun, add chocolate curls, sprinkles, or a dusting of cocoa. Slice with a hot, clean knife for perfect portions. Get ready to serve pure happiness!
Your Timing Guide for a Stress-Free Bake
Good baking is all about planning. Here’s a handy timeline so you know what to expect.
- Prep Time (Cake & Mousse): 45 minutes
- Cooking Time (Cake): 35 minutes
- Cooling & Setting Time: 5 hours (mostly hands-off chilling)
- Total Time (Start to Finish): About 6 hours 20 minutes
My best advice? Make the cake layers a day ahead. Wrap them tightly in plastic once cool. The next day, make the mousses, assemble, and let it set overnight. This breaks up the work and makes the whole process feel easy.
My Number One Secret for the Best Tuxedo Cake
Here’s my little secret: temperature control. Make sure every component is at the right temp before combining. Your custard should be cool before you fold in the whipped cream. Your cake layers must be completely cool before you add the mousse. And your ganache should be just warm, not hot, when you pour it. This prevents melting, seizing, and ensures those stunning, distinct layers we’re all after.
A Fun Chocolate Fact for Your Next Dinner Party
Did you know the cocoa powder in your cake comes from beans that are fermented, dried, roasted, and ground? Dutch-processed cocoa (like we use here) is treated with an alkali. This makes it less acidic, darker in color, and gives it a smoother, richer flavor. That’s why it works so magically in baked goods!
Gear Up! Necessary Kitchen Equipment
You don’t need fancy tools, but these will make your life easier:
- Two 8-inch round cake pans
- Parchment paper
- Mixing bowls (large, medium, small)
- Whisk and spatula
- Electric hand mixer or stand mixer (for whipping cream)
- Saucepan
- 8-inch Dessert Ring, Springform Pan, or high-sided cake pan for assembly
- Wire cooling rack
- Serrated knife (for leveling cakes)
How to Keep Your Triple Chocolate Mousse Cake Fresh
Because of the dairy-heavy mousse and cream, this cake must live in the refrigerator. Once decorated, cover it loosely with a cake dome or tent it with plastic wrap. You want to protect it from fridge smells without squishing the beautiful ganache.
It will stay fresh and delicious for up to 5 days. The moist cake and the mousse actually meld together a bit more over time, making each slice even more flavorful.
If you want to make parts ahead, baked cake layers can be wrapped tightly and stored at room temperature for 2 days, or frozen for up to 3 months. Thaw frozen cakes in the fridge before assembling.
My Best Tips and Advice for Success
- Read the entire recipe once before you start. It helps you visualize the process.
- Use a kitchen scale for the chocolate and flour if you can. Measuring by weight is more accurate and leads to perfect results.
- When folding whipped cream into chocolate, use a gentle hand. Fold until just combined to keep the mousse light.
- If you don’t have a dessert ring, a springform pan is your next best friend. Line the sides with a strip of parchment or acetate for super clean edges.
- To get clean slices, dip your knife in hot water and wipe it dry between each cut.
Presentation Ideas to Make It Even More Special
Make your cake the center of attention with these simple ideas:
- Place the cake on a beautiful cake stand or a simple white plate.
- Top with fresh raspberries or strawberries. The red looks amazing against the chocolate.
- Dust the plate with a little powdered sugar or cocoa powder just before serving.
- Add a few edible gold flakes or silver dragees for a truly festive look.
- Serve each slice with a small dollop of extra whipped cream or a scoop of vanilla bean ice cream.
Lighter & Healthier Recipe Twists
Love the idea but want a lighter version? Try one of these clever variations.
- Low-Sugar Version: Use a sugar substitute like monk fruit or erythritol designed for baking in the cake. Choose sugar-free chocolate for the mousse and ganache.
- Dairy-Free Delight: Swap milk for almond milk, use coconut cream instead of heavy cream, and choose high-quality dairy-free chocolates. The texture will be slightly different but still delicious.
- Gluten-Free Cake Base: Use a 1-to-1 gluten-free all-purpose flour blend in place of regular flour. Make sure your baking powder and cocoa are gluten-free certified.
- Berry Bliss Layer: Add a thin layer of sugar-free raspberry jam or fresh raspberry puree between the cake and the dark chocolate mousse for a fruity, tart contrast.
- Mini Tuxedo Cakes: Bake the cake in a sheet pan. Use a round cutter to make small cake rounds. Assemble individual servings in glasses or rings. This helps with portion control!
- Protein-Packed Mousse: For the mousse, blend silken tofu or Greek yogurt with melted chocolate and a little sweetener. Whip until smooth for a higher-protein, lower-fat filling.
Common Mistakes to Avoid
Mistake 1: Using Warm Cake Layers
This is a big one! If your cake layers are even slightly warm, they will melt the delicate mousse on contact. You’ll end up with a messy, runny layer instead of a clean, firm one. The melted mousse can also make the cake soggy. Always, always let your cakes cool completely on a wire rack. You can speed this up by popping them in the fridge for an hour after they reach room temperature. Patience here is your best friend.
Mistake 2: Overwhipping or Underwhipping the Cream
The texture of your mousse depends on perfectly whipped cream. Underwhipped cream is too soft and won’t give the mousse enough structure. It might not set properly. Overwhipped cream is grainy and thick. It’s hard to fold in smoothly and can make your mousse lumpy. Watch carefully! Stop whipping when the cream holds firm, distinct peaks. If you accidentally overwhip, add a tablespoon of fresh liquid cream and whisk gently to bring it back.
Mistake 3: Rushing the Chill Time
I know it’s tempting to sneak a slice early. Don’t do it! The mousse needs that full 4+ hours in the fridge to set completely. If you cut it too soon, the layers will squish together and the mousse will be soft and messy. It won’t hold its beautiful shape. Planning is key. Make it the day before you need it. Let it chill overnight. You’ll be rewarded with a cake that slices like a dream and looks just like the pictures.
Mistake 4: Adding Hot Liquid to Chocolate Incorrectly
When making the ganache or melting chocolate into the custard, pouring hot liquid straight in can sometimes cause the chocolate to “seize.” This is when it turns into a grainy, stiff mess. To avoid this, always chop your chocolate finely so it melts evenly. Pour the hot cream over it, then let it sit for a full minute before stirring. Start stirring gently from the center. This allows the chocolate to melt gradually and smoothly, giving you that perfect silky texture every time.
Your Tuxedo Cake Questions, Answered
Can I make this cake without a dessert ring?
Absolutely! A 8-inch or 9-inch springform pan is the easiest alternative. The removable sides make it simple to get the cake out. If you only have a regular cake pan, line it with plastic wrap or parchment paper with enough overhang to use as handles. This will help you lift the whole cake out once it’s set. Just be gentle. The layers might not look quite as sleek on the sides, but it will taste just as amazing.
How far in advance can I make the Tuxedo Cake?
You can make the entire cake 1-2 days in advance. In fact, I recommend it! The flavors get better as they meld, and the mousse sets up perfectly. Keep it covered in the fridge until you’re ready to serve. You can even add the ganache topping a day ahead. If you need to make it further ahead, bake and freeze the cake layers. Make the mousse and assemble the cake the day before your event.
Can I freeze the Tuxedo Cake?
You can, but with caution. The mousse contains whipped cream, which can sometimes separate or become grainy when frozen and thawed. For best results, freeze only the baked and cooled cake layers. Wrap them tightly in plastic wrap and then foil. Thaw in the fridge overnight before assembling. I don’t recommend freezing the fully assembled cake with mousse.
My mousse seems too runny. What did I do wrong?
A runny mousse usually means one of two things. First, the custard base might not have been cooked enough to thicken properly. It should coat the back of a spoon. Second, the chocolate-custard mixture might have been too warm when you folded in the whipped cream. The warmth can melt the cream. The fix for next time is to make sure your custard is thick and cool. If it’s runny right now, just chill the whole mixture in the fridge for 20-30 minutes. Then gently stir. It should firm up.
What’s the purpose of the espresso powder?
Espresso powder is my favorite baking secret weapon! It doesn’t make the cake taste like coffee. Instead, it enhances and deepens the chocolate flavor, making it taste richer and more complex. It’s like turning up the volume on chocolate. If you don’t have it or don’t like coffee, you can simply leave it out. The cake will still be delicious.
Can I use different types of chocolate for the mousse layers?
Yes, you can definitely play around! The classic tuxedo look uses dark and white. But you could do milk chocolate and dark chocolate, or white chocolate and a flavored chocolate like raspberry. Just keep the total weight about the same (3.5 oz per layer). Make sure you use good quality chocolate meant for eating or baking, not chocolate chips, for the smoothest texture.
Do I have to use Dutch-processed cocoa?
It’s highly recommended for its rich color and flavor, but you can use natural cocoa powder in a pinch. Remember, natural cocoa is acidic. It reacts with the baking soda in the recipe. This reaction is what helps the cake rise. Dutch-processed cocoa is neutral. The recipe uses both baking soda and powder to work with either type, so you’ll be fine. The color and flavor will just be slightly lighter and more sharp with natural cocoa.
My ganache is too thin/too thick. How can I fix it?
Ganache is easy to adjust! If it’s too thin and runny, let it cool at room temperature for longer. You can also pop it in the fridge for 5-minute intervals, stirring in between, until it thickens. If it’s too thick and gloopy, it has cooled too much. Gently re-warm it in short bursts in the microwave or over a double boiler, stirring constantly. Add a tiny splash more warm cream if needed to get it pourable again.
Why did my cake sink in the middle?
A sunken cake is often due to underbaking or opening the oven door too early. The hot air escapes, and the cake structure collapses before it’s set. Make sure to bake until a tester comes out clean. Don’t open the oven door until at least the 25-minute mark. Also, check that your baking powder and soda are fresh. Old leaveners lose their power and won’t make the cake rise properly.
Is there a way to make this recipe egg-free?
For an egg-free mousse, you’ll need a different base. You can try using a gelatin-stabilized mousse. Bloom 1 teaspoon of gelatin in 2 tablespoons of cold water for the custard portion. Heat the cream and vanilla, then stir in the bloomed gelatin until dissolved. Proceed by pouring this over the chocolate. Chill until it starts to set, then fold in the whipped cream. The texture will be slightly firmer but still delightful.
Go Bake Something Amazing
There you have it – your complete guide to creating a stunning Decadent Tuxedo Delight. This triple chocolate mousse cake is more than a dessert. It’s an experience. It’s the joy of making something beautiful with your own hands. It’s the happy silence that falls over the table when everyone takes their first bite. Don’t be intimidated by the layers. Take your time, follow the steps, and trust the process. You can do this. Gather your ingredients, put on some fun music, and get ready to create a chocolate masterpiece that will have everyone asking for the recipe. Happy baking!
Decadent Tuxedo Delight
Ingredients
Equipment
Method
- Preheat the oven to 350°F (180°C). Grease two 8-inch round pans and line with parchment paper.
- Sift together the flour, sugar, cocoa powder, baking powder, baking soda, and salt in a large bowl.
- In another bowl, whisk the eggs, milk, sour cream, vegetable oil, and vanilla until smooth.
- Pour the wet mixture into the dry ingredients and stir gently until combined.
- Mix hot water with espresso powder and whisk into the batter. Divide the batter between the pans.
- Bake for about 35 minutes until a toothpick comes out clean. Cool completely in the pans on a wire rack.
- For the mousses, chop dark and white chocolate and place in separate bowls.
- Whisk egg yolks until pale. Heat 1 cup of heavy cream with vanilla and warm. Slowly pour into yolks while whisking, then return to saucepan and cook until thickened.
- Pour custard over chopped chocolate, let sit, then stir until smooth. Cool to room temperature.
- Whip remaining heavy cream to stiff peaks. Fold half into each chocolate mixture gently.
- To assemble, place one cooled cake layer on a dessert ring or springform pan.
- Spread the dark chocolate mousse over the cake layer and chill for 30 minutes.
- Pour white chocolate mousse over the set dark layer and smooth the top. Chill for another 30 minutes.
- Place the second cake layer on top and let the entire cake chill in the fridge for at least 4 hours, or overnight.
- For the ganache, heat heavy cream until simmering. Pour over chopped milk chocolate and stir until smooth. Let cool until thickened.
- Remove the cake from its mold and pour ganache over the top, letting it drip down the sides. Decorate as desired.