Homemade Lemon Cookies: Sunshine in Every Bite
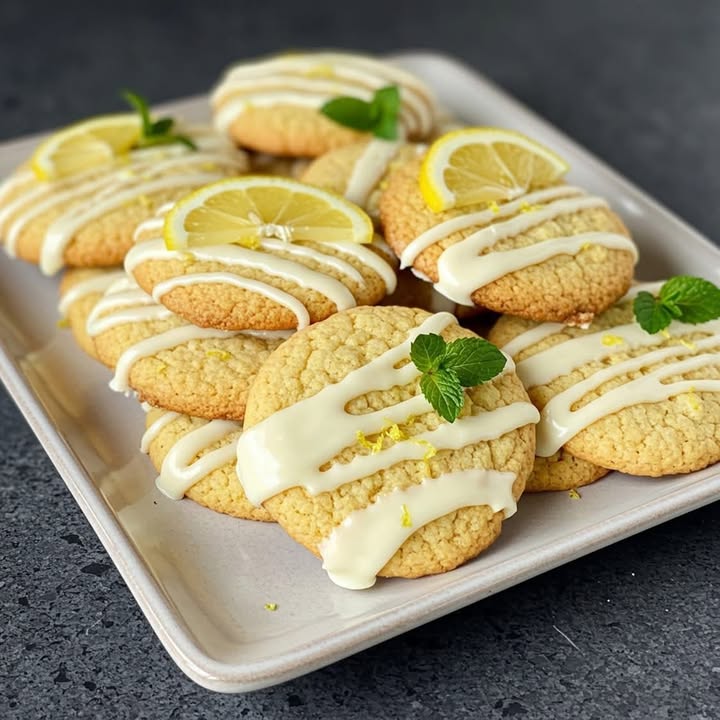
There’s something about the smell of lemon zest and butter in the kitchen that feels like a hug. It reminds me of my grandmother’s apron pockets, always carrying a secret cookie or two. These lemon cookies are my happy place. They are crispy at the edges, wonderfully soft inside, and that bright citrus touch… it truly does rejoice the soul! It’s a classic recipe you’ll make again and again, and I’m so excited to share it with you.
A Slice of Sunshine: The Story of Lemon Cookies
Lemon cookies are a beloved treat found in bakeries from Italy to the American Midwest. While not as old as some classics, their popularity soared as home bakers sought refreshing flavors beyond vanilla and chocolate. My version is a modern, simple take on a shortbread-style cookie. The magic is in the pure, homemade process. No artificial flavors needed! Just real lemon zest and good butter create a treat that’s both nostalgic and delightfully fresh. It’s a recipe that connects us to those simple, joyful moments of baking for people we love.
Why You’ll Fall in Love With These Lemon Cookies
You’ll adore these cookies because they are perfection in simplicity. The texture is the star: a slight crisp gives way to a melt-in-your-mouth center. The lemon flavor is aromatic, not sour, and it brightens up the rich, buttery dough beautifully. They are also incredibly versatile. Dress them up with a glaze or keep them plain and rustic. Best of all, the dough comes together in one bowl and is a dream to handle, making it an ideal baking project for any day of the week.
Perfect Occasions for Lemon Cookie Magic
These cookies are your new go-to recipe! They are perfect for a weekend baking session with children—let them pick out fun cookie cutter shapes. Pack them in a beautiful box for a heartfelt homemade gift that beats any store-bought present. They shine at afternoon tea, bridal or baby showers (think pastel-colored icing!), or as a lovely finish to a summer picnic. Really, any moment that calls for a little bit of sweet, citrusy joy is the right occasion.
What You’ll Need: Simple, Homemade Ingredients
Gather these simple pantry staples:
- Zest of 1 large, fresh lemon
- 300 g (about 1 1/3 cups) of unsalted butter, softened
- 150 g (about 1 1/4 cups) of confectioners’ (powdered) sugar
- 1 large egg, lightly beaten
- 1 teaspoon of pure vanilla extract
- 400 g (about 3 1/4 cups) of all-purpose flour, sifted
No Problem! Handy Substitution Ideas
Out of something? Don’t worry!
- Butter: A high-quality margarine can work, but butter gives the best flavor.
- Lemon Zest: In a pinch, 1/2 teaspoon of pure lemon extract can be used, but zest is superior for aroma.
- Vanilla: The seeds from half a vanilla bean or 1/2 teaspoon of almond extract are lovely alternatives.
- Flour: For a slightly denser texture, you can use up to half whole wheat pastry flour.
Let’s Get Baking: Your Step-by-Step Guide
Step 1: Creaming the Butter and Sugar
Place your softened butter and confectioners’ sugar in a large mixing bowl. Use a hand mixer or stand mixer on medium speed. Beat them together for about 3-4 minutes. You’ll know it’s ready when the mixture turns lighter in color, becomes fluffy, and looks almost like a pale, creamy cloud. This step is crucial for creating that tender, melt-in-your-mouth texture in your finished cookies. Don’t rush it! Pro tip: Your butter should be soft enough to leave a dent when pressed, but not greasy or melted.
Step 2: Adding the Wet Ingredients
Now, pour in your lightly beaten egg. Add the fragrant lemon zest and the teaspoon of vanilla. Mix on low speed just until everything is beautifully combined. The kitchen will start to smell amazing! You’ll see little flecks of bright yellow lemon zest dancing through the creamy mixture. At this point, scrape down the sides of the bowl with a spatula to make sure every bit is incorporated evenly.
Step 3: Bringing in the Flour
Reduce your mixer speed to its lowest setting. Begin adding the sifted flour about one cup at a time. Let each addition mix in before adding the next. Watch as the dough transforms from a wet batter to a soft, pliable mass. Once the last of the flour is in, stop mixing as soon as no dry patches remain. The dough will be soft but not sticky—perfect for rolling. Pro tip: Overmixing the flour can make cookies tough, so mix with a gentle hand.
Step 4: The Essential Chill Time
This step is non-negotiable for easy handling! Turn the soft dough out onto a piece of plastic wrap. Gently shape it into a flat disc and wrap it tightly. Pop it into the refrigerator for at least 30 minutes. Chilling firms up the butter, which prevents the cookies from spreading too much in the oven. It also gives the flavors time to mingle and deepen. You can even chill it overnight if you want to bake the next day.
Step 5: Rolling and Cutting the Shapes
Lightly flour your work surface and rolling pin. Take the chilled dough and roll it out to about 1/4-inch thickness. Now for the fun part! Dip your favorite cookie cutters in a little flour and press them firmly into the dough. Carefully lift the shapes and place them on a baking sheet lined with parchment paper. Re-roll the scraps and keep cutting until all the dough is used.
Step 6: Baking to Golden Perfection
Preheat your oven to 180°C (350°F). Arrange your cookie shapes on the prepared baking sheets, leaving a little space between them. Bake for 10-12 minutes. You’re looking for the cookies to be set, with just the faintest hint of golden color around the very bottom edges. The tops should remain pale. They firm up as they cool, so don’t over-bake for that soft center! Chef’s Tip: Bake one sheet at a time on the middle rack for even cooking.
Step 7: Cooling and the Final Touch
Let the cookies cool on the baking sheet for 5 minutes. Then, transfer them to a wire rack to cool completely. This is when you can get creative! Leave them plain and elegant, dust them with a little extra powdered sugar, or drizzle with a simple lemon glaze (just mix powdered sugar with a little lemon juice). Once decorated, they are ready to enjoy with a cup of tea or coffee!
Your Baking Timeline
- Prep Time: 20 minutes (plus 30 minutes chilling)
- Cook Time: 10-12 minutes per batch
- Resting/Cooling Time: 30 minutes minimum
- Total Time: About 1 hour 30 minutes
The Chef’s Secret for Extra Soft Cookies
The real secret is in the baking time. These cookies continue to cook on the hot baking sheet after you take them out of the oven. For that perfect soft interior, take them out just as you see the first hint of gold on the bottom edges. They might seem a tiny bit underdone, but trust the process! Letting them cool on the sheet for 5 minutes sets them perfectly, leaving the center dreamily soft.
A Fun Fact About Lemons
Did you know the zest holds the most potent lemon oil and fragrance? That’s why we use it here instead of just juice. When zesting, only take the bright yellow outer skin. The white pith underneath is bitter. A microplane grater is the perfect tool for getting fine, fluffy zest that distributes flavor evenly throughout your cookie dough.
Gear You’ll Need
- Mixing bowls
- Hand mixer or stand mixer
- Measuring cups and spoons
- Microplane or fine grater (for zest)
- Plastic wrap
- Rolling pin
- Fun-shaped cookie cutters
- Baking sheets
- Parchment paper or silicone baking mats
- Wire cooling rack
How to Keep Your Cookies Fresh
Once your cookies are completely cool, store them in an airtight container at room temperature. Place a piece of parchment paper between layers if you’ve glazed them. They will stay perfectly soft and delicious for up to 5 days.
For longer storage, you can freeze the baked cookies. Place them in a single layer in a freezer-safe container, separated by parchment. They’ll keep for up to 3 months. Thaw at room temperature when you’re ready for a treat.
You can also freeze the unbaked dough! Wrap the dough disc tightly in plastic and then foil. You can also roll, cut, and freeze the shapes on a tray before transferring to a freezer bag. Bake from frozen, adding just a minute or two to the baking time.
My Top Tips for Cookie Success
- Use fresh, unsalted butter for the best control over flavor.
- Zest the lemon first, before you juice it—it’s much easier!
- If the dough gets too soft while rolling, just pop it back in the fridge for 10 minutes.
- For uniform baking, try to cut cookies to a similar size and thickness.
Pretty Ways to Serve Your Masterpiece
- Stack them on a vintage cake stand for a tea party.
- Package them in a clear cellophane bag tied with a yellow ribbon for gifting.
- Arrange them on a platter with fresh blueberries and raspberries for a color pop.
- Drizzle half with lemon glaze and half with a simple white icing for variety.
Try These Delicious Variations
Love the base recipe? Mix it up!
- Lemon Lavender: Add 1 teaspoon of culinary dried lavender to the flour.
- Lemon Poppy Seed: Stir 2 tablespoons of poppy seeds into the dough.
- Lemon Ginger: Add 1 teaspoon of ground ginger and 1/4 cup of finely chopped crystallized ginger.
- Iced Lemon: Top cooled cookies with a glaze of powdered sugar and lemon juice.
- Lemon Thyme: Add 1 tablespoon of fresh thyme leaves for a herbal twist.
- Sandwich Cookies: Spread lemon curd or buttercream between two cookies.
Common Mistakes to Avoid
Mistake 1: Using Hard or Melted Butter
Butter that’s too cold won’t cream properly with the sugar. Melted butter will make the dough greasy and cause the cookies to spread too thin. Your butter should be at cool room temperature. A good test is to press it with your finger. It should leave a clear indentation easily but still hold its shape. This creates the ideal base for a soft, structured cookie.
Mistake 2: Skipping the Chill Time
It’s so tempting to roll and bake right away! But skipping the fridge time leads to trouble. Warm dough is sticky and hard to roll. Worse, it will spread into shapeless blobs in the oven. The 30-minute chill firms the butter back up. This gives you clean-cut shapes and cookies that hold their design. Think of it as a necessary nap for the dough.
Mistake 3: Over-measuring the Flour
Packing your measuring cup directly into the flour bag adds way too much flour. This makes the dough dry and crumbly, and the cookies will be hard instead of soft. The best method is to “fluff, spoon, and level.” Fluff the flour in its container with a spoon. Then, gently spoon it into your measuring cup. Finally, level it off with the flat edge of a knife. For perfect results, use a kitchen scale.
Mistake 4: Over-baking for “Crispiness”
If you want a soft center, you must resist the urge to bake until they are brown all over. These cookies bake quickly. They are done when the bottoms are just lightly golden and the tops look dry and set. They will continue to firm up as they cool on the hot baking sheet. Taking them out at the right moment is the single best trick for that perfect soft, aromatic texture.
Your Lemon Cookie Questions, Answered
Can I use lemon juice instead of zest?
I don’t recommend it for this specific recipe. Lemon zest contains the flavorful oils that give a powerful, bright aroma without adding extra liquid. Lemon juice would add too much moisture and can throw off the dry-to-wet ingredient balance, potentially making the dough sticky. The juice also provides a sharper sourness, while the zest gives a more rounded, perfumed lemon flavor. If you’re out of lemons, a tiny bit of pure lemon extract is a better substitute than juice.
My dough is too crumbly and won’t come together. What did I do wrong?
A crumbly dough usually means there’s too much flour in relation to the wet ingredients. This often happens if the flour was packed into the measuring cup or if you added a bit extra. Don’t worry! Try kneading the dough with your hands for a minute. The warmth from your hands can help the butter soften and bind it. If it’s still very dry, you can add a teaspoon of cold milk or cream, one at a time, until it just comes together. Be careful not to add too much liquid.
How can I make my cookies thicker and softer?
For a thicker, extra-soft cookie, make sure you chill the dough thoroughly. Also, try rolling your dough slightly thicker—aim for just over 1/4 inch instead of exactly 1/4 inch. A thicker cookie will need a minute or two longer in the oven but will retain a more substantial soft center. Finally, always use parchment paper on your baking sheet. It insulates the bottom slightly and promotes even baking without over-browning the bottoms too quickly.
Can I make the dough ahead of time?
Absolutely! This dough is perfect for making ahead. After you wrap it in plastic, you can refrigerate it for up to 3 days before rolling and baking. The flavor actually gets better! You can also freeze the wrapped dough disc for up to 3 months. When you’re ready to bake, thaw it overnight in the fridge (if frozen) and then let it sit at room temperature for about 10-15 minutes until it’s just soft enough to roll without cracking.
Why did my cookies spread too much and lose their shape?
This is almost always due to butter that was too warm or dough that wasn’t chilled enough. If the butter is soft or melted when it goes into the oven, it will cause rapid spreading. Ensure your dough is firm and cold before baking. Also, check your oven temperature with an independent thermometer. An oven that runs too cool can cause the butter to melt before the cookie sets, leading to spread. Preheating fully is key.
What’s the best way to zest a lemon without a microplane?
If you don’t have a microplane, the finest holes on a box grater will work. Be very careful of your knuckles! You can also use a vegetable peeler to remove wide strips of just the yellow zest. Then, chop those strips as finely as possible with a sharp knife. The goal is to get tiny, fluffy pieces, not big chunks. Avoid the white pith with any method, as it is bitter.
Can I decorate these cookies with royal icing?
You can, but with a tip! These soft-baked cookies have a delicate texture. Royal icing sets very hard. For the best eating experience, I suggest a simple glaze icing instead. Mix confectioners’ sugar with a little lemon juice or milk until it’s a drizzle consistency. It will set but remain slightly soft. If you really want royal icing for detailed decorating, make sure your cookies are completely cool and the icing is not applied too thickly.
Are these cookies good for shipping or gifting?
They are excellent for gifting! Their sturdy yet soft texture holds up well in a box. For shipping, choose simpler shapes without thin, delicate parts. Pack them in a single layer in a rigid container, like a tin or a sturdy cardboard box. Use crumpled parchment paper or bubble wrap to fill any empty space and prevent shifting. Avoid glazes that stay sticky if you’re shipping in warm weather; a dusting of powdered sugar is safer.
My cookies are hard the next day. How can I soften them?
To revive slightly hard cookies, place them in an airtight container with a piece of plain white bread or a damp (not wet) paper towel. Close the lid tightly. The cookies will absorb moisture from the bread or towel and soften up over a few hours. You can also warm a single cookie in the microwave for 5-10 seconds to soften it instantly. Storing them properly from the start in an airtight container is the best prevention.
Can I use this dough for slice-and-bake refrigerator cookies?
Yes, this dough adapts beautifully! Instead of rolling and cutting, shape the chilled dough into a log about 2 inches in diameter. Wrap it tightly in plastic wrap and chill until very firm (at least 2 hours). When ready to bake, simply slice the log into 1/4-inch thick rounds with a sharp knife. Place them on a baking sheet and bake as directed. It’s a quicker, no-rolling-required method with a charming, rustic look.
Time to Bake Some Happiness
There you have it—the complete guide to making the most wonderful, soft, aromatic homemade lemon cookies. This recipe is a little piece of sunshine you can create in your own kitchen. It’s about the joy of the process, from zesting that first lemon to seeing the golden edges peek out of the oven. So gather your ingredients, maybe call over a little helper or two, and create some delicious memories. I promise, one bite of these buttery, citrusy delights, and your soul will feel truly rejoiced. Happy baking!
Cheesy Cajun Chicken
Ingredients
Equipment
Method
- Cream together the softened butter and confectioners' sugar in a large mixing bowl for about 3-4 minutes until fluffy.
- Add the lightly beaten egg, lemon zest, and vanilla extract; mix on low speed until combined.
- Gradually add the sifted flour, one cup at a time, mixing until no dry patches remain.
- Turn the dough onto plastic wrap, shape into a flat disc, and refrigerate for at least 30 minutes.
- Roll out the chilled dough on a floured surface to about 1/4-inch thickness and cut with cookie cutters.
- Preheat the oven to 180°C (350°F) and arrange cut cookies on a parchment-lined baking sheet.
- Bake for 10-12 minutes until the edges are faintly golden and the tops are set but pale.
- Let cool on the baking sheet for 5 minutes before transferring to a wire rack to cool completely.