Heavenly Lemon Dream Squares: Your New Favorite Sunshine Dessert
Okay, I need to confess something. I am a sucker for anything lemony. But for years, lemon bar recipes left me a little sad. They were either too eggy, too sweet, or had a crust that crumbled into dust. Then, after what my family calls “The Great Lemon Bar Experiment of 2020,” I perfected this one. Let me tell you, the name “Heavenly Lemon Dream Squares” is not just marketing—it’s a promise. One bite of that perfect, tangy-sweet filling on that buttery shortbread crust, and you’ll be transported. It’s like catching sunshine in a pan.
A Slice of Sunshine History
While we often think of lemon bars as a classic American potluck staple, their roots are a delightful mix. They’re a descendant of the lemon curd tart, a British teatime favorite. Some food historians trace the “bar” form to the mid-20th century, when home bakers began adapting pie fillings for easy, portable slices. My version is a nod to both tradition and modern taste. It uses plenty of fresh juice and zest for that bright, authentic flavor, but the method is streamlined for any busy home cook. It’s the perfect marriage of old-world charm and new-world convenience.
Why You’ll Absolutely Adore This Recipe
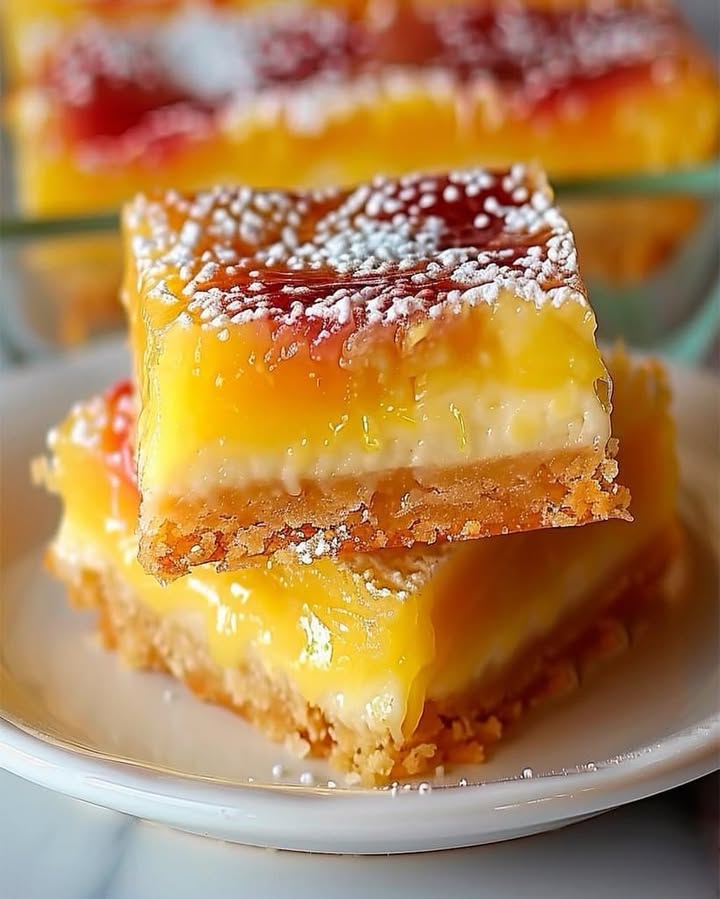
First, they’re downright gorgeous. That dusting of powdered sugar looks like a light snowfall on a sunny field. But beyond looks, this recipe works every single time. The crust is foolproof—just mix and press. The filling sets up beautifully without being rubbery. The balance of sweet and tart is just right. Plus, they make a lot (16 generous squares!), which means you can share the joy. They’re the kind of dessert that makes people ask for the recipe before they’ve even finished their first piece.
Perfect Occasions for Your Lemon Dream Squares
These squares are the ultimate social butterfly of desserts. They fit in anywhere! Bring them to a spring picnic, a summer barbecue, or a fall potluck for a bright pop of flavor. They’re elegant enough for a baby or wedding shower, yet simple enough for a weeknight treat with coffee. I always make a double batch during the holidays; their cheerful yellow color is a wonderful contrast to all the chocolate and peppermint. Honestly, any day that needs a little lift is a perfect day for these.
Gathering Your Ingredients
Freshness is key here! Let’s gather what you need for these dreamy lemon squares.
- 2 cups all-purpose flour
- 1/2 cup powdered sugar
- 1 cup (2 sticks) unsalted butter, softened
- 4 large eggs
- 1 1/2 cups granulated sugar
- 1/2 cup fresh lemon juice (about 2-3 large lemons)
- 1 tablespoon lemon zest
- 1/4 cup all-purpose flour
- 1/2 teaspoon baking powder
- Extra powdered sugar for the beautiful finish
Simple Substitution Options
Out of something? Don’t worry! Here are some easy swaps.
- Butter: Salted butter works in a pinch. Just omit any added salt in the recipe.
- Fresh Lemons: In an emergency, bottled pure lemon juice can work, but the flavor won’t be as bright. Never skip the zest if using bottled juice!
- Gluten-Free: Use a trusted 1:1 gluten-free all-purpose flour blend for both the crust and filling flour.
- A Little Less Sweet: You can reduce the granulated sugar in the filling to 1 1/4 cups for a more pucker-up tartness.
Creating Your Lemon Masterpiece
Here’s the fun part! Let’s walk through each step together. I’ll be with you all the way.
Step 1: Preheat and Prepare
Start by heating your oven to 350°F (175°C). There’s no need to grease your 13×9-inch baking pan. The buttery crust will release perfectly after baking and cooling. This is one less thing to do! Get out your mixing bowls and measuring cups. Measure your flour by spooning it into the cup and leveling it off for accuracy.
Step 2: Make the Buttery Crumb Crust
In a medium bowl, combine the 2 cups of flour and 1/2 cup of powdered sugar. Give it a whisk to blend. Now, add the softened butter. Use a pastry cutter, a fork, or even your clean fingers to work the butter into the dry ingredients. You’re looking for a crumbly mixture that holds together when you pinch it. It will smell sweet and rich. Pro tip: Your hands are the best tool here! You can quickly rub the butter into the flour for an even consistency.
Step 3: Press and Bake the Foundation
Dump the crumbly mixture into your ungreased pan. Press it down firmly and evenly across the bottom. I like to use the bottom of a measuring cup to get it really smooth and packed. This creates a solid base for our luscious filling. Slide the pan into your preheated oven and bake for 20 minutes. It will turn a lovely light golden brown and become slightly puffy. Your kitchen will start to smell amazing.
Step 4: Whisk Up the Sunny Lemon Filling
While the crust bakes, make the magic happen. In a large bowl, beat the eggs and granulated sugar together until the mixture is smooth and slightly pale. Now, whisk in the fresh lemon juice and that all-important lemon zest. The zest is where the true lemon magic lives—those fragrant oils make all the difference. In a separate small bowl, stir together the 1/4 cup flour and baking powder. Whisk this into your lemon mixture until it’s completely smooth and no lumps remain.
Step 5: Combine and Bake to Set
When the crust is golden, pull it from the oven (leave the oven on!). Carefully pour the lemon filling right over the hot crust. It will sizzle a little—that’s good! Gently tilt the pan to spread the filling evenly. Return the pan to the oven. Bake for 20-25 minutes. The filling is set when the edges are lightly browned and the center has just the faintest jiggle when you gently shake the pan.
Step 6: The Crucial Cool and Final Flourish
This is the hardest part: patience! Let the pan cool completely on a wire rack. Rushing this will lead to messy, gooey squares. The filling needs time to firm up as it cools. Once it’s fully at room temperature, generously dust the entire top with powdered sugar through a fine-mesh sieve. Chef’s tip: Always dust after cooling. If you do it while warm, the sugar will melt into a sticky glaze. Now, use a sharp knife to cut into beautiful squares. Wipe the knife clean between cuts for perfect edges.
Timing Your Dessert Perfectly
Planning is key for a stress-free bake. Here’s your timeline:
- Active Prep Time: A quick 15 minutes.
- Cooking Time: About 45 minutes total (20 for crust, 25 for filling).
- Cooling Time: At least 1-2 hours, trust me!
- Total Time (Start to Serve): Plan for about 2 hours.
- Yield: 16 generous squares.
- Kcal per Square: Approximately 320.
My Secret for the Best Lemon Flavor
Here’s my little secret: roll your lemons on the countertop with the palm of your hand before juicing. This breaks down the internal membranes and gets you so much more juice! Also, always zest your lemons before you juice them. It’s much easier. This one simple trick ensures you get every last drop of that sunny flavor into your Heavenly Lemon Dream Squares.
A Zesty Little Fact
Did you know the high acid content in lemon juice “cooks” the eggs in the filling without heat, in a process called denaturation? This is why your filling sets up so beautifully. It’s the same principle used in key lime pie! It’s not just magic—it’s delicious science.
Necessary Kitchen Equipment
You don’t need any fancy gadgets! Just gather these basics:
- 13×9-inch baking pan (metal or glass)
- Mixing bowls (one medium, one large)
- Whisk and a fork or pastry cutter
- Measuring cups and spoons
- Microplane or fine grater for zesting
- Juicer or a fork for juicing lemons
- Wire cooling rack
- Fine-mesh sieve for dusting sugar
How to Store Your Lemon Dream Squares
To keep your squares fresh and fabulous, storage is simple. Once cut, you can layer them in an airtight container with parchment paper between layers. They will keep beautifully at room temperature for 1 day, thanks to the sugar acting as a preservative.
For longer storage, the refrigerator is your friend. Place the airtight container in the fridge, and your squares will stay perfect for up to 4-5 days. The cool temperature helps the filling stay firm and the crust retain its texture.
Yes, you can freeze them! Individually wrap each cooled square in plastic wrap, then place them all in a freezer bag. They will keep for up to 3 months. Thaw overnight in the refrigerator and give them a fresh dusting of powdered sugar before serving.
Tips and Advice for Flawless Squares
- Room Temp Eggs: Using room temperature eggs helps them incorporate more smoothly into the filling for a uniform texture.
- Don’t Over-Bake the Filling: That faint jiggle in the center is your cue to take it out. It will set as it cools.
- Clean Cuts: Run your knife under hot water and wipe it dry between each cut for those picture-perfect edges.
- Brighten it Up: For an extra flavor kick, add a tiny pinch of salt to the filling. It makes the lemon taste even brighter.
Presentation Tips to Impress Your Guests
- Serve on a white or pastel platter to make the yellow filling pop.
- Garnish each square with a tiny twist of lemon peel or a single edible flower.
- For a fancier look, cut them into smaller, bite-sized triangles.
- Pair with fresh berries and a dollop of lightly sweetened whipped cream on the side.
Healthier & Fun Alternative Recipes
Love the idea but want to mix it up? Try these delightful variations!
- Lemon Coconut Dream Squares: Add 1 cup of sweetened shredded coconut to the crust mixture. The tropical twist is incredible.
- Gluten-Free Lemon Squares: Simply swap the all-purpose flour for your favorite 1:1 gluten-free baking blend. Everything else stays the same.
- Reduced-Sugar Version: Use a sugar substitute designed for baking (like erythritol) in the filling. Keep the powdered sugar in the crust or use a light dusting of the substitute on top.
- Lemon Blueberry Swirl Squares: Before adding the filling, scatter 1/2 cup of fresh blueberries over the hot crust. Then pour the filling on top—some will sink, some will stay, creating a beautiful marbled effect.
- Lime or Orange Dream Squares: Swap the lemon juice and zest for fresh lime or orange. A lime version is wonderfully tangy, while orange is sweeter and more mellow.
- Vegan Lemon Bars: Use a vegan butter stick for the crust. For the filling, use a thick plant-based yogurt or a commercial vegan lemon curd blended with a little cornstarch. Bake until set.
Common Mistakes to Avoid
Mistake 1: Using Cold Butter for the Crust
If your butter is rock hard, it won’t blend properly with the flour. You’ll end up with a dry, sandy crust that won’t press together. Always let your butter soften at room temperature for about 30-60 minutes. It should yield gently to pressure. This creates the perfect crumbly-yet-cohesive texture that bakes into a firm, buttery base.
Mistake 2: Skipping the Lemon Zest
The juice gives the tartness, but the zest holds the powerful, fragrant lemon oil. Leaving it out results in a one-dimensional, flat lemon flavor that lacks that bright, sunny punch. Always zest your lemons first, using a fine grater. Just be careful to avoid the bitter white pith underneath the yellow skin.
Mistake 3: Cutting the Squares While Warm
Impatience is the enemy of pretty lemon squares! The filling is essentially a custard that needs time to cool and set fully. If you cut into it while warm, it will ooze and smear, making a mess. The crust can also crumble. Let the pan cool completely on a wire rack. This ensures clean cuts and the perfect firm-yet-creamy texture.
Mistake 4: Over-Baking the Filling
Baking until the filling is completely firm and browned on top will give you a dry, rubbery texture. You want it just set. The filling is done when the edges are lightly golden and the center still has a slight, gentle jiggle when you shake the pan. Remember, it continues to cook from residual heat as it cools.
Frequently Asked Questions (FAQ)
Can I use bottled lemon juice instead of fresh?
You can in a pinch, but I highly recommend fresh lemons. Bottled juice often has a flat, preservative taste and lacks the vibrant oils found in fresh zest. The flavor of your Heavenly Lemon Dream Squares will be noticeably less bright and complex. If you must use bottled, try to find pure lemon juice (not from concentrate) and absolutely do not skip adding fresh zest from a separate lemon to boost the flavor.
Why is my crust soggy?
A soggy bottom usually happens for two reasons. First, the pre-baked crust might not have been fully golden before adding the filling. It needs that 20 minutes to form a seal. Second, the squares might have been cut and stored while still slightly warm, trapping steam. Always ensure your crust is visibly baked (light gold, slightly puffy) and let the whole pan cool completely on a rack before cutting or covering.
My filling didn’t set. What went wrong?
An unset filling is often due to under-baking or inaccurate measurements. Make sure you bake the full 20-25 minutes after adding the filling until the edges are set. Also, double-check your flour and baking powder measurements in the filling—that 1/4 cup flour is crucial for structure. Using eggs that are too small can also throw off the liquid ratio. Always use large eggs as specified.
How far in advance can I make these?
These squares are fantastic make-ahead desserts! You can bake them 1-2 days in advance. Store them uncut, covered, in the refrigerator. Dust with powdered sugar and cut them just before you plan to serve. This actually allows the flavors to meld beautifully. For longer storage, freeze them as directed. They thaw perfectly.
Can I double this recipe?
Doubling the recipe in a single 13×9 pan won’t work—it will be far too deep and won’t bake through properly. To make a larger batch, you must use two separate 13×9 pans. Simply prepare the recipe twice, dividing the doubled ingredients between the two pans. The baking time should remain roughly the same, but keep an eye on them.
What’s the best way to get clean cuts?
The secret is a hot, clean knife. Run a sharp chef’s knife under very hot water, then wipe it completely dry with a towel. Make your first cut. Then, repeat: rinse, dry, cut. The heat helps the blade glide through the filling without dragging and sticking, giving you those pristine, professional-looking edges every time.
Can I use a different size pan?
Yes, but the baking time and thickness will change. A 9×9-inch pan will give you thicker squares with a higher crust-to-filling ratio. You’ll need to increase the baking time for the filling by 5-10 minutes. An 11×7-inch pan is a good alternative. Avoid using a deeper dish, like a casserole dish, as it will prevent the bottom crust from crisping properly.
Are these lemon squares very sweet?
They offer a perfect sweet-tart balance. The shortbread crust is sweet, and the filling has a good amount of sugar to counteract the sharp lemon juice. The final dusting of powdered sugar adds a final touch of sweetness. If you prefer a tarter bar, you can reduce the granulated sugar in the filling by 1/4 cup as suggested in the substitutions.
Why unsalted butter?
Using unsalted butter lets you control the exact amount of salt in your dessert. Different brands of salted butter have varying salt levels. By starting with unsalted, you ensure your Heavenly Lemon Dream Squares have a pure, sweet, buttery flavor without any unexpected saltiness that could clash with the bright lemon.
How do I know when the crust is done pre-baking?
Look for visual clues! The crust will lose its raw, floury look and turn a light, even golden brown, especially around the edges. It will also puff up slightly all over. A good test is to gently press the center with a fingertip—it should feel set and firm, not soft or doughy. Twenty minutes is usually perfect.
The Final Sweet Slice
And there you have it—everything you need to make the most amazing, sunny, glorious lemon squares ever. This recipe has been tested, loved, and shared more times than I can count. It’s my go-to when I need a guaranteed crowd-pleaser or just a little edible sunshine on a cloudy day. So grab those lemons, soften that butter, and get ready to bake something truly heavenly. I can’t wait for you to taste your own Lemon Dream Squares!
Cajun Creamy Rotini
Ingredients
Equipment
Method
- Preheat your oven to 350°F (175°C) and prepare a 13x9-inch baking pan (no greasing needed).
- In a medium bowl, combine 2 cups flour and 1/2 cup powdered sugar and whisk together.
- Add softened butter to the dry mixture and blend until crumbly.
- Press the crumbly mixture into the bottom of the ungreased pan.
- Bake the crust for 20 minutes until light golden brown.
- In a large bowl, beat together the eggs and granulated sugar until smooth and pale.
- Whisk in fresh lemon juice and lemon zest.
- In a separate bowl, mix 1/4 cup flour and baking powder, then whisk into the lemon mixture until smooth.
- Pour the lemon filling over the hot crust and spread it evenly.
- Return the pan to the oven and bake for an additional 20-25 minutes until the edges are lightly browned.
- Allow to cool completely on a wire rack before dusting with powdered sugar and cutting into squares.