Divine Chocolate Chip Scones: A Little Slice of Breakfast Heaven
You know those weekend mornings where you just want something wonderful? Not just toast, but something that feels like a hug from the kitchen. That’s exactly why I created these Divine Chocolate Chip Scones. They’re the perfect mix of cozy tradition and a sweet chocolate surprise. Trust me, once you smell them baking, you’ll know you made the right choice.
From Scottish Firesides to Your Kitchen Counter
The humble scone started its life in Scotland centuries ago, cooked on a griddle. The classic version was plain, served with jam and clotted cream. My twist, adding rich chocolate chips, is a very modern, very happy invention. It combines that beloved, slightly crumbly texture with the joy of melty chocolate. I like to think of it as honoring tradition while having a little fun. My family now refuses to have a “proper” weekend brunch without them!
Why You’ll Absolutely Adore This Recipe
First, they are incredibly easy to make. No fancy skills needed! Second, the smell of them baking is pure happiness. Third, they are so versatile. Enjoy them warm from the oven, at room temperature, or even split and toasted the next day. They are tender inside, slightly crisp outside, and every bite has a pocket of melted chocolate. What’s not to love?
The Perfect Moments for Divine Chocolate Chip Scones
- Lazy Weekend Brunches: The star of the coffee table.
- Afternoon Tea Party: Elevate your spread instantly.
- Book Club or Girls’ Morning: Guaranteed to get compliments.
- Just Because Treat: Sometimes Tuesday needs chocolate.
- Special Holiday Breakfasts: A sweet start to any celebration.
Gathering Your Ingredients
Simple, quality ingredients make the best Divine Chocolate Chip Scones. Here’s what you need:
- 2 cups all-purpose flour
- 1/3 cup granulated sugar
- 1 tablespoon baking powder
- 1/2 teaspoon fine salt
- 1/2 cup (1 stick) unsalted butter, chilled and cubed
- 1/2 cup semi-sweet chocolate chips
- 2/3 cup cold milk (whole or 2%)
- 1 teaspoon pure vanilla extract
- Optional: 1 tablespoon milk & coarse sugar for topping
No Problem! Handy Substitution Ideas
- Flour: For a heartier texture, swap 1 cup of all-purpose for whole wheat flour.
- Chocolate Chips: Use dark chocolate chunks, mini chips, or even chopped-up chocolate bar.
- Milk: Buttermilk is fantastic for extra tang and tenderness. Any non-dairy milk works too.
- Butter: For a dairy-free version, use a high-quality, firm vegan butter stick.
Crafting Your Divine Chocolate Chip Scones
Alright, let’s get our hands a little dusty with flour! This part is easy and kind of therapeutic.
Step 1: Heat Things Up
First, preheat your oven to 425°F (220°C). This high heat is key for a good rise and a golden top. Line a baking sheet with parchment paper. No sticking allowed! This simple step makes clean-up a breeze and gives you perfect bottoms on your scones.
Step 2: Mix the Dry Goods
In a large bowl, whisk together the flour, sugar, baking powder, and salt. See how the white flour mixes with the sparkly sugar? You’re creating the base of your masterpiece. A good whisk here makes sure the baking powder is evenly spread for a consistent, fluffy lift in every bite. Pro tip: You can sift it for an extra-light texture, but a thorough whisk does the job.
Step 3: Work in the Butter
Now, add your cold, cubed butter to the bowl. This is the secret to flakiness! Use a pastry cutter, two forks, or just your fingertips to pinch and rub the butter into the flour. You want it to look like coarse breadcrumbs with a few bigger, pea-sized bits of butter left. Those little butter pockets will create steam in the oven, making lovely, flaky layers.
Step 4: Welcome the Chocolate
Gently stir in the chocolate chips. I like to toss them in the flour-butter mixture first. This light coating helps prevent them from all sinking to the bottom while baking. The dark chips look gorgeous against the pale, sandy mixture. Try not to eat too many straight from the bag!
Step 5: Bring It Together
Create a little well in the center of your bowl. Pour in the cold milk and vanilla extract. Using a fork or a spatula, stir gently. Stir just until a shaggy dough forms and there are no more dry patches at the bottom of the bowl. It will look messy and rough—that’s perfect! Overmixing is the enemy of tender scones.
Step 6: Shape with Care
Lightly flour your counter. Dump the dough out and give it a few gentle kneads, just 4-5 times, to bring it together. Then, pat it into a circle about 1-inch thick. Use a sharp, round cutter (about 2.5-3 inches) to cut out your scones. Press straight down—no twisting! Place them on your baking sheet. Chef’s tip: For extra-crispy edges, space them about 2 inches apart.
Step 7: The Big Bake
If you like, brush the tops with a little milk and sprinkle with coarse sugar for a sparkly, crunchy finish. Pop the tray into your hot oven. In about 12-15 minutes, magic happens. Your kitchen will smell amazing. The scones will puff up and turn a beautiful golden brown. The chocolate might peek out, glossy and melted. It’s a beautiful sight.
Timing is Everything
Let’s break down the clock for your Divine Chocolate Chip Scones:
- Prep Time: 15 minutes (it’s quick!)
- Cook Time: 12-15 minutes
- Cooling Time: 5-10 minutes (if you can wait!)
- Total Time: About 30 minutes from bowl to plate.
The #1 Secret for Ultimate Flakiness
Keep everything cold. I mean it! Cold butter, cold milk, even a cold bowl if you have space. Warm butter melts before baking and gets absorbed by the flour. This makes a dense scone. Cold butter creates steam pockets for that dreamy, layered, flaky texture we all crave. I sometimes chill the cubed butter in the freezer for 10 minutes before I start.
A Sweet Little Fact
Did you know the word “scone” might come from the Dutch word ‘schoonbrot,’ meaning ‘fine white bread,’ or the Scottish Gaelic ‘sgonn,’ a shapeless mass? I think my Divine Chocolate Chip Scones are the perfect blend of both—elegant and beautifully rustic at the same time.
What You’ll Need to Make Them
- Large mixing bowl
- Whisk or fork
- Pastry cutter or two forks
- Rubber spatula
- Measuring cups and spoons
- Rolling pin (or just your hands!)
- Round cookie/biscuit cutter (2.5-3 inch)
- Baking sheet
- Parchment paper
- Pastry brush (for milk wash)
Storing Your Baked Treasure
Freshly baked scones are best eaten the same day. Their texture is at its peak—crisp on the outside and wonderfully tender inside. If you have leftovers (lucky you!), let them cool completely first.
Store them in an airtight container at room temperature for up to 2 days. You can refresh them by popping them in a toaster oven or a warm oven for a few minutes. This brings back some of their just-baked charm.
For longer storage, freeze them! Wrap each cooled scone tightly in plastic wrap, then place them in a freezer bag. They’ll keep for up to 2 months. Thaw at room temperature and reheat for a perfect treat anytime.
My Best Tips for Scone Success
- Use a light hand when mixing. Tough dough makes tough scones.
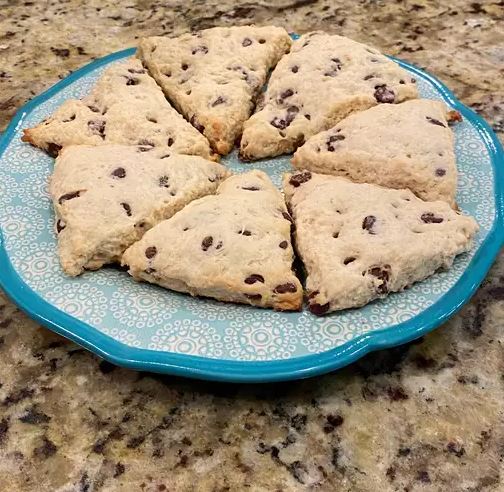
- Don’t have a cutter? Use a sharp knife to cut the dough circle into 8 triangles (like a pizza). It works perfectly!
- If the dough feels too sticky when shaping, dust your hands with a bit more flour.
- For even more chocolate, try adding 1/4 cup of cocoa powder to the dry ingredients for double-chocolate scones.
Making Them Look Pretty
- Dust with powdered sugar just before serving for a snowy, elegant look.
- Serve on a wooden board or a pretty tiered stand for a tea party vibe.
- Offer small bowls of clotted cream, lemon curd, and strawberry jam for dipping and spreading.
- Pair with fresh berries on the side for a pop of color and freshness.
Want to Mix It Up? Try These Variations!
Once you master the basic Divine Chocolate Chip Scone, the world is your oyster (or your bakery!). Here are six fun twists:
- Orange Chocolate: Add the zest of one orange to the dry ingredients. The citrus brightens the rich chocolate beautifully.
- Salted Caramel Chip: Swap the chocolate chips for salted caramel baking chips. The sweet-salty combo is irresistible.
- Coconut Dream: Fold in 1/2 cup of shredded coconut with the chocolate chips for a tropical twist.
- Mocha Chip: Add 1 tablespoon of instant espresso powder to the flour mixture. It deepens the chocolate flavor without tasting like coffee.
- Berry Chocolate Duo: Use 1/4 cup chocolate chips and 1/2 cup dried cranberries or cherries. Tart and sweet together!
- Gluten-Free Goodness: Use a 1-to-1 gluten-free all-purpose flour blend. The texture will be slightly more delicate but just as delicious.
Common Mistakes to Avoid
Even easy recipes have pitfalls. Here’s how to steer clear of the common ones with Divine Chocolate Chip Scones.
Mistake 1: Using Warm or Melted Butter
This is the biggest error! If your butter is soft or melted, it will blend completely into the flour. This gives you a cookie-like texture, not a flaky, layered scone. Your butter must be cold when it goes into the oven. Take it from the fridge, cube it, and if your kitchen is warm, chill it again for a few minutes before using.
Mistake 2: Overmixing the Dough
We mix muffins until just combined, and the same rule goes for scones. Overworking the dough develops the gluten in the flour. This makes your scones tough and chewy, not tender and crumbly. Stir the wet into the dry until you see no more dry flour. It’s okay if it looks scrappy. When you knead it, just do it 4-5 times to bring it together.
Mistake 3: Twisting the Cutter
When you cut out your scones, press the cutter straight down and lift it straight up. Do not twist it! Twisting seals the edges of the dough. This prevents the scone from rising properly in the oven. You want those sides to be clean and open so they can puff up high and proud.
Mistake 4: Baking at the Wrong Temperature
That 425°F (220°C) preheat is not a suggestion. A properly hot oven gives the scones a strong, initial burst of steam from the butter and liquid. This “oven spring” creates a great rise. If your oven is too low, they’ll spread more than they rise and can become dense. Always use an oven thermometer to be sure your temperature is accurate.
Your Divine Chocolate Chip Scone Questions, Answered
Can I make the dough ahead of time?
Absolutely! You can make the dough, shape the scones, and place them on the baking sheet. Instead of baking right away, pop the whole sheet into the freezer for about an hour until the scones are frozen solid. Then transfer them to a freezer bag. When you’re ready to bake, you can put them straight from the freezer into the preheated oven. Just add 2-3 extra minutes to the baking time. This is a fantastic trick for having fresh scones any morning!
Why are my scones dry and crumbly?
Dry scones usually mean there wasn’t enough liquid, or they were overbaked. First, make sure you measured your flour correctly. The best way is to spoon it into the measuring cup and level it off. Don’t scoop the cup directly into the flour bag, as this packs it down and adds too much. Also, set a timer! Ovens vary, so start checking at 12 minutes. They’re done when the tops are golden and a toothpick inserted near the center comes out clean (except for maybe melted chocolate).
Can I use milk chocolate chips instead of semi-sweet?
You sure can! Use whatever chocolate you love best. Milk chocolate will make a sweeter scone. Dark chocolate chunks will give a richer, less sweet flavor. White chocolate chips with some dried cranberries is another fantastic combo. The recipe is very forgiving with the type of chocolate. Just try to use good quality baking chips or chopped bars, as they melt better than cheaper brands.
What’s the difference between a scone and an American biscuit?
They are close cousins! Both use a similar mixing method with cold fat. The main differences are that scones are sweeter, often have egg or more sugar, and include mix-ins like fruit or chocolate. Biscuits are usually savory, relying on buttermilk and no sugar for their flavor. Scones also often have a glaze or wash on top. In texture, a good scone is a bit more dense and crumbly, while a biscuit aims for super flaky, airy layers.
My scones didn’t rise much. What happened?
Flat scones can be disappointing. The usual culprits are old baking powder, overmixed dough, or an oven that wasn’t hot enough. Baking powder loses its power over time. Check the date on yours! Overmixing, as we talked about, makes them tough and prevents a good rise. And finally, make sure your oven is fully preheated. Put the scones in the oven as soon as you’ve shaped them, so the baking powder gets to work immediately.
Is it okay to use frozen butter?
Yes, and it’s a great trick for hot kitchens! Grate your frozen butter on the large holes of a box grater. Toss the fluffy butter shreds into the flour mixture. This distributes the cold butter incredibly evenly and quickly, which is perfect for flakiness. Just work fast so the butter doesn’t thaw from the heat of your hands.
Can I make these dairy-free?
Easily! Use a firm, stick-style vegan butter (chilled and cubed) and your favorite non-dairy milk, like oat, almond, or soy milk. Make sure your chocolate chips are dairy-free too (many semi-sweet chips are, but always check the label). The method stays exactly the same, and you’ll get delicious vegan scones.
How do I get a nice, crisp top on my scones?
The sugar wash is your friend! Before baking, brush the tops very lightly with milk, cream, or even a beaten egg. Then, sprinkle generously with coarse sugar like turbinado or sanding sugar. This creates a delightful sweet, shimmery, and slightly crunchy crust that contrasts wonderfully with the soft interior. It also gives them a professional, bakery-style look.
What should I serve with my chocolate chip scones?
They are amazing all on their own, still slightly warm. But if you want to go all out, offer a few toppings. Clotted cream and jam is the classic English way. Lemon curd is a tangy alternative. For a simple option, a pat of good salted butter melting into the warm scone is heavenly. A hot cup of coffee, black tea, or even a cold glass of milk completes the picture perfectly.
Can I add nuts or other flavors?
Please do! This is a wonderful base recipe. Try adding 1/4 cup of chopped toasted pecans or walnuts with the chocolate chips. A teaspoon of cinnamon or pumpkin pie spice in the dry ingredients makes a fantastic fall version. Get creative with what you have in your pantry—just keep the total volume of add-ins to about 3/4 cup so the dough can still hold together.
Go Forth and Bake!
There you have it—everything you need to make the most delicious Divine Chocolate Chip Scones. They are simpler than you think and more rewarding than you can imagine. Baking them fills your home with warmth and your heart with joy. So preheat that oven, get your butter cold, and treat yourself to something truly special. Happy baking!
Cheesy Garlic Chicken
Ingredients
Equipment
Method
- Preheat your oven to 425°F (220°C) and line a baking sheet with parchment paper.
- In a large bowl, whisk together flour, sugar, baking powder, and salt.
- Add the cold, cubed butter and mix until it resembles coarse breadcrumbs.
- Stir in the chocolate chips to coat them lightly with flour.
- Make a well in the center, pour in cold milk and vanilla, and stir until a shaggy dough forms.
- Lightly flour your counter, dump the dough, and knead gently 4-5 times to bring it together.
- Pat the dough into a circle about 1-inch thick and cut out scones using a round cutter.
- Place scones on the baking sheet, brush with milk, and sprinkle with coarse sugar if desired.
- Bake for 12-15 minutes until golden brown.