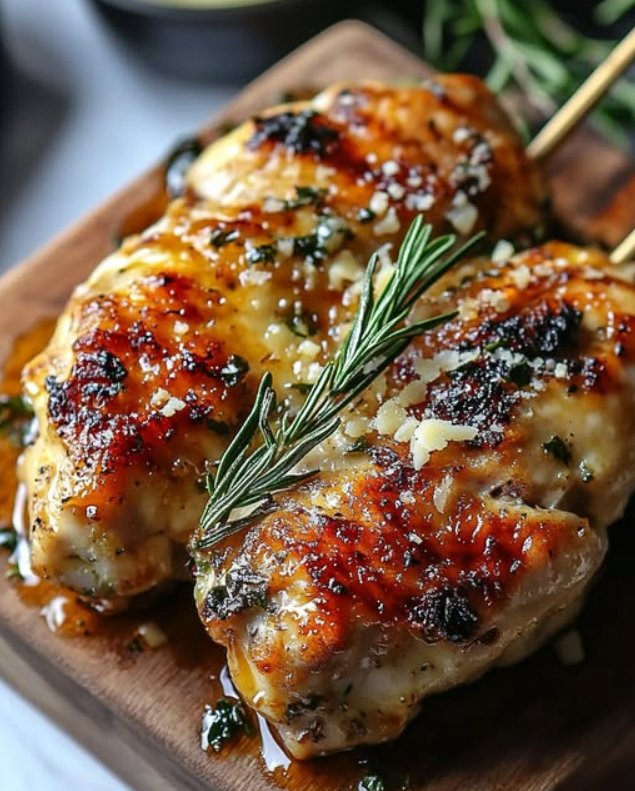
Why This Crispy Garlic Chicken Recipe is a Game-Changer
Let me tell you a little story. One evening, I was scrambling to put dinner on the table for my family. Everyone was hungry, and I needed something quick, easy, and delicious. That’s when I stumbled upon this Crispy Garlic Chicken with Parmesan recipe. It was love at first bite! The crispy golden crust paired with the savory garlic aroma turned an ordinary chicken dish into something extraordinary. Now, it’s a staple in my kitchen, and I’m thrilled to share it with you.
A Little Background on Crispy Garlic Chicken
This dish is inspired by classic Italian flavors but with a modern twist. Garlic and parmesan are a match made in heaven, and the addition of panko breadcrumbs gives it that irresistible crunch. While traditional recipes might use regular breadcrumbs, panko elevates the texture to a whole new level. I remember making this for the first time and watching my kids devour it—proof that even picky eaters can’t resist this dish!
Why You’ll Love This Recipe
First off, it’s ridiculously easy to make. If you can melt butter and mix ingredients, you’re halfway there. The flavors are bold yet comforting, and the crispy exterior contrasts beautifully with the juicy chicken inside. Plus, it’s versatile. Whether you’re cooking for your family or hosting a dinner party, this Crispy Garlic Chicken will impress everyone.
Perfect Occasions for Crispy Garlic Chicken
This dish is perfect for busy weeknights when you need something quick but satisfying. It’s also a crowd-pleaser for casual get-togethers or potlucks. Serve it alongside a fresh salad or roasted veggies, and you’ve got a meal that feels fancy without the fuss. Trust me, your guests will think you spent hours in the kitchen!
Ingredients for Crispy Garlic Chicken
- 4 boneless, skinless chicken breasts
- 1/2 cup melted butter
- 4 cloves of garlic, minced
- 1 cup panko breadcrumbs
- 1 cup grated parmesan cheese
- 2 tablespoons fresh parsley, chopped
- Salt and pepper to taste
Substitution Options
- Chicken: Swap chicken breasts for chicken thighs if you prefer darker meat.
- Panko: Use regular breadcrumbs if panko isn’t available, though the texture won’t be as crispy.
- Parmesan: Substitute with grated pecorino romano for a sharper flavor.
- Fresh Parsley: Dried parsley works in a pinch, but fresh herbs always taste better.
Step 1: Preheat and Prep
Start by preheating your oven to 375°F (190°C). This ensures your oven is nice and hot when the chicken goes in, which is key for achieving that golden crust. While the oven heats up, grab your chicken breasts and pat them dry with paper towels. Removing excess moisture helps the coating stick better. Pro tip: Cut the chicken into even pieces so they cook uniformly.
Step 2: Mix the Garlic Butter
In a small bowl, combine the melted butter and minced garlic. The aroma alone will have your mouth watering! This garlic butter not only adds incredible flavor but also helps the breadcrumb mixture adhere to the chicken. Stir it well, ensuring the garlic is evenly distributed throughout the butter. Chef’s tip: Let the garlic sit in the butter for a few minutes to infuse more flavor.
Step 3: Prepare the Coating
In another bowl, mix the panko breadcrumbs, grated parmesan, chopped parsley, salt, and pepper. This is where the magic happens! The combination of crispy panko and nutty parmesan creates a coating that’s both crunchy and flavorful. Give it a good toss to ensure everything is evenly mixed. Pro tip: Taste a tiny bit of the mixture to check the seasoning—you want it to be perfectly balanced.
Step 4: Coat the Chicken
Now comes the fun part! Dip each chicken breast into the garlic butter, making sure it’s fully coated. Then, press it firmly into the breadcrumb mixture, ensuring an even layer of coating on all sides. The butter acts like glue, helping the crumbs stick beautifully. Place the coated chicken on a baking sheet lined with parchment paper. This prevents sticking and makes cleanup a breeze.
Step 5: Bake to Perfection
Pop the baking sheet into the preheated oven and bake for 25-30 minutes. Keep an eye on it during the last few minutes to avoid overcooking. You’ll know it’s done when the chicken is golden brown and the internal temperature reaches 165°F (74°C). The aroma filling your kitchen will be absolutely irresistible!
Timing Breakdown
- Prep Time: 15 minutes
- Cooking Time: 30 minutes
- Total Time: 45 minutes
Chef’s Secret
For an extra layer of flavor, sprinkle a pinch of red pepper flakes into the breadcrumb mixture. It adds a subtle kick that pairs beautifully with the garlic and parmesan. Just don’t tell anyone—it’ll be our little secret!
Fun Fact About Garlic
Did you know garlic has been used for thousands of years not just for cooking but also for its medicinal properties? Ancient Egyptians even swore by its healing powers. So, while you’re enjoying this Crispy Garlic Chicken, you’re also getting a dose of history!
Necessary Equipment
- Baking sheet
- Parchment paper
- Two mixing bowls
- Meat thermometer
Storage Tips
If you have leftovers (which is rare in my house!), store them in an airtight container in the fridge for up to 3 days. Reheat in the oven at 350°F (175°C) to maintain the crispiness. Avoid microwaving, as it can make the coating soggy. For longer storage, freeze the cooked chicken in a freezer-safe bag for up to 3 months. Thaw overnight in the fridge before reheating.
Tips and Advice
To make the dish even tastier, use freshly grated parmesan instead of pre-grated. Freshly grated cheese melts better and has a richer flavor. Also, don’t skip the parchment paper—it really does make a difference in preventing sticking and simplifying cleanup.
Presentation Ideas
- Garnish with extra parsley for a pop of color.
- Serve on a platter with lemon wedges for a bright touch.
- Pair with a side of roasted vegetables or a crisp salad for a complete meal.
Healthier Alternatives
Here are six ways to make this recipe healthier:
- Air Fryer Version: Cook the chicken in an air fryer at 375°F for 12-15 minutes for a lower-fat option.
- Whole Wheat Panko: Swap regular panko for whole wheat to add fiber.
- Olive Oil Spray: Use olive oil spray instead of melted butter for a lighter coating.
- Low-Sodium Parmesan: Opt for reduced-sodium parmesan to cut back on salt.
- Herb Boost: Add more fresh herbs like thyme or rosemary for extra flavor without calories.
- Veggie Side: Serve with steamed broccoli or zucchini for a nutrient-packed meal.
Mistake 1: Skipping the Pat Dry Step
One common mistake is not drying the chicken before coating it. Wet chicken won’t hold onto the breadcrumb mixture properly, leading to a soggy crust. Always pat the chicken dry with paper towels before starting. Pro tip: Let the chicken sit uncovered in the fridge for 15 minutes to dry out further.
Mistake 2: Overcrowding the Baking Sheet
Placing the chicken too close together on the baking sheet can cause uneven cooking. Make sure there’s enough space between each piece for proper airflow. This ensures the coating gets crispy all around.
Mistake 3: Underseasoning the Coating
Don’t be shy with the salt and pepper! The coating needs to be well-seasoned to complement the mild flavor of the chicken. Taste the breadcrumb mixture before coating the chicken to ensure it’s flavorful enough.
FAQs
Can I use chicken tenders instead of breasts?
Absolutely! Chicken tenders work great and cook faster, usually in about 15-20 minutes. Just adjust the cooking time accordingly.
What sides go well with this dish?
Roasted vegetables, mashed potatoes, or a simple green salad pair beautifully with this Crispy Garlic Chicken.
Can I make this recipe gluten-free?
Yes, substitute the panko breadcrumbs with gluten-free breadcrumbs and use gluten-free parmesan cheese.
How do I know when the chicken is fully cooked?
Use a meat thermometer to check the internal temperature. It should read 165°F (74°C) for safe consumption.
Can I prepare this ahead of time?
You can coat the chicken and refrigerate it for up to 2 hours before baking. This saves time and allows the flavors to meld.
Is it okay to use dried parsley?
While fresh parsley is ideal, dried parsley works in a pinch. Use about half the amount since dried herbs are more concentrated.
Can I double the recipe?
Definitely! Just make sure you have enough space on your baking sheets to avoid overcrowding.
What if I don’t have panko breadcrumbs?
Regular breadcrumbs will work, but the texture won’t be as light and crispy. Crushed cornflakes are another fun alternative.
Can I add other spices to the coating?
Of course! Paprika, oregano, or onion powder would all complement the flavors nicely.
How do I reheat leftovers without losing crispiness?
Reheat in the oven at 350°F (175°C) for 10-15 minutes. Avoid the microwave, as it can make the coating soggy.
Final Thoughts
This Crispy Garlic Chicken with Parmesan is a dish that keeps on giving. It’s easy to make, packed with flavor, and versatile enough for any occasion. Whether you’re cooking for one or feeding a crowd, this recipe is sure to become a favorite. So grab your ingredients, roll up your sleeves, and get ready to wow everyone at the dinner table. Happy cooking!
Crispy Garlic Chicken
Ingredients
Equipment
Method
- Preheat your oven to 375°F (190°C) and pat the chicken breasts dry with paper towels.
- In a small bowl, combine melted butter and minced garlic, stirring well.
- In another bowl, mix panko breadcrumbs, grated parmesan, chopped parsley, salt, and pepper thoroughly.
- Dip each chicken breast into the garlic butter, then press it into the breadcrumb mixture, ensuring coating on all sides.
- Place the coated chicken on a parchment-lined baking sheet and bake for 25-30 minutes until golden brown and cooked through.