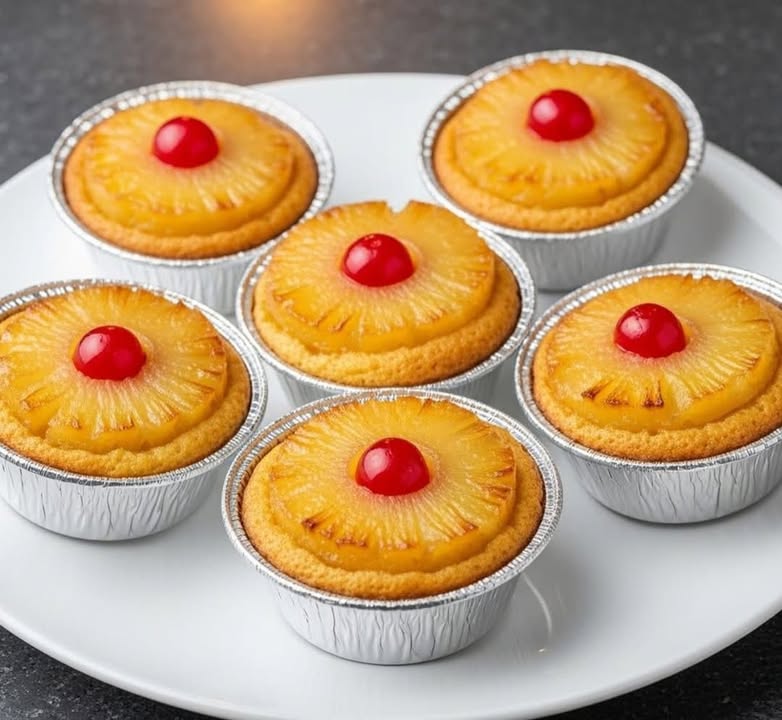
Tropical Sunshine on a Plate: Mini Pineapple Upside-Down Cakes
Have you ever wanted a dessert that feels like a mini vacation? I was searching for exactly that—a treat to brighten a rainy Tuesday—when I stumbled upon the magic of mini pineapple upside-down cakes. Picture this: a golden, buttery cake base, a glossy caramelized topping, and a sweet, sunny ring of pineapple hugging a cheerful cherry in the center. It’s like a burst of tropical sunshine right in your kitchen. These little gems are not just pretty; they are a flavor explosion in every single bite. Perfect for sharing at a party or claiming one all for yourself with a cup of tea, they never fail to bring smiles to the table. I’ve tweaked this recipe over countless family gatherings, and I’m thrilled to share my favorite version with you.
A Slice of Sweet History
The classic pineapple upside-down cake is a beautiful piece of American baking history. It became wildly popular in the early 1900s after canned pineapple became widely available. This recipe puts a fun, personal twist on that tradition by making them mini. Instead of one large cake, we get adorable individual servings. It’s a perfect mix of old-fashioned comfort and modern convenience. I love that each person gets their own perfect little cake, complete with its own pineapple “flower” on top. It feels special, and let’s be honest, it means no fighting over who gets the biggest slice!
Why You’ll Fall in Love With This Recipe
First, the taste is pure joy. The brown sugar and butter create a rich, almost toffee-like sauce that soaks into the fruit and cake. Second, it’s surprisingly simple. You don’t need any fancy skills, just a good mixing bowl and a bit of love. Finally, they look stunning with minimal effort. When you flip them out of the pan and see that glistening, jewel-like top, you’ll feel like a professional pastry chef. It’s the ultimate “wow” factor dessert that secretly required very little stress.
Perfect Occasions to Whip These Up
These mini cakes are incredibly versatile. I love them for summer picnics and backyard barbecues, where their tropical vibe fits right in. They’re a hit at potlucks because they are already perfectly portioned. I also bake them for holiday parties, using the red cherries for a festive Christmas look. Honestly, any day that needs a little brightening is the perfect occasion for these sunny treats.
Gathering Your Ingredients
Here’s what you’ll need to create this tropical bliss. I recommend having everything at room temperature for easier mixing.
- For the Luscious Base:
- 6-8 pineapple slices in syrup (depending on your mold size)
- Maraschino cherries (they add that classic pop of color!)
- 4 tablespoons (60g) of melted butter
- 1/2 cup (100g) of packed light or dark brown sugar
- For the Soft Cake:
- 1 cup (120g) of all-purpose flour
- 1 teaspoon of baking powder
- 1 pinch of salt
- 1/2 cup (100g) of white granulated sugar
- 1/2 cup (110g) of softened butter
- 2 large eggs
- 1/4 cup of pineapple juice from the can (or milk)
- 1 teaspoon of pure vanilla essence
Smart Swaps: Substitution Options
No brown sugar? Use white sugar with a teaspoon of molasses mixed in. Out of pineapple juice? Milk or even orange juice works beautifully. For a dairy-free version, use your favorite plant-based butter and milk. You can even skip the cherry in the center if you don’t have any, though it does make them extra cute.
Let’s Get Baking: Your Step-by-Step Guide
Step 1: Create the Caramel Glaze
Start by preheating your oven to 180°C (350°F). Grab a small bowl and mix that melted butter and brown sugar together. It will form a thick, fragrant paste that smells like caramel dreams. Use a spoon to place a heaping tablespoon of this mixture into the bottom of each well in your muffin tin. Spread it evenly to coat the base. This magical layer is what will transform into that sticky, sweet topping after baking.
Step 2: Arrange the Fruity Topping
Now for the pretty part! Take your pineapple slices. If they are too big for your molds, simply use kitchen scissors to trim them down to fit snugly. Place one slice right on top of the butter-sugar mixture in each mold. Now, pop a bright red maraschino cherry right in the center of each pineapple ring. It looks like a little jewel and promises a burst of flavor in every cake.
Step 3: Whip Up the Cake Batter
In a large mixing bowl, beat the softened butter and white sugar together until it’s light, fluffy, and pale yellow. This takes a few minutes but is key for a soft cake. Add the eggs, one at a time, beating well after each. Stir in the vanilla essence. In a separate bowl, whisk together the flour, baking powder, and salt. Gently add this dry mixture to the wet ingredients, alternating with the pineapple juice. Mix until just combined—a few lumps are okay! Overmixing makes a tough cake.
Pro tip: If your butter isn’t quite soft, cut it into small cubes. It will cream with the sugar much faster.
Step 4: Fill the Molds and Bake
Carefully spoon the cake batter over your pineapple and cherry arrangements. Fill each mold only about 3/4 full to leave room for the cake to rise. Gently smooth the tops with the back of your spoon. Slide the tin into your preheated oven and bake for 20-25 minutes. You’ll know they’re done when the tops are golden and a toothpick inserted into the cake part comes out clean. Your kitchen will smell absolutely heavenly.
Step 5: The Grand Reveal (The Unmolding!)
This is the most exciting part! Take the cakes out of the oven and let them rest in the pan for exactly 5 minutes—no more, no less. This allows the hot sugar topping to set just enough. Place a wire cooling rack or a large baking sheet over the top of the muffin tin. With confidence (and oven mitts!), flip the whole thing over. Give the tin a gentle tap, and lift it away. Behold your beautiful, glistening mini masterpieces! If any pineapple tries to stick, just nudge it back into place.
Chef’s tip: Run a thin knife around the edge of each cake before flipping for a guaranteed clean release.
Your Baking Timeline
- Prep Time: 20 minutes
- Cooking Time: 20-25 minutes
- Resting Time: 5 minutes (in pan)
- Total Time: About 50 minutes
A Secret From My Kitchen
For an even more intense pineapple flavor, I sometimes sprinkle a little extra brown sugar directly onto the pineapple slice before adding the batter. It creates a deeper, almost candied layer that is simply irresistible.
A Fun Pineapple Fact
Did you know it takes nearly three years for a pineapple plant to produce just one fruit? That makes each sweet, juicy ring a little piece of patience and sunshine. It adds a whole new layer of appreciation when you’re placing those golden rings in your pan!
Necessary Equipment
- A standard 6 or 12-cup muffin tin
- Mixing bowls (large and medium)
- Electric hand mixer or a sturdy whisk
- Measuring cups and spoons
- Spatula and spoons
- Wire cooling rack
Storing Your Tropical Treats
These cakes are truly best served warm, the same day they are made. The topping is at its shiniest and the cake at its most tender. If you have leftovers, let them cool completely first.
Store them in an airtight container at room temperature for up to 2 days. You can also keep them in the fridge for up to 4 days. The chilled cake will have a firmer texture, but the flavors will still be delightful.
To reheat, place a cake on a microwave-safe plate and warm for 15-20 seconds. This will soften the cake and make the pineapple topping wonderfully gooey again, almost as good as fresh from the oven.
Tips and Advice for Success
Always use room temperature eggs and butter for a smoother, fluffier batter. Don’t skip the “resting for 5 minutes” step after baking—it’s crucial for a clean unmolding. If you’re worried about sticking, you can very lightly grease the sides of the muffin cups above the pineapple layer. And finally, serve them warm with a scoop of vanilla ice cream. The contrast of hot and cold, cake and cream, is pure magic.
Presentation Ideas to Impress
- Place each warm cake on a small, colorful plate with a dollop of whipped cream and a sprinkle of toasted coconut.
- For a party, line them up on a beautiful cake stand and garnish with fresh mint leaves.
- Drizzle a little caramel sauce around the plate for a restaurant-worthy look.
- Serve them right in the muffin tin for a casual, rustic family-style dessert.
Healthier & Fun Variations
Love the idea but want to mix it up? Here are six tasty twists:
- Whole Wheat Twist: Swap half the all-purpose flour for whole wheat flour. It adds a subtle nutty flavor and extra fiber.
- Apple-Cinnamon Delight: Use thinly sliced apples instead of pineapple and add a teaspoon of cinnamon to the cake batter. Perfect for fall!
- Peach Paradise: In summer, use fresh or canned peach halves with an almond in the center instead of the cherry.
- Chocolate Lover’s Dream: Add 1/4 cup of cocoa powder to the dry ingredients for a chocolate cake base. The combo with pineapple is surprisingly good.
- Gluten-Free Goodness: Use a 1-to-1 gluten-free flour blend in place of the regular flour. The result is just as moist and delicious.
- Individual Skillet Cake: Make one large cake in an 8 or 9-inch oven-safe skillet instead of mini ones. It makes for a stunning centerpiece.
Common Mistakes to Avoid
Mistake 1: Using Cold Ingredients
Using butter and eggs straight from the fridge is a common pitfall. Cold butter won’t cream properly with the sugar, leading to a dense cake. Cold eggs can cause the batter to curdle. Always plan ahead and let your dairy and eggs sit out for about 30 minutes before you start baking. Your batter will be smoother, fluffier, and will bake up much more tender.
Mistake 2: Overmixing the Batter
Once you add the flour, it’s time to be gentle. Overmixing develops the gluten in the flour, which makes the cake tough and chewy instead of soft and crumbly. Mix the dry and wet ingredients together just until you no longer see streaks of flour. A few small lumps are perfectly fine and will disappear during baking.
Mistake 3: Skipping the Resting Time Before Unmolding
The urge to flip those cakes immediately is strong, I know! But if you do, the hot, syrupy topping will just run everywhere, and the fruit might stick to the pan. Letting the cakes rest for exactly 5 minutes allows the sugar to cool slightly and set just enough. This creates the perfect layer that holds everything together when you flip it over.
Mistake 4: Overfilling the Molds
It’s easy to get excited and pour in too much batter. Remember, cake batter rises! If you fill the molds to the brim, the batter will overflow in the oven, making a mess and possibly causing the cakes to sink. Filling them about 3/4 full is the golden rule. This leaves the perfect amount of space for a nice dome on top.
Frequently Asked Questions
Can I use fresh pineapple instead of canned?
You absolutely can! Fresh pineapple will give a brighter, tangier flavor. The important thing is to cook it a bit first because fresh pineapple contains an enzyme that can break down the cake and prevent it from setting properly. Lightly sauté the fresh rings in a little of the butter-sugar mixture until softened before placing them in the molds.
My cakes stuck to the pan. What did I do wrong?
This usually happens for one of two reasons. First, you might not have used enough of the butter-sugar mixture in the bottom. This layer acts as your non-stick release. Second, you might have waited too long to unmold them. After 5 minutes, that sugar starts to harden and can glue the cakes in place. Be brave and flip them at the 5-minute mark!
Can I make these ahead of time?
You can prepare the batter up to a day in advance and keep it covered in the fridge. Give it a quick stir before using. You can also assemble the pineapple and sugar base in the molds ahead of time. However, for the best texture and that perfect caramelized top, I recommend baking them the day you plan to serve them.
Is it necessary to use maraschino cherries?
They are traditional and add a lovely pop of color and sweetness, but they are not mandatory. You can leave the center empty, use a fresh raspberry or blueberry, or even a small piece of apricot. Get creative with what you have!
Can I freeze mini pineapple upside-down cakes?
Yes, you can freeze them once they are completely cooled. Wrap each cake individually in plastic wrap and then place them in a freezer bag. They will keep for up to 2 months. Thaw at room temperature and warm slightly in the microwave or oven before serving.
Why is my cake dry?
A dry cake often results from overbaking or overmixing the batter. Always check for doneness a minute or two before the timer goes off. The toothpick test should come out with a few moist crumbs attached, not completely dry. Also, be sure to measure your flour correctly—scooping it directly from the bag packs it down, leading to too much flour. Spoon it into the measuring cup and level it off.
What can I use if I don’t have a muffin tin?
Ramekins or small oven-proof teacups work wonderfully. Just be sure to adjust the baking time slightly as the thickness of the material can affect how they cook. You can also use a regular cake pan to make one large cake. An 8 or 9-inch round pan is perfect, and you’ll need to increase the baking time to about 30-35 minutes.
Can I reduce the sugar in this recipe?
You can slightly reduce the sugar in the cake batter, but I wouldn’t recommend reducing the brown sugar in the base. That sugar is essential for creating the caramel sauce that defines this dessert. Reducing it there might leave you with a dry, sticky layer instead of a saucy one.
What’s the best way to clean the muffin tin afterward?
Soak it! After unmolding, fill the dirty pan with hot, soapy water and let it sit for 15-20 minutes. The caramelized sugar will dissolve, making it much easier to scrub clean without damaging your pan.
Can I add other spices to the cake?
Absolutely! A quarter teaspoon of ground ginger or a pinch of nutmeg added to the dry ingredients complements the pineapple beautifully. It adds a lovely warm spice note that takes the flavor to another level.
A Sweet Final Thought
There you have it—my foolproof path to creating mini moments of tropical happiness. These Mini Pineapple Upside-Down Cakes are more than just a dessert; they’re a little edible joy. They prove that the simplest ingredients, combined with a bit of care, can create something truly spectacular. So preheat that oven, gather your sunny pineapple rings, and get ready to flip a panful of smiles. Don’t forget the ice cream! I promise, one bite of that warm cake with the cold cream melting into the sweet caramelized fruit, and you’ll have conquered hearts. Happy baking!
Lemon Carlota Delight
Ingredients
Equipment
Method
- Preheat the oven to 180°C (350°F).
- Mix melted butter and brown sugar in a bowl until combined.
- Place a tablespoon of the butter-sugar mixture in the bottom of each muffin mold.
- Arrange a pineapple slice over the topping in each mold and add a maraschino cherry in the center.
- In a mixing bowl, beat softened butter and white sugar until light and fluffy.
- Add eggs, one at a time, beating well after each addition; stir in vanilla essence.
- In a separate bowl, whisk flour, baking powder, and salt; add this to the wet mixture, alternating with pineapple juice, until just combined.
- Spoon the batter over the pineapple slices in the molds, filling each about 3/4 full.
- Bake in the oven for 20-25 minutes until golden and a toothpick inserted comes out clean.
- Let the cakes rest in the pan for 5 minutes, then flip onto a wire cooling rack to unmold.