Why Sourdough Starter Bread is a Game Changer in Your Kitchen
There’s something magical about the smell of fresh bread wafting through your home. But when it comes to sourdough starter bread, it’s not just bread—it’s an experience. I remember the first time I baked this beauty. My kitchen smelled like a bakery, and my family couldn’t stop raving about its tangy flavor and chewy texture. It felt like I had unlocked a secret that bakers have kept for centuries. If you’ve ever wondered how to make sourdough bread starter or if quick sourdough bread recipe exists, you’re in the right place.
A Little History About Sourdough Starter Bread
Sourdough isn’t just trendy; it’s timeless. The origins of sourdough date back thousands of years, with ancient Egyptians likely being the first to discover fermentation. Fast forward to today, and sourdough starter bread flour remains a staple in artisan bakeries worldwide. I once read that during the Gold Rush, miners carried their sourdough starters in pouches around their necks to keep them alive. Crazy, right? While we don’t need to go to those lengths anymore, there’s still something romantic about nurturing your own sourdough starter. It’s like having a little pet that rewards you with delicious bread.
Why You’ll Love This Recipe
This sourdough starter bread is special because it’s packed with flavor and health benefits. Unlike store-bought bread, sourdough is easier to digest thanks to the natural fermentation process. Plus, it doesn’t need commercial yeast—perfect for anyone looking for a sourdough bread recipe no yeast involved. The crust is golden and crackly, while the inside is soft and airy. And let’s not forget the aroma—earthy, tangy, and warm all at once. Whether you’re a seasoned baker or a newbie, this classic sourdough bread recipe will make you feel like a pro.
Perfect Occasions to Bake This Bread
Sourdough starter bread is versatile. Serve it as a centerpiece at brunch, slice it for sandwiches at lunch, or pair it with soups and stews for dinner. I once brought a loaf to a friend’s housewarming party, and it was gone before dessert. Trust me, this bread never disappoints, whether it’s a casual family meal or a fancy gathering.
Ingredients
- 1 cup active sourdough starter (learn how to make sourdough starter below)
- 3 ½ cups bread flour (plus extra for dusting)
- 1 ¼ cups lukewarm water
- 1 ½ teaspoons salt
Substitution Options
- Flour: Use whole wheat flour or spelt flour for a nuttier flavor.
- Water: Filtered water works best to avoid chlorine affecting the starter.
- Salt: Sea salt or kosher salt can be swapped in for table salt.
Preparation Section
Step 1: Activate Your Sourdough Starter
If you’re wondering how to make sourdough starter, it’s simple. Mix equal parts flour and water in a jar and let it sit at room temperature for 5-7 days, feeding it daily. Once bubbly and fragrant, it’s ready. For this recipe, ensure your starter is active by feeding it 4-6 hours before baking. Pro tip: A float test helps determine readiness—drop a spoonful into water; if it floats, you’re good to go!
Step 2: Mix the Dough
In a large bowl, combine your active starter, water, and flour. Stir until a shaggy dough forms. Add the salt and mix again. At this stage, the dough will look rough and sticky, but don’t worry—that’s normal. Cover the bowl with a damp towel and let it rest for 30 minutes. This resting period, called autolyse, allows the flour to absorb moisture fully.
Step 3: Knead and Fold
Time to get hands-on! Using wet hands, stretch and fold the dough every 30 minutes for 2 hours. Each fold strengthens the gluten, giving your bread structure. After folding, cover the dough and let it rise at room temperature for 4-6 hours, or until doubled in size. The dough should feel pillowy and elastic. Chef’s tip: Keep drafts away from your dough to maintain consistent rising conditions.
Step 4: Shape the Loaf
Gently shape the dough into a round or oval loaf. Place it seam-side up in a floured proofing basket or bowl lined with a clean kitchen towel. Cover and refrigerate overnight. Cold fermentation slows down the process, enhancing the bread’s flavor. Imagine waking up to the promise of fresh sourdough—it’s worth the wait!
Step 5: Bake to Perfection
Preheat your oven to 450°F (230°C) and place a Dutch oven inside to heat up. Carefully transfer the dough onto parchment paper, score the top with a sharp knife, and bake covered for 20 minutes. Remove the lid and bake for another 20-25 minutes until the crust turns deep golden brown. The smell? Pure heaven.
Timing
Here’s the breakdown: Prep time takes about 15 minutes, cooking time is 40-45 minutes, resting and rising times add up to 8-12 hours, and the total time ranges from 9-14 hours depending on your schedule. Patience pays off with this one.
Chef’s Secret
To enhance the sour tang, let your starter ferment longer between feedings. This boosts the lactic acid bacteria, which gives sourdough its signature flavor.
Extra Info
Did you know sourdough has been linked to improved gut health? The fermentation process breaks down phytic acid, making nutrients more bioavailable. No wonder our ancestors loved it so much!
Necessary Equipment
- Dutch oven or heavy pot with a lid
- Proofing basket or mixing bowl
- Parchment paper
- Kitchen scale (optional but recommended)
Storage
Freshly baked sourdough keeps well at room temperature for 2-3 days. Store it in a paper bag to preserve the crust’s crispiness. For longer storage, wrap it tightly in plastic wrap and freeze for up to 3 months. To reheat, pop it in a 350°F oven for 10 minutes. Never refrigerate bread—it dries out faster.
If you want to refresh stale bread, sprinkle it with water and bake briefly. Voilà! It’s almost as good as new.
Lastly, don’t toss scraps. Dry them out, blend into breadcrumbs, and use them in recipes like meatballs or casseroles.
Tips and Advice
- Use a kitchen scale for precise measurements.
- Keep your workspace clean to avoid contaminating the dough.
- Experiment with scoring patterns for unique designs.
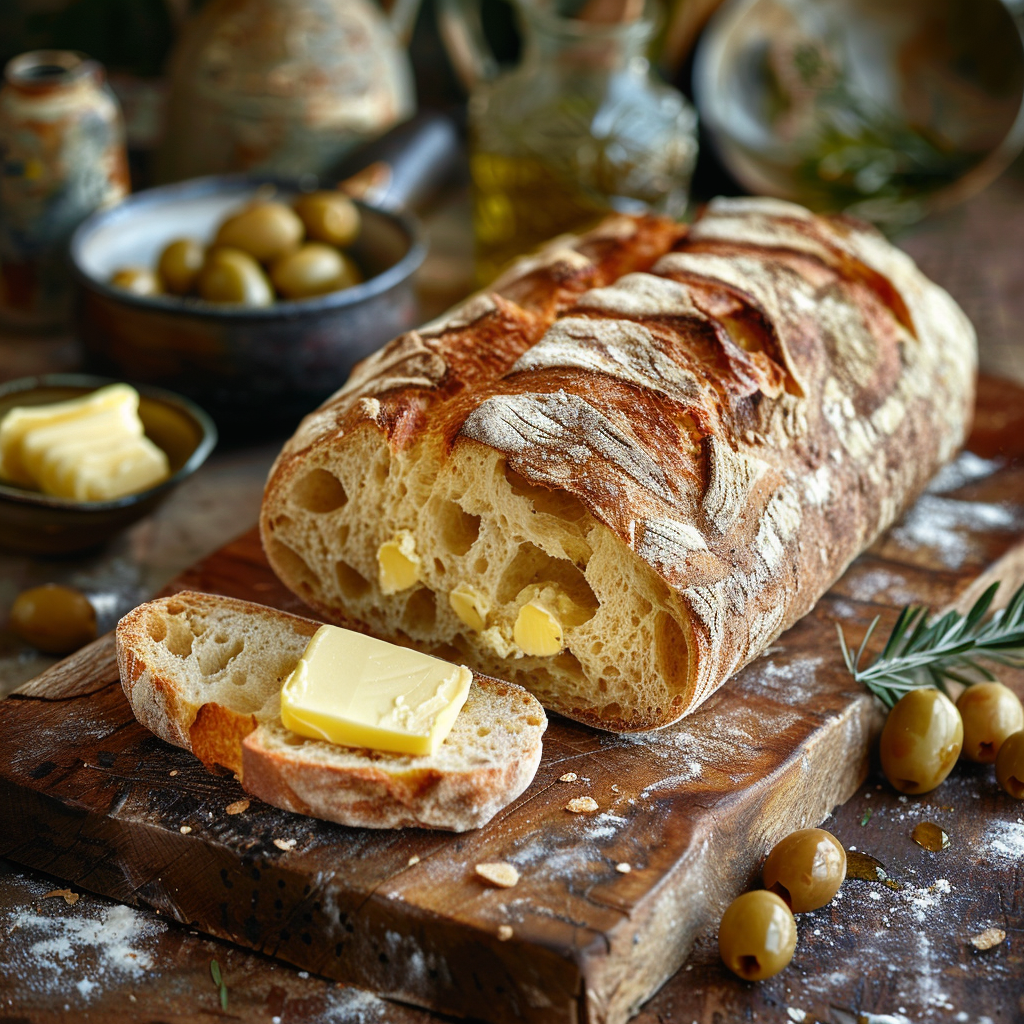
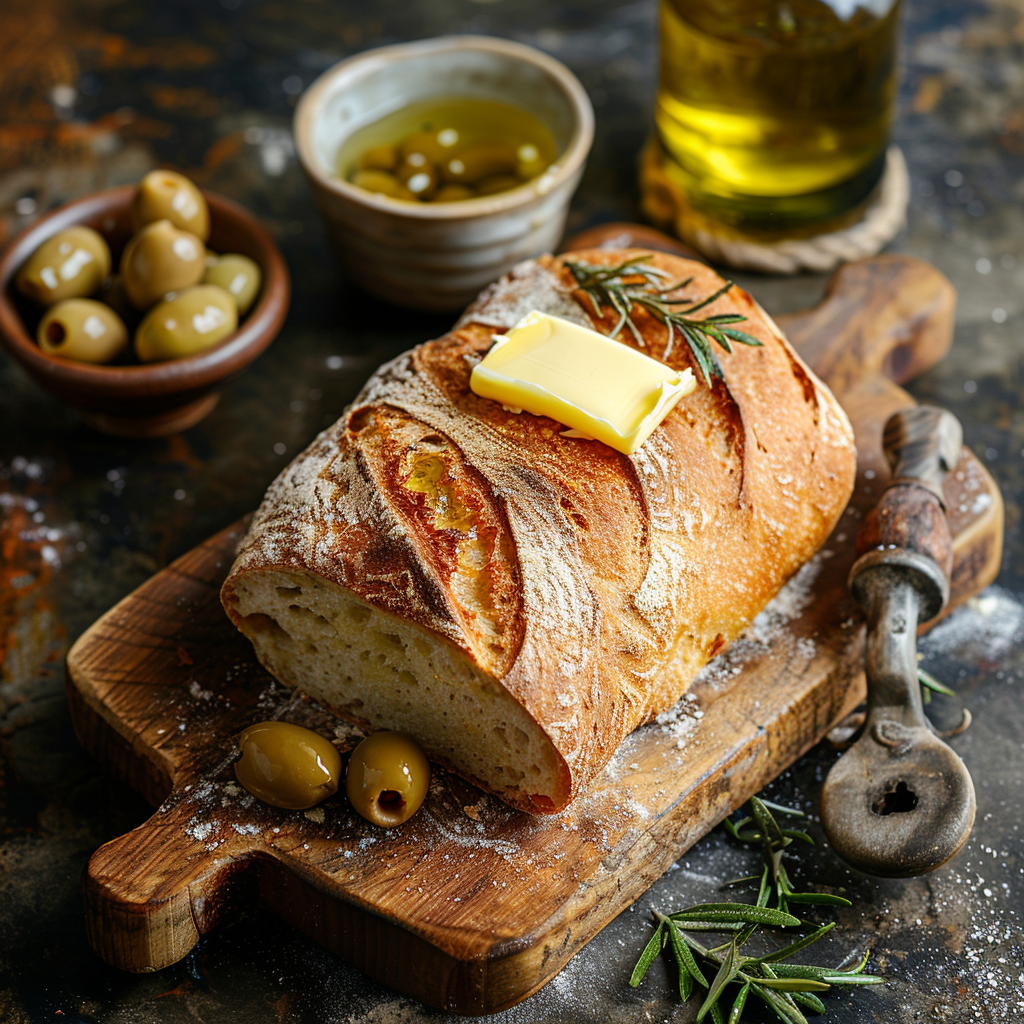
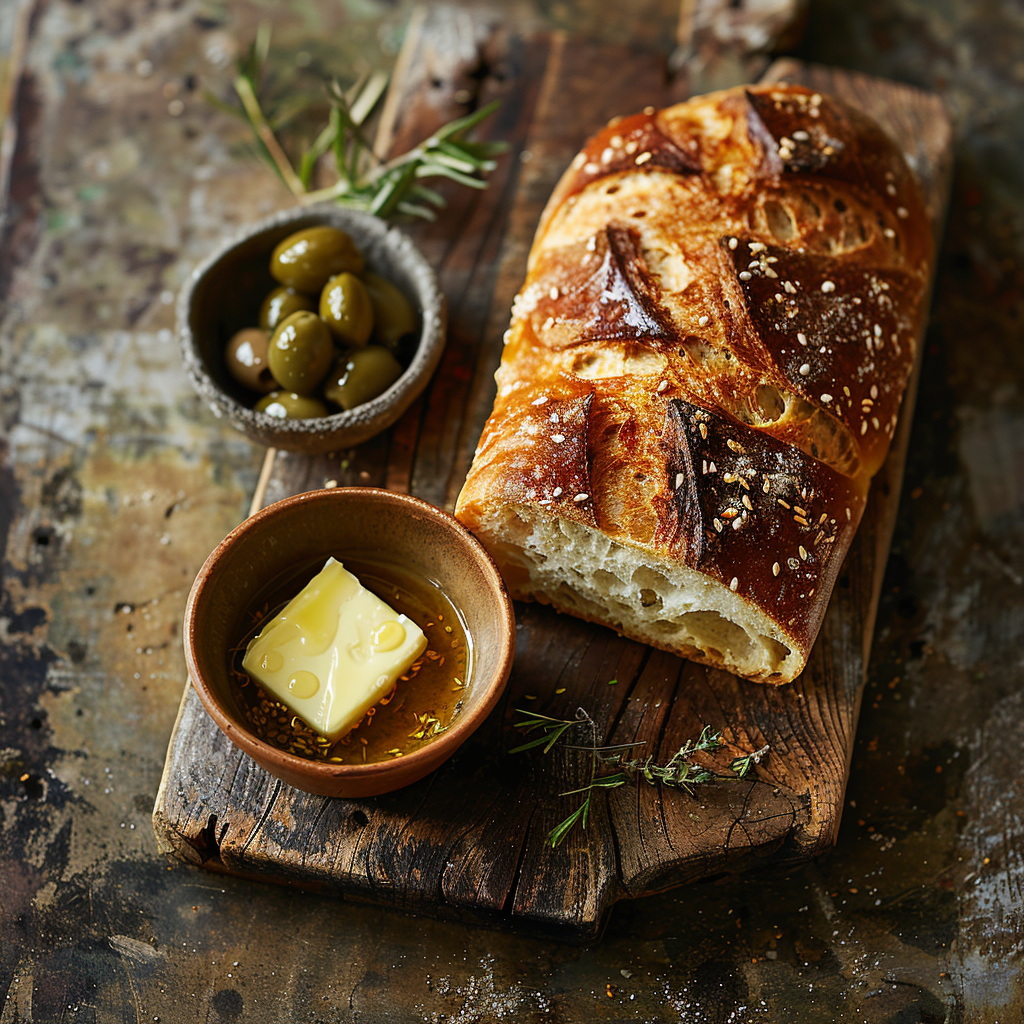
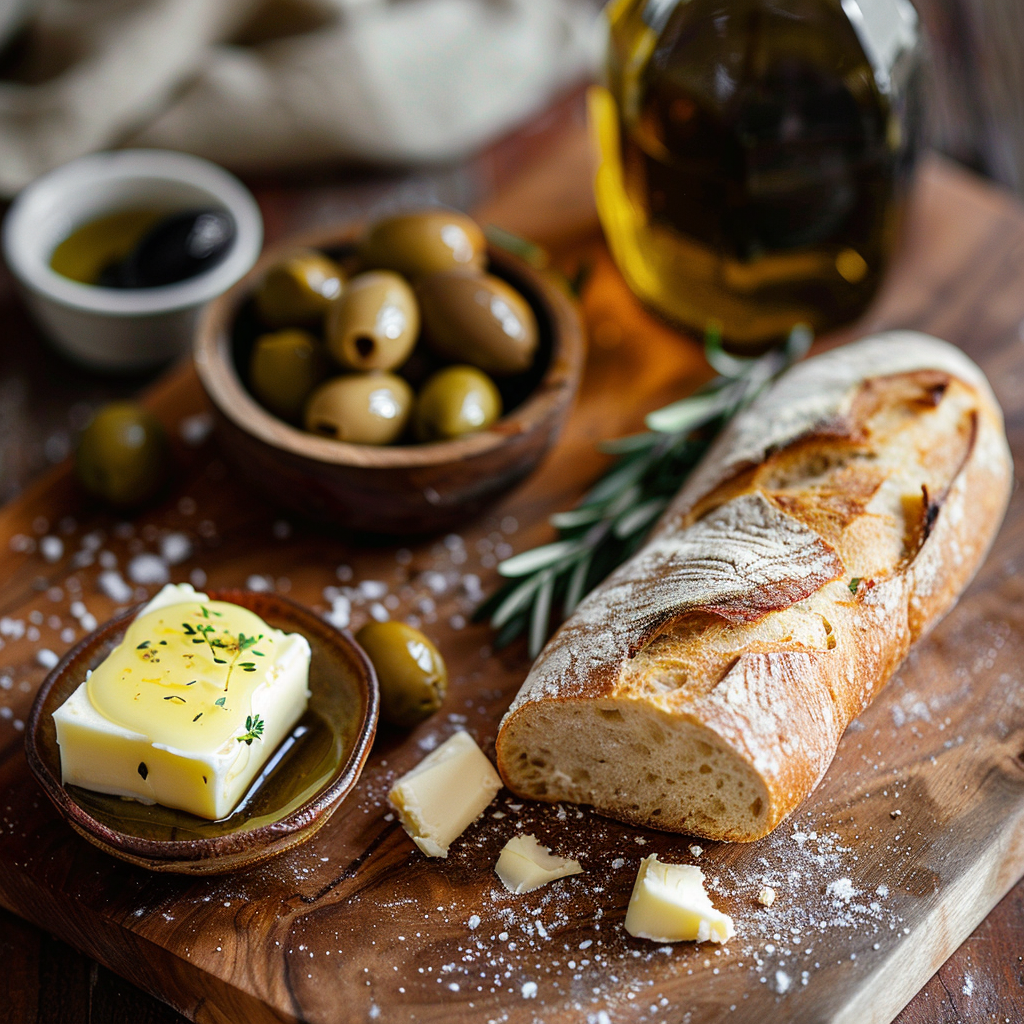
Presentation Tips
- Serve slices with a drizzle of olive oil or honey for contrast.
- Create a rustic display with wooden boards and linen napkins.
- Pair with cheeses, jams, or charcuterie for a stunning spread.
Healthier Alternative Recipes
Looking to switch things up? Try these variations:
- Whole Grain Sourdough: Substitute half the bread flour with whole wheat for added fiber.
- Seeded Sourdough: Roll the dough in seeds like sesame or sunflower before shaping.
- Herb-Infused Sourdough: Mix chopped rosemary or thyme into the dough.
- Olive Sourdough: Add pitted olives for a savory twist.
- Rye Sourdough: Replace some flour with rye for a denser loaf.
- No-Knead Sourdough: Skip folding and let the dough rise slowly overnight.
Common Mistakes to Avoid
Mistake 1: Skipping the Autolyse Step
Some bakers rush past the autolyse phase, but skipping it leads to underdeveloped gluten. This means your bread might lack structure and airiness. Take the extra 30 minutes—it’s worth it.
Mistake 2: Overflouring the Dough
Adding too much flour makes the dough stiff and dry. Stick to the recipe amounts unless absolutely necessary. Remember, sourdough is meant to be slightly sticky.
Mistake 3: Not Scoring Properly
Scoring controls where the bread expands during baking. Without it, your loaf might crack unevenly. Use a sharp blade and make confident cuts.
Mistake 4: Baking at the Wrong Temperature
Baking at too low a temp results in a pale crust, while too high burns the exterior. Always preheat your oven thoroughly for even baking.
Mistake 5: Rushing the Process
Sourdough needs time to develop flavor. Don’t rush fermentation or proofing. Slow and steady wins the race here.
FAQ
What is sourdough starter?
A sourdough starter is a fermented mixture of flour and water used to leaven bread naturally. Think of it as a living culture full of wild yeast and bacteria.
How do I know my starter is ready?
Your starter should be bubbly, smell tangy, and pass the float test. Drop a small amount in water—if it floats, it’s active enough to bake with.
Can I use regular flour instead of bread flour?
Yes, but bread flour has higher protein content, resulting in better structure. Regular flour works fine but may yield a softer crumb.
Do I need a Dutch oven?
A Dutch oven traps steam, creating a crispy crust. If you don’t have one, use a baking stone and a metal pan filled with water for steam.
Why does my bread taste bland?
Blandness often comes from insufficient fermentation. Let your dough rise longer or try retarding it in the fridge overnight.
How long does sourdough last?
Stored properly, sourdough stays fresh for 2-3 days. Freeze leftovers for extended shelf life.
Is sourdough healthier than other breads?
Yes! The fermentation process reduces gluten and increases nutrient availability, making it easier to digest.
Can I make sourdough without yeast?
Absolutely. Sourdough relies on wild yeast from the starter, so commercial yeast isn’t needed.
What if my starter smells bad?
A healthy starter smells mildly sour or fruity. If it smells strongly alcoholic or rotten, discard most of it and start fresh.
Why is my bread dense?
Dense bread usually stems from weak gluten development or inadequate proofing. Be patient and follow the steps carefully.
The Joy of Baking Sourdough Starter Bread
Baking sourdough starter bread is more than just following a recipe—it’s about connecting with tradition, experimenting with flavors, and sharing joy with loved ones. Whether you’re mastering how to make sourdough starter or perfecting a quick sourdough starter, each loaf tells a story. So grab your ingredients, roll up your sleeves, and let the magic begin. Happy baking!
Sourdough Starter Bread
Ingredients
Equipment
Method
- Activate your sourdough starter by mixing equal parts flour and water and letting it sit at room temperature for 5-7 days, feeding daily.
- Mix the active starter, water, and flour in a large bowl until a shaggy dough forms; then add the salt and mix again.
- Cover the bowl with a damp towel and let the dough rest for 30 minutes.
- Stretch and fold the dough every 30 minutes for 2 hours, then let it rise at room temperature for 4-6 hours until doubled in size.
- Gently shape the dough into a round or oval loaf and place seam-side up in a floured proofing basket or bowl lined with a clean kitchen towel; cover and refrigerate overnight.
- Preheat your oven to 450°F (230°C) with a Dutch oven inside.
- Carefully transfer the dough onto parchment paper, score the top with a sharp knife, and bake covered for 20 minutes.
- Remove the lid and bake for another 20-25 minutes until the crust is deep golden brown.
Nutrition
Notes
Store the bread in a paper bag at room temperature for 2-3 days, or wrap tightly and freeze for up to 3 months.
To refresh stale bread, sprinkle it with water and bake briefly. Avoid refrigerating bread to prevent it from drying out.
If you're feeling adventurous, experiment with different additions like seeds or herbs for unique flavors. Enjoy your baking journey!