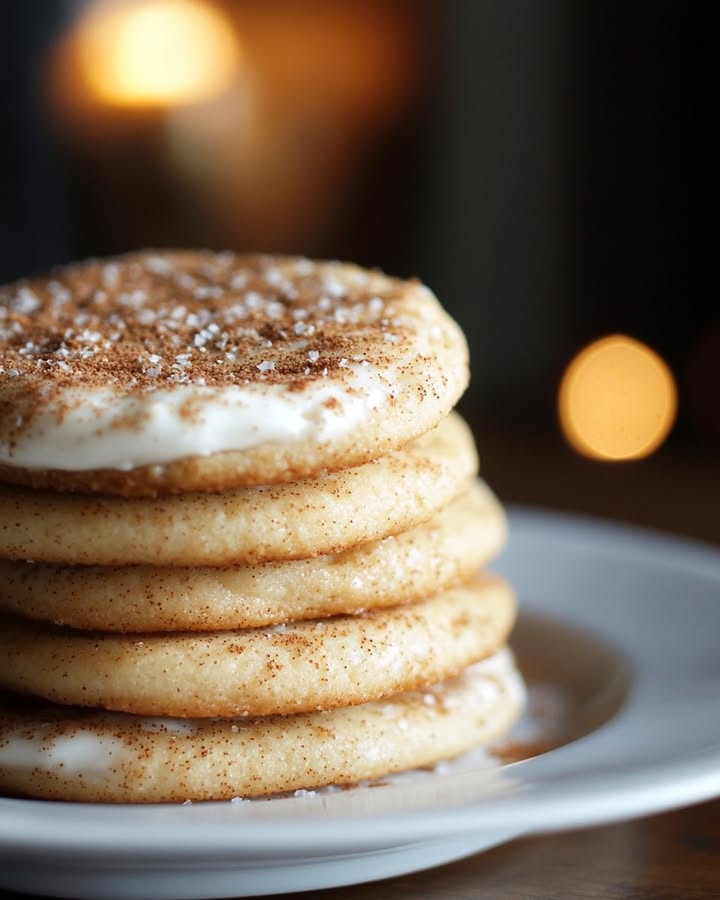
Creamy Dreamy Cinnamon Cream Cheese Cookies
Is there anything better than the scent of warm cinnamon and butter wafting through your kitchen? I don’t think so. It’s the smell of pure, cozy joy. Last weekend, I was desperate for a cookie that felt like a warm hug—something soft, a little bit rich, and wonderfully spiced. That’s when I pulled out my cream cheese and got to work. The result? These Creamy Dreamy Cinnamon Cream Cheese Cookies. They disappeared from the cooling rack faster than I could say “dessert.”
A Little Story Behind These Dreamy Treats
Cream cheese in cookies isn’t a new trick. Bakers have used it for decades to add a fantastic tang and incredible softness to cakes and pastries. I first tried a version of this at a friend’s holiday cookie swap. She called them “cloud cookies,” and they were the talk of the party. I took her basic idea and played around, adding more cinnamon and tweaking the method until I got this perfect, melt-in-your-mouth texture. It’s a modern twist on a classic shortbread, made infinitely better with a simple block of cream cheese.
Why You’ll Fall in Love with This Recipe
You’re going to adore these cookies for so many reasons. They’re incredibly simple to make with no fancy equipment needed. The dough comes together in minutes. The cream cheese does a magical thing: it makes the cookie tenderly soft and gives them a slight richness that’s utterly irresistible. Paired with the warm, familiar spice of cinnamon and a snowy dusting of powdered sugar, they feel both fancy and homey at the same time. Trust me, your family will beg you to make them again.
The Perfect Time for Cinnamon Cream Cheese Cookies
These cookies are your new secret weapon for any gathering. They’re a must for Christmas cookie tins and holiday parties. They’re lovely with a cup of coffee on a chilly autumn morning. I love packing them for picnics or taking a plate to a new neighbor. Honestly, a Tuesday afternoon is a perfect occasion too! They turn any ordinary moment into a small, sweet celebration.
Gathering Your Ingredients
Let’s get your ingredients ready. Using quality, simple components is the key to amazing flavor. Everything should be at room temperature for easy mixing.
- 1 cup unsalted butter, softened
- 1/2 cup cream cheese, softened
- 1 large egg yolk
- 1 teaspoon vanilla extract
- 1/2 teaspoon salt
- 2 cups all-purpose flour
- 1 cup powdered sugar
- 1 teaspoon ground cinnamon
Easy Ingredient Swaps
- Butter: You can use salted butter. Just omit the extra 1/2 teaspoon of salt from the recipe.
- Cream Cheese: Full-fat is best for texture, but low-fat will work in a pinch. Avoid whipped or flavored varieties.
- Cinnamon: Feel free to use a cinnamon-sugar blend if that’s what you have. Just reduce the powdered sugar slightly.
- Gluten-Free: A 1-to-1 gluten-free all-purpose flour blend works perfectly here.
Crafting Your Creamy Dreamy Cookies: Step-by-Step
Step 1: Prep Your Stage
Start by turning your oven to 350°F (175°C). This lets it heat evenly. Grab your baking sheets and line them with parchment paper. This little step is a game-changer. It prevents sticking and makes cleanup a total breeze. Trust me, it’s worth the extra minute. You’ll thank yourself later when the cookies slide right off.
Step 2: Cream the Butter and Cream Cheese
In a large mixing bowl, combine your softened butter and cream cheese. Use a hand mixer or a sturdy spoon. Beat them together until the mixture is completely smooth, pale, and fluffy. This should take about 2-3 minutes. You’ll see the color lighten and the texture become almost cloud-like. This step adds air, which helps create that lovely soft texture in the baked cookie.
Pro tip: Your butter should be soft enough that your finger leaves a clear indentation, but not melted or greasy. This is the secret to perfect creaming.
Step 3: Add Egg and Vanilla
Now, add the single egg yolk and that teaspoon of vanilla extract to your creamy mixture. The yolk adds richness and helps bind everything together, while the vanilla brings a beautiful, warm background note. Blend it all well until it’s fully incorporated. The mixture will look glossy and smell absolutely divine at this point. You’re on your way to cookie heaven.
Step 4: Combine the Dry Ingredients
In a separate, medium-sized bowl, whisk together your dry team: the flour, powdered sugar, cinnamon, and salt. The whisking helps to evenly distribute the cinnamon and salt throughout the flour, so every bite is perfectly seasoned. See the light brown hue the cinnamon gives the flour? That’s the promise of flavor to come.
Step 5: Bring the Dough Together
Gradually add your dry ingredient mix to the wet ingredients in the large bowl. Mix on a low speed or stir gently with a wooden spoon. Watch as the mixture transforms from a loose, sandy texture into a soft, pliable dough. It should come together easily and pull away from the sides of the bowl. Don’t overmix! Just mix until no dry flour patches remain.
Step 6: Shape and Place
Scoop out tablespoon-sized portions of dough. Roll each one between your palms to form a neat, smooth ball. Place them on your prepared baking sheets, giving them about 2 inches of space to spread. They won’t spread a ton, but they need a little room to breathe and bake evenly. You should get about 24 perfect little dough balls.
Step 7: Bake to Golden Perfection
Slide your baking sheets into the preheated oven. Bake for 10-12 minutes. You’re looking for the very edges to just start turning a light, golden brown. The centers should still look soft and set, not wet. Remember, they’ll continue to cook a bit on the hot pan. Let them cool right on the baking sheet for 5 minutes before moving them. This prevents breakage.
Step 8: The Final Flourish
Once the cookies are completely cool on a wire rack, it’s time for the final touch. Place a little extra powdered sugar or a cinnamon-sugar mix in a fine-mesh sieve. Give it a gentle tap over the cookies for a gorgeous, snowy dusting. This adds a sweet finish and makes them look bakery-worthy. It’s the ribbon on the present!
Chef’s tip: For an extra sparkle and crunch, roll the dough balls in coarse sparkling sugar before baking. It creates a delightful crispy exterior.
Let’s Talk Timing
This recipe respects your busy schedule. From start to finish, you’re looking at less than an hour for a full batch of joy.
- Prep Time: 15-20 minutes
- Cook Time: 10-12 minutes per batch
- Cooling Time: 15-20 minutes
- Total Time: About 45 minutes
- Servings: 24 perfect cookies
A Secret from My Kitchen to Yours
Here’s my little secret for the most flavorful cookies: toast your cinnamon. Before adding it to the flour, warm the teaspoon of ground cinnamon in a small, dry skillet over low heat for just 30-60 seconds until it becomes fragrant. Let it cool before using. This simple trick wakes up the essential oils and intensifies the cinnamon flavor wonderfully. It makes a world of difference!
A Pinch of Extra Info
Did you know cinnamon was once more valuable than gold? It was a treasured spice traded along ancient routes. Adding it to sweets like these cookies connects us to a long, rich history of baking for pleasure and celebration. Every time you sprinkle it in, you’re adding a little bit of culinary magic.
Your Kitchen Toolbox
- Large mixing bowl
- Medium mixing bowl
- Hand mixer or sturdy wooden spoon
- Measuring cups and spoons
- Whisk
- Baking sheets
- Parchment paper or silicone baking mats
- Wire cooling rack
Keeping Your Cookies Dreamy
To keep these cookies soft and fresh, storage is key. Once they are completely cooled, place them in a single layer inside an airtight container. You can separate layers with parchment paper if you need to stack them.
They will stay perfectly soft and delicious at room temperature for up to one full week. The cream cheese helps them retain their moisture beautifully, so they won’t dry out quickly.
For longer storage, these cookies freeze exceptionally well. Place them in a freezer-safe bag or container, and they will keep for up to 3 months. Thaw them at room temperature for an hour or so before serving.
My Best Tips for Success
- For uniform cookies, use a small cookie scoop or a tablespoon measure.
- If your dough feels too soft after mixing, pop it in the fridge for 15-20 minutes. This makes rolling easier.
- Rotate your baking sheets halfway through baking for even browning, especially if your oven has hot spots.
- Let the cookies cool fully before dusting with sugar, or the sugar will melt and disappear.
Presentation Ideas to Wow Your Guests
- Stack them on a vintage cake stand for a charming, homey look.
- Package them in clear cellophane bags tied with a cinnamon stick and a ribbon for lovely gifts.
- Arrange them on a platter with other spiced treats like snickerdoodles for a themed dessert table.
- Serve them slightly warm with a small bowl of vanilla ice cream for an easy, decadent dessert.
Playing with Your Food: Recipe Variations
Love this base recipe? Get creative with these six tasty twists!
- Orange-Cinnamon Twist: Add 1 tablespoon of fresh orange zest to the dough. The citrus brightens the warm spice beautifully.
- Cinnamon Sugar Crunch: Roll the shaped dough balls in a mix of 1/4 cup sugar and 1 teaspoon cinnamon before baking.
- Maple Glazed: Skip the powdered sugar dusting. Instead, drizzle cooled cookies with a simple glaze made of powdered sugar and a little pure maple syrup.
- Chocolate Chip Cinnamon: Fold 3/4 cup of mini chocolate chips into the dough after mixing. The chocolate and cinnamon are a classic, cozy duo.
- Pecan Sandies Style: Mix 1/2 cup of very finely chopped toasted pecans into the dry ingredients. It adds a lovely nutty flavor and texture.
- Spiced Chai Version: Replace the plain cinnamon with 2 teaspoons of your favorite chai spice blend for a more complex, warming flavor.
Common Mistakes to Avoid for Perfect Cookies
Using Cold Butter and Cream Cheese
This is the number one reason dough feels lumpy or tough. If your butter and cream cheese are straight from the fridge, they won’t cream properly with the sugar. You’ll end up with uneven dough and dense cookies. Let them sit on the counter for at least an hour before you start. They should be soft enough to easily dent with your finger but not oily or melted.
Overmixing the Dough
Once you add the flour, you need a gentle hand. Overmixing develops the gluten in the flour, which can make your cookies tough instead of tenderly soft. Mix just until the flour disappears and a dough forms. It’s okay if there’s a faint streak or two of flour; it will incorporate as you roll the balls.
Overbaking the Cookies
These cookies are meant to be soft. They won’t get dark brown all over. If you wait for a deep golden color, they’ll be dry and crumbly once cooled. Pull them out when the edges are just barely golden and the centers look soft and puffy. They will firm up as they cool on the sheet.
Skipping the Cooling Step on the Pan
It’s tempting to move cookies right off the hot baking sheet. But these delicate, soft cookies need a few minutes to set. If you move them too soon, they can break apart. Let them rest on the hot pan for a full 5 minutes. This lets them finish cooking gently and firm up just enough to transfer safely to a rack.
Your Cookie Questions, Answered
Can I use margarine instead of butter?
I really don’t recommend it. Butter is key for the rich, classic flavor and the perfect texture of these cookies. Margarine often has a higher water content and different fat structure. It can make your cookies spread more, taste less rich, and have a softer, sometimes greasier, texture. For the best Creamy Dreamy Cinnamon Cream Cheese Cookies, real butter is worth it.
My dough is too sticky to roll. What do I do?
Don’t worry, this happens! It likely means your butter was a bit too soft or your kitchen is warm. The easy fix is to chill the dough. Cover the bowl and pop it in the refrigerator for 20-30 minutes. This firms up the fats in the butter and cream cheese. When you take it out, it will be much easier to handle. You can also lightly dust your hands with flour while rolling to prevent sticking.
Can I make these cookies ahead of time?
Absolutely, you can! You have two great options. First, you can bake the cookies completely, let them cool, and store them in an airtight container for up to 3 days before serving. Second, you can prepare the dough, shape it into balls, and freeze them on a baking sheet. Once frozen solid, transfer the dough balls to a freezer bag. Bake directly from frozen, adding 1-2 extra minutes to the baking time.
Why did my cookies come out flat?
Flat cookies usually point to two issues. First, your butter and cream cheese may have been too warm or almost melted. This causes the dough to spread too fast in the oven. Second, make sure your flour was measured correctly. If you scooped it directly from the bag with the measuring cup, you might have packed in too much. The best way is to spoon flour into the cup and level it off. Too little flour means not enough structure to hold the cookie’s shape.
Can I add nuts or raisins to this recipe?
You sure can, but do it carefully. Adding about 1/2 to 3/4 cup of mix-ins is plenty for this dough. Fold them in right at the end, after the dough has come together. If you add too many, the cookies might not hold together as well. For nuts, I recommend toasting them first for the best flavor. For raisins, you could plump them in warm water or rum for 10 minutes, then pat them dry before adding.
How do I get my powdered sugar dusting to look even and pretty?
The trick is all in the tool. Don’t sprinkle the sugar with your fingers or a spoon—it creates clumps. Instead, use a fine-mesh sieve or a small shaker. Put a few tablespoons of powdered sugar in the sieve. Hold it over the cooled cookies and tap the side gently. This creates a light, snowy, professional-looking dust that covers the cookies evenly without gobs of sugar.
Can I double this recipe easily?
Yes, this recipe doubles beautifully. Just make sure you’re using a bowl large enough to hold all the dough! You might need to mix it in stages if your mixer bowl is small. Also, remember you’ll likely need to bake in more batches since putting too many cookies on a pan at once can affect air flow and baking. Keep an eye on the first batch to judge your timing perfectly.
Are these cookies soft or crispy?
These Creamy Dreamy Cinnamon Cream Cheese Cookies are definitively soft. The cream cheese and extra egg yolk ensure a tender, cake-like, melt-in-your-mouth crumb. The edges might have a slight firmness if baked until just golden, but the center remains beautifully soft. They are the opposite of a thin, crispy cookie. Think of them as little pillow-like spiced delights.
What’s the purpose of the egg yolk only?
Using just the yolk, not the whole egg, is a baker’s trick for richness and tenderness. The yolk adds fat and emulsifiers which make the dough richer and help create a soft, dense texture. The egg white, if included, can add more lift and make the cookie a bit airier or cakey. For these dense, tender cookies, the yolk gives us the perfect texture we’re looking for.
My powdered sugar seems to “melt” into the cookie after a day. Why?
This is completely normal! Powdered sugar contains a tiny bit of cornstarch, but it’s still mostly sugar. Over time, especially if the cookies are stored in a slightly humid environment, the sugar will absorb moisture from the air and the cookie itself. It kind of “dissolves” into the surface. If you want the snowy look to last for days, dust the cookies right before serving. For gifting, it’s still pretty to dust them right before you package them up.
A Sweet Final Thought
I hope these Creamy Dreamy Cinnamon Cream Cheese Cookies bring as much happiness to your kitchen as they have to mine. They are more than just a recipe; they’re a simple way to create a warm, sweet moment. Whether you’re baking for a crowd or just for yourself with a good book, these cookies deliver pure comfort in every bite. Now go preheat that oven! Your delicious, spiced, soft cookie dreams are about to come true.
Ultimate Layered Dip
Ingredients
Equipment
Method
- Preheat the oven to 350°F (175°C) and line baking sheets with parchment paper.
- In a large mixing bowl, combine softened butter and cream cheese, and beat until smooth and fluffy.
- Add the egg yolk and vanilla extract to the mixture, blending well.
- In a separate bowl, whisk together flour, powdered sugar, cinnamon, and salt.
- Gradually add the dry ingredients to the wet mixture, stirring until just combined.
- Scoop tablespoon-sized portions of dough and roll into balls, placing them on the prepared baking sheets with space in between.
- Bake for 10-12 minutes until the edges are light golden brown and centers are soft.
- Cool cookies on the baking sheet for 5 minutes before transferring to a wire rack.
- Dust cooled cookies with powdered sugar or cinnamon-sugar mix for a finishing touch.