Rise and Shine with the Easiest, Fluffiest Pancakes!
Is there anything better than a warm stack of perfectly fluffy pancakes on a lazy morning? I don’t think so! For years, I struggled with lumpy, flat, or just-plain-sad pancakes. After countless Saturday mornings of testing, I finally found the perfect, fail-proof recipe. It’s so simple, my grandkids can help me make it! This recipe is my little secret to starting the day with a smile and a delicious, homemade treat that feels like a hug on a plate.
A Short Stack of History
Pancakes are a truly ancient comfort food, with versions popping up in cookbooks from all over the world for centuries. Our fluffy, leavened American-style pancake, though, really took off with the introduction of baking powder in the 1850s. Before that, they were often dense and flat. My version is a nod to that modern convenience, celebrating how a few simple pantry staples can be transformed into a breakfast classic. It’s a recipe that connects us to generations of home cooks who just wanted a warm, satisfying start to their day.
Why You’ll Absolutely Adore This Recipe
You’ll love this because it’s fast, foolproof, and fantastically fluffy. The ingredient list is short, and the steps are straightforward. No fancy techniques or mysterious rests required. In about 15 minutes, you go from a sleepy kitchen to a table full of golden, cloud-like pancakes that are just begging for a drizzle of maple syrup. The best part? The batter is incredibly forgiving, perfect for those mornings when you’re still half-asleep but still want something special.
Perfect Occasions for These Perfect Pancakes
This recipe isn’t just for lazy weekends! It’s your secret weapon for many happy moments.
- Saturday Morning Tradition: Start a family ritual of cooking together.
- Sleepover Surprise: Impress your kids’ friends with a towering stack.
- Quick Weekday Win: Need a hot breakfast fast? This is it.
- Brunch with Friends: Easily double or triple the batch to feed a crowd.
- Just Because: Sometimes, you just need a pancake on a Tuesday.
What You’ll Need: The Pantry All-Stars
Gather these simple ingredients. I promise you probably have most of them already!
- 1 ½ cups all-purpose flour – The foundation of our fluffy stack.
- 3 ½ teaspoons baking powder – The magic that makes them rise.
- 1 tablespoon white sugar – For a hint of sweetness and golden color.
- ¼ teaspoon salt – Balances the flavors perfectly.
- 1 ¼ cups milk – Whole milk is best for richness, but any works.
- 1 large egg – Binds everything together beautifully.
- 3 tablespoons melted butter, plus extra for the pan – For incredible flavor and a tender crumb.
No Problem! Handy Substitution Options
Out of something? Don’t worry! Here are some easy swaps:
- Milk: Buttermilk makes them extra tangy and tender. Or use any non-dairy milk like almond or oat.
- Egg: For one egg, mix 1 tablespoon ground flaxseed with 3 tablespoons water and let it sit for 5 minutes.
- Butter: Neutral oil like vegetable or canola oil works in a pinch.
- Gluten-Free: Use a 1-to-1 gluten-free flour blend.
Let’s Get Cooking: Your Foolproof Steps
Step 1: Mix the Dry Team
Grab a large mixing bowl. Add your flour, baking powder, sugar, and salt. Take a whisk and give these dry ingredients a good, gentle stir. You want to see everything evenly distributed, with no little clumps of baking powder hiding. This step ensures your pancakes will rise evenly and taste perfect in every single bite. The snowy white flour combined with the fine grains of sugar creates a lovely, pale mixture just waiting to become batter.
Step 2: Unite the Wet Team
In another bowl or a large measuring cup, pour in your milk. Crack in the egg and add the beautifully golden, melted butter. Now, whisk this trio together until you have a smooth, creamy, sunshiny yellow liquid. The egg will fully blend in, and the butter will create little specks throughout. Pro tip: Let your melted butter cool just a touch before adding it, so it doesn’t cook the egg!
Step 3: Combine With a Light Touch
Here’s the most important step for fluffy pancakes! Pour your wet ingredients into the bowl with the dry ingredients. Use your whisk and stir gently. Stop stirring when you can no longer see dry flour. A few lumps are absolutely perfect and necessary! Overmixing is the enemy of fluffy pancakes, as it develops the gluten and makes them tough. The batter will be thick and will plop off the whisk.
Step 4: Cook to Golden Perfection
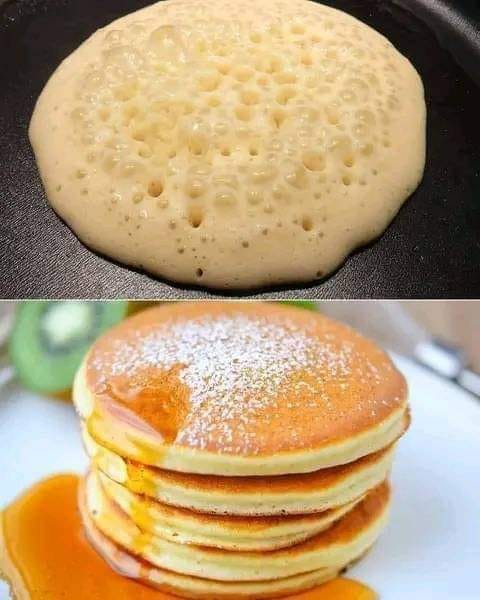
Heat a non-stick skillet or griddle over medium heat. Add a small pat of butter and let it melt and sizzle. Pour about ¼ cup of batter for each pancake. You’ll see the surface start to look dry around the edges. Then, wonderful little bubbles will form and pop on top. This is your sign! Slide your spatula underneath and give it a confident, smooth flip. Cook for another minute or so until the second side is a gorgeous, golden brown. Chef’s tip: To keep pancakes warm for serving, place them on a baking sheet in a single layer in a 200°F oven.
Your Pancake Timing Guide
This recipe is wonderfully quick from start to finish.
- Prep Time: 5 minutes
- Cooking Time: 10 minutes
- Total Time: Just 15 minutes!
The Chef’s Little Secret
For the absolute fluffiest pancakes, let your batter rest for exactly 5 minutes after mixing and before cooking. This allows the baking powder to start working and the flour to fully hydrate. You’ll see the batter puff up slightly, and it will cook up much lighter and more tender.
A Fun Pancake Fact
In the UK, they have a whole day dedicated to pancakes called Shrove Tuesday or “Pancake Day.” It’s the day before Lent begins, and people use up all the rich ingredients in their pantry by making piles of pancakes! It’s a delicious tradition we can all get behind any day of the year.
Necessary Equipment
- Large Mixing Bowl
- Whisk
- Measuring Cups and Spoons
- Non-Stick Skillet or Griddle
- Spatula
Storing Your Pancake Leftovers
If, by some miracle, you have pancakes left over, let them cool completely on a wire rack. Once cool, place them in a single layer in a resealable bag or airtight container. You can separate layers with parchment paper to prevent sticking.
They will keep well in the refrigerator for up to 2 days. For longer storage, freeze them! Arrange the cooled pancakes in a single layer on a baking sheet to flash freeze for an hour. Then, transfer them to a freezer bag. They’ll keep for up to 2 months.
Reheating is a breeze. Simply pop them in the toaster, toaster oven, or a warm oven until heated through. This brings back their fresh-made texture beautifully.
Tips and Advice for Pancake Success
- Don’t press down on the pancakes with your spatula after flipping. This squeezes out the air!
- Use a ¼ cup measuring cup or ice cream scoop for perfectly uniform pancakes.
- Adjust the heat as you go. If they’re browning too fast, turn it down a bit.
- Clean your pan between batches if any burnt bits appear for the cleanest taste.
Making Breakfast Beautiful: Presentation Tips
- Create a tall, impressive stack dusted with powdered sugar.
- Drizzle maple syrup in a zig-zag pattern over the top.
- Add a crown of fresh berries, banana slices, or a dollop of whipped cream.
- For kids, make funny faces with blueberries for eyes and a strawberry slice for a smile.
- Serve with a little pitcher of warm syrup on the side for that diner-style feel.
Healthier Pancake Adventures
Want to mix things up? Here are six delicious variations:
- Whole Wheat Wonders: Swap half the all-purpose flour for whole wheat flour for a nutty flavor and fiber boost.
- Berry Blast: Gently fold a cup of fresh or frozen blueberries or raspberries into the batter for a juicy surprise.
- Chocolate Chip Delight: A handful of mini chocolate chips turns breakfast into a celebration.
- Banana Oat Bliss: Mash one ripe banana into the wet ingredients and replace ½ cup flour with rolled oats.
- Protein Power: Add a scoop of vanilla or unflavored protein powder and an extra splash of milk.
- Pumpkin Spice Special: Add ½ cup of pumpkin puree and a teaspoon of pumpkin pie spice for a fall twist.
Common Mistakes to Avoid
Mistake 1: Overmixing the Batter
This is the #1 reason pancakes turn out flat and tough. When you mix too much, you develop the gluten in the flour, which makes the pancakes chewy instead of soft. It’s tempting to keep stirring until it’s perfectly smooth, but you must resist! The batter should be lumpy. Just mix until the dry ingredients are wet. A few flour streaks are okay.
Mistake 2: Cooking at the Wrong Temperature
If your pan is too hot, the outside will burn before the inside cooks. If it’s too low, the pancakes will be pale and dense. The perfect temperature is medium heat. Test it by sprinkling a few drops of water on the pan. If they sizzle and jump, it’s ready. Your first pancake is often a test—adjust the heat after it based on how it browns.
Mistake 3: Flipping Too Many Times
Flipping your pancake more than once can deflate it. Be patient and wait for those bubbles to form and pop on the surface. Then, flip it just once. Trust that the other side will cook perfectly. Peeking constantly by lifting the edge can also let out steam and result in uneven cooking.
Mistake 4: Measuring Flour Incorrectly
Scooping flour directly from the bag with your measuring cup packs it down, leading to too much flour and dry, heavy pancakes. The right way is to spoon the flour lightly into the measuring cup and level it off with a knife. This “spoon and level” method gives you the perfect, light amount every time.
Your Pancake Questions, Answered!
Can I make the pancake batter ahead of time?
I don’t recommend making the batter too far in advance. The baking powder starts working right away, and if it sits for hours, it will lose its power. For the best results, mix the dry and wet ingredients separately the night before. In the morning, just combine them and cook. If you must store mixed batter, keep it covered in the fridge for no more than an hour.
Why are my pancakes not fluffy?
Flat pancakes usually come from overmixed batter, old baking powder, or a pan that’s not hot enough. Check the expiration date on your baking powder—it loses strength over time. Also, remember the gentle mixing and the right heat. Letting the batter rest for 5 minutes, as in our chef’s secret, can also make a huge difference in fluffiness.
Can I use a different type of milk?
Absolutely! Any milk will work. Buttermilk will give you a lovely tang and tender texture. Any plain non-dairy milk like almond, soy, or oat milk works perfectly as a 1-to-1 substitute. The flavor might change slightly, but you’ll still get wonderful pancakes.
How do I know when to flip the pancake?
Watch the surface closely. The edges will start to look set and dry. Then, small bubbles will form across the top. Once those bubbles pop and leave little holes, it’s time. This usually takes about 2-3 minutes on the first side. Don’t flip when you see the first bubble; wait until several have formed and popped.
What’s the best way to keep pancakes warm for a crowd?
Preheat your oven to 200°F (about 95°C). As you cook the pancakes, place them in a single layer on a baking sheet or oven-safe plate and keep them in the warm oven. Do not stack them or cover them with a towel, as this will trap steam and make them soggy. They’ll stay perfectly warm for up to 20 minutes.
Can I freeze these pancakes?
Yes, they freeze wonderfully! Let the cooked pancakes cool completely. Lay them in a single layer on a baking sheet and freeze them for about an hour. This is called “flash freezing.” Then, transfer them to a freezer-safe bag or container. They can be frozen for up to 2 months. Reheat them straight from the freezer in a toaster, toaster oven, or regular oven.
What can I use if I don’t have baking powder?
In a pinch, you can make a substitute. For every teaspoon of baking powder, mix ¼ teaspoon of baking soda with ½ teaspoon of cream of tartar and ¼ teaspoon of cornstarch. However, this recipe really relies on baking powder for its lift, so I highly recommend using it if you can.
My batter is too thick/thin. What should I do?
Batter thickness can vary based on flour type and humidity. If it’s too thick (doesn’t pour easily), add a tablespoon of milk at a time until it’s pourable. If it’s too thin (spreads too thinly in the pan), sprinkle in a tablespoon of flour at a time and whisk gently until it thickens up. It should be thick but able to slowly spread into a circle.
Can I add other flavors to the batter?
Of course! This is a great base recipe. Try adding a teaspoon of vanilla extract or almond extract to the wet ingredients. You can also mix in spices like cinnamon, nutmeg, or a pinch of cardamom into the dry ingredients. Get creative with add-ins like chopped nuts, shredded coconut, or even cooked, crumbled bacon.
Are these pancakes good for meal prep?
They are excellent for meal prep! Cook a big batch on the weekend, let them cool, and store them in the fridge or freezer as described. On busy mornings, you have a homemade, healthy breakfast ready in minutes. Just pop them in the toaster, add your toppings, and you’re out the door with a happy tummy.
Happy Morning, Happy Pancakes!
And there you have it, my foolproof secret to the easiest, fluffiest pancakes ever. I hope this recipe brings as much joy to your kitchen as it has to mine. It’s more than just a recipe; it’s a way to create a warm, loving moment to share with the people you care about. So heat up that griddle, pour a cup of coffee, and get ready for the best part of waking up. Don’t forget to share your beautiful stacks with friends and spread the love—one fluffy pancake at a time!
Zesty Chadon Beni Sauce
Ingredients
Equipment
Method
- In a large mixing bowl, combine flour, baking powder, sugar, and salt; whisk gently.
- In another bowl, mix milk, egg, and melted butter; whisk until smooth.
- Pour the wet ingredients into the dry ingredients; stir gently until just combined (lumps are fine).
- Heat a non-stick skillet over medium heat and melt a small pat of butter.
- Pour about ¼ cup of batter for each pancake; cook until bubbles form on the surface and edges look dry.
- Flip the pancakes and cook until the second side is golden brown.