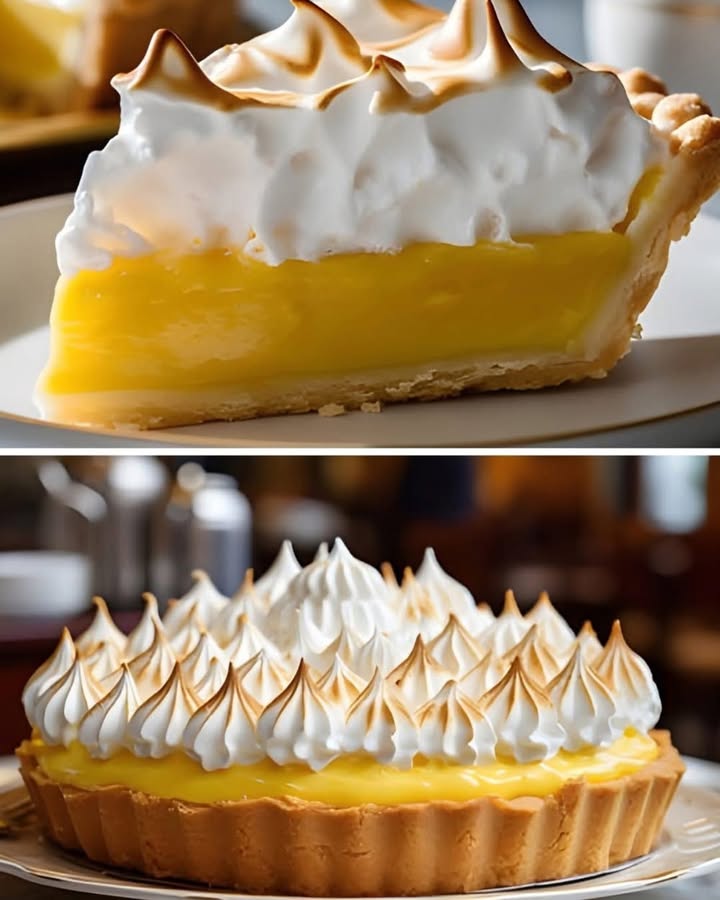
There’s a certain kind of magic in a dessert that both hums and sings. The hum comes from that rich, tart, soul-satisfying lemon curd, a whisper of sunshine on a cloudy day. The singing? That’s the billowing, cloud-like meringue topping that promises pure, sweet joy with every bite. My love affair with lemon meringue pie began at my grandmother’s Formica countertop, watching her whip egg whites into glossy peaks with a wooden spoon – a feat I thought was pure wizardry. Today, I’m sharing my tried-and-true recipe for this classic. It’s the one I make when I need to bring a little guaranteed happiness to the table for family and friends.
The Sweet and Sour Story of a Beloved Dessert
Lemon meringue pie as we know it is a true American creation, but its roots travel across the ocean. The concept of lemon custard dates back to medieval Europe, while meringue is often credited to Swiss pastry chefs. The genius who first married the two in a pie tin? That’s up for debate, but many credit the ingenious 19th-century Philadelphia baker, Elizabeth Coane Goodfellow. What started as a fancy treat in genteel tearooms quickly became a staple of diners and home kitchens nationwide. Its beauty lies in that perfect contrast—the sharp, vibrant lemon filling cutting through the sweet, airy meringue, all nestled in a buttery, crisp crust. It’s a balance that has charmed taste buds for well over a century.
Why This Lemon Meringue Pie Recipe Is a Keeper
You will love this recipe because it delivers that perfect classic diner-style pie right in your own kitchen. The filling is lush and tangy, not overly sweet, with a texture that’s firm enough to slice neatly. The meringue is my favorite part—it’s sweet, fluffy, and doesn’t weep (that’s the watery separation that can happen)! I’ve tested this method countless times for church potlucks and book club meetings, and it never fails to get “oohs” and “aahs.” It’s a labor of love, but each step is straightforward and oh-so-rewarding.
When to Whip Up This Sunshine Pie
This pie isn’t just for summer! Its bright flavor is a wonderful pick-me-up any time of year. It’s perfect for:
- Spring celebrations like Easter or Mother’s Day.
- Summer picnics and barbecues (just keep it cool!).
- Bringing to a friend who needs a cheer-up gift.
- Ending a heavy holiday meal with a light, refreshing note.
- Any Tuesday that feels like it needs a special dessert!
Gathering Your Ingredients for Lemon Meringue Pie
This recipe breaks down into three simple parts: the crust, the filling, and the meringue. Here’s what you’ll need:
For the Crispy Base:
- 1 ½ cups (190 g) of all-purpose flour
- ¼ cup (50 g) of sugar
- ½ cup (115 g) of cold butter, cubed
- 2-3 tablespoons of ice-cold water
For the Luscious Lemon Filling:
- 1 cup (240 ml) of water
- ½ cup (120 ml) of fresh lemon juice (about 3-4 lemons)
- 1 cup (200 g) of sugar
- ¼ cup (30 g) of cornstarch
- 4 large egg yolks (save the whites for the meringue!)
- 2 tablespoons of butter
For the Perfect Meringue Topping:
- 4 large egg whites, at room temperature
- ½ cup (100 g) of sugar
- ¼ teaspoon of cream of tartar
- 1 teaspoon of vanilla extract
Easy Ingredient Swaps (No Stress!)
Don’t have something? No panic! Here are some simple swaps:
- Pre-made crust: A store-bought graham cracker or shortcrust pastry shell works in a pinch to save time.
- Bottled lemon juice: Fresh is best for flavor, but bottled works in a tight spot. You may want a little extra zest for fragrance.
- Cornstarch substitute: An equal amount of arrowroot powder can thicken the filling well.
- Cream of tartar substitute: A tiny pinch of salt or ½ teaspoon of lemon juice can help stabilize the egg whites.
Creating Your Lemon Meringue Masterpiece, Step-by-Step
Step 1: Building the Buttery Base
First, get your oven warming to 180°C (350°F). In a medium bowl, whisk together the flour and sugar. Now, add those cold butter cubes. Use your fingertips, a pastry cutter, or a food processor to work the butter into the flour. You want it to look like coarse, pebbly sand with a few larger butter pieces still visible. This creates flakiness! Drizzle in the ice water, one tablespoon at a time, mixing gently with a fork just until the dough comes together. Press it evenly into your pie dish, prick the bottom with a fork, and bake for about 15 minutes. You’re looking for a light golden color and a lovely, nutty smell. Let it cool while you make the magic.
Pro tip: The colder your butter and water, the flakier your crust. I sometimes even chill my flour bowl!
Step 2: Whisking Up the Sunny Lemon Filling
This is the heart of the pie. In a medium saucepan, combine the water, fresh lemon juice, sugar, and cornstarch. Whisk it well so no cornstarch lumps remain. Cook this over medium heat, stirring constantly. Watch as it transforms from a cloudy liquid into a thick, glossy, translucent bubbling mass. In a separate bowl, whisk your four egg yolks. To prevent them from scrambling, you need to “temper” them. Slowly drizzle about a half-cup of the hot lemon mixture into the yolks while whisking fiercely. Now, pour this warmed yolk mixture back into the saucepan. Cook for two more minutes, stirring non-stop. Remove it from the heat and stir in the butter until it melts into a silky, radiant yellow curd. Pour this glorious filling into your waiting crust.
Step 3: Whipping the Fluffy Meringue Clouds
Time for the crowning glory! Ensure your mixing bowl and beaters are spotlessly clean and grease-free. Any fat will stop the eggs from whipping. Beat the room-temperature egg whites with the cream of tartar on medium speed until soft peaks form—they’ll curl over when you lift the beater. Now, with the mixer running, gradually add the sugar, about a tablespoon at a time. Once all the sugar is in, increase the speed to high. Beat until the meringue is thick, glossy, and holds stiff peaks. This means the peaks stand straight up when you lift the beater. Gently fold in the vanilla extract.
Step 4: The Final Bake to Golden Perfection
Now, pile all that beautiful meringue onto the warm lemon filling. Use a spatula to spread it right to the edges of the crust, sealing it completely. This helps prevent the meringue from shrinking. Create lovely swirls and peaks with your spatula—these will brown beautifully. Pop the pie into your preheated oven for 10-12 minutes. Watch it closely! You just want the meringue tips to turn a delicate, toasty brown. The smell is incredible. Once done, the hard part begins: you must let it cool completely at room temperature, then chill it for several hours before slicing. This sets the filling perfectly.
Chef’s tip: For an extra special touch, grate a little fresh lemon zest over the top of the meringue before serving. It adds a pop of color and a burst of citrus fragrance.
Your Lemon Meringue Pie Timeline
Good things take a little time! Here’s what to plan for:
- Prep Time: 30 minutes
- Cook Time: 30 minutes (15 for crust + 12 for meringue)
- Cooling/Chilling Time: At least 4 hours (crucial for setting!)
- Total Time: About 5 hours
The Secret to a Slice That Stands Tall
My biggest secret is patience and temperature. Pouring the hot filling into the warm crust starts the setting process. Then, topping it immediately with meringue and baking locks in the heat. But the real magic happens during the long, slow cooldown. Rushing this step is the number one reason for soupy slices. Letting it set fully in the fridge gives you those gorgeous, clean wedges that hold their shape on the plate.
A Zesty Fact About Our Star Ingredient
Did you know lemons were once so prized they were given as royal gifts? In the 1700s, wealthy Europeans grew lemon trees in orangeries as status symbols. We’re lucky to have them readily available today! The juice and zest contain natural citrus oils that are bursting with flavor—that’s why fresh lemons make all the difference in this pie compared to artificial flavorings.
Tools You’ll Need for the Job
You don’t need fancy gear! A few basics will do:
- 9-inch pie dish
- Mixing bowls (medium and large)
- Whisk and rubber spatula
- Medium saucepan
- Electric hand mixer or stand mixer (for the meringue)
- Measuring cups and spoons
- Zester or fine grater (for garnish)
Keeping Your Lemon Meringue Pie Delicious
This pie is best enjoyed within 1-2 days of making it. The meringue is at its peak on day one. Cover any leftover pie loosely with plastic wrap or place it under a pie dome and store it in the refrigerator. The crust may soften slightly over time from the moisture of the filling, but it will still taste wonderful.
I do not recommend freezing the assembled pie. Freezing causes the meringue to break down and become rubbery, and the filling can become watery when thawed. If you must get ahead, you can pre-bake and freeze the crust alone, or make and freeze the lemon curd filling in a separate container. Thaw both in the fridge before assembling and making fresh meringue.
For serving, use a sharp, thin-bladed knife dipped in hot water and wiped dry between each slice. This gives you the cleanest cuts through the meringue and filling.
My Best Tips for Lemon Meringue Success
- Room temperature egg whites whip up higher and smoother than cold ones. Separate the eggs when cold (it’s easier), then let the whites sit on the counter for 30 minutes.
- When tempering the egg yolks, go slow and steady with the hot mixture. Rushing can cook the yolks.
- For the most stable meringue, add the sugar very gradually after soft peaks form. This helps it dissolve completely.
- If you see beads of moisture (“weeping”) on the meringue, it’s often because the meringue was under-whipped or the sugar didn’t fully dissolve.
Making Your Pie Look Like a Pro’s
Presentation is half the fun! Try these ideas:
- Garnish with thin slices of lemon or twists of lemon zest just before serving.
- Add a few fresh raspberries or blueberries on the side for a color pop.
- Dust a little powdered sugar over the meringue peaks.
- Serve on a pretty, vintage cake stand for a special occasion.
- Pair each slice with a dollop of softly whipped cream.
Play with Your Food: Fun Variations to Try
Once you’ve mastered the classic, why not mix it up?
- Lime Meringue Pie: Swap the lemon juice for fresh lime juice. It’s a tangy, tropical twist!
- Orange Meringue Pie: Use half orange juice and half lemon juice. The flavor is sweeter and more floral.
- Graham Cracker Crust: Use a simple graham cracker crust instead of pastry for a different texture and flavor.
- Toasted Coconut Meringue: Fold ½ cup of sweetened shredded coconut into the meringue before piling it on.
- Individual Tartlets: Make mini versions in a muffin tin for a perfect portion-controlled treat at parties.
- Ginger-Lemon Pie: Add 1 teaspoon of ground ginger or 2 tablespoons of finely chopped crystallized ginger to the filling for a warm, spicy note.
Common Mistakes to Avoid for Lemon Meringue Pie
Mistake 1: Using Cold Egg Whites for the Meringue
Cold egg whites are harder to whip to their full volume. They won’t incorporate as much air, leading to a smaller, less fluffy meringue that might be grainy if the sugar doesn’t dissolve well. Always plan ahead and separate your eggs when cold (it’s cleaner), then let the whites sit on the counter for about 30 minutes. Room temperature whites whip up higher, smoother, and more stable, giving you those gorgeous, billowing peaks.
Mistake 2: Not Sealing the Meringue to the Crust
If you just dollop the meringue in the center, it will shrink away from the edges as it bakes and cools. This leaves the filling exposed and can make slicing messy. The fix is simple! When spreading your meringue, make sure you take it all the way to the inner edge of the pastry crust and press it down gently to create a complete seal. This “anchors” the meringue and gives you a beautiful, domed top.
Mistake 3: Skipping the Long Chill Time
Cutting into the pie while it’s still warm is the most tempting error! The filling needs time to cool and set properly. If you slice it too soon, the lemon curd will run all over the plate, no matter how well you cooked it. The proteins and starches need hours to firm up in the fridge. Be patient. Let the pie cool to room temperature after baking, then refrigerate it for at least 4 hours, or ideally overnight. Your reward will be perfect, neat slices.
Mistake 4: Adding Sugar to the Meringue Too Soon
Dumping all the sugar into the egg whites at the start is a common blunder. It weighs down the forming foam and can result in a dense, syrupy meringue that may weep. The correct method is to beat the whites with cream of tartar until soft peaks form first. Then, with the mixer running, add the sugar very slowly, one tablespoon at a time. This allows the sugar to dissolve completely into the protein structure, creating a shiny, stiff, and stable meringue.
Your Lemon Meringue Pie Questions, Answered
Can I make this pie ahead of time?
Yes, but with a strategic approach. You can pre-bake the crust 1-2 days ahead and store it at room temperature. You can make the lemon filling 1 day ahead, cover it with plastic wrap pressed directly on its surface (to prevent a skin), and refrigerate it. However, I strongly recommend making the meringue and doing the final bake on the day you plan to serve it. Fresh meringue has the best texture and appearance. Assemble the chilled filling in the crust, top with fresh meringue, bake, and then let it chill fully before your event.
Why did my meringue weep or get watery?
Weeping (those little beads of syrup) happens when the sugar isn’t fully dissolved or the meringue is under-whipped. To avoid it, make sure you add the sugar gradually to room temperature whites and beat until the meringue is very stiff and glossy. Another cause can be humidity. Also, sealing the meringue to the crust helps create a better environment. If it happens, don’t worry—the pie still tastes great! Just gently blot the beads with a paper towel before serving.
My lemon filling didn’t set firm. What went wrong?
A runny filling usually means the cornstarch wasn’t cooked long enough or the mixture wasn’t brought to a full boil. Cornstarch needs to reach a certain temperature to activate its thickening power. When cooking the filling with the egg yolks, you must let it come back to a bubble and cook for the full two minutes, stirring constantly. This ensures the starch is fully activated. Also, remember that it continues to thicken as it cools, so don’t judge its final consistency while it’s still hot.
Can I use a store-bought crust?
Absolutely! Using a pre-made refrigerated pie crust or a frozen deep-dish crust is a fantastic time-saver. Just follow the package instructions for pre-baking (often called “blind baking”). Usually, you’ll prick it with a fork, line it with foil or parchment and pie weights, and bake it first. This prevents a soggy bottom. It’s a great shortcut that still yields a delicious pie.
How do I get picture-perfect slices?
The secret weapon is a sharp, thin-bladed knife and hot water. Dip the knife blade into a tall glass of very hot water and wipe it completely dry with a towel. Make a clean, confident cut. After each slice, dip and dry the knife again. The heat helps the knife glide smoothly through the sticky meringue and firm filling without dragging or tearing. This little extra step makes your served pie look like it came from a professional bakery.
Is cream of tartar really necessary?
It’s highly recommended! Cream of tartar is an acid that stabilizes the egg white foam. It helps the meringue hold more air, increases its volume, and prevents over-beating (which can lead to a grainy texture). If you don’t have any, you can substitute a small pinch of salt or about ½ teaspoon of lemon juice or white vinegar per egg white. However, for the most reliable, lofty meringue, cream of tartar is the best choice.
Can I freeze lemon meringue pie?
Freezing the fully assembled pie is not recommended. The meringue becomes spongy, tough, and often separates when thawed. The filling can also become watery. If you want to get ahead, freeze components separately. You can freeze the baked pie crust. You can also freeze the lemon curd filling in an airtight container. Thaw both in the refrigerator overnight, then assemble with freshly made meringue and bake as directed.
What’s the best way to separate eggs cleanly?
The easiest way is to use the eggshell itself, but it risks yolk contamination from sharp edges. I prefer the “hand method.” Crack the egg into a clean bowl. Then, with clean, dry hands, gently scoop up the yolk, letting the white drip through your fingers into a second bowl. Transfer the yolk to a third bowl. If a bit of yolk gets in the whites, use an empty eggshell half to scoop it out—it’s magnetic! Having three small bowls prevents one bad separation from ruining all your whites.
Why is my meringue browning too fast or unevenly?
If the meringue browns too quickly, your oven rack might be too high, or your oven temperature could be running hot. Try baking on a middle rack. For more even browning, you can rotate the pie halfway through the baking time. If some peaks are burning while others are pale, your oven might have hot spots. An oven thermometer can help you check the true temperature. Remember, you’re just toasting the meringue, not cooking it through, so 10-12 minutes at 350°F is usually perfect.
Can I make this without cornstarch?
Yes, you can use other thickeners. An equal amount of arrowroot powder is a direct substitute and works very well. You could also use all-purpose flour, but you’ll need more (about ⅓ cup for this recipe) and must cook it a bit longer to remove the raw flour taste. The texture with flour will be slightly more opaque and less glossy than with cornstarch. Tapioca starch is another option. Stick with cornstarch or arrowroot for that classic, clear, glossy filling.
Making a lemon meringue pie from scratch feels like a real accomplishment. From the flaky crust to the last golden swirl of meringue, it’s a process filled with love. It’s more than just a dessert; it’s a conversation starter, a comfort food, and a bright spot on any table. So gather your ingredients, put on some good music, and create a little edible sunshine. I promise, the smiles you get when you present this classic pie will make every minute worth it. Now, I’d love to know – when you make yours, what do you prefer: a seriously tart lemon kick or an extra-thick layer of sweet meringue?
Cherry Almond Cookies
Ingredients
Equipment
Method
- Preheat your oven to 350°F (180°C).
- In a medium bowl, whisk together the flour and sugar, then add cubed butter and mix until it resembles coarse sand.
- Gradually add ice-cold water until the dough comes together, then press it into a pie dish and prick the bottom with a fork.
- Bake the crust for about 15 minutes or until lightly golden, then let it cool.
- In a medium saucepan, combine water, lemon juice, sugar, and cornstarch, whisking to remove lumps.
- Cook over medium heat, stirring constantly until thick and glossy.
- In a separate bowl, whisk the egg yolks and temper them by slowly adding hot lemon mixture.
- Return tempered yolks to the saucepan and cook for 2 more minutes while stirring.
- Remove from heat and stir in butter until melted.
- Pour the lemon filling into the cooled crust.
- In a clean bowl, whip egg whites with cream of tartar until soft peaks form.
- Gradually add sugar and beat until stiff peaks form, then fold in vanilla extract.
- Spread meringue over the lemon filling, sealing the edges.
- Bake for 10-12 minutes until the meringue is lightly browned.
- Let cool completely at room temperature, then refrigerate for at least 4 hours before slicing.