The Quest for the Perfect Crumbl-Style Sugar Cookie
You know that moment when you bite into a cookie so good, you have to stop and just savor it? That’s what I was after when my best friend raved about a certain famous bakery’s sugar cookie. You know the one—the thick, soft, perfectly sweet cookies that taste like pure joy. I love baking for my family, but I also love my grocery budget. So, I decided to become a kitchen detective. After dozens of batches (my neighbors were very happy taste-testers!), I finally nailed it. This recipe for Scrumptious Crumbl-Style Sugar Cookies is my proudest kitchen win, and I can’t wait for you to make them.
A Sweet Slice of Cookie History
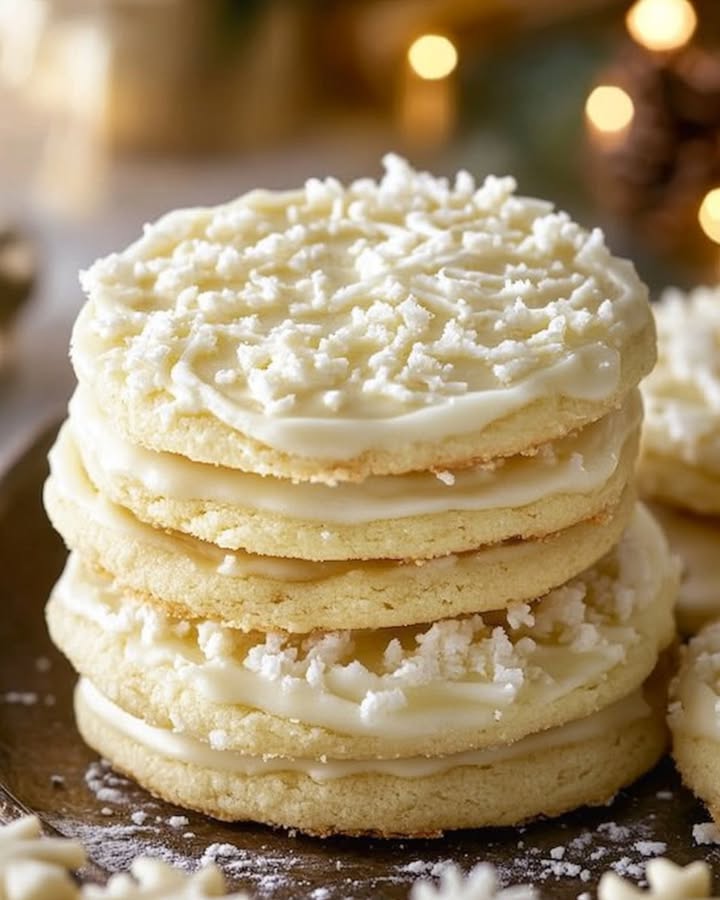
The classic sugar cookie is an American treasure. It dates back to the 1700s with German settlers in Pennsylvania. They called them “Nazareth Cookies.” Back then, they were simple: butter, sugar, flour, eggs. Over time, this blank canvas became the star of holidays, decorated with colorful icing. The modern twist, like the ones from Crumbl Cookies, takes this simple idea and makes it BIG. They are famously thick, soft-centered, and often topped with creative glazes and sprinkles. My version captures that iconic soft, bakery-style texture. But I’ve added my own perfectly sweet twist with a hint of vanilla and a dash of love.
Why You’ll Love This Cookie Recipe
First, these cookies are incredibly easy. No chilling the dough! You can go from craving to cookie in under 30 minutes. Second, they are unbelievably soft and stay that way for days. They have that perfect slightly crisp edge and a melt-in-your-mouth center. Finally, they are the ultimate crowd-pleaser. Kids adore them plain, and you can dress them up for any party. They are my go-to for a quick baking win that always gets smiles.
Perfect Occasions for These Sweet Treats
These cookies are like the little black dress of desserts—they work for everything! Bake them for a school bake sale where you’ll be the star parent. They’re perfect for a girls’ night in paired with coffee. I love making a big batch for holiday cookie swaps, adding red and green sprinkles. Sometimes, my favorite occasion is a quiet Tuesday afternoon, just because my son asked. They turn any ordinary day into a sweet celebration.
Gathering Your Ingredients
Here’s your simple shopping list. Using quality ingredients really makes a difference here, especially with the butter and vanilla.
- 1 cup unsalted butter, softened
- 1 cup granulated sugar
- 1 large egg
- 1 tablespoon vanilla extract
- 2 1/2 cups all-purpose flour
- 1/2 teaspoon baking powder
- 1/2 teaspoon baking soda
- 1/4 teaspoon salt
- 1/4 cup milk
- Sprinkles (optional, for decoration)
Easy Ingredient Swaps
Don’t panic if you’re missing something! Here are some easy fixes:
- Butter: Salted butter works fine. Just omit the extra salt in the recipe.
- Milk: Any milk you have—whole, 2%, almond, or oat—will do the trick.
- Vanilla: If you’re out, try using almond extract. Use just 1 teaspoon, as it’s stronger.
- Sugar Topping: Swap regular sugar for coarse sanding sugar before baking for a lovely crunch.
Step-by-Step to Cookie Bliss
Step 1: Preheat and Prepare
Start by heating your oven to 350°F (175°C). This gives it time to reach the perfect temperature. Line your baking sheet with parchment paper. This little step is a game-changer. It prevents sticking and makes cleanup a breeze. I never bake cookies without it. Get your other tools ready too—a big mixing bowl, your mixer, and measuring cups.
Step 2: Cream the Butter and Sugar
In your large bowl, combine the softened butter and granulated sugar. Beat them together with an electric mixer on medium speed. You want to mix for a good 2-3 minutes, until the mixture turns pale yellow and becomes wonderfully light and fluffy. This step incorporates air, which is the secret to a soft, tender cookie. You should see the texture change right before your eyes.
Step 3: Add the Egg and Vanilla
Crack in that egg and pour in the glorious vanilla extract. The vanilla aroma will start to fill your kitchen already. Beat everything on medium speed until it’s completely smooth and combined. The mix will look creamy and rich. This is where the flavor foundation is built. Pro tip: Use real vanilla extract, not imitation, for the best flavor.
Step 4: Whisk the Dry Ingredients
In a separate, medium-sized bowl, grab your whisk. Add the all-purpose flour, baking powder, baking soda, and salt. Give it a good whisk for about 30 seconds. This does two important things: it blends the leavening agents evenly throughout the flour, and it aerates the flour a bit. This helps avoid overmixing later, which can lead to tough cookies.
Step 5: Combine Wet and Dry
Now, with your mixer on low speed, gradually add the dry ingredient mixture to the wet butter mixture. Add it in about three parts. Mix until the flour is just incorporated and no big dry pockets remain. The dough will be quite thick at this point. That’s perfectly normal! We’re about to loosen it up.
Step 6: Stir in the Milk
Pour in the 1/4 cup of milk. This is my secret weapon for that perfectly soft, almost cake-like texture. Mix it in on low speed until the dough becomes smooth and comes together. It should be soft, pliable, and easy to scoop. The dough will be slightly sticky, which is what we want.
Step 7: Scoop and Shape
Use a tablespoon-sized cookie scoop or a regular spoon to portion the dough. Roll it into balls about 1.5 inches in diameter. Place them on your prepared baking sheet, spacing them about 2 inches apart. They need room to spread a little. Then, gently flatten each ball with the bottom of a glass or the palm of your hand. Aim for a disc about 1/2 inch thick.
Step 8: Add Toppings and Bake
This is the fun part! If you’re using sprinkles or a little extra sugar, press it gently onto the tops of the flattened cookies now. Slide the sheet into your preheated oven. Bake for 10-12 minutes. Watch for the edges to turn a very light, golden brown. The centers should still look soft and slightly underdone. This is the key to a soft cookie!
Step 9: Cool and Enjoy
When you pull the cookies out, let them cool right on the baking sheet for 5 minutes. They are still setting up from the residual heat. Then, use a spatula to move them to a wire rack to cool completely. This stops the cooking process and lets the bottom crisp up nicely. Try to wait until they’re just warm to taste one. It’s pure heaven.
Chef’s Tip
For an extra bakery-style look, make a simple glaze with powdered sugar and a tiny bit of milk. Drizzle it over the cooled cookies and add sprinkles immediately. It takes them from homemade to professional in seconds!
Your Cookie Timeline
This recipe moves fast, which I love.
- Prep Time: 15 minutes
- Cooking Time: 10-12 minutes per batch
- Resting Time: 5 minutes on sheet, then cool on rack
- Total Time: About 30 minutes
- Servings: About 24 delicious cookies
The Secret to Super Soft Cookies
My biggest secret is the milk. Most standard sugar cookie recipes don’t call for it. Adding that 1/4 cup of milk creates a slightly wetter dough. This adds moisture that translates directly into a softer, more tender crumb after baking. It’s the magic touch that replicates that famous soft texture.
A Fun Cookie Fact
Did you know the world record for the largest sugar cookie weighed over 100 pounds? It was over 100 feet in diameter! Luckily, our home kitchen version is much more manageable. The term “sugar cookie” first appeared in American cookbooks around the 1930s, solidifying its place as a classic.
Tools You’ll Need
You likely have everything already!
- Large and medium mixing bowls
- Electric hand mixer or stand mixer
- Whisk
- Measuring cups and spoons
- Baking sheet(s)
- Parchment paper or silicone baking mat
- Cookie scoop or tablespoon
- Wire cooling rack
Storing Your Scrumptious Cookies
To keep your cookies soft and fresh, store them correctly. Once completely cooled, place them in an airtight container at room temperature. Layer them between sheets of parchment or wax paper if you’re stacking them. They will stay perfectly soft for up to a week.
For longer storage, you can freeze the baked cookies. Wrap them tightly in plastic wrap or place them in a heavy-duty freezer bag. They can be frozen for up to 3 months. Thaw them at room temperature for a few hours when you’re ready for a treat.
You can also freeze the unbaked cookie dough balls! Scoop the dough, place the balls on a sheet, and freeze solid. Then transfer them to a freezer bag. When you want fresh cookies, bake them straight from the freezer, adding 1-2 extra minutes to the bake time.
My Best Baking Tips
- Butter Temperature: “Softened” butter is key. It should be cool to the touch but leave a slight indentation when you press it. Don’t use melted or too-warm butter.
- Don’t Overmix: Once you add the flour, mix only until combined. Overmixing develops gluten, leading to tough cookies.
- Underbake Slightly: Take them out when the edges are just turning golden. The centers will look soft but will set as they cool.
- Even Scooping: Use a cookie scoop for uniform size. This ensures they all bake at the same rate.
How to Serve Them in Style
Presentation is half the fun!
- Stack them on a cute cake stand for a dessert table.
- Place a few in a cellophane bag tied with ribbon for a sweet gift.
- Serve warm with a small scoop of vanilla ice cream on the side.
- Arrange them on a platter with different sprinkle colors for a festive look.
6 Delicious Recipe Variations
Once you master the base, try these fun twists!
- Lemon Sugar Cookies: Add the zest of one lemon to the butter-sugar mix. Swap 1 tsp of the vanilla for lemon extract.
- Chocolate Chip Style: Fold in 1 cup of semi-sweet chocolate chips after adding the milk.
- Almond Joy Delight: Add 1/2 tsp almond extract with the vanilla. Top baked cookies with a drizzle of chocolate and a sprinkle of coconut.
- Funfetti Party: Fold in 1/2 cup of rainbow sprinkles into the dough along with the milk.
- Brown Sugar Spice: Replace 1/2 cup of the white sugar with packed brown sugar. Add 1 tsp of cinnamon to the dry ingredients.
- Strawberry Glazed: Make a pink glaze with powdered sugar, a little milk, and a touch of strawberry jam. Spread on cooled cookies.
Common Mistakes to Avoid
Mistake 1: Using Butter That’s Too Soft or Melted
This is a huge one. If your butter is melted or super soft, your cookies will spread too much in the oven. They’ll become flat and greasy instead of thick and soft. The butter should be softened but still cool. A good test: you should be able to make an indent with your finger, but the butter shouldn’t squish through. Tip: If you’re in a hurry, cut the butter into small chunks. It will soften much faster.
Mistake 2: Overmeasuring the Flour
Packing your measuring cup with flour is a common error. It leads to dry, crumbly, and dense cookies. Too much flour absorbs all the moisture. The proper way is to spoon the flour into your measuring cup lightly. Then, level it off with the flat edge of a knife. For absolute accuracy, use a kitchen scale.
Mistake 3: Overbaking the Cookies
We want soft cookies, not crispy ones! It’s tempting to leave them in until they look “done” all over. But the magic happens as they cool. Take them out when the edges are just starting to turn a light golden brown. The centers will look puffy and soft, even a little underdone. They will finish setting up on the hot baking sheet. Tip: Set a timer for the minimum bake time and check them.
Mistake 4: Skipping the Flattening Step
If you don’t flatten the dough balls at all, your cookies may stay in a tall mound and not bake evenly. They might be raw in the middle or too tall. A gentle press with your hand or a glass gives them the perfect starting shape. This helps them spread into that ideal thick, round cookie we’re after.
Frequently Asked Questions
Can I make the dough ahead of time?
Absolutely! You can prepare the dough, wrap it tightly in plastic wrap, and store it in the refrigerator for up to 3 days. Let it sit at room temperature for about 30 minutes before scooping and baking. You can also freeze the dough balls for up to 3 months and bake from frozen, adding a minute or two to the bake time.
Why are my cookies flat and spreading too much?
This usually points to butter that was too warm or melted. Ensure your butter is just softened, not melted. Also, check that your baking powder and baking soda are fresh and not expired. An old leavening agent won’t help the cookies rise properly. Finally, make sure you used all-purpose flour, not self-rising or cake flour by accident.
Can I use a sugar substitute?
I don’t recommend using liquid sweeteners or most granulated sugar substitutes in this exact recipe. They can change the texture and spread dramatically. For a sugar-free version, you’d need a recipe specifically designed for sugar substitutes. For this one, sticking with regular granulated sugar gives the best results.
My dough seems too sticky. What did I do wrong?
The dough is meant to be a little sticky, which helps keep the cookies soft. If it’s impossibly sticky to handle, you might have added a touch too much milk or under-measured the flour. You can dust your hands with a little flour when scooping the balls. But avoid adding more flour to the entire dough batch, as it can make the cookies dry.
How do I get my cookies to look more like Crumbl’s?
Crumbl cookies are famous for their thick, almost muffin-top shape. To mimic this, make sure you don’t over-flatten your dough balls before baking. Just a gentle press is enough. Also, using a taller, narrower cookie scoop can help. Their signature look often comes from a thick, colorful frosting piped on top after baking and cooling completely.
Can I double this recipe?
Yes, you can easily double all the ingredients. Just make sure you have a large enough mixing bowl! You may need to bake in batches so you don’t overcrowd the oven. Overcrowding can lead to uneven baking and steaming instead of browning.
What’s the best way to soften butter quickly?
Cut the cold butter into small cubes. It will soften on the counter in about 15-20 minutes. You can also gently microwave it in 5-second bursts, turning it each time. Be very careful, as it’s easy to melt it! You want pliable, cool butter, not liquid.
Why add both baking powder and baking soda?
This combination gives us the best of both worlds. Baking soda helps the cookies brown nicely and spread a bit. Baking powder gives them a little extra lift and that soft, airy texture. Together, they create the perfect rise and browning for this style of cookie.
Can I make these without a mixer?
You can, but it will take some elbow grease! Use a sturdy wooden spoon to cream the butter and sugar until very light and fluffy. This is the hardest part by hand. Then, whisk the dry ingredients well and mix everything together just until combined. It’s a bit of a workout, but it works.
Do I really need to cool them on a wire rack?
I highly recommend it. Letting them cool directly on the hot baking sheet will continue to cook the bottoms, and steam can get trapped, making them soggy. The wire rack allows air to circulate all around the cookie. This stops the cooking process evenly and keeps the bottom crisp, not hard.
The Sweet Reward
And there you have it! My tried-and-true recipe for the most Scrumptious Crumbl-Style Sugar Cookies. They are soft, simple, and absolutely packed with sweet vanilla flavor. Baking these always fills my home with warmth and happy faces. I hope this recipe becomes a favorite in your home too. It’s proof that you don’t need a fancy bakery box to enjoy a truly magical cookie. Now, go preheat that oven and get baking. Your perfect cookie is just moments away!
Hearty Budget Stew
Ingredients
Equipment
Method
- Preheat your oven to 350°F (175°C) and line a baking sheet with parchment paper.
- In a large bowl, cream together the softened butter and granulated sugar using an electric mixer on medium speed for 2-3 minutes.
- Add the egg and vanilla extract; mix until smooth and combined.
- In a separate medium bowl, whisk together the flour, baking powder, baking soda, and salt for about 30 seconds.
- Gradually add the dry ingredient mixture to the wet butter mixture on low speed until just combined.
- Pour in the milk and mix until the dough is smooth and combined.
- Use a tablespoon-sized cookie scoop to portion out the dough and roll it into balls about 1.5 inches in diameter.
- Place the dough balls on the prepared baking sheet, spacing them 2 inches apart, and gently flatten each ball.
- If desired, press sprinkles or extra sugar onto the tops of the flattened cookies.
- Bake for 10-12 minutes, watching for the edges to turn light golden brown while the centers remain soft.
- Let the cookies cool on the baking sheet for 5 minutes before transferring them to a wire cooling rack to cool completely.