Have you ever had one of those food dreams that feels so real you can almost taste it? I had a dream about heavenly, sugar-dusted clouds filled with silky vanilla cream. I woke up with such a craving that I spent the entire weekend in my kitchen, flour on my nose and a mission in my heart. The result? These Homemade Dreams: spongy, stuffed, and simply irresistible! My family declared them better than any bakery’s, and I knew this recipe was a keeper worth sharing with all of you.
The Sweet Legacy of a Homemade Dream
Every culture has its version of a sweet, fried dough delight. In Brazil, this particular treat is known as “sonho,” which literally translates to “dream.” Folklore says they were named because eating them feels like a little bite of heaven. Traditionally sold in bakeries, they are a staple at children’s parties and family gatherings. My version is inspired by the ones my grandmother used to make. Her secret was the hot milk in the dough, which creates an incredibly soft and airy texture. While the classic is filled with simple pastry cream, modern versions now feature chocolate, “dulce de leche,” or even fruit jams. This recipe embraces the traditional magic while giving you clear steps for foolproof success.
Why You’ll Fall in Love With This Recipe
This recipe is a true joy-maker! First, the ingredients are simple pantry staples—no fancy equipment needed. Second, the process is forgiving and fun; it’s a perfect kitchen project to do with kids or friends. The magic moment when you see those dough balls puff up in the oil is pure kitchen happiness. Finally, the flavor combination is unbeatable: a slightly crisp, sugar-coated shell giving way to a feather-light crumb and a lusciously smooth filling. It’s a textural dream come true!
These stuffed dreams are a versatile treat for any sweet occasion. They are the star of weekend brunches, turning an ordinary morning into a celebration. Bring a big platter to a potluck or picnic and watch them disappear first. They make birthdays extra special, especially for kids who love helping fill and sugar-coat them. Honestly, any day that needs a little extra joy is a perfect day for homemade dreams.
Everything You Need: The Ingredients List
For the Dream Dough:
- 5 eggs 🥚
- 1 cup of vegetable oil 🫒
- 6 tablespoons of sugar
- 250 ml of hot milk 🥛
- 1 pinch of salt 🧂
- Vanilla extract to taste
- 2 tablespoons of dry biological yeast (instant yeast)
- 800 g to 1 kg (about 6-7 cups) of wheat flour
For the Filling Cream:
- 1 liter of milk 🥛
- 2 sifted egg yolks 🥚
- 1 tablespoon of salted margarine or butter 🧈
- 1 can (14 oz) of condensed milk
- 6 tablespoons of corn starch
- Vanilla extract to taste
- 1 Box (8 oz) of milk cream (heavy whipping cream), add later
No Worries! Handy Substitution Options
Out of something? No problem! For the dough, you can use warm water instead of hot milk, though the milk adds richness. If you don’t have instant yeast, use active dry yeast but activate it in the warm milk first. For the filling, unsalted butter works perfectly instead of margarine. Don’t have heavy whipping cream? A full-fat canned coconut milk (chilled) can be whipped for a dairy-free alternative, though the texture will differ slightly.
Let’s Make Some Magic: Step-by-Step Preparation
Step 1: Prepare the Dream Dough
Grab your blender! This is where we create the liquid base of our dreams. Crack in the five eggs, pour in the glistening oil, and add the sugar, hot milk, pinch of salt, vanilla, and yeast. Blend it all on high until you have a smooth, frothy, pale yellow mixture. The scent of vanilla and yeast is just wonderful. Pour this liquid into a large, comfortable mixing bowl. Now, start adding the flour, about one cup at a time, stirring with a wooden spoon first and then using your hands. The dough will go from sticky to shaggy to smooth. Pro tip: Add flour until the dough no longer sticks to your clean fingers, but is still soft and pliable. It should feel like a soft, warm pillow.
Step 2: The Rise & Shine Rest
This is the patience step, but it’s so worth it! Form the dough into smooth, uniform balls, about the size of a golf ball. Place them on a lightly floured tray, cover them loosely with a clean kitchen towel, and let them rest in a warm, draft-free spot. Give them 40 to 50 minutes to grow. They should almost double in size and feel light and airy. Chef’s tip: Want to know exactly when they are perfectly proofed? Place one dough ball in a glass of water. When it cheerfully floats to the surface, your dreams are ready to fly into the oil!
Step 3: The Golden Fry
Time for the exciting part! In a deep, heavy-bottomed pot, heat a generous amount of oil over medium heat. To test if it’s ready, drop a tiny piece of dough in—if it sizzles and rises immediately, you’re good. Gently place a few dough balls in, don’t crowd them. Watch the magic! They will puff up, turn a beautiful golden brown, and float. Turn them once for even color. When they’re gorgeously golden and sound hollow if tapped, remove them. Let them drain on a rack or paper towels. That crisp, golden shell is your canvas for sweetness.
Step 4: Whip Up the Silky Cream
While the dough rests or the dreams cool, make the filling. In a medium saucepan, whisk together the milk, sifted yolks, margarine, condensed milk, and corn starch. The corn starch is our thickening hero. Place the pan over medium-low heat. Stir constantly and patiently with a wooden spoon. The mixture will slowly transform from thin and milky to thick and lusciously creamy. Once it thickens to a pudding-like consistency, remove it from the heat, stir in the vanilla, and let it cool completely. Once cool, gently fold in the whipped heavy cream. This gives the cream an airy, mousse-like texture that’s perfect for piping.
Step 5: Fill, Sugar, and Devour!
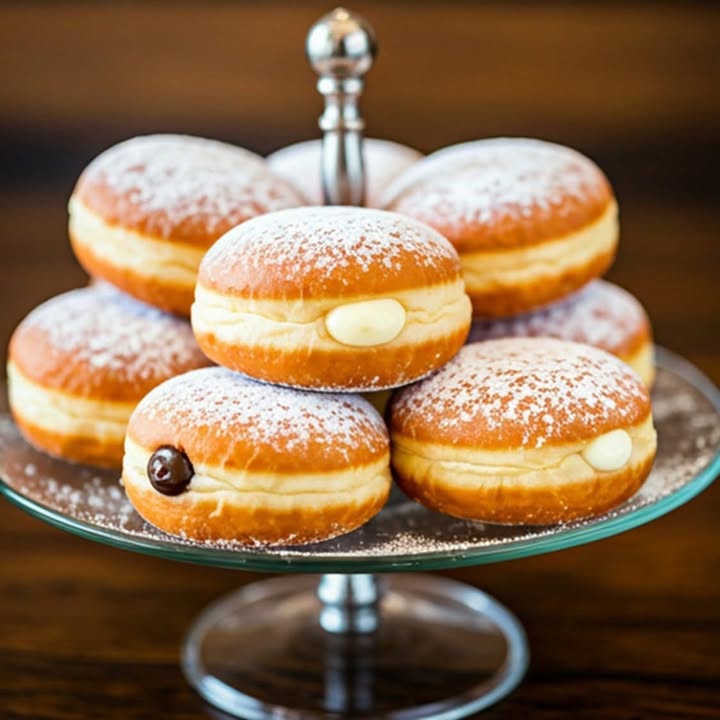
The grand finale! Fit a pastry bag with a long, narrow tip (a Bismarck tip is perfect). Fill the bag with the cool, silky cream. Gently poke the tip into the side of each golden dream and squeeze, filling it until you feel it gently plump up. Roll each stuffed dream in a bowl of refined sugar until it’s completely coated in sparkling sweetness. Arrange them on a beautiful plate. Now, take a bite and experience the perfect crunch, the cloud-like crumb, and the burst of cool, vanilla cream. Pure bliss!
Your Kitchen Timetable
Plan your dream-making session with this simple guide:
- Prep Time: 30 minutes
- Resting Time: 50 minutes
- Cooking Time: 20-30 minutes (per batch)
- Total Time: About 1 hour 50 minutes
Chef’s Secret: The Temperature Trick
My absolute secret for perfectly spongy dreams that aren’t greasy is oil temperature control. If the oil is too hot, the outside browns before the inside cooks, leaving a doughy center. If it’s too cool, the dreams soak up oil and become heavy. Keep a small piece of dough as a tester. The ideal temperature is around 350-365°F (175-185°C). Adjust the heat as you fry to maintain this golden zone.
A Little Extra Sweet Info
Did you know the “floating dough” test used in this recipe is an ancient baker’s trick? Bakers have used water tests for centuries to check if yeasted doughs are properly proofed before baking or frying. It’s a beautiful example of kitchen wisdom passed down through generations, proving that sometimes the simplest methods are the most reliable.
Gather Your Trusty Tools
You don’t need anything fancy! A large mixing bowl, a blender, a wooden spoon, a deep pot for frying, a slotted spoon or spider skimmer, a pastry bag with a narrow tip, and a cooling rack are the main helpers. A kitchen thermometer is helpful but not essential if you use the dough tester method.
Keeping Your Dreams Delicious: Storage Tips
For the Freshest Bite: These dreams are truly best enjoyed the day they are made. The sugar coating stays crisp and the dough is at its airy peak. If you have leftovers, place them in a single layer in an airtight container at room temperature for up to one day.
If You Must Store Them: You can store unfilled dreams for 2-3 days in an airtight container. The filling is best made fresh. If you have pre-filled ones, the sugar will dissolve and the shell will soften. To refresh them, you can give them a quick 5-10 second blast in the air fryer or a hot oven to crisp up the exterior again before serving.
Freezing Option: You can freeze the unfilled, fried, and cooled dough balls. Place them on a baking sheet to freeze solid, then transfer to a freezer bag. When ready, thaw at room temperature, warm them in the oven, fill, and sugar-coat. The cream filling does not freeze well.
My Best Tips for Dream-Worthy Success
- Ensure your milk is hot but not boiling when you blend it. Too hot can kill the yeast, too cold won’t activate it well.
- When kneading, add flour gradually. The exact amount can vary based on humidity and flour type. Trust the “not sticky” feel.
- Let the cream cool completely before adding the whipped cream. If it’s warm, it will melt the cream and make the filling runny.
- Use a tall glass to hold your pastry bag while filling it. It makes the process much less messy!
Presentation Ideas to Wow Your Guests
- The Classic Tower: Stack them high on a cake stand for a dramatic centerpiece.
- Dusting Delight: Instead of rolling in plain sugar, use a mix of powdered sugar and cinnamon.
- Drizzle Drama: Arrange them on a platter and drizzle with melted chocolate or caramel sauce just before serving.
- Individual Servings: Place each dream in a petite paper cupcake liner for a cute, party-ready look.
Dreamy Twists: Healthier & Fun Variations
Feel like mixing it up? Here are six delicious spins on the classic dream:
- Whole Wheat Honey Dreams: Substitute half the white flour with whole wheat flour and use honey instead of sugar in the dough for a deeper, nuttier flavor.
- Baked “Almost” Dreams: For a less greasy option, proof the dough balls, brush with melted butter, and bake at 375°F until golden brown. They’ll be denser but still tasty.
- Chocolate Hazelnut Bliss: Fill the dreams with store-bought or homemade chocolate-hazelnut spread mixed with a little whipped cream for a decadent treat.
- Lemon Berry Burst: Add the zest of one lemon to the dough. Fill with a light lemon curd and a single fresh raspberry inside each one.
- Dulce de Leche Delight: Swap the vanilla cream for straight, thick dulce de leche. The rich, caramel flavor is incredible.
- Apple Cinnamon Spice: Add a teaspoon of cinnamon to the dough. Fill with a finely diced, cinnamon-sautéed apple mixture for a fall-inspired twist.
Common Mistakes to Avoid for Perfect Dreams
Mistake 1: Using Cold or Scalding Hot Milk
This is the number one reason dreams don’t puff up. Yeast is a living thing! If the milk is boiling, it will kill the yeast. If it’s cold, the yeast won’t wake up and get to work. Your milk should feel hot to the touch but not burning, ideally between 105-115°F. A good rule of thumb is that it should feel comfortably warm on your wrist.
Mistake 2: Adding All The Flour At Once
Grabbing all the flour and dumping it in is a sure path to dense, tough dreams. Flour absorbs moisture differently every day. By adding it gradually, you allow the gluten to develop gently and you stop at the perfect point where the dough is soft and supple, not stiff. A sticky start is normal; keep kneading and adding flour bit by bit until it no longer sticks to your clean hands.
Mistake 3: Frying in Oil That’s Too Cold
Impatient frying leads to greasy, sad dreams. If the oil isn’t hot enough, the dough will sit there and soak up oil like a sponge before it cooks through. This makes them heavy and unpleasantly oily. Always test with a small piece of dough first. It should sizzle vigorously and rise to the surface relatively quickly, not sink and slowly brown.
Mistake 4: Filling While Still Warm
I know it’s tempting to dive right in! But if you try to fill the dreams or roll them in sugar while they are piping hot from the oil, you’ll create a mess. The heat will melt the sugar into a glaze (which can be tasty, but not the goal) and potentially cause the filling to melt and leak out. Let them cool on a rack for at least 15-20 minutes. They should be just warm to the touch, not hot.
Mistake 5: Overcooking the Cream Filling
Stirring the cream over the heat requires patience. If you crank the heat to make it thicken faster, you risk scrambling the egg yolks or creating lumps. It also might thicken too much and become pasty as it cools. Keep the heat at medium-low and stir constantly. It will take a few minutes, but you’ll be rewarded with a perfectly smooth, velvety pastry cream.
Your Homemade Dreams Questions, Answered
Can I make the dough ahead of time?
Yes, you can! After the first rise (when the dough balls have doubled), you can cover the tray tightly with plastic wrap and refrigerate it for up to 24 hours. This is called a “cold proof” and can actually develop more flavor. When you’re ready to fry, let the dough balls sit at room temperature for about 30 minutes while you heat the oil, then proceed as normal. The fry time might be a tiny bit longer since the dough will be cold.
What can I use if I don’t have a pastry bag?
No pastry bag? No problem! You have a couple of clever options. The first is to use a sturdy plastic zip-top bag. Spoon the cream into one corner, squeeze out the air, and seal it. Then, snip a small hole in that corner—instant piping bag! Alternatively, you can carefully slice a small opening in the side of each dream with a sharp knife and use a small spoon to gently stuff the cream inside. It’s a bit more rustic, but just as delicious.
My dreams turned out dense inside. What went wrong?
A dense interior usually points to one of three issues. The most common is that the oil temperature was too high. The outside browned too fast, locking in a raw, dense center. Second, the dough might not have proofed long enough—it needs that full time to become light and airy. Finally, you may have added too much flour during kneading, making the dough too heavy. Next time, focus on the oil temp and the dough’s texture, not the clock.
Can I bake these instead of frying?
You can bake them, but the texture will be different. They will be more like very soft, sweet dinner rolls rather than the classic airy, crispy-on-the-outside dream. To bake, proof the dough balls as usual, brush them with an egg wash or melted butter, and bake in a preheated 350°F oven for 20-25 minutes until golden. Let them cool completely before filling. They won’t have the same hollow center, so you might need to cut a small slit to insert the cream.
Why did my cream filling turn out runny?
A runny filling almost always means the corn starch didn’t get hot enough to fully activate its thickening power, or the cream wasn’t allowed to cool and set properly. When cooking the cream, make sure it comes to a gentle bubble and thickens noticeably. It should coat the back of a spoon. Also, it’s crucial to let it cool completely to room temperature (or even chill it) before folding in the whipped cream. The chilled fat in the whipped cream needs a cool base to stay stable.
How do I know when the oil is at the right temperature?
The best tool is a deep-fry or candy thermometer—aim for 350-365°F. If you don’t have one, use the trusty dough test. Tear off a small, marble-sized piece of dough and drop it in the oil. If it sinks to the bottom and then immediately rises to the top, sizzling and bubbling, your oil is ready. If it sinks and sits, the oil is too cold. If it immediately burns or darkens extremely fast, the oil is too hot.
Can I use a different filling?
Absolutely! This vanilla cream is a classic, but your imagination is the limit. A thick chocolate pudding, lemon curd, or even a simple jam are fantastic. For a quicker option, a high-quality store-bought pastry cream or custard can be doctored up with a little whipped cream. Just make sure any alternative filling is thick enough to not leak out.
What is “dry biological yeast”?
This is simply another term for active dry yeast or instant yeast, which is what you’ll commonly find in supermarket baking aisles in the US. “Biological” just means it’s a living organism. For this recipe, standard “instant yeast” works perfectly. You don’t need to dissolve it in water first when using a blender with warm liquid, as the instructions show.
My sugar coating got soggy. How can I prevent this?
Soggy sugar happens from moisture. The two main culprits are rolling the dreams in sugar while they are still too warm (trapping steam) or filling them too far in advance. For the crispiest sugar shell, let the fried dreams cool completely. Fill them just before you plan to serve them, and roll them in sugar right after filling. If you need to store leftovers, keep the sugar separate and roll them just before eating again.
Are these similar to cream puffs or profiteroles?
They are cousins in the world of filled pastries, but different! Cream puffs and profiteroles are made from a choux pastry, which is cooked on the stove and uses steam from its high water content to puff in the oven. These dreams are a yeasted dough, which relies on the yeast’s gas production to become light and airy. They are fried, not baked, giving them a distinct crispy exterior and a more bread-like, spongy interior. Both are delicious, but the process and texture are unique.
The Final Sweet Word
There you have it, friends—my heartfelt recipe for pure, sugary joy. Yes, making these Homemade Dreams takes a little time and love, but the reward is immense. Seeing the smile on someone’s face when they bite into one of these pillowy treats makes every minute worthwhile. So gather your ingredients, put on your favorite apron, and get ready to create some kitchen magic. I promise, the first bite will feel just like… a dream. Happy cooking!
Cheesy Cajun Pasta
Ingredients
Equipment
Method
- Cook the pasta according to package directions, then drain and set aside.
- In a large skillet, cook the sliced sausage over medium heat until browned. Add the shrimp and cook until they turn pink.
- Stir in the heavy cream, cheese, Cajun seasoning, salt, and pepper; cook until the cheese is melted and the sauce thickens.
- Add the cooked pasta to the skillet and toss to coat with the sauce. Cook for an additional few minutes to heat through.
- Serve immediately, garnished with additional cheese if desired.